
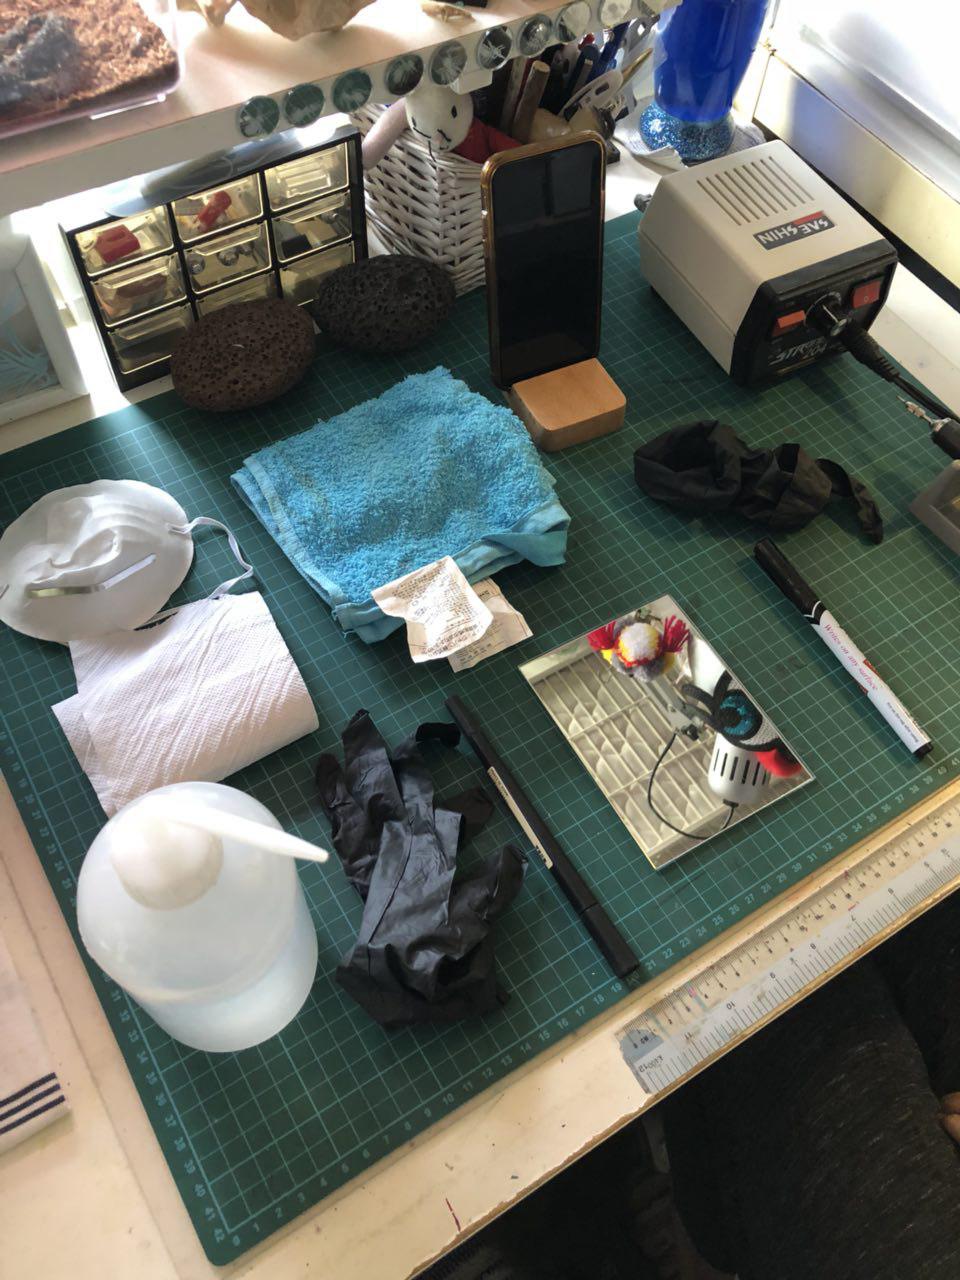
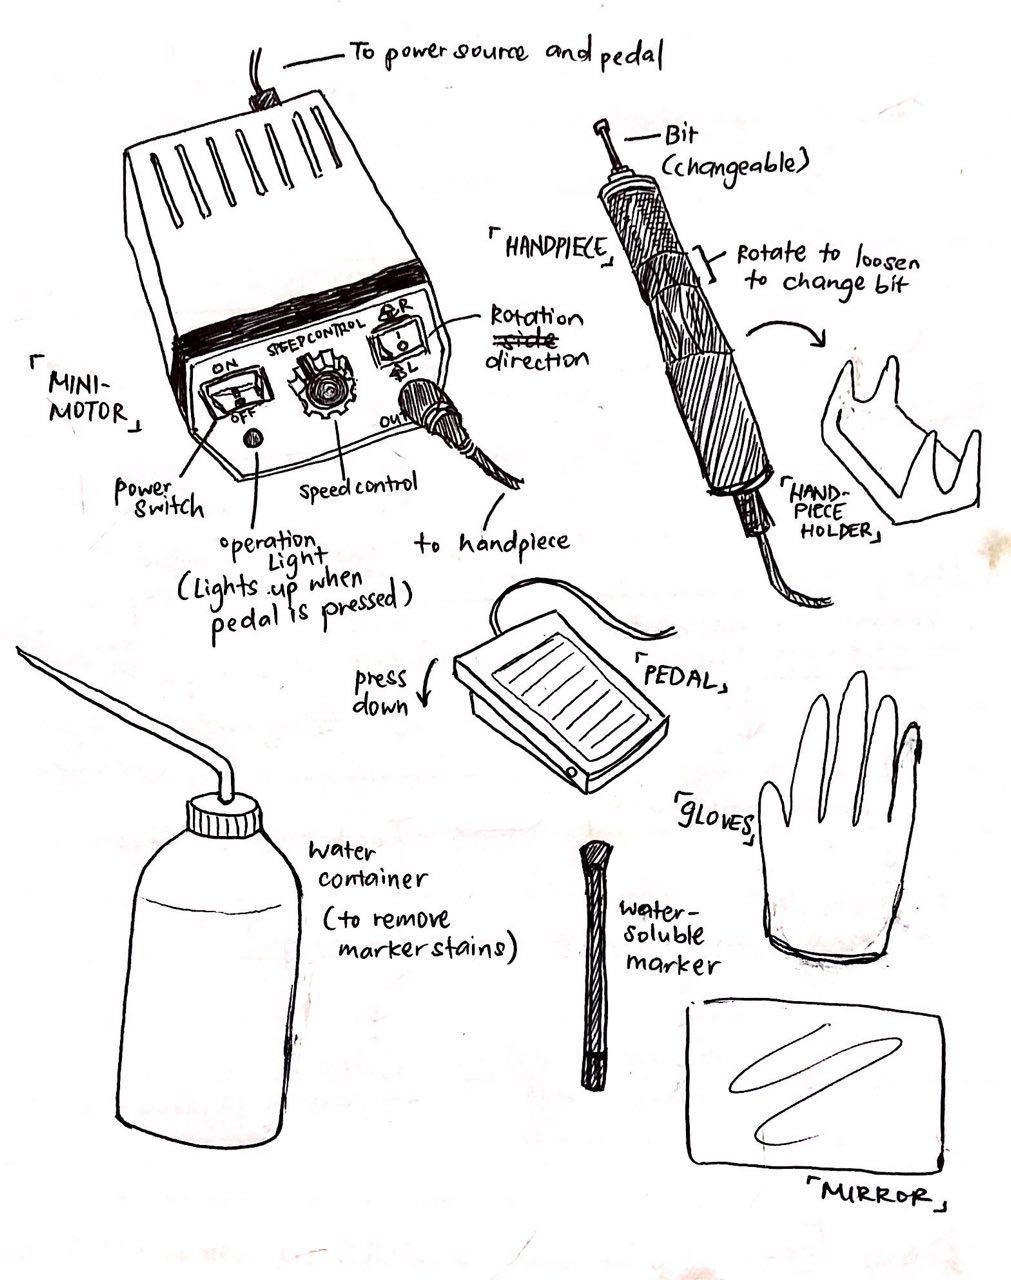
(Left) Various tools that are required for mirror engraving.
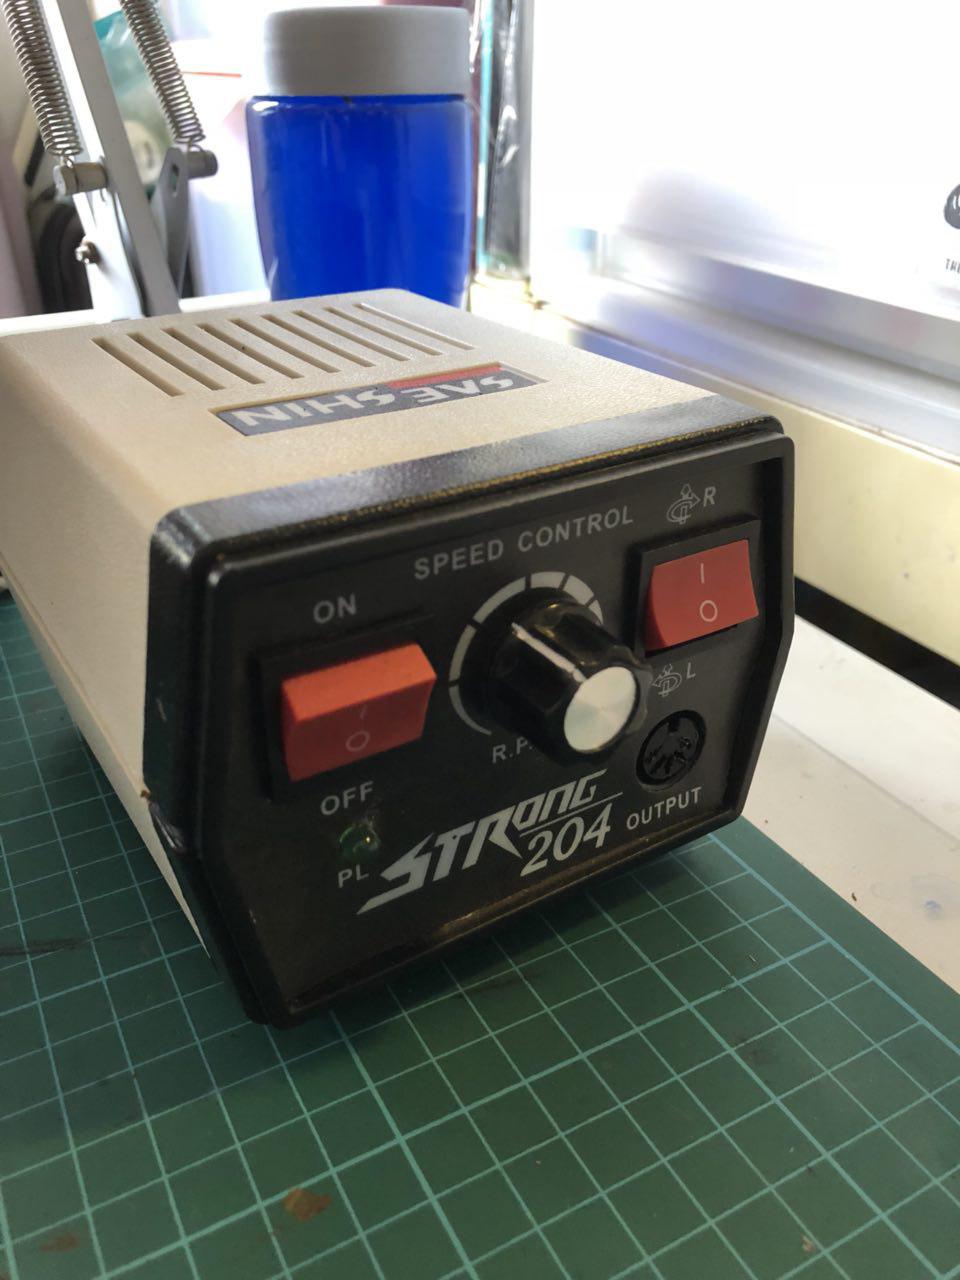
(Middle) Main body of the micromotor machine.
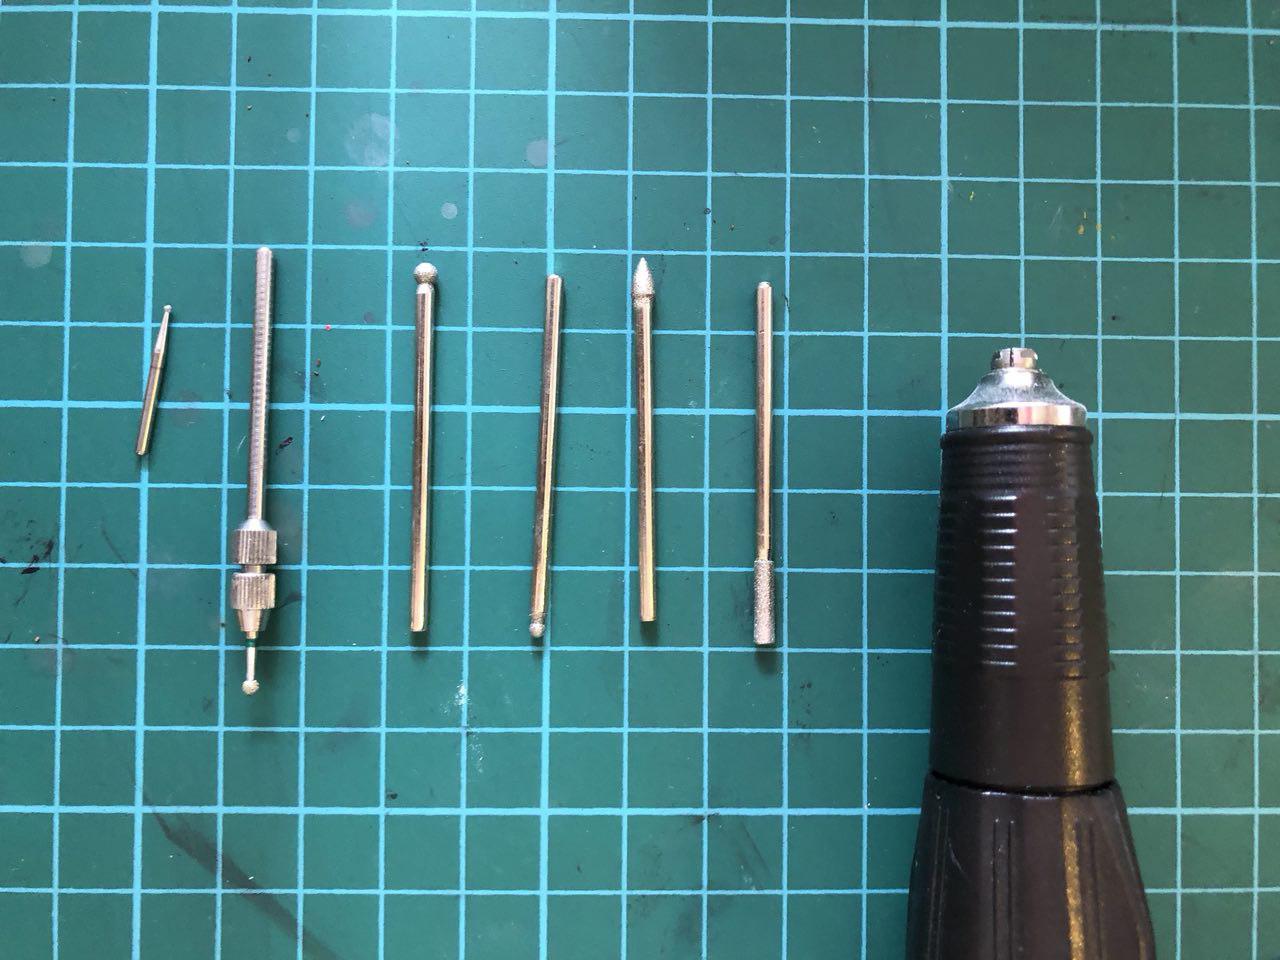
(Right) A few examples of the different bits that can be put into the handpiece – each achieves a different type of thickness and roughness (for lines to be drawn and to suit a range of different materials)
Alicia, the mirror engraver, allowed me to engrave my own mirror, while teaching me the basics of how to do so.
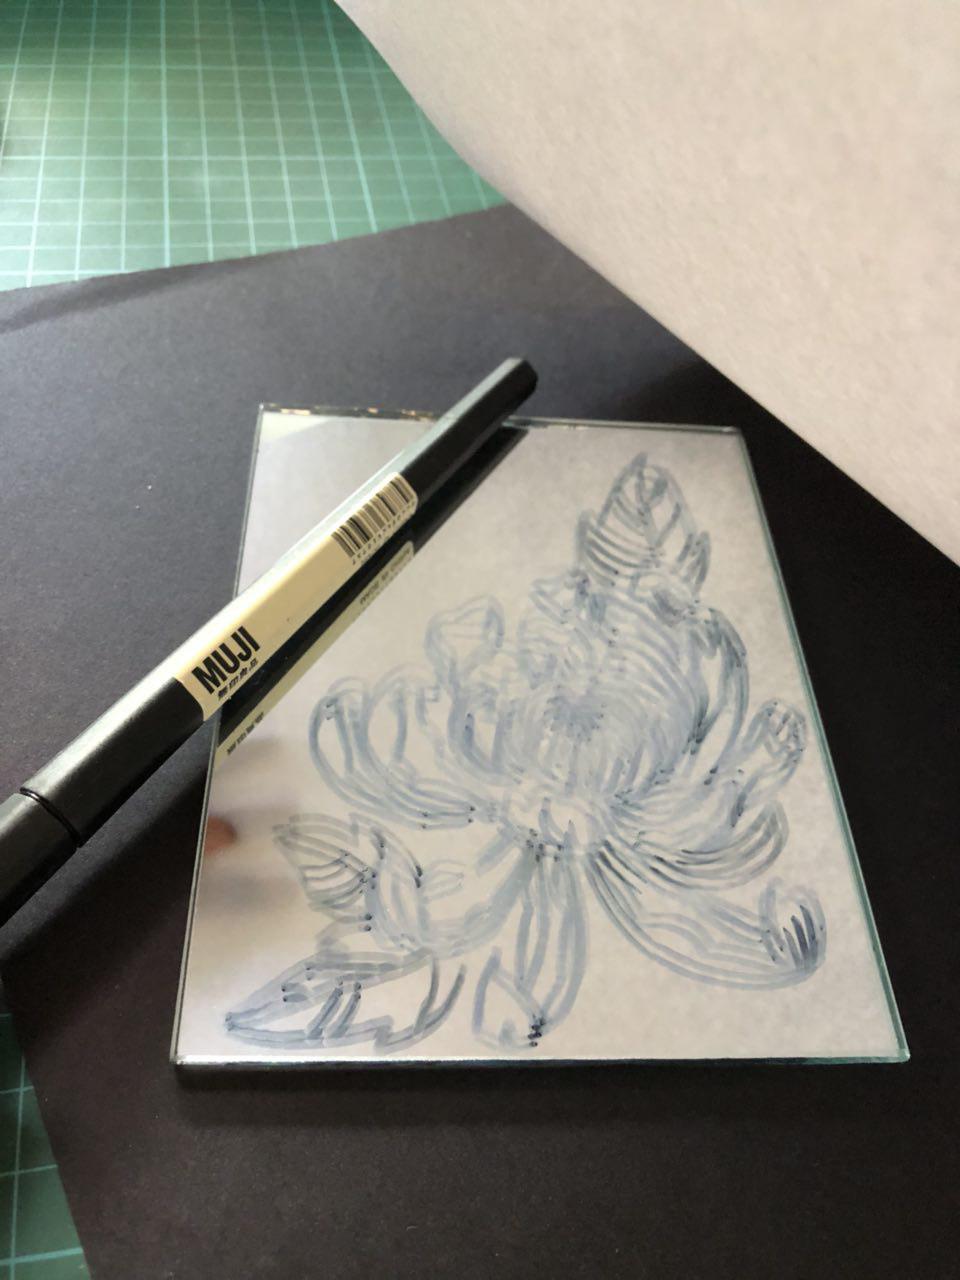
I decided to draw a chrysanthemum.
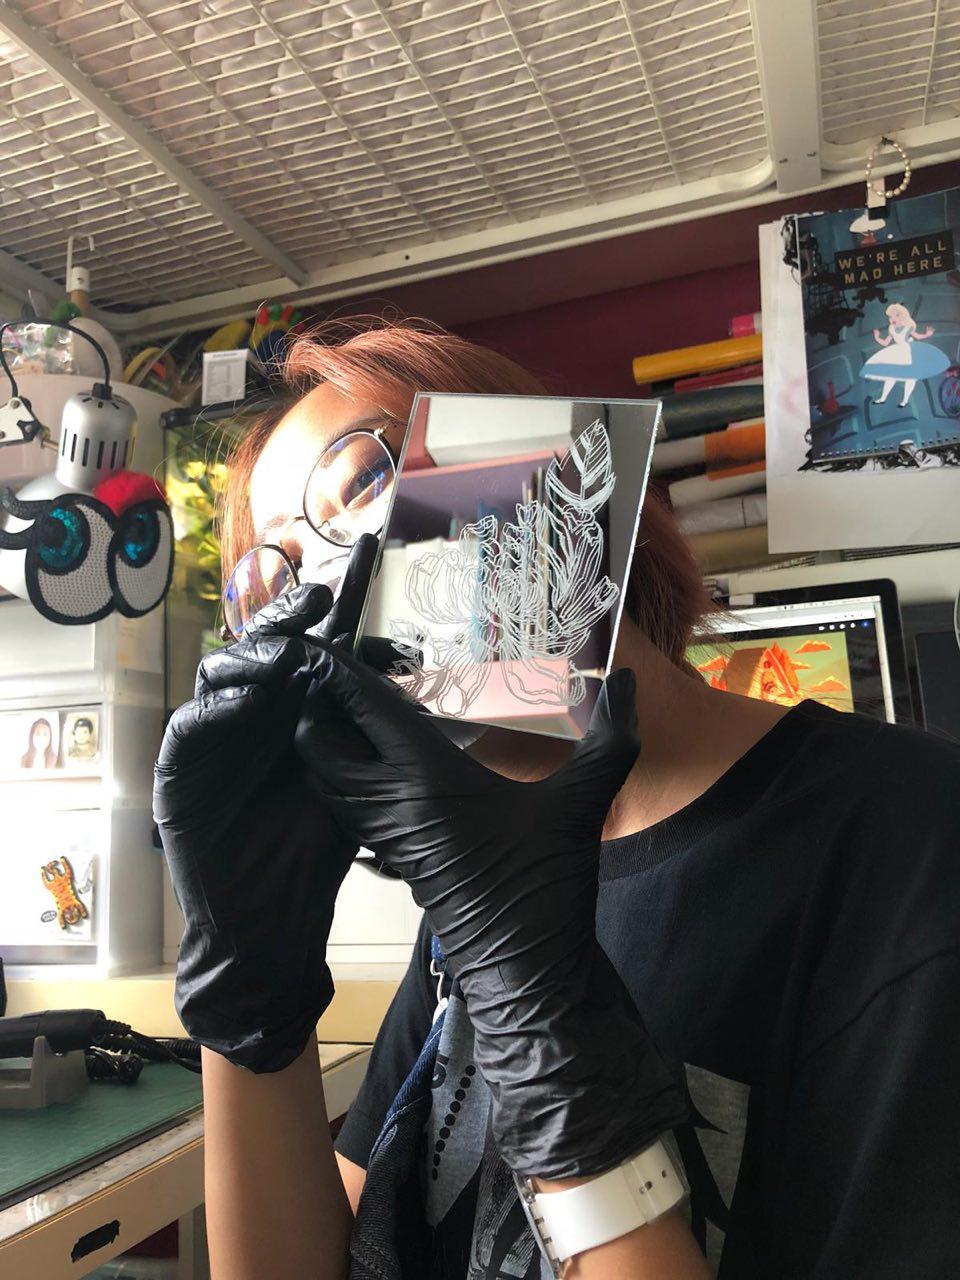
The mirror turned out a lot better than I expected for a first-time engraving. As I was allowed to fully experience the entire process, I had a much better idea of what is needed and various considerations that are needed to make the engraving process run smoothly.
Alicia’s work space (her studio of sorts) was in her own room. She mentioned that she has brought her equipment to other locations (such as art events) as well on several occasions.
Ng Yixian Jo-Ann (A0142014B) – Practitioner 1/3