With the art therapy practitioner we’d interacted with, our group decided to develop several prompts that were related to art-making and ideas related to the elderly.
Within our group, we each came up with an activity related to art-making and the elderly. These centred around abstract visualisation, word association, and photography.
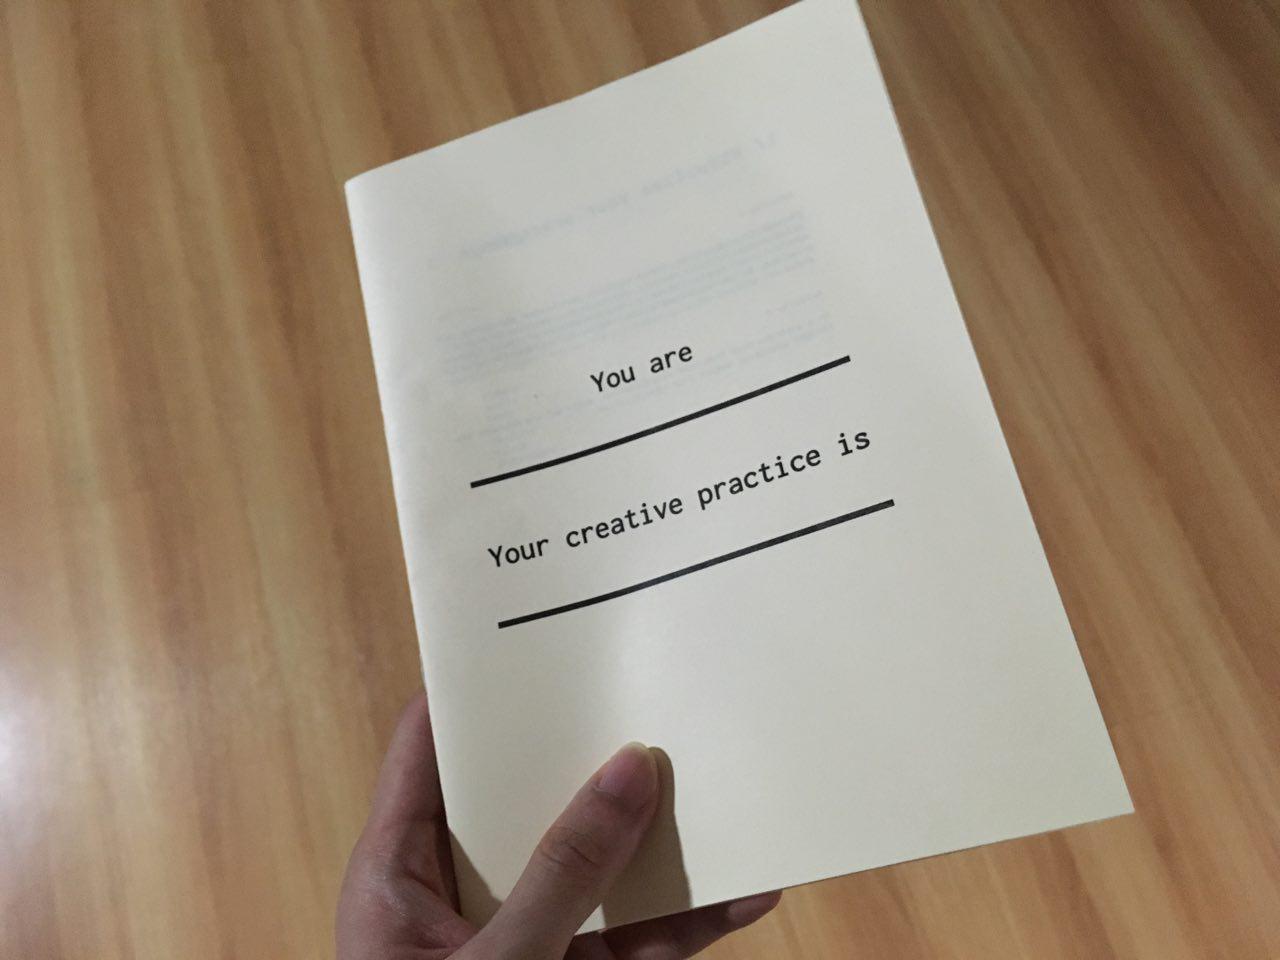
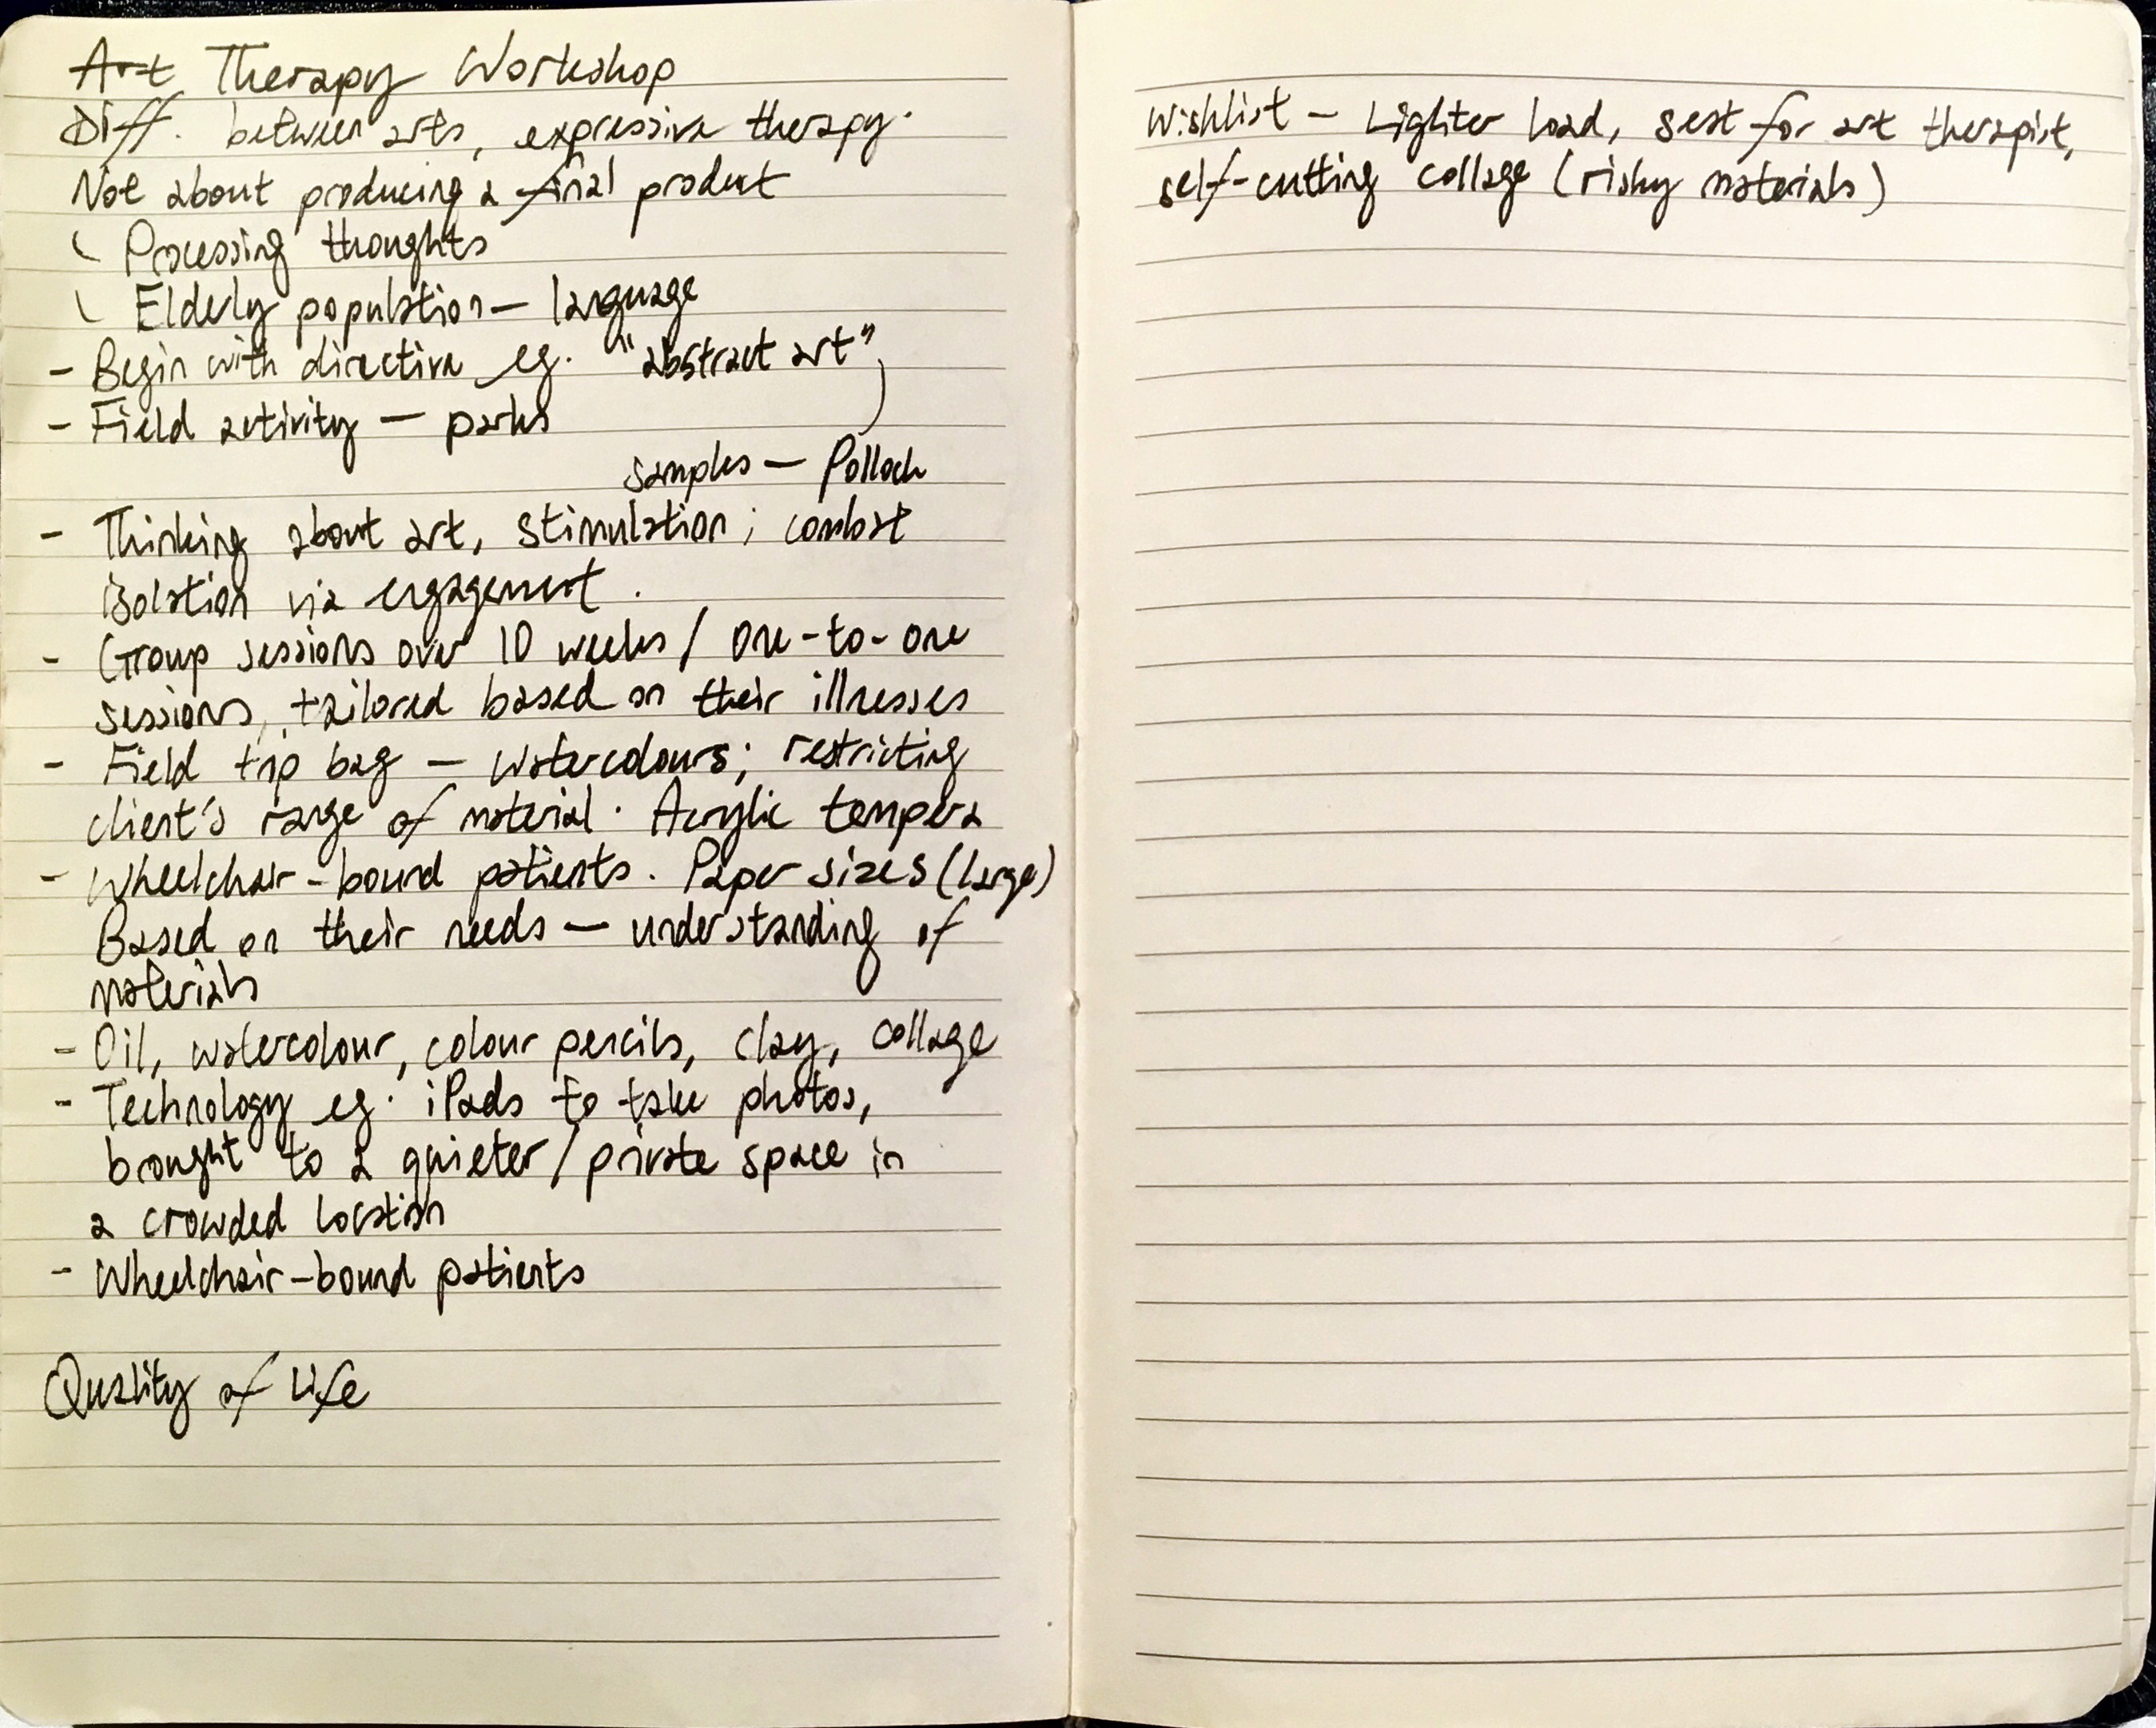
Design Probe: Workbook with 3 activities, each self-recorded
Goal: To investigate attitudes towards art therapy for the elderly as a creative practice and ageing from the perspectives of an art therapist and general populace
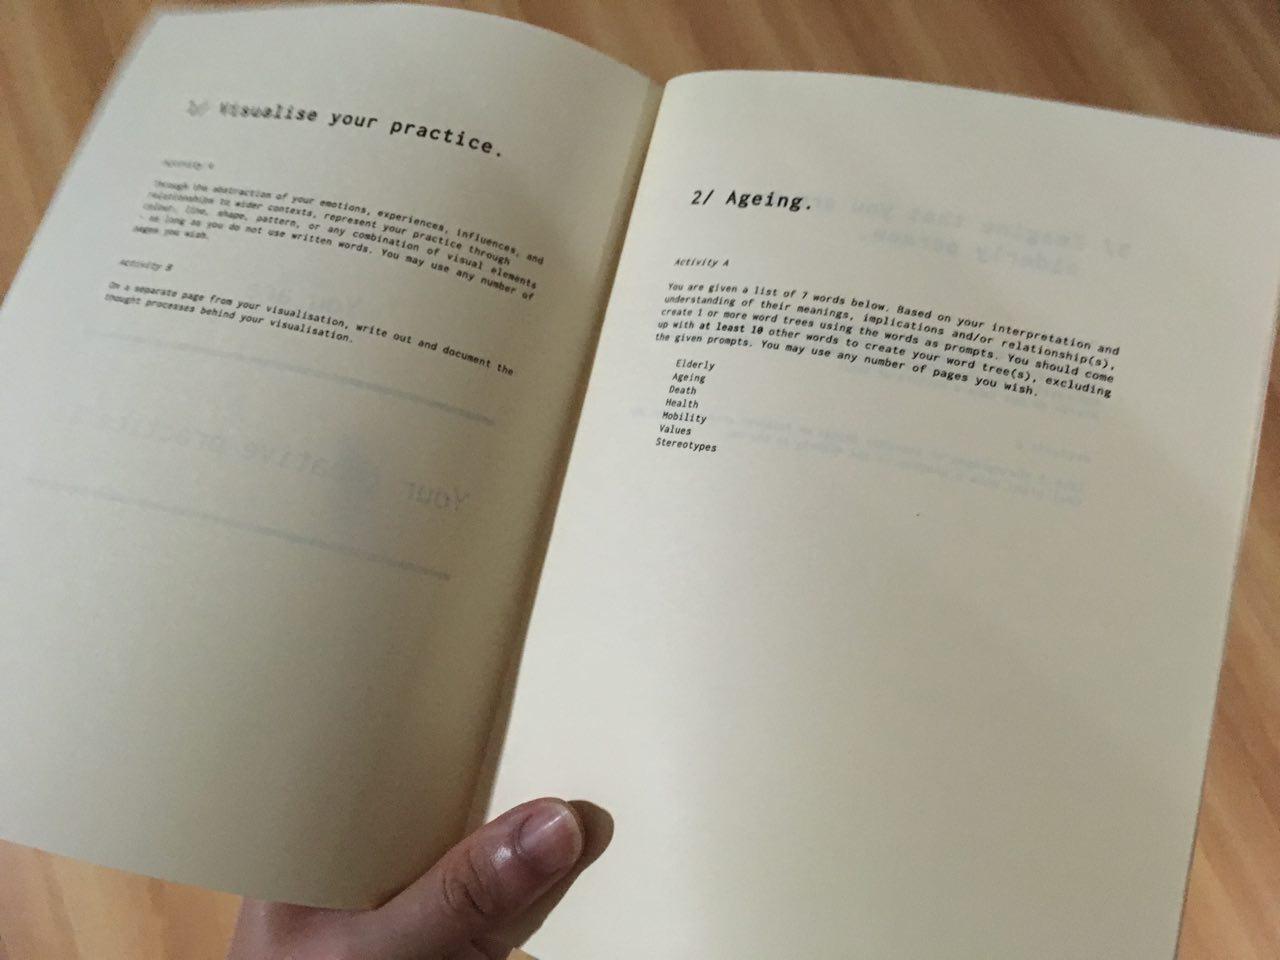
Visualisation of practice
Through the abstraction of your emotions, experiences, influences, and relationships to wider contexts, represent your practice through colour, line, shape, pattern, or any combination of visual elements – as long as you do not use written words. You may use any number of pages you wish.
On a separate page from your visualisation, write out and document the thought processes behind your visualisation.
Mental model of ageing and the elderly
You are given a list of 7 words below. Based on your own interpretation and understanding of their meanings, implications and/or relationship(s), create one or more word trees using the words as prompts. You should come up with at least 10 other words to create your word tree(s), excluding the given prompts. You may use any number of pages you wish.
Elderly
Death
Ageing
Health
Mobility
Values
Stereotypes
Imagine that you are an elderly person.
Take 2 photographs of objects or elements around you that were integrated to accommodate the various needs of the elderly. (e.g. ramps and railings for the elderly who are unable to navigate up the stairs)
Take 3 photographs of everyday things or features around you that you feel might pose a problem to the elderly in any way.
These activities were then compiled into a workbook form, which was provided to a practitioner.
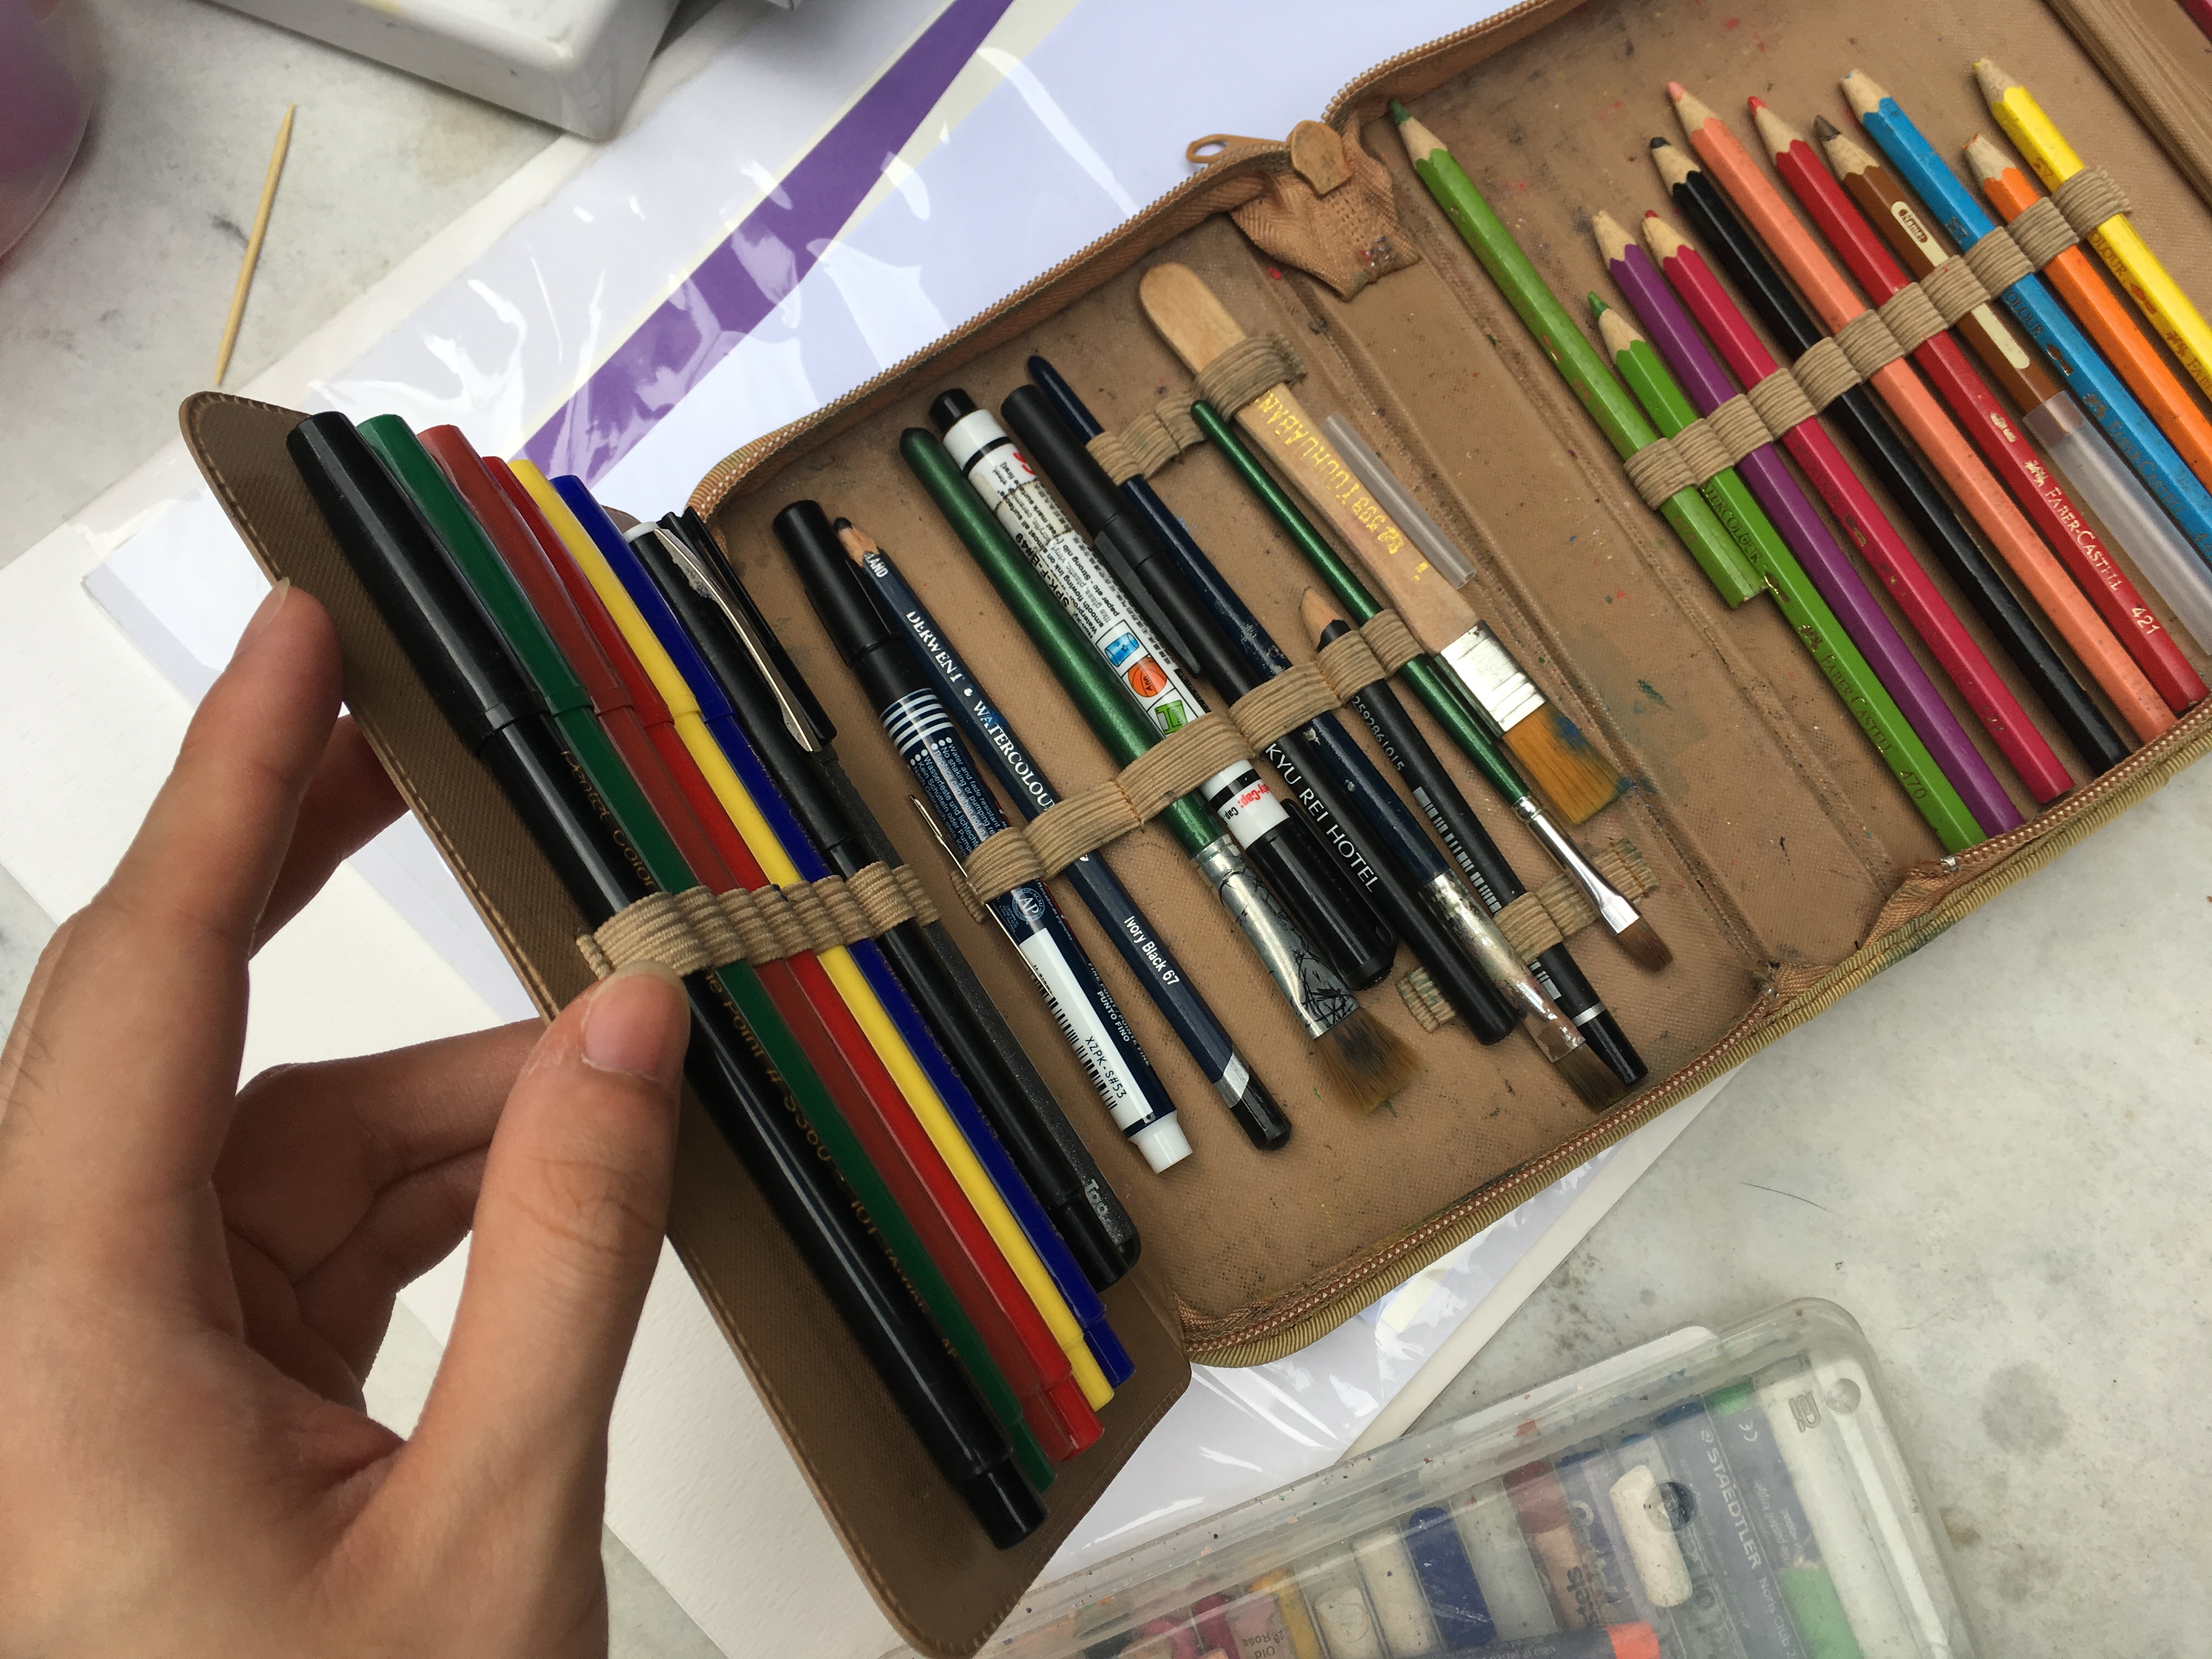
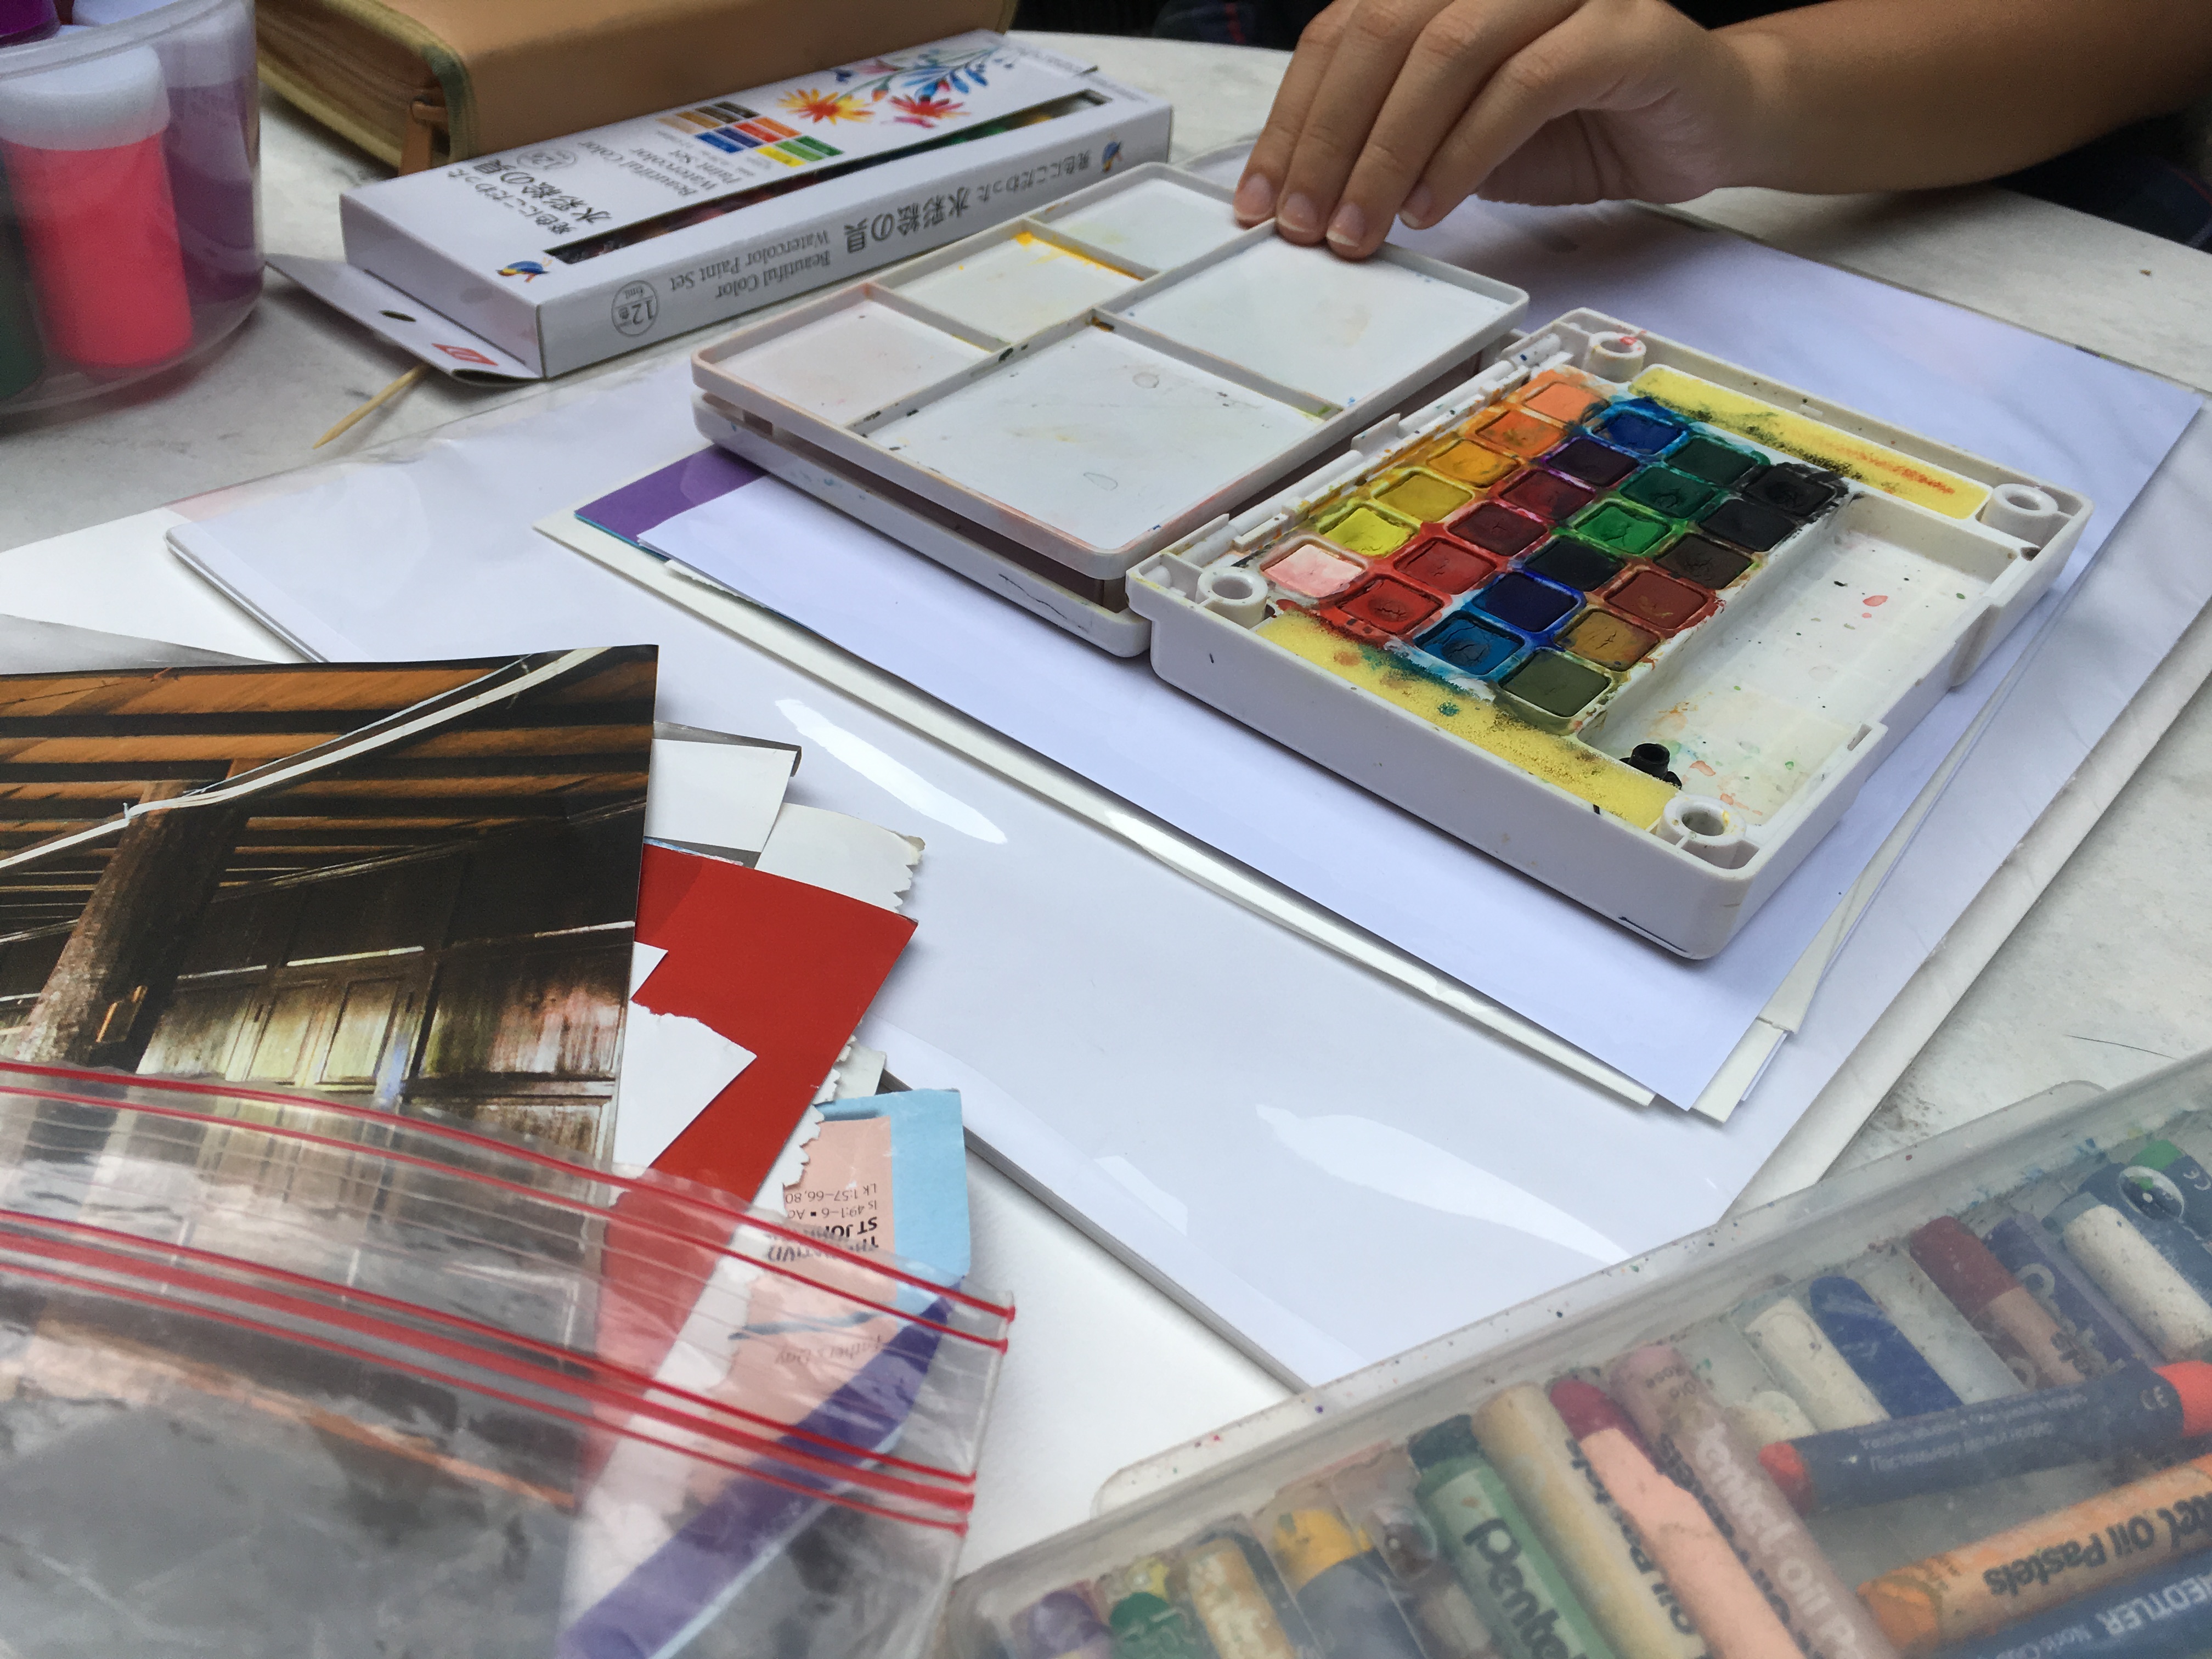
I was able to meet an art therapist who works in multiple mediums, tailoring her approach to her client’s needs. As such, her tools spanned across multiple artistic mediums, such as for watercolour and collage.
Tools:
Watercolour set (pans and tubes)
Brushes
Colour pencils
Crayon
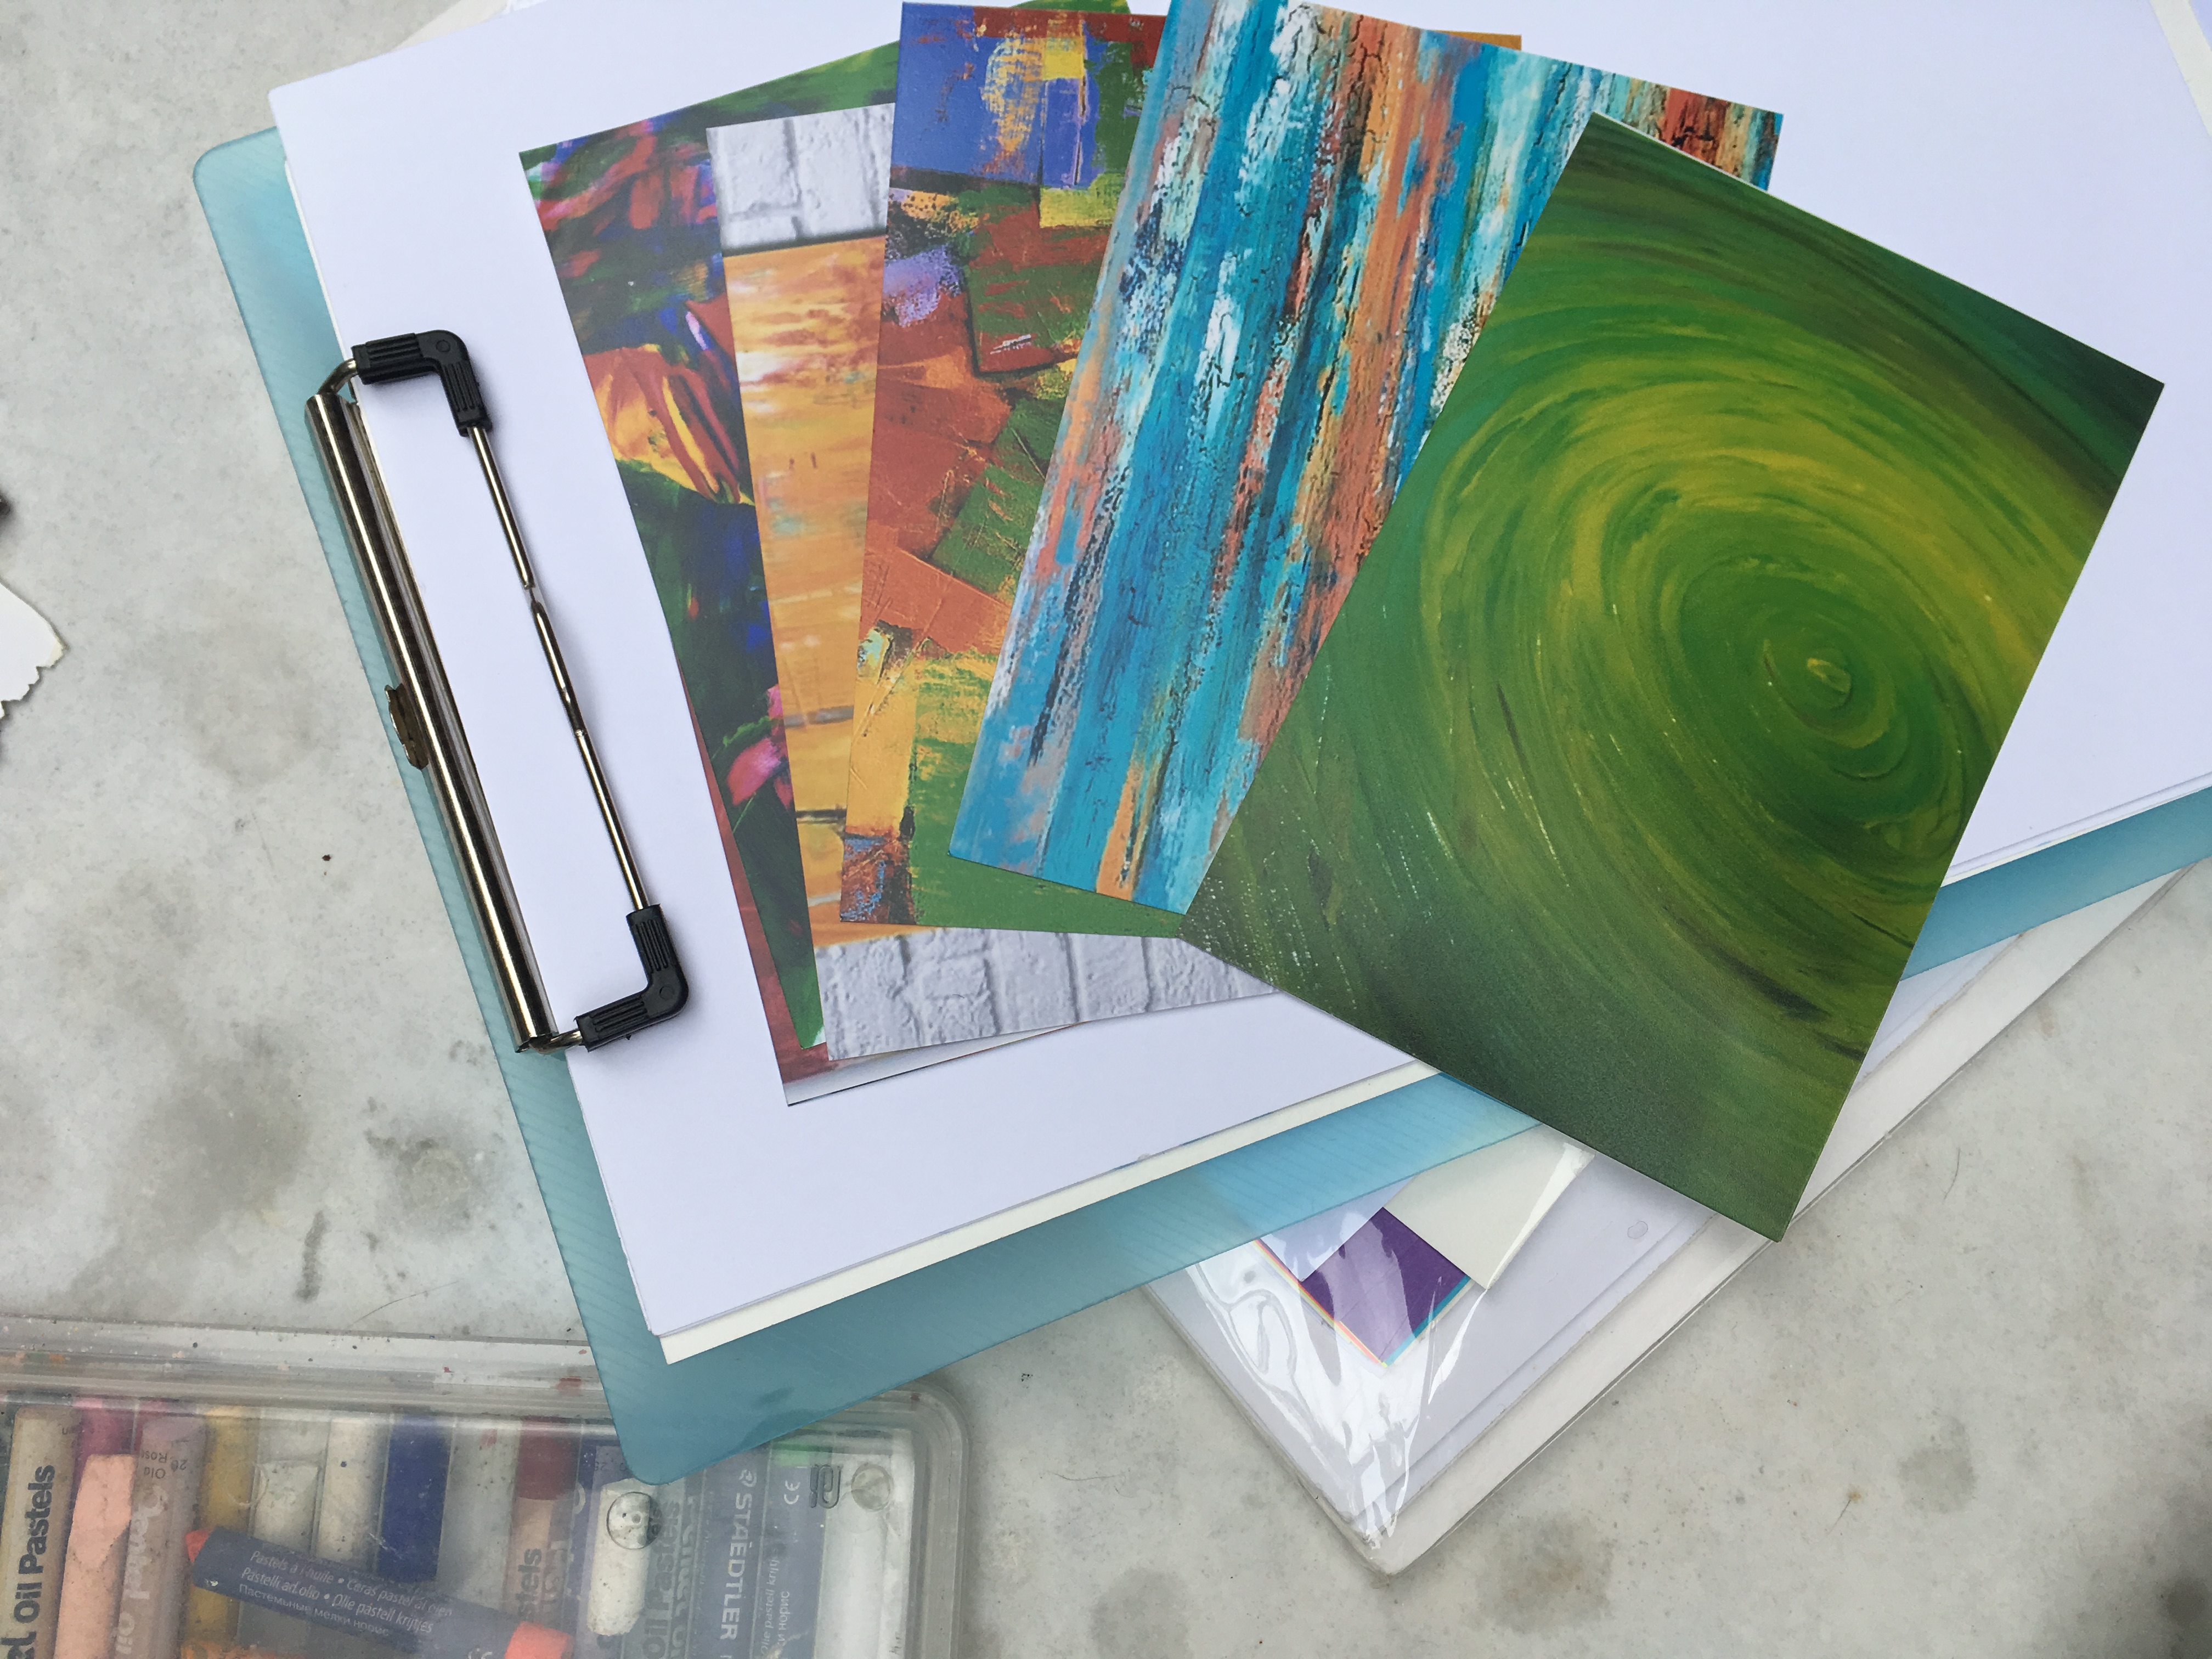
Reference images
Clipboards
Different types of paper
Images for collaging
Scissors
Glue
She talked about how she worked predominantly with the elderly now, and emphasised the use of artistic processes and creation to engage their attention. To her, it was important to emphasise that art therapy was not about creating final works, per se, but allowing one to engage with the processes of making to spur further positive effects such as thinking, engagement, and openness to share about personal processes. These would act as gateways towards sociability and introversion, allowing one to develop a sensitivity to their internal worlds and harvesting that positively through art-making.
Worksite — Elderly care centres, Field trip sites
Her practice was diverse in working both with physical centres where elderly would take part in therapy in a group setting, and more individual sessions which involved field trips to spaces such as parks which would allow them to paint subject matter like flowers.
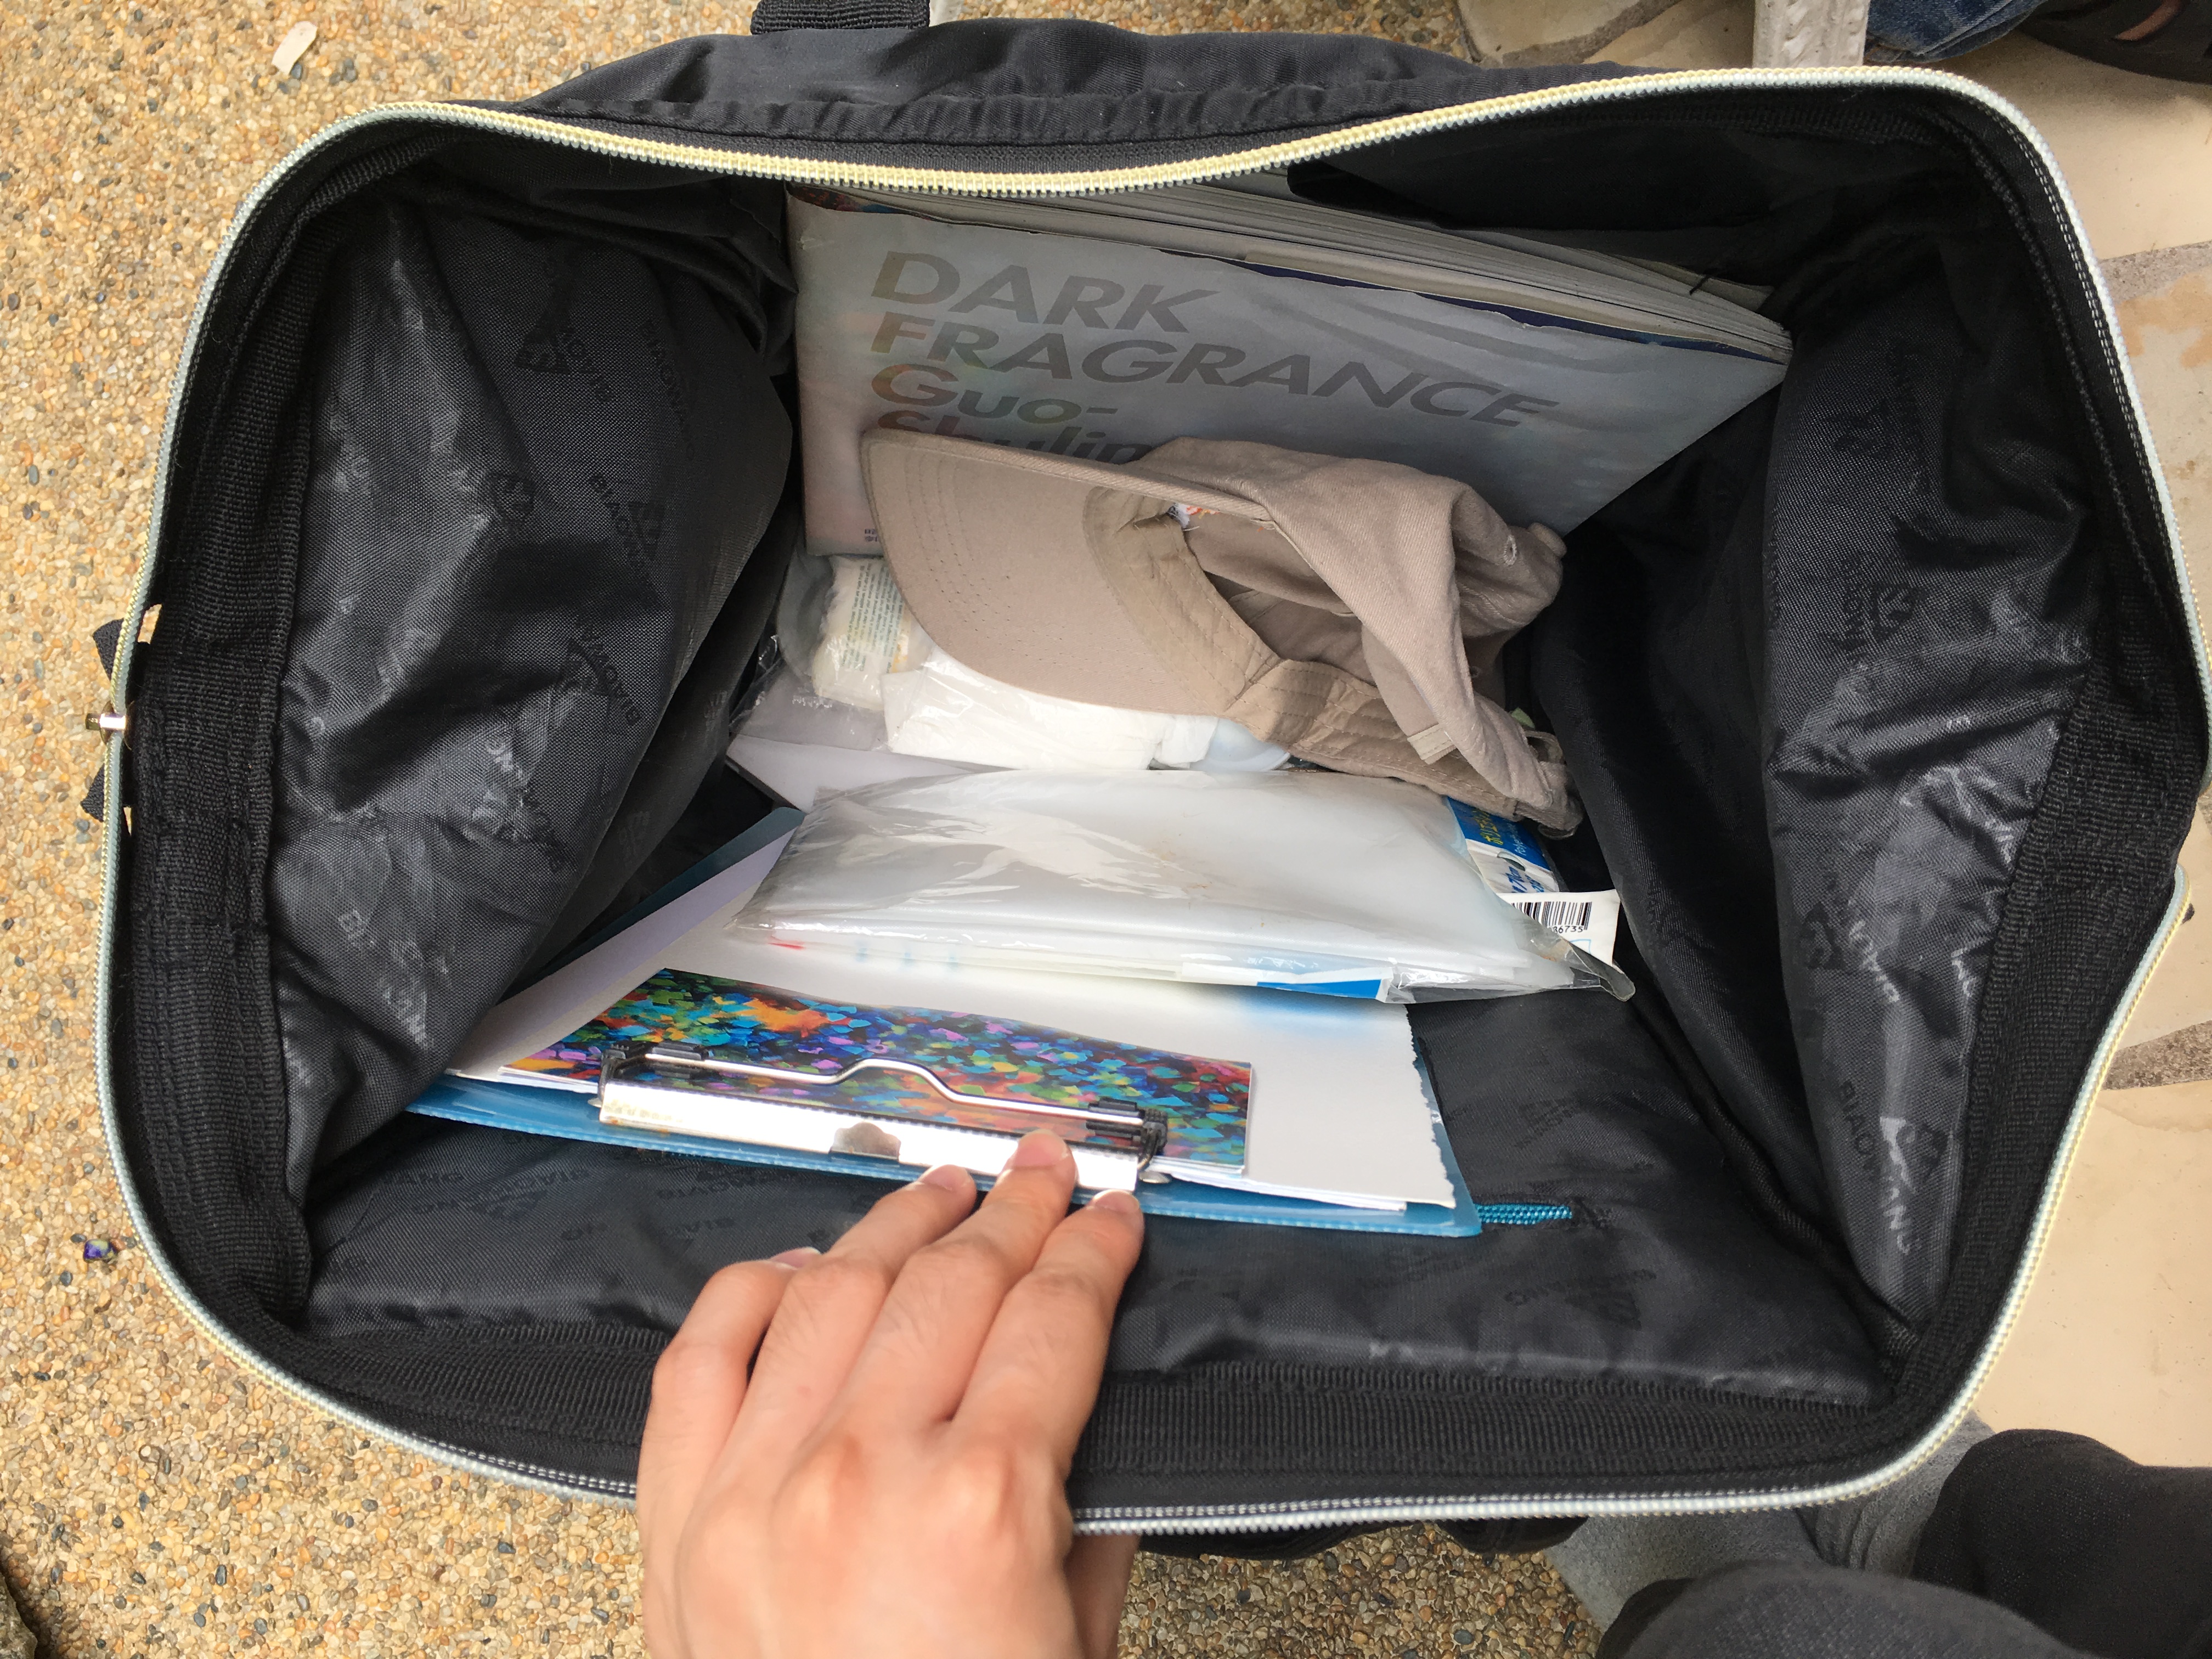
She actually had 2 bags to lug her tools around with! She mentioned things such as needing large art equipment, as large paper sizes were important for elderly to have the space to manipulate materials with.
Workshop
We then engaged in a quick art therapy like session, which involved us making anything we wanted for a set period of time. Afterwards, we would talk about our works and processes and how that would tease out interesting notions about our own personal psyche.
Overall, some difficulties faced by her were as follows —
Transporting of materials
Seating for the art therapist — her clients were usually wheelchair-bound, but she herself didn’t have spaces to rest
Lack of suitable spaces for clients to paint outdoors — whether wheelchair accessibility issues, or the space being too crowded, which led to her clients feeling too shy
I went to Richlife Chinese Medical Centre with Charmaine to take a look at how the TCM practitioner does his work. Due to patient privacy and competition reasons, photo documentation of the process was not allowed. He shared that TCM consists of many components – Tui Na, Cupping therapy, Gua sha, Electrotheraphy, and Internal medication.
He shared a little more about the various treatments. Tui Na is a hands-on body treatment that uses Chinese taoist principles in an effort to bring the eight principles of Traditional Chinese Medicine (TCM) into balance. The practitioner may brush, knead, roll, press, and rub the areas between each of the joints, known as the eight gates, to attempt to open the body’s defensive chi (Wei Qi) and get the energy moving in the meridians and the muscles. Medicated pastes are commonly used during this process to reduce the friction and to make the process less painful.
Cupping therapy is when local suction is created on the skin. The practitioner uses glass cups, a lighter, alcohol and cotton balls during this process. He shared that there are new devices that use air suction to replicate this process but notes that the heat from the flame makes the treatment more effective.
An online image of how fire cupping is done
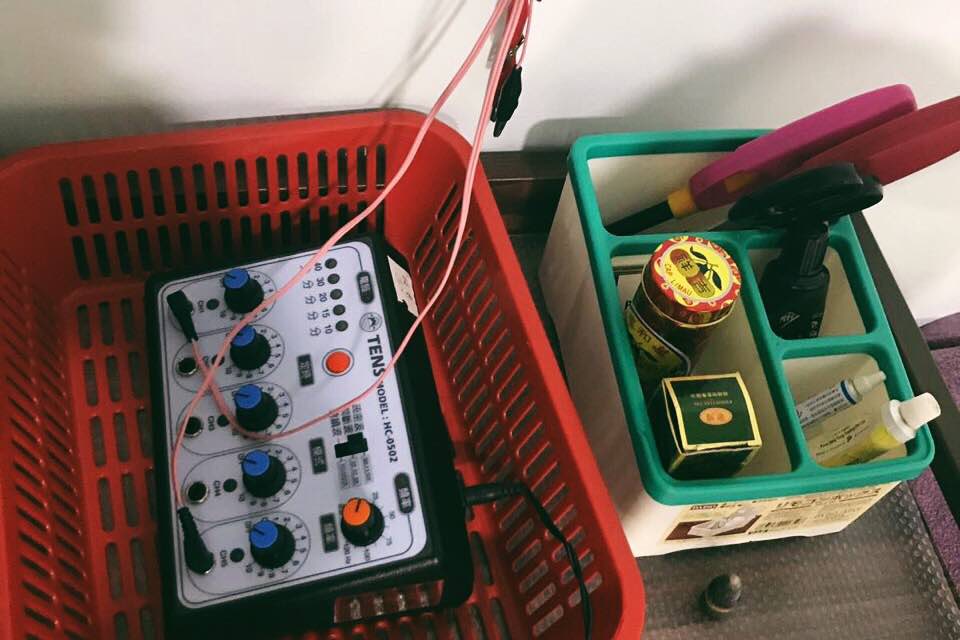
Following that, Electrolysis requires an electrical outlet, electrolysis machine, needles, alcohol swabs.
Electrolysis machine
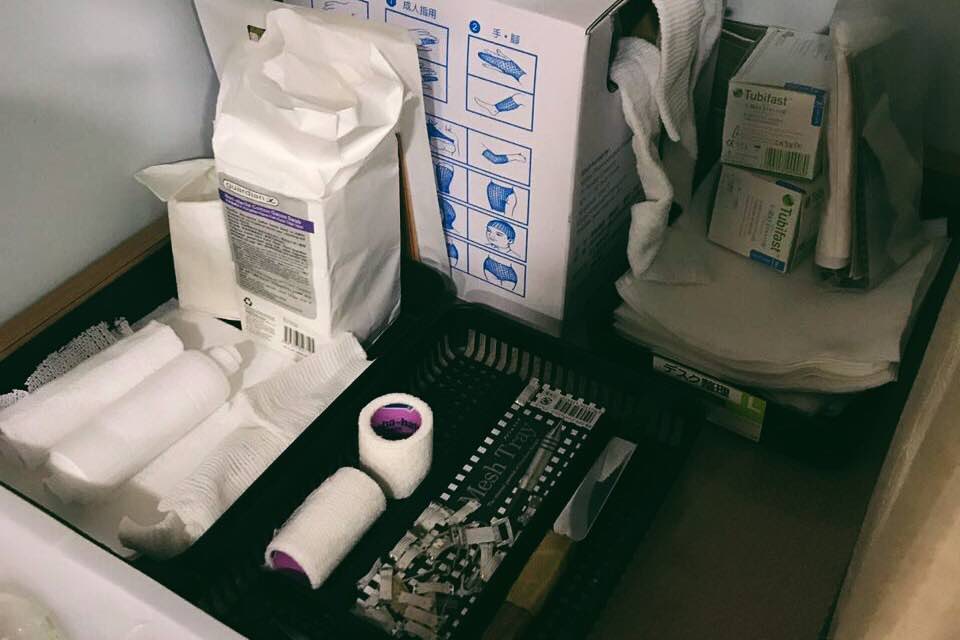
He noted that the younger generation tend to come in when they suffer from external injuries such as sprains and muscle aches. For these external treatments, we need gauze, cotton pads and medicated oil.
Tools for external injuries
Moving on to acupuncture, the general theory of acupuncture is based on the premise that there are patterns of energy flow (Qi) through the body that are essential for health. Disruptions of this flow are believed to be responsible for diseases. Acupuncture corrects imbalances of flow at identifiable points close to the skin. The acupuncture needles have varying sizes from 1 inch to 3 inches. For this process, the acupuncture needles, kidney dish, and alcohol swabs are required.
After exploring three practitioners, I decided to design a probe with regard to painting. Similar to Zi Lin, I was also inspired by the recent news of NUS undergraduate who made tools for the visually impaired to cook.
Since painting is such a visual activity, I keen to invent a tool to make it more accessible to the visually impaired. During my practitioner observation, my friend always made sure to mix all her paints first. She was able to easily pick out the paint tubes she needed, and squeeze the right amount of paint before swatching them to test. This task might seem simple, but to a blind person, it could be of utmost difficulty. Hence, I looked into producing a color mixing kit.
Contents + Rationale
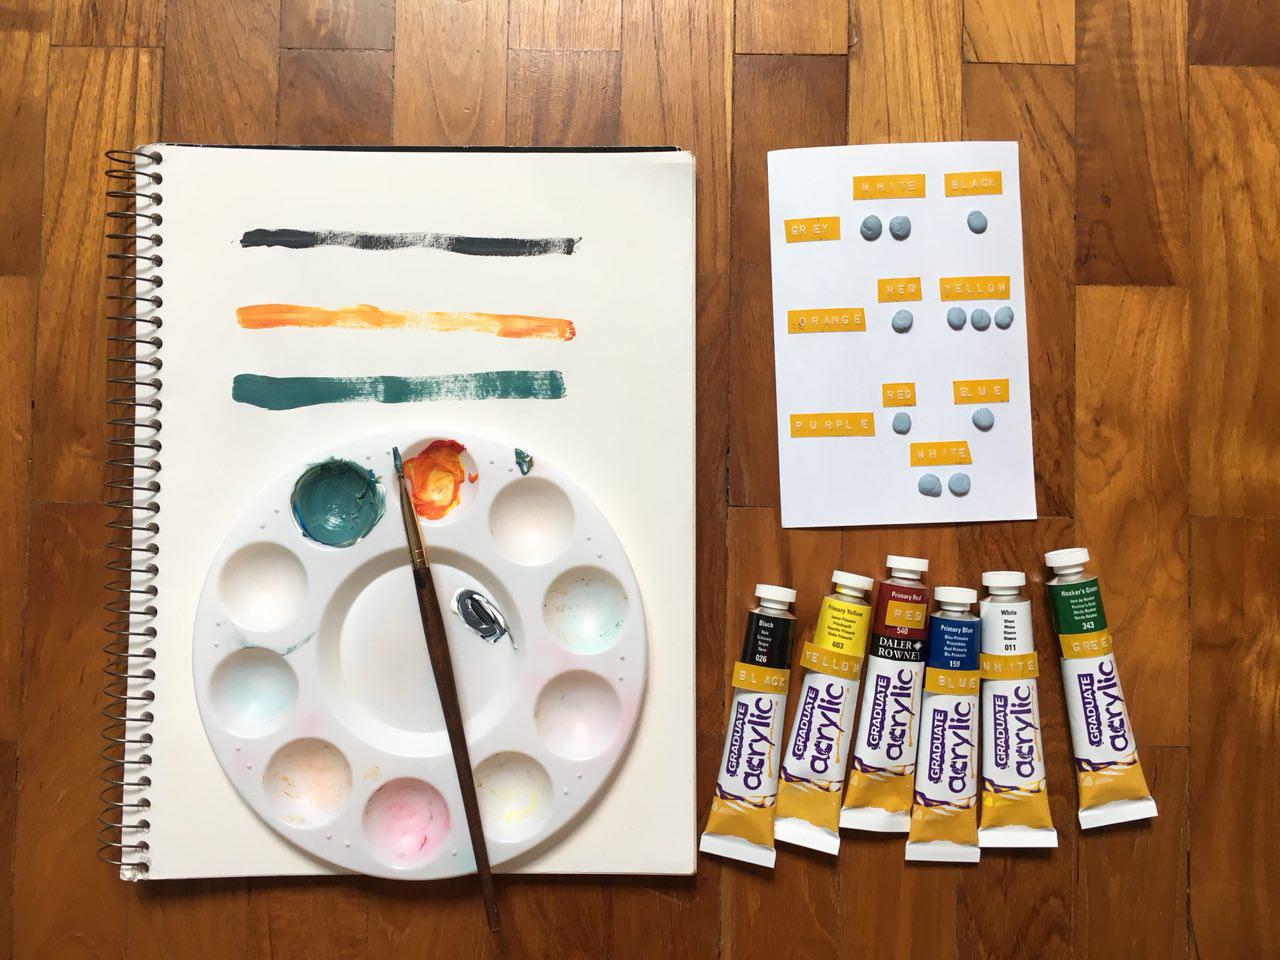
The contents of my kit: paper, palette, paintbrushes, a color recipe card, paint tubes. Not included in the picture: blindfold and instruction card.
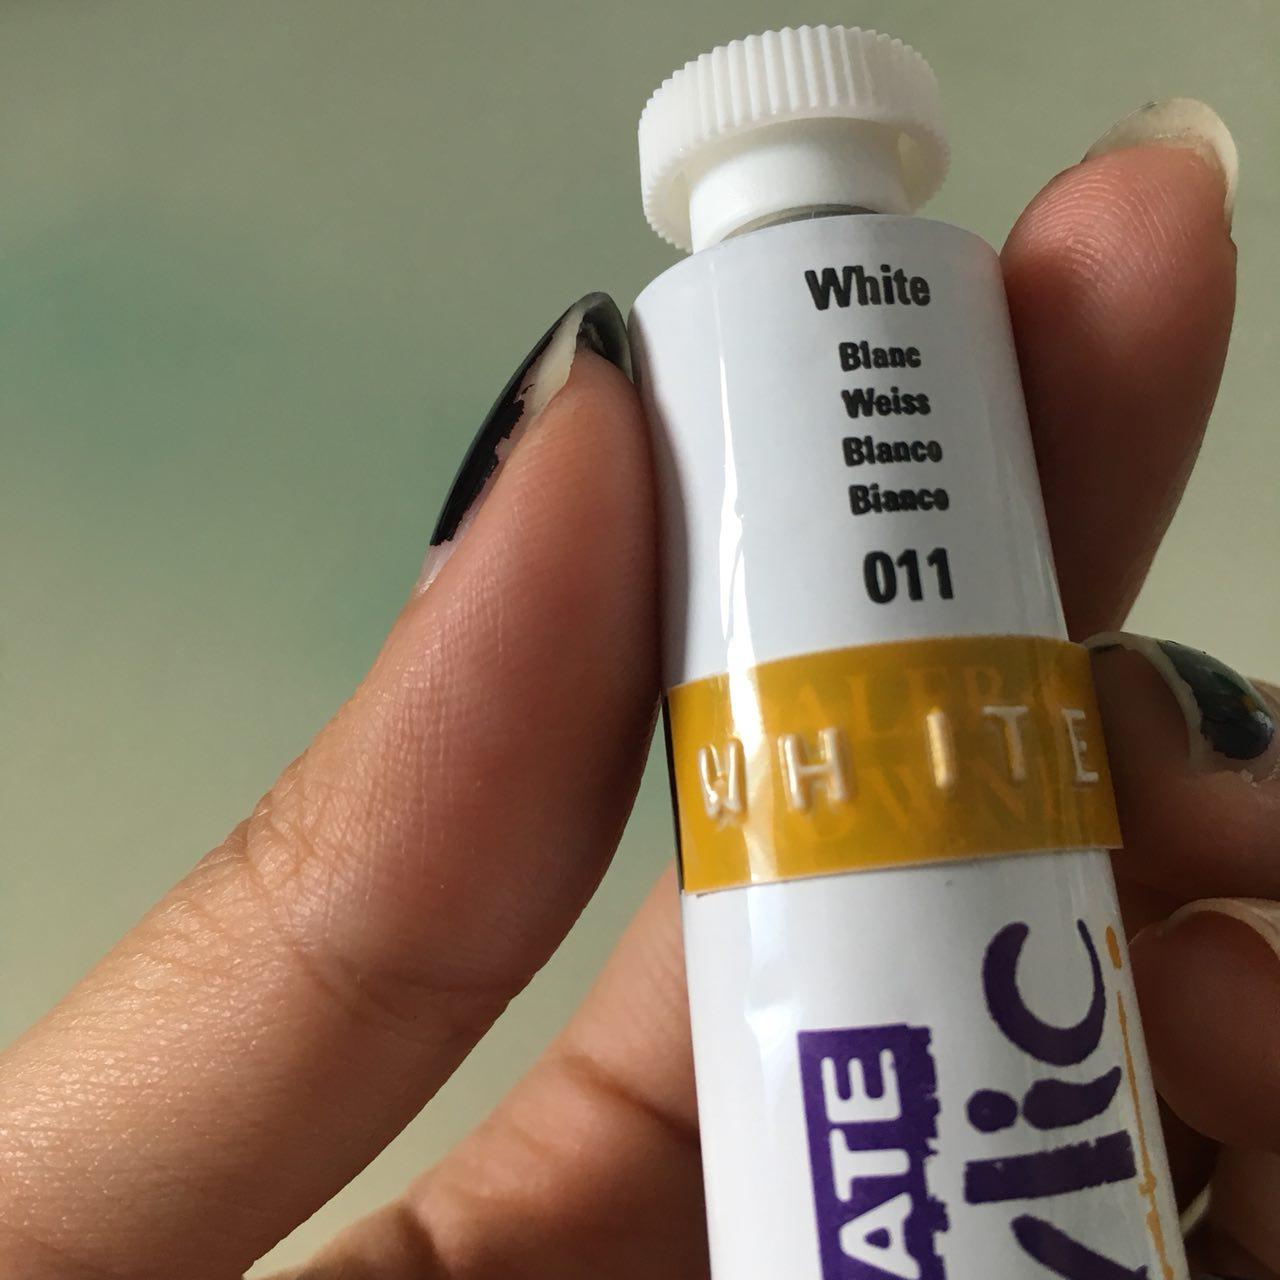
In order to make it easier for the visually impaired to identify the color of individual paint tubes, I wanted to label the tubes with braille. However, for obvious reasons (1. I don’t know braille 2. I don’t know people who read braille), I decided to use a embossing tool to label the tubes. Ideally, however, the tubes would be labelled with both the letters and braille.
Fully labeled set!
Embossing tool enables the label to ‘stand out’.
This made the labels more textured and would allow for people to read it, whether or not they knew how to read braille. By running your fingers over the labels, you could make out what word it was.
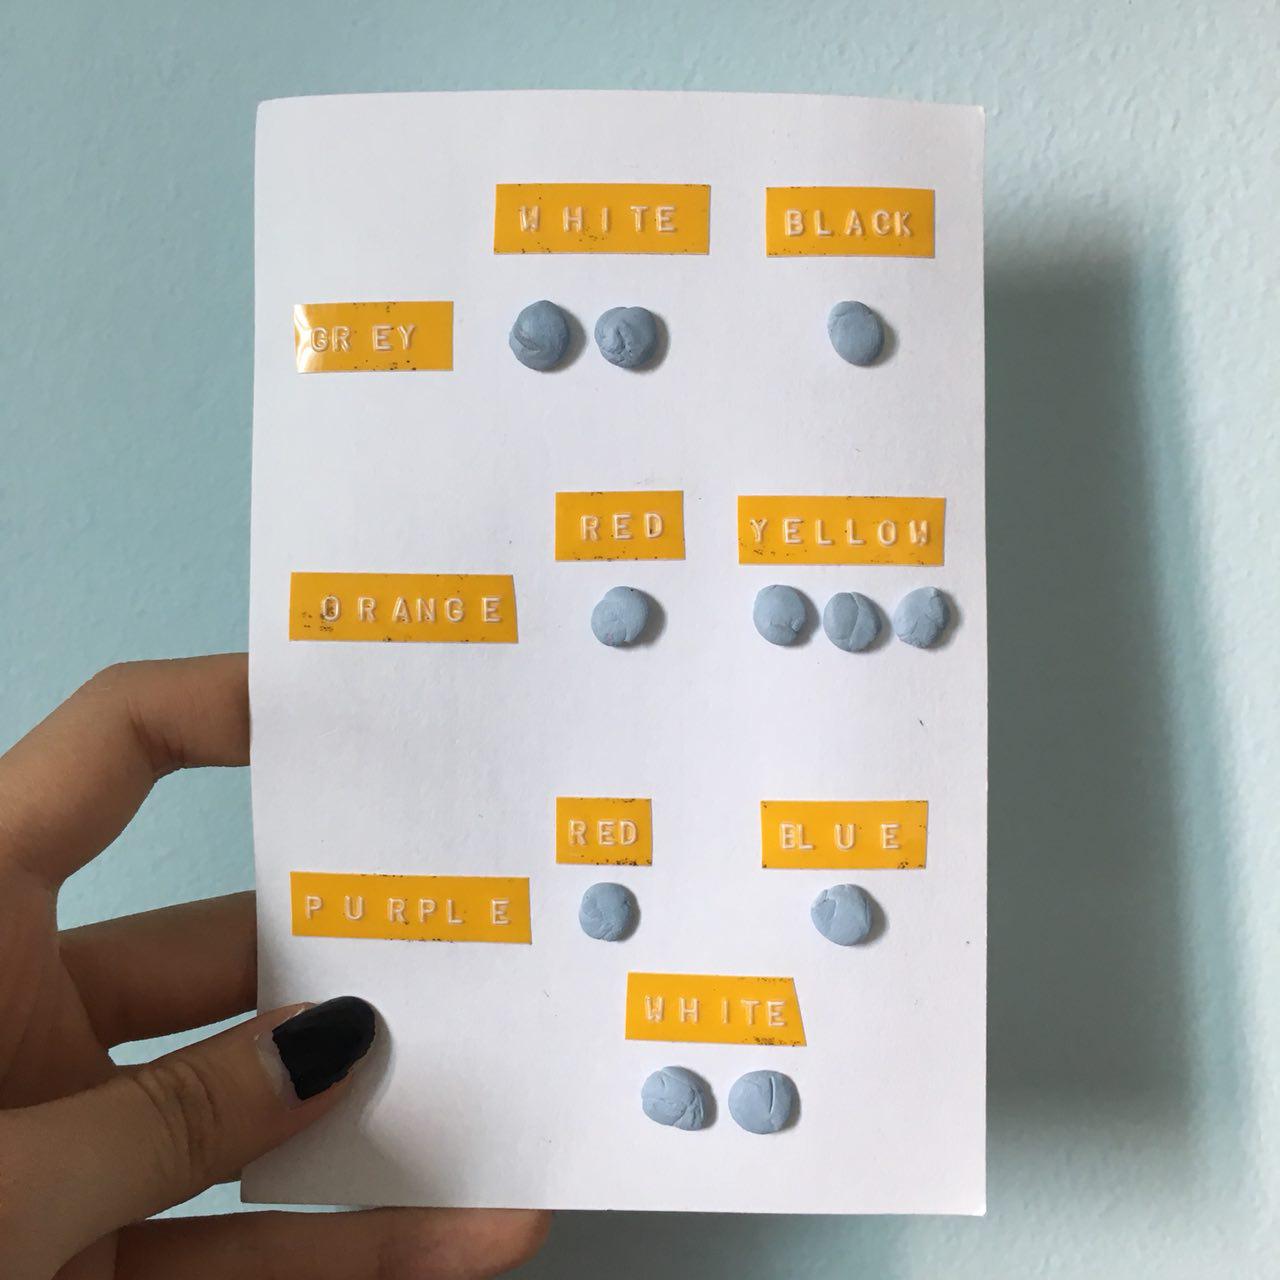
As mentioned previously, mixing paints is an integral part of the painting process. However, if one is blind or visually impaired, they may find it difficult to tell how much paint they need for a certain color. Hence, I came up with a color recipe card that uses the same concept as the labeling of tubes to guide painters in mixing their paints.
Color recipe card! Each blob of blue tack represents a ‘unit’ of paint. For example, in order to mix grey, you need two parts white to one part black.
Once more, this would ideally be labeled with braille as well! Following this recipe card, the painter would be able to know the proportions of paint to use in order to make the necessary color.
Accompanying my kit, is this instruction card.
Experience with Probes
The result of one participant. Grey and orange done relatively well, but purple…???? question mark.
Unfortunately, I was unable to meet up with the original practitioner to get her to test out my kit. However, I did get other people to try it out! Here are some of my findings.
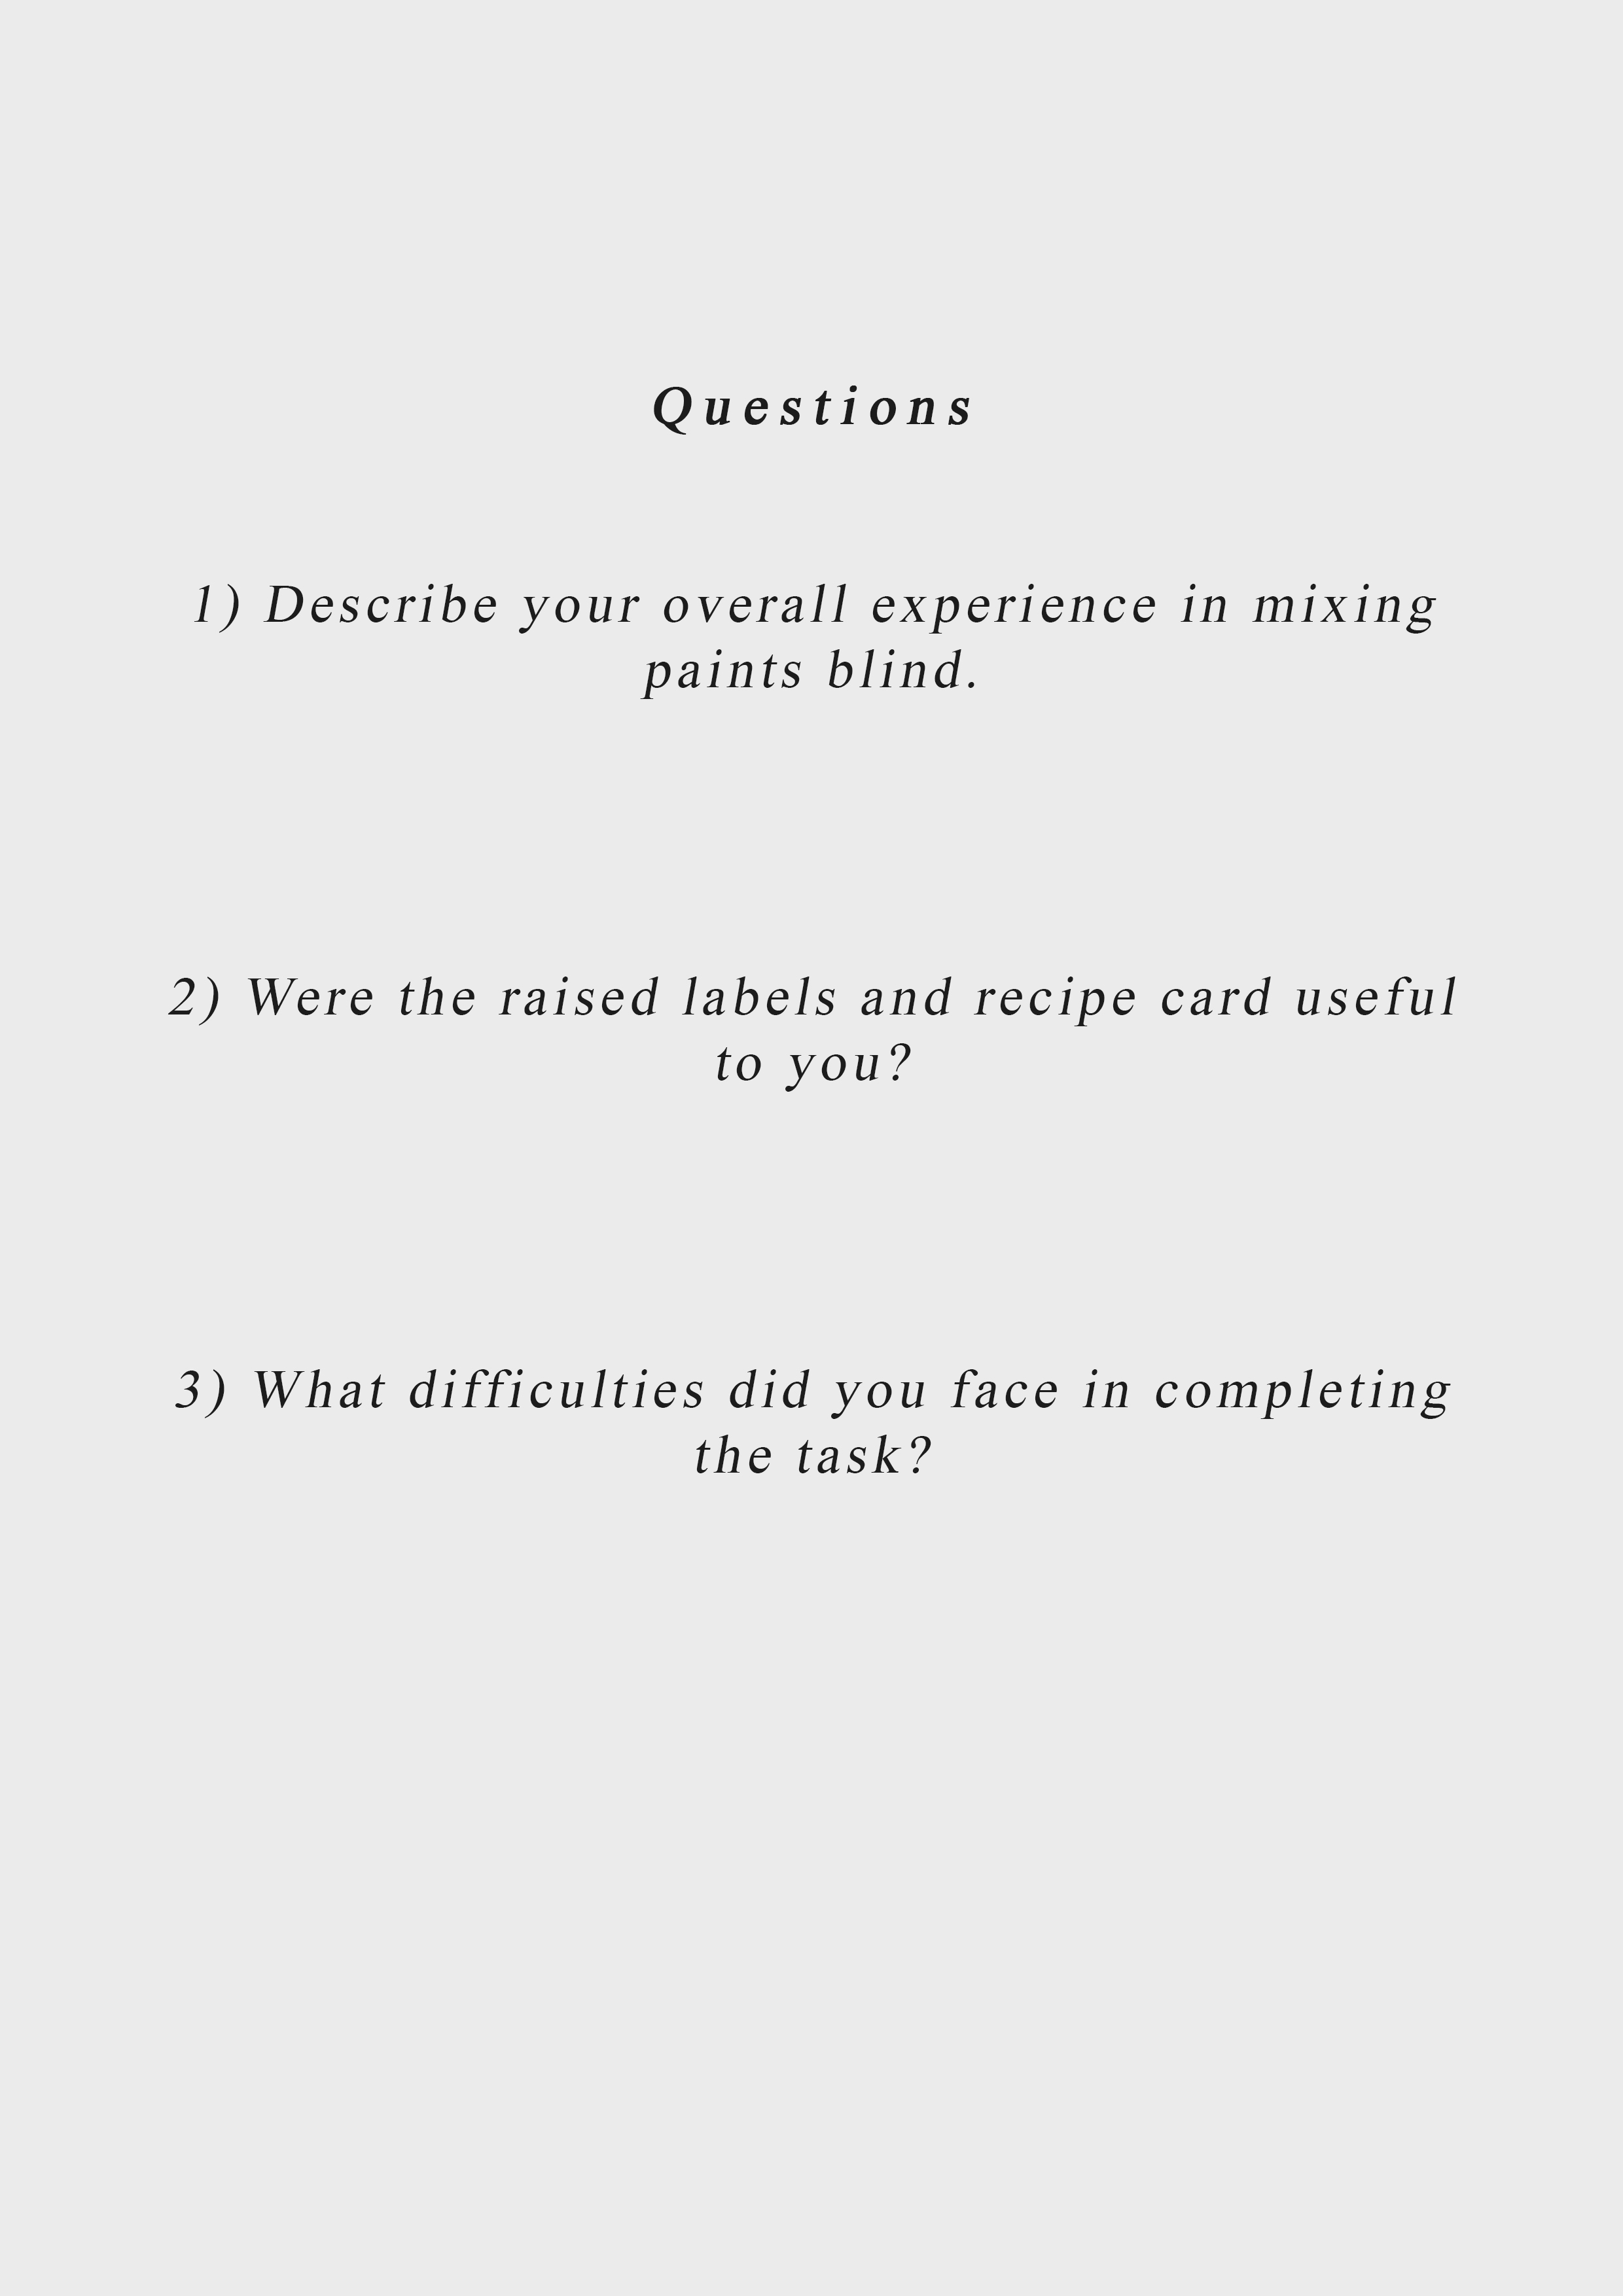
1) Describe your overall experience in mixing paints blind.
“Immediately felt ‘crippled’, totally not used to painting without sight! I felt a lot of hesitation.”
“I thought that it was going to be a lot messier, but I think I did pretty well. At least the paint ended up on the palette and the colors look alright.”
2) Were the raised labels and recipe card useful to you?
“I liked the idea of having a ‘recipe card’. The proportions helped me estimate how much paint I needed from each tube to produce the correct color. But it was hard to gauge how much I was squeezing out from the tube since I couldn’t see – I can only gauge from my strength.”
“The labels helped, but definitely took a lot of time and focus in feeling around it to figure out what color the tube of paint was. I had to touch and feel each and every tube at least twice before I was confident that they were the colors I needed.”
“The recipe card was useful, but I think I spent a lot of time on it. I think it would be better if there was a line separating the ‘resulting color’ (i.e purple, orange, grey) from the ‘recipe’. Because after awhile, I wasn’t sure what I was feeling anymore. Had to use a lot of brain power!!! But I can see how braille or embossed tubes of paint would help with visually impaired people.”
3) What difficulties did you face in completing the task?
“Squeezing all the paint into the same place on the palette and mixing them together!”
“Gauging whether or not my ‘units’ of paint were equal. For example, I had to use one part red, one part blue and two parts white to produce purple. But I think my one part red was bigger than my one part of blue, and my white was definitely not two parts. So the resulting colour was super off.”
Personal Thoughts
Creating this kit was incredibly fun, and it was exciting to see the different responses from the people who used my kit! I think it’s difficult to try and control subjective factors such as how much ‘one part’ or ‘two part’ of paints means to each person – as it differs from person to person. Perhaps this is something that can be looked into, or left to the individual’s intuition. I was also thinking of a similar recipe card to aid those with color blindness. Granted, the card would not need to be textured as color blind people can still see. However, it could showcase different colors, along with verbal descriptions, so that color blind artists can learn to recognize the subtleties in the different hues and shades of color. And if they don’t know what color something is, they would be able to match it to the color recipe card to figure it out. Different types of color blindness would also warrant different types of color recipe cards, but perhaps it could reduce the amount of second-guessing color blind artists have to do.
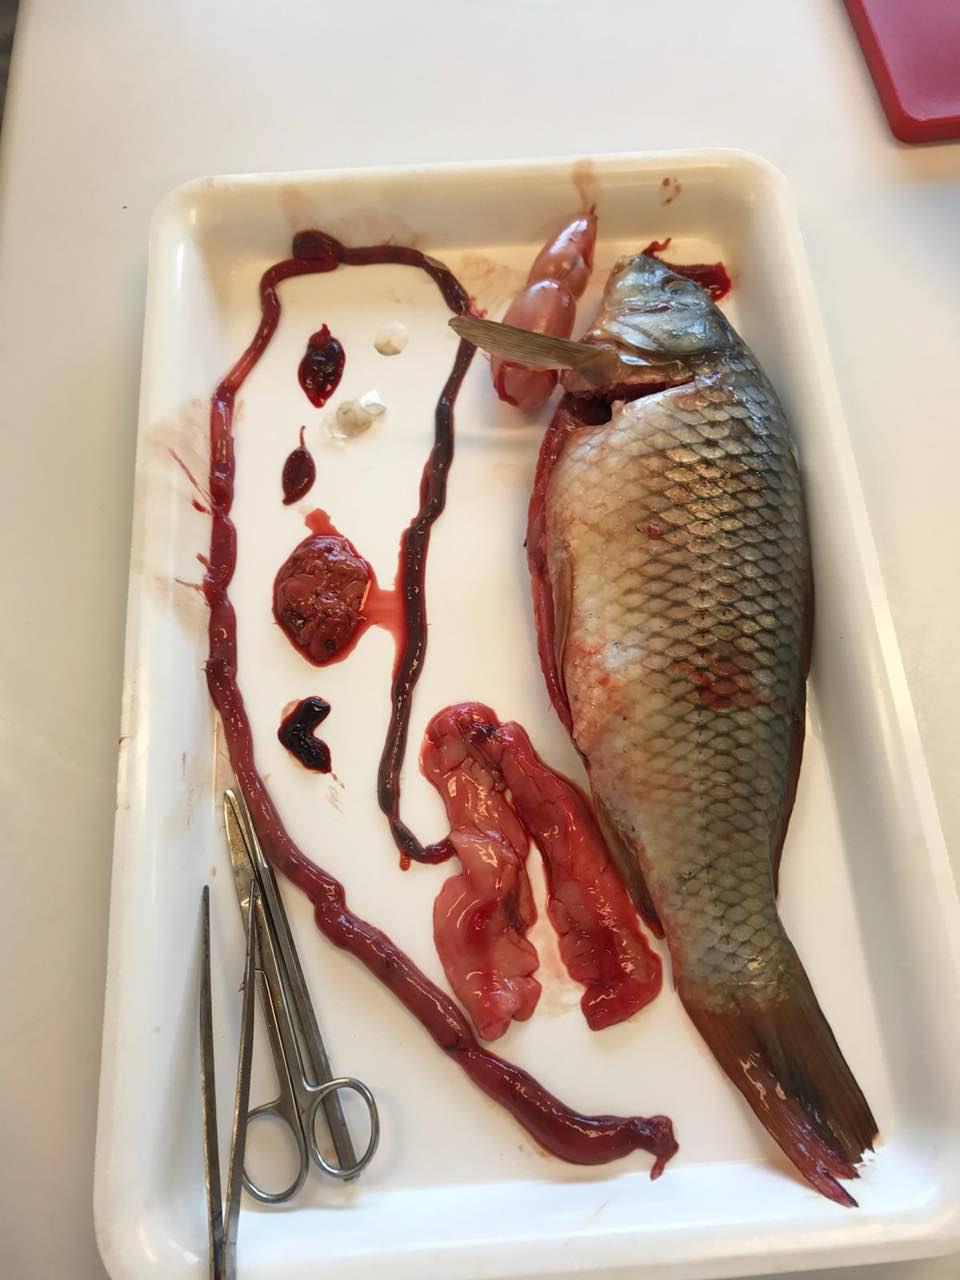
I got the chance to see the process of a fish dissection. This is a common practice for marine biologists who study fish in order to find out more about the anatomy and life cycle of aquatic creatures for conservation purposes.
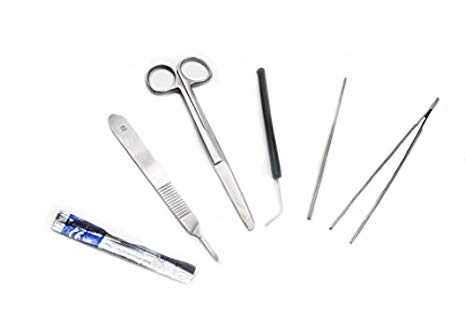
Tools
Scalpel
Point tweezers
Ruler
Measuring tape
Vernier calliper
Needles
Tray
Electronic scale
Microscope
Worksite
The experiments are usually done in a research lab, with access to appropriate equipment, chemicals, etc. There are usual procedures to be followed to ensure that the experiments are done in a systematic and proper manner.
Process
The fish dissected was called a common carp. First, the width and the length of the fish was measured using the tape and the vernier calliper. Different parts were measured such as the mouth size, which says a lot about its diet and initial environment.
Then, the needles were placed around to position the fish when cutting it up. The scalpel was used to cut the fish from tail to the fin. Afterwards, the organs were taken out slowly and carefully using the tweezers.
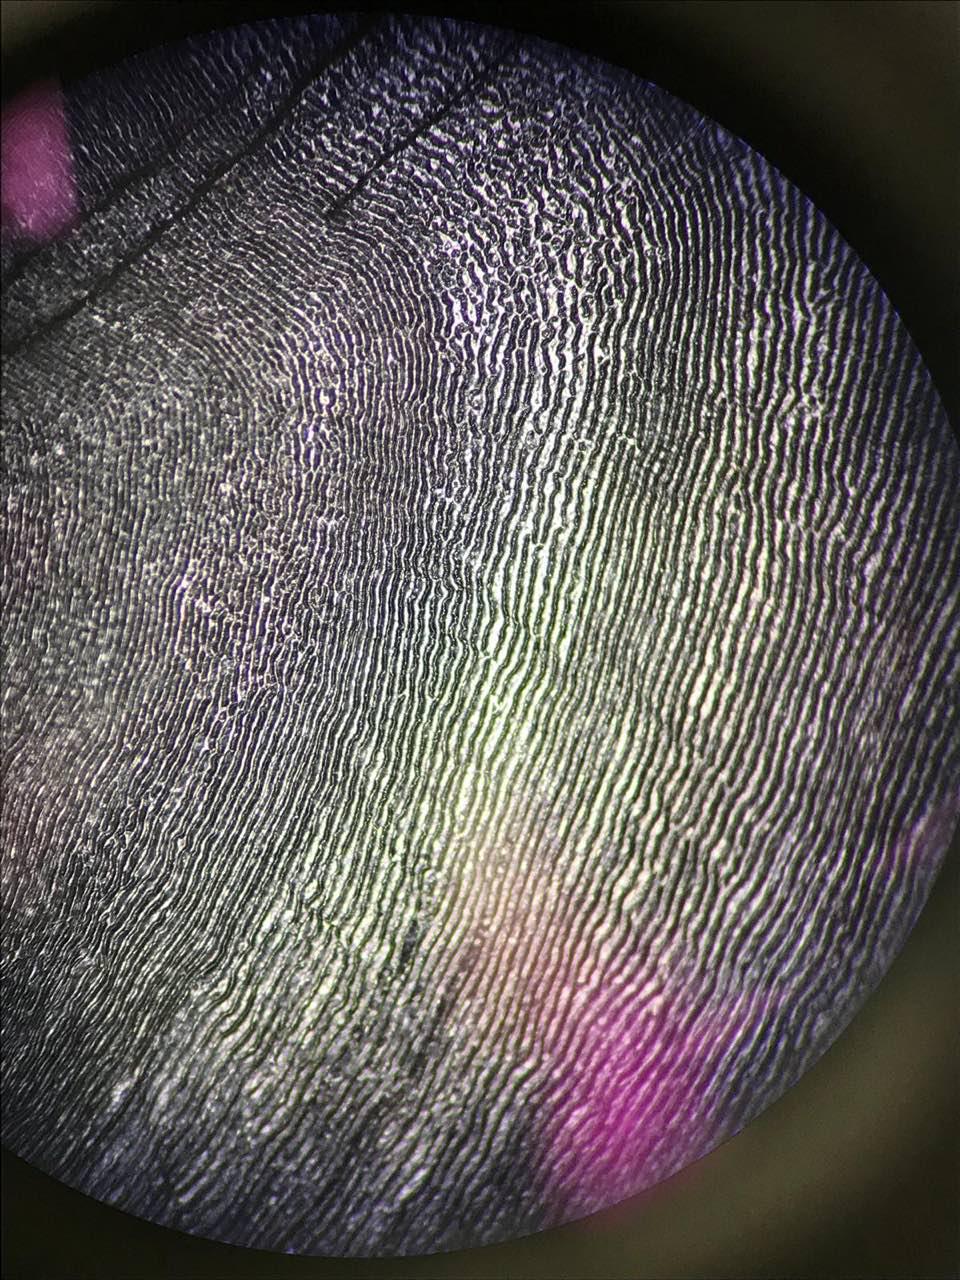
After gathering all the individual organs, each were measured and weighed. The microscope was also used to look at the scales of the fish which shows how old the fish is.
Thoughts
It can get quite messy with all the blood but it’s still an interesting process. One of the challenges would be trying to take out the organs because one has to do it slowly, without affecting the other parts. At one point, the fat can be all lumped up together making it difficult to separate each organ. The scalpel is also really sharp so putting too much pressure might accidentally cut an organ and resulting in more blood and inaccurate measurements after the experiment. Overall, each tool has an important function and ensures that the dissection is done as carefully and properly as possible.
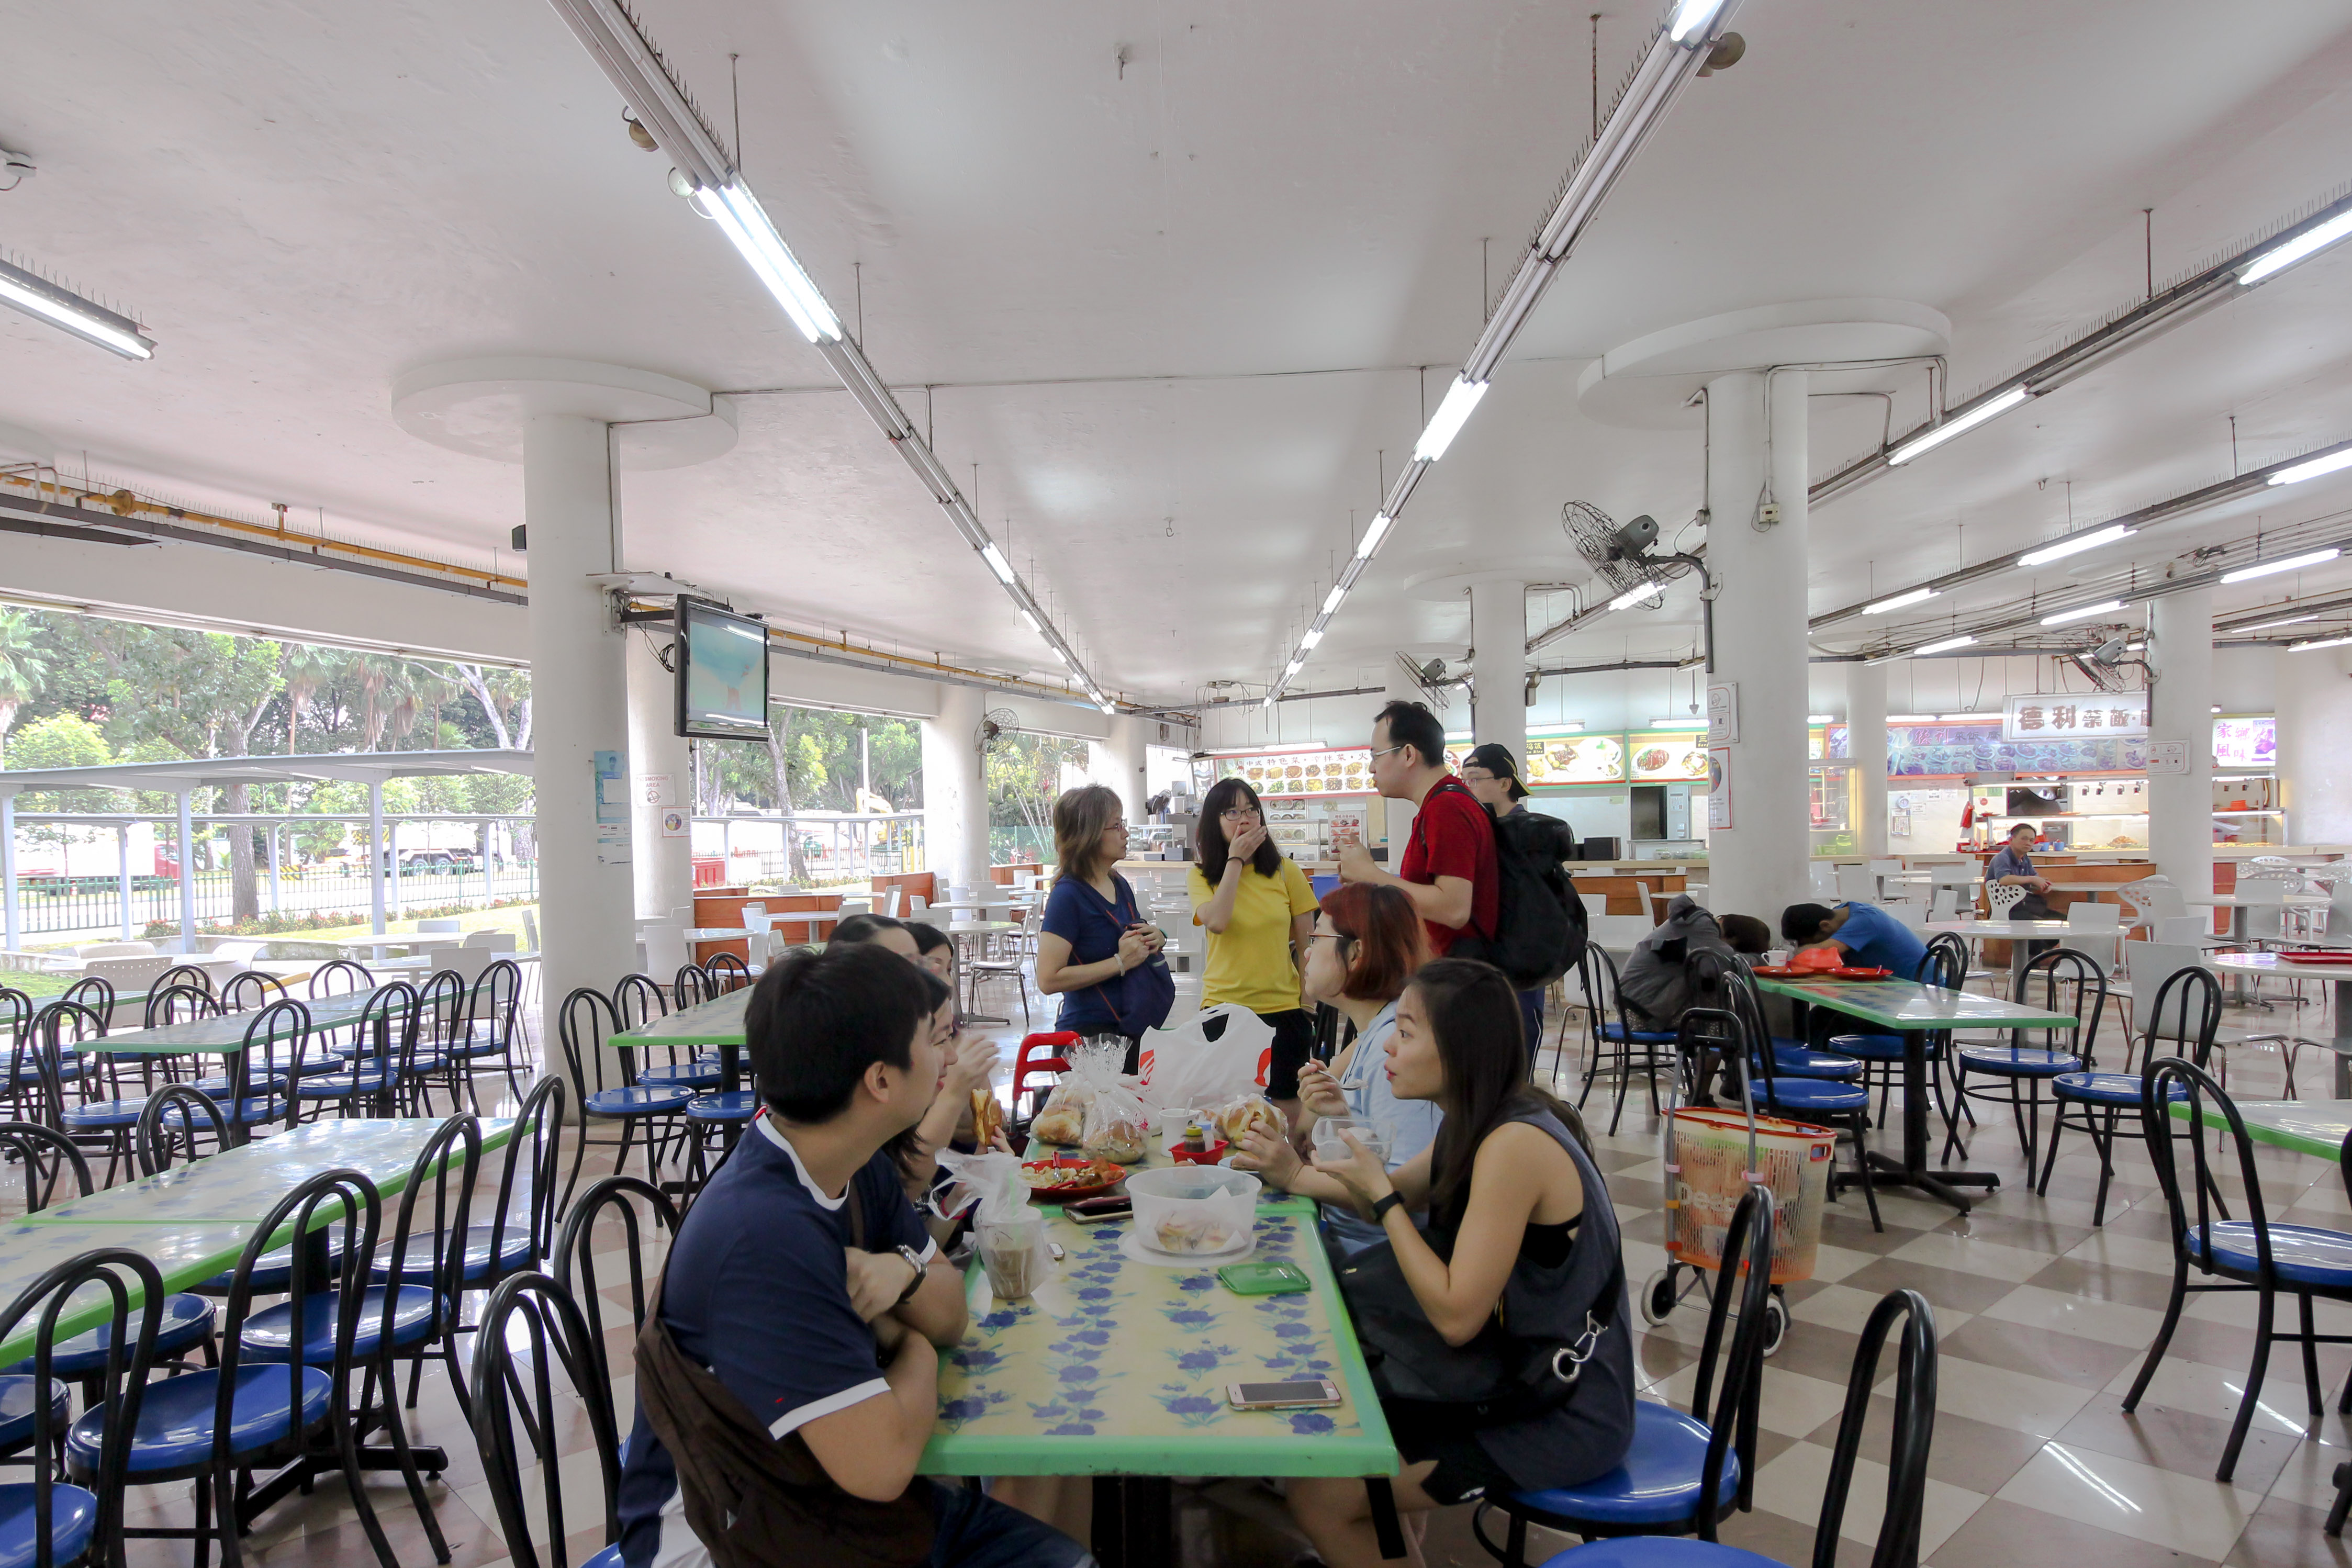
My group decided to create cultural probes based on art therapy for the elderly.
Our cultural probe: an activity booklet accompanied with drawing / writing materials (pens, pencils and colour pencils)
Goal: To investigate attitudes towards art therapy for the elderly as a creative practice and ageing from the perspectives of an art therapist and general populace
We came up with three main activities that required participants to visualise their practices, think about ageing and imagine themselves as the aged.
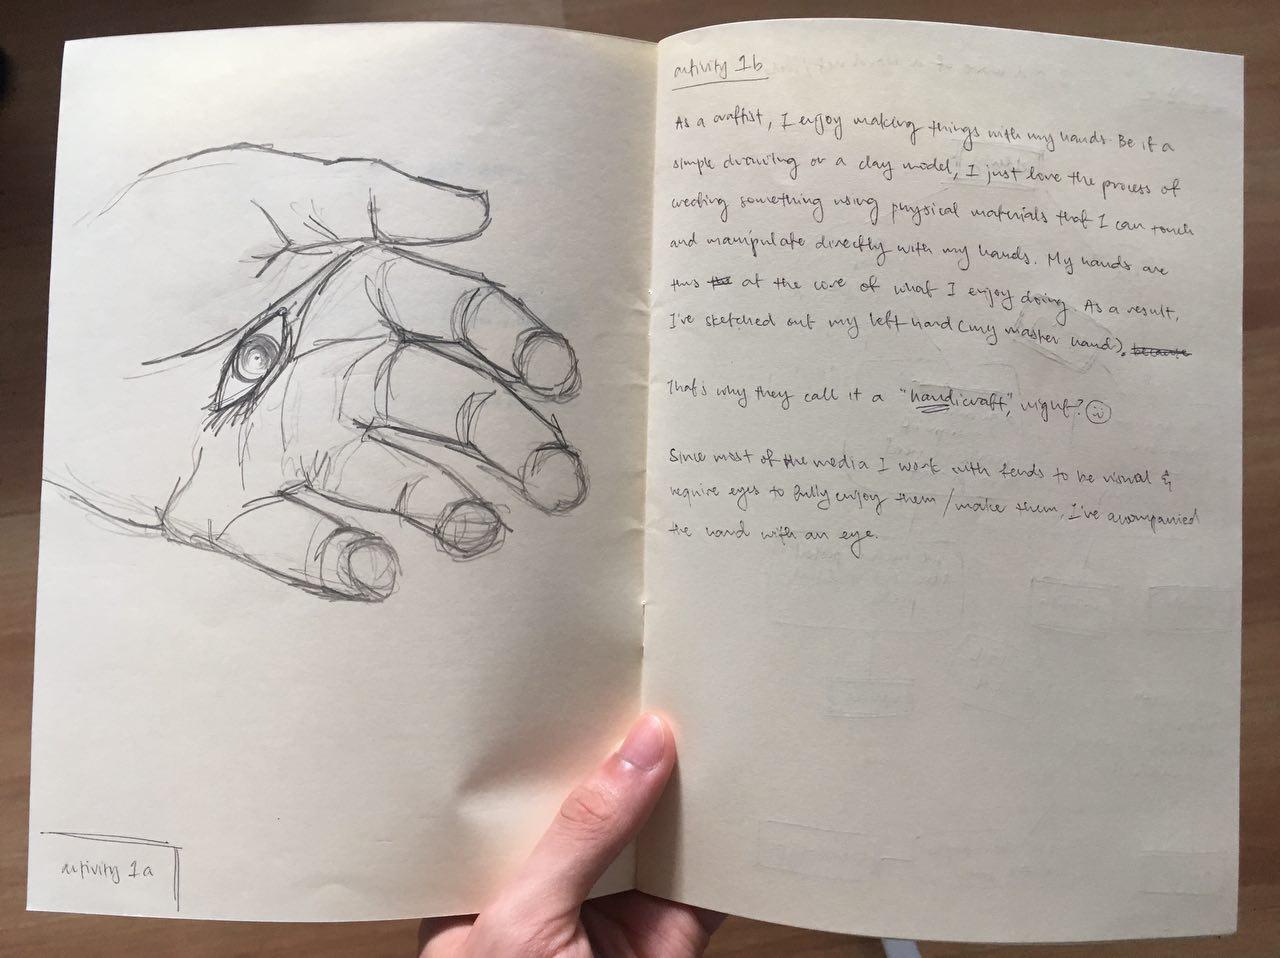
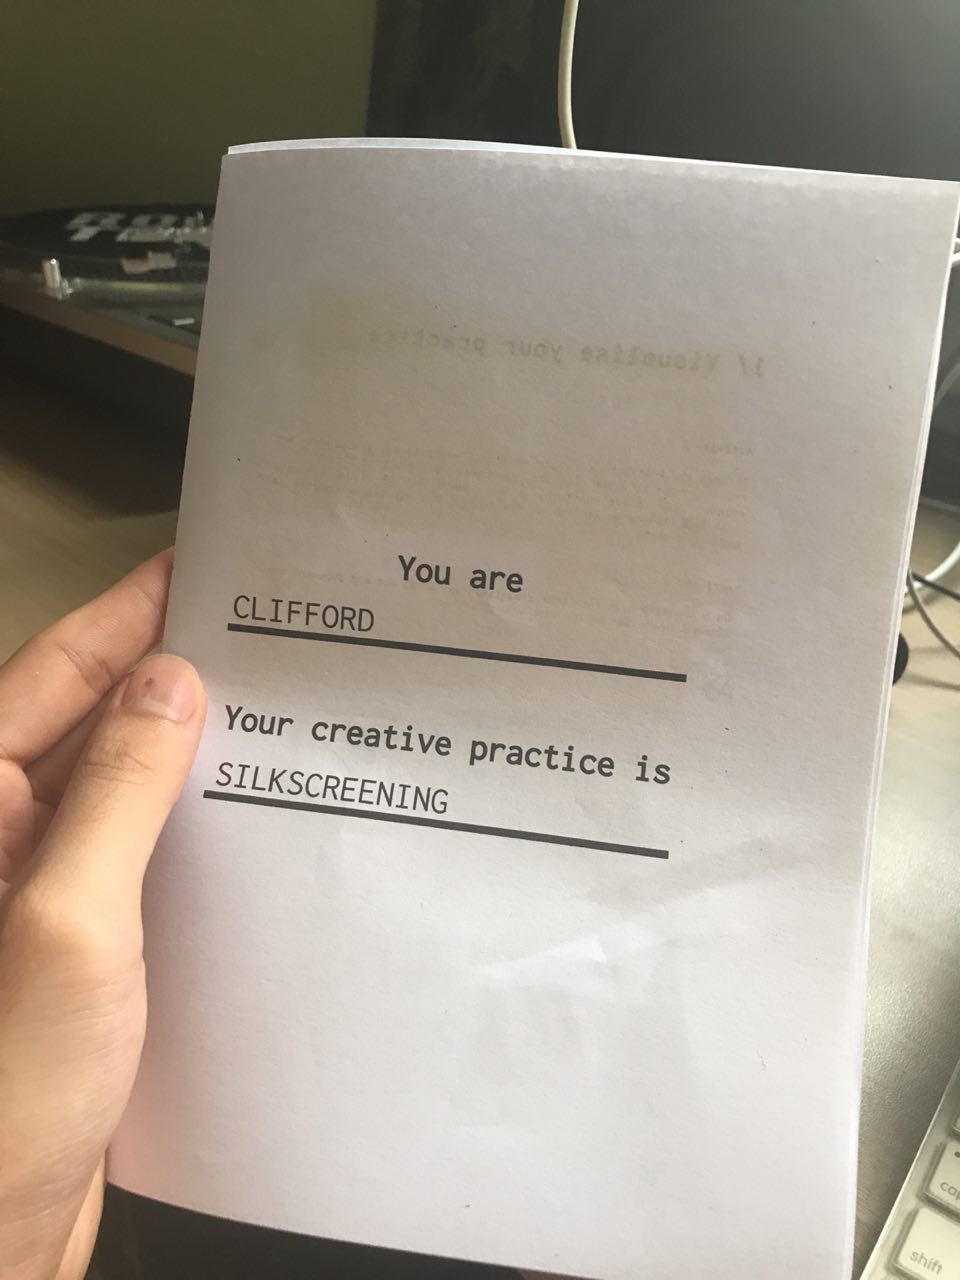
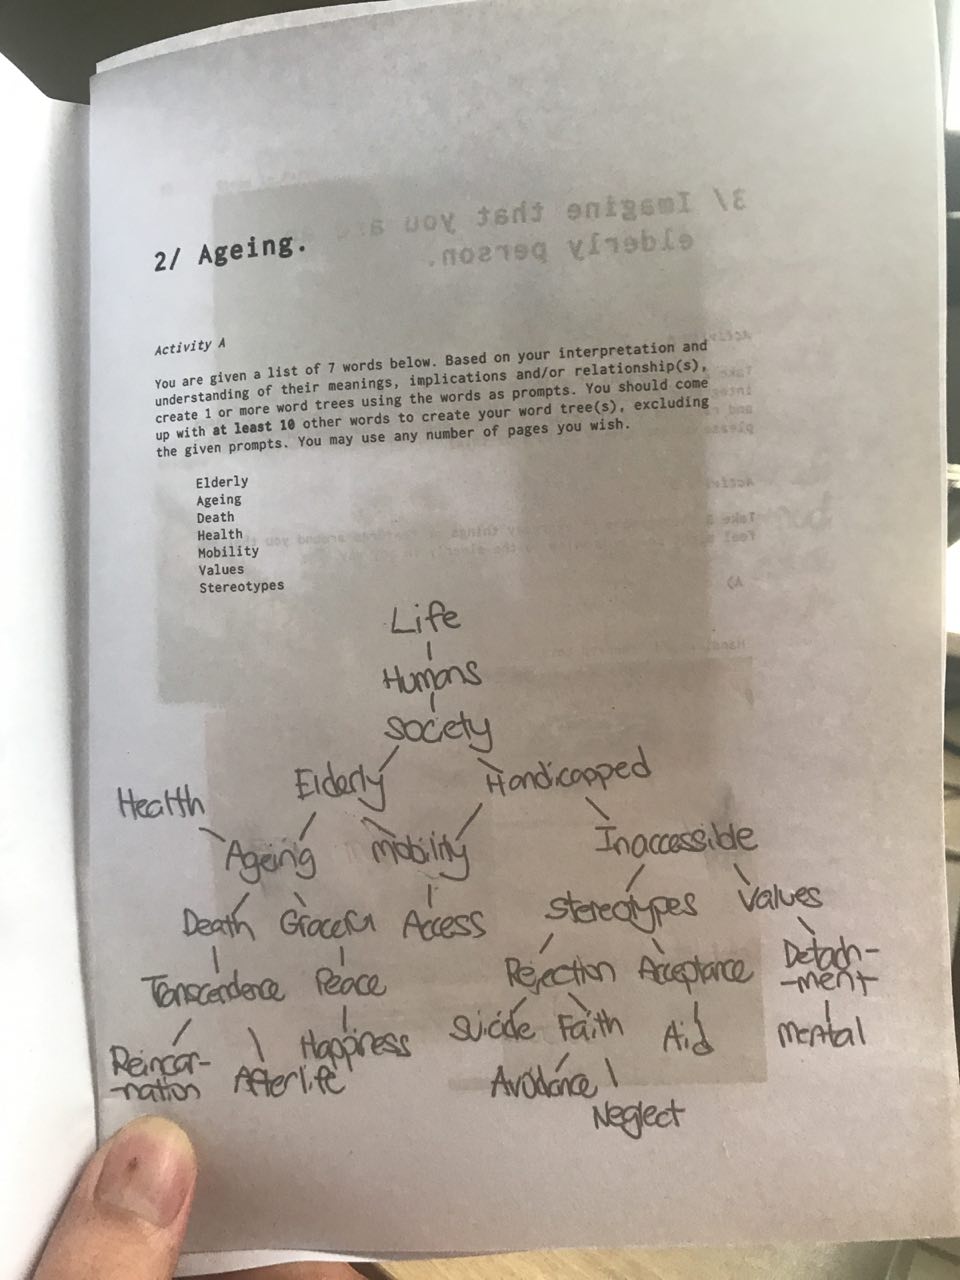
One of the participants is Clifford, a silkscreen printer. It would be intriguing to see how another practitioner other than an art therapist visualises ageing and the elderly, an unusual perspective that might be useful when creating a wearable studio suited for our story world (to be told).
Clifford, a silkscreen printer’s perspective on art therapy
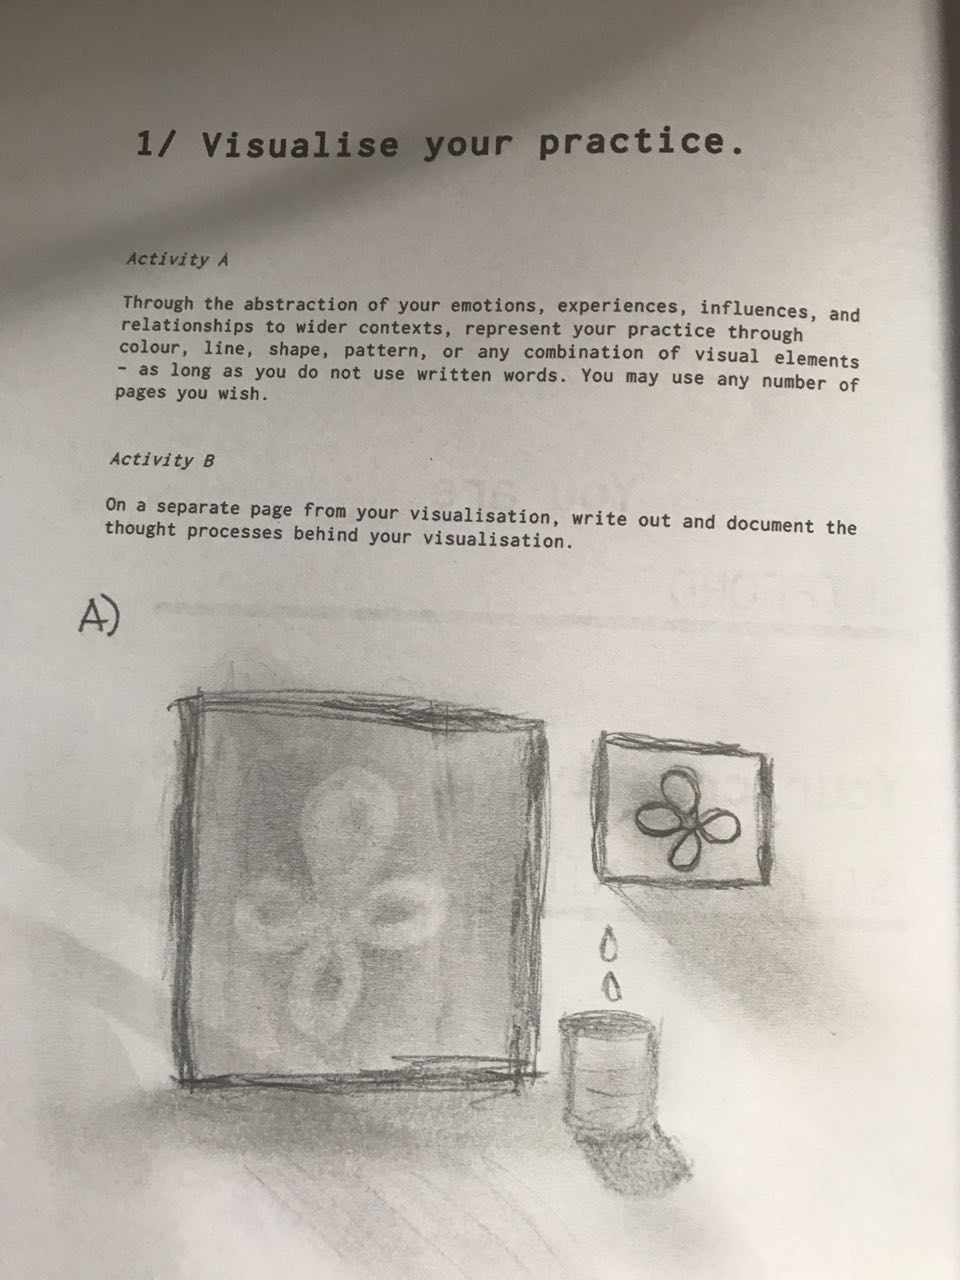
Activity 1: Visualise Your Practice
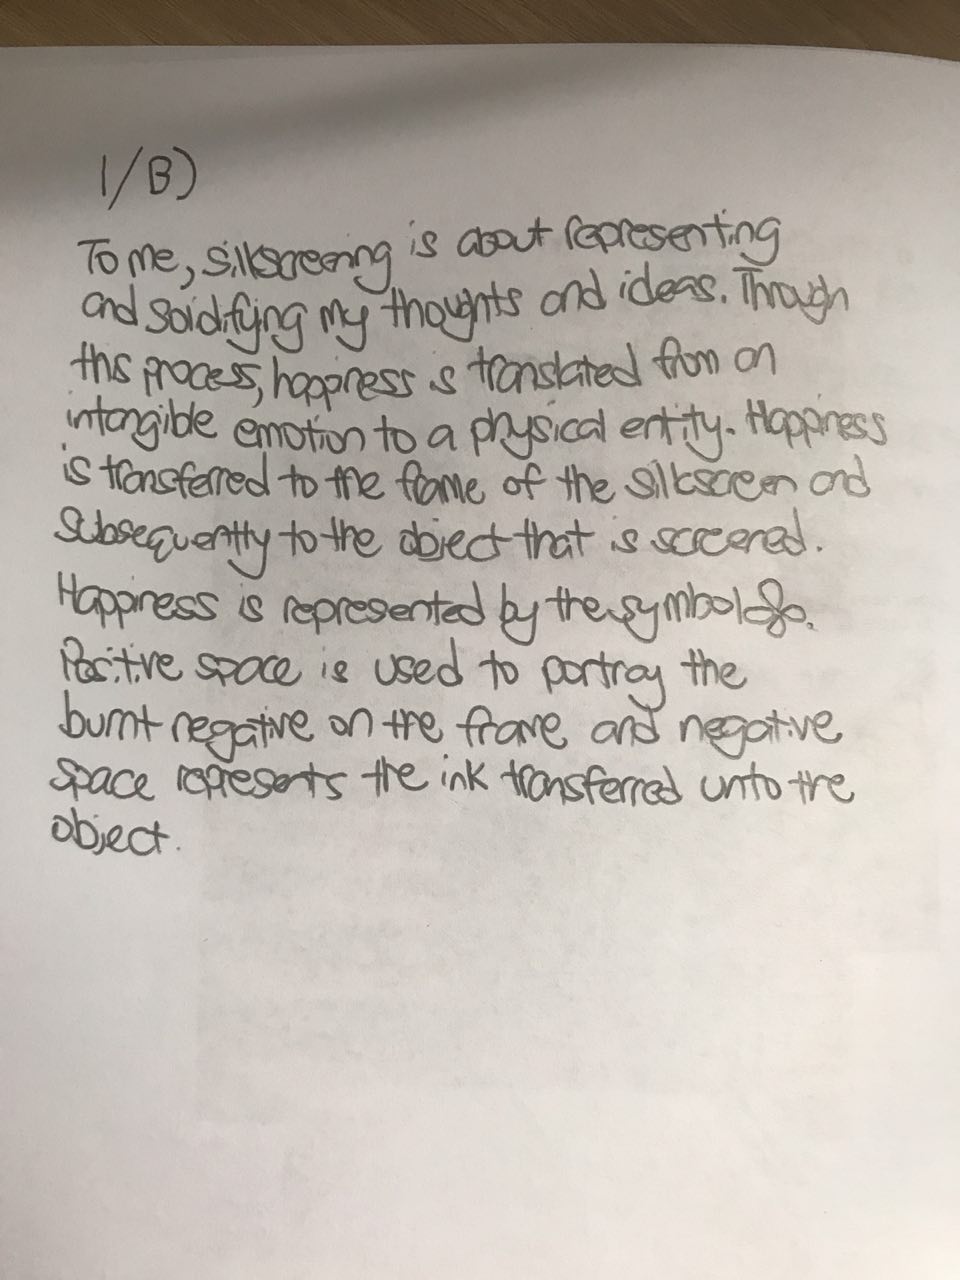
Interestingly, Clifford’s take on silkscreen printing seems to be similar to an underlying aim of art therapy when he mentioned “translating … an intangible emotion to a physical entity”. The focus in both practices seems to be the process rather than the final product and one that would bring about an emotional response such as happiness. This highlights the importance of art therapists to provide ample means to enhance the therapy process; and of designers to take such into consideration, i.e. to augment their wearables’ holding capacity for a variety of art mediums.
Activity 2: Ageing
To help create a rich story world, we sought to understand how general populace in Singapore understand the elderly and ageing.
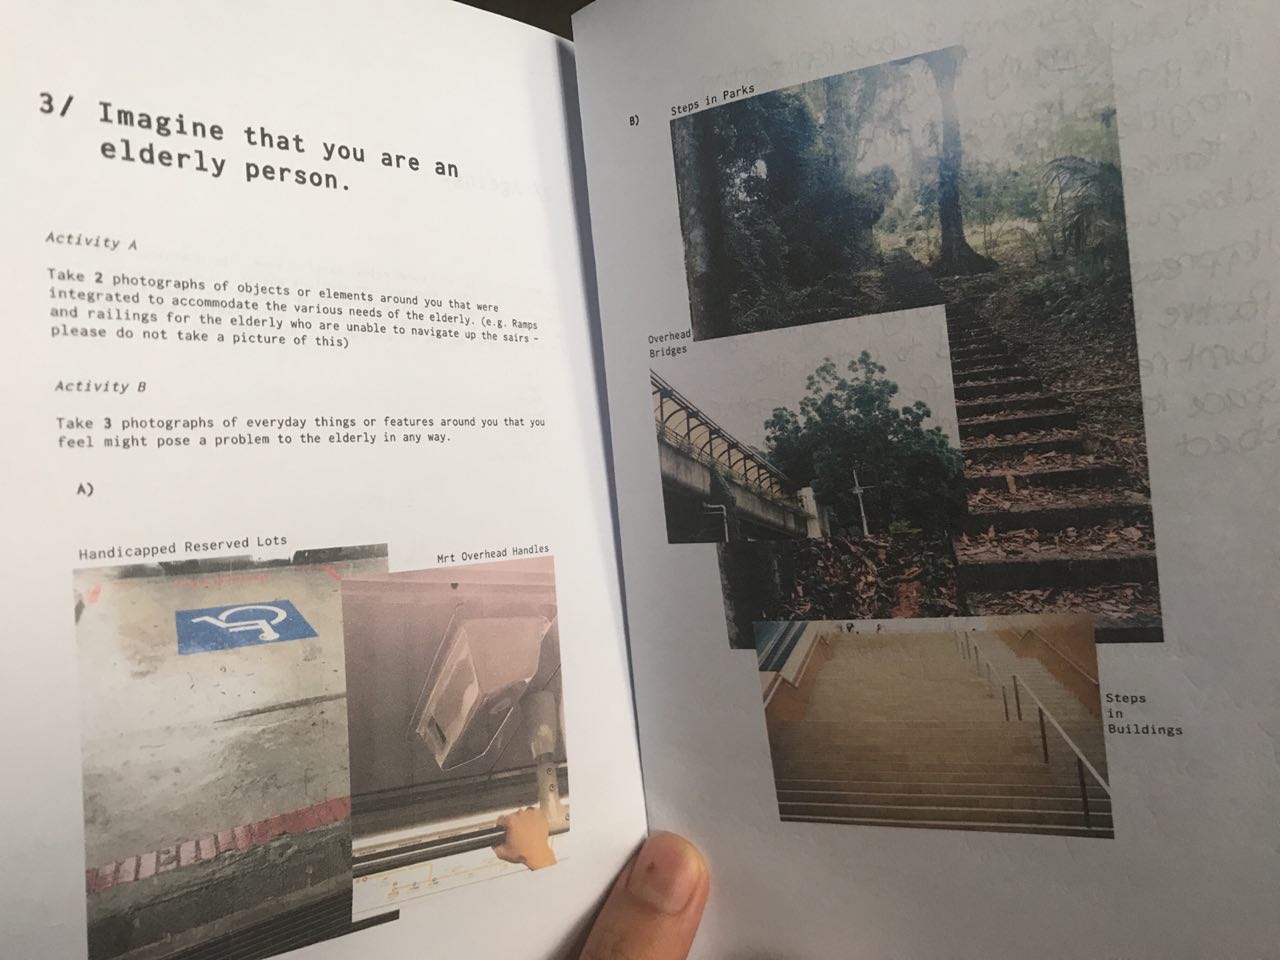
Activity 3: Imagine that you are an elderly person.
Photographs would help us to visualise good or bad designs out there so that we could emulate or avoid.
Based on Clifford’s word tree and photographs, his observations largely are centred around physical mobility, where mobility for the elderly can be improved upon or accommodations can be made. Indeed while designing for an older crowd, including middle-aged art therapists and elder therapy clients, it is important to take their physical abilities into account. It would be useless to create a heavy wearable studio even if it can carry many things, when ultimately they cannot lift it up, rendering the design to be useless.
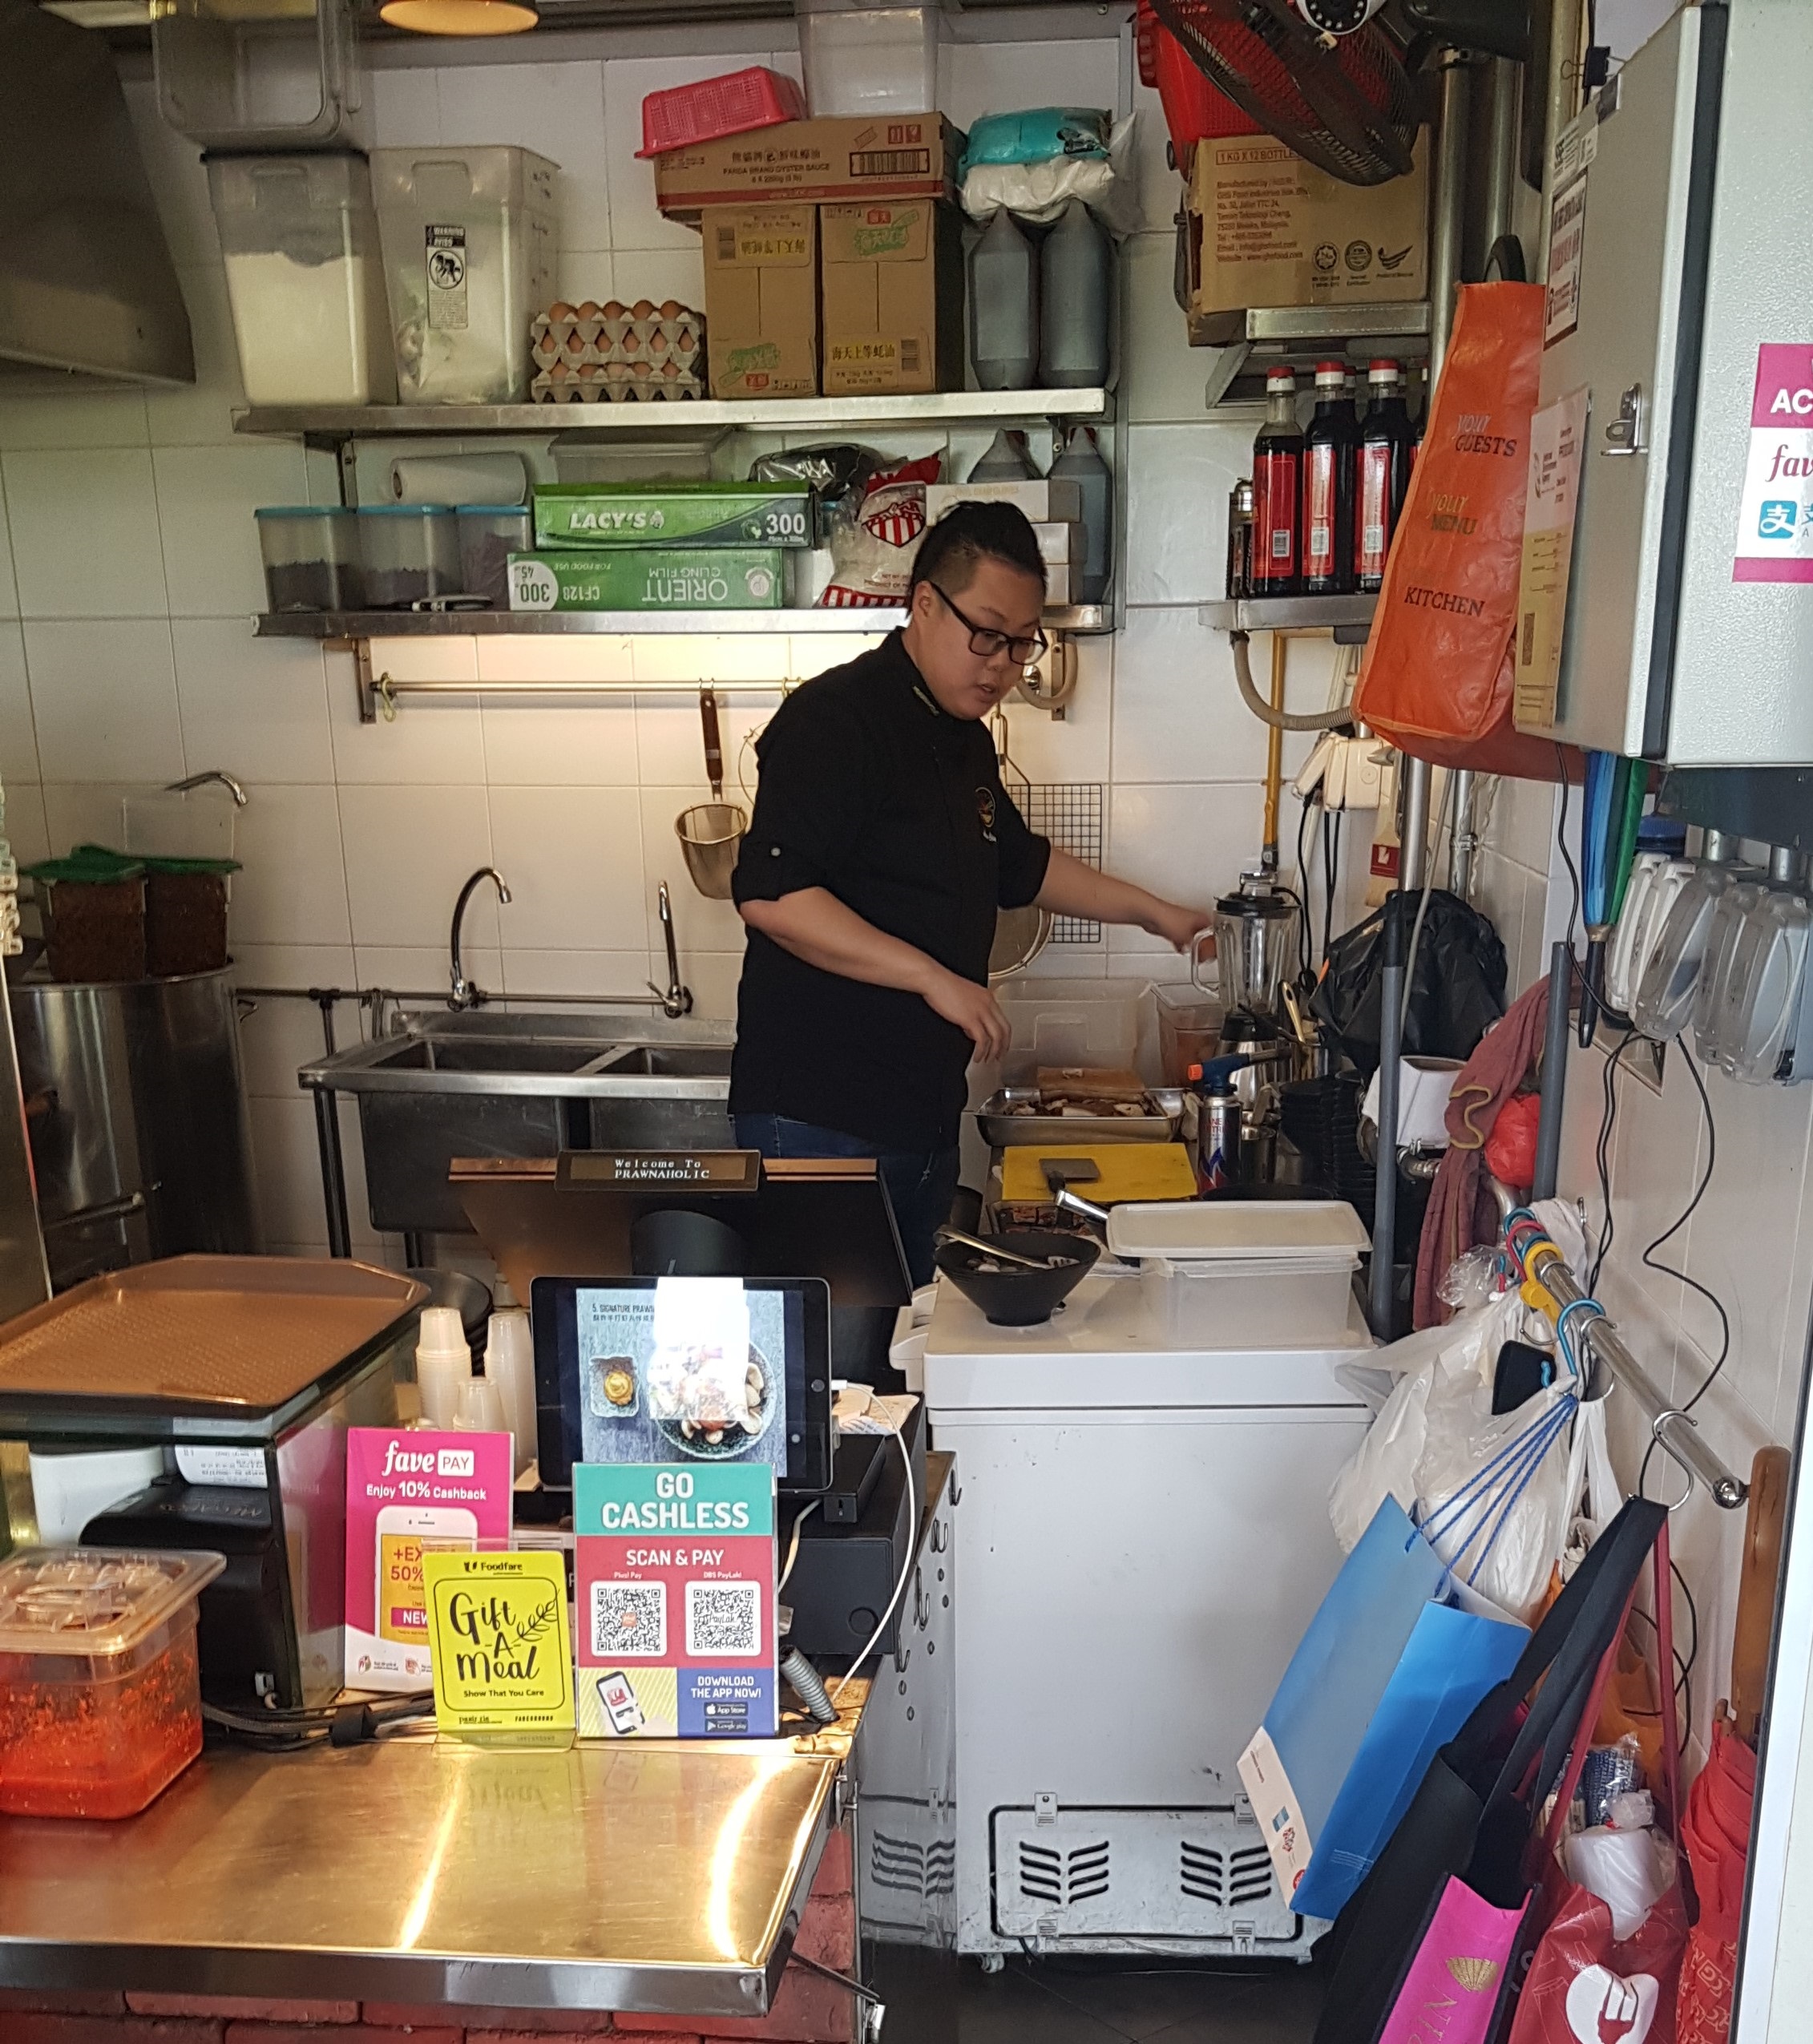
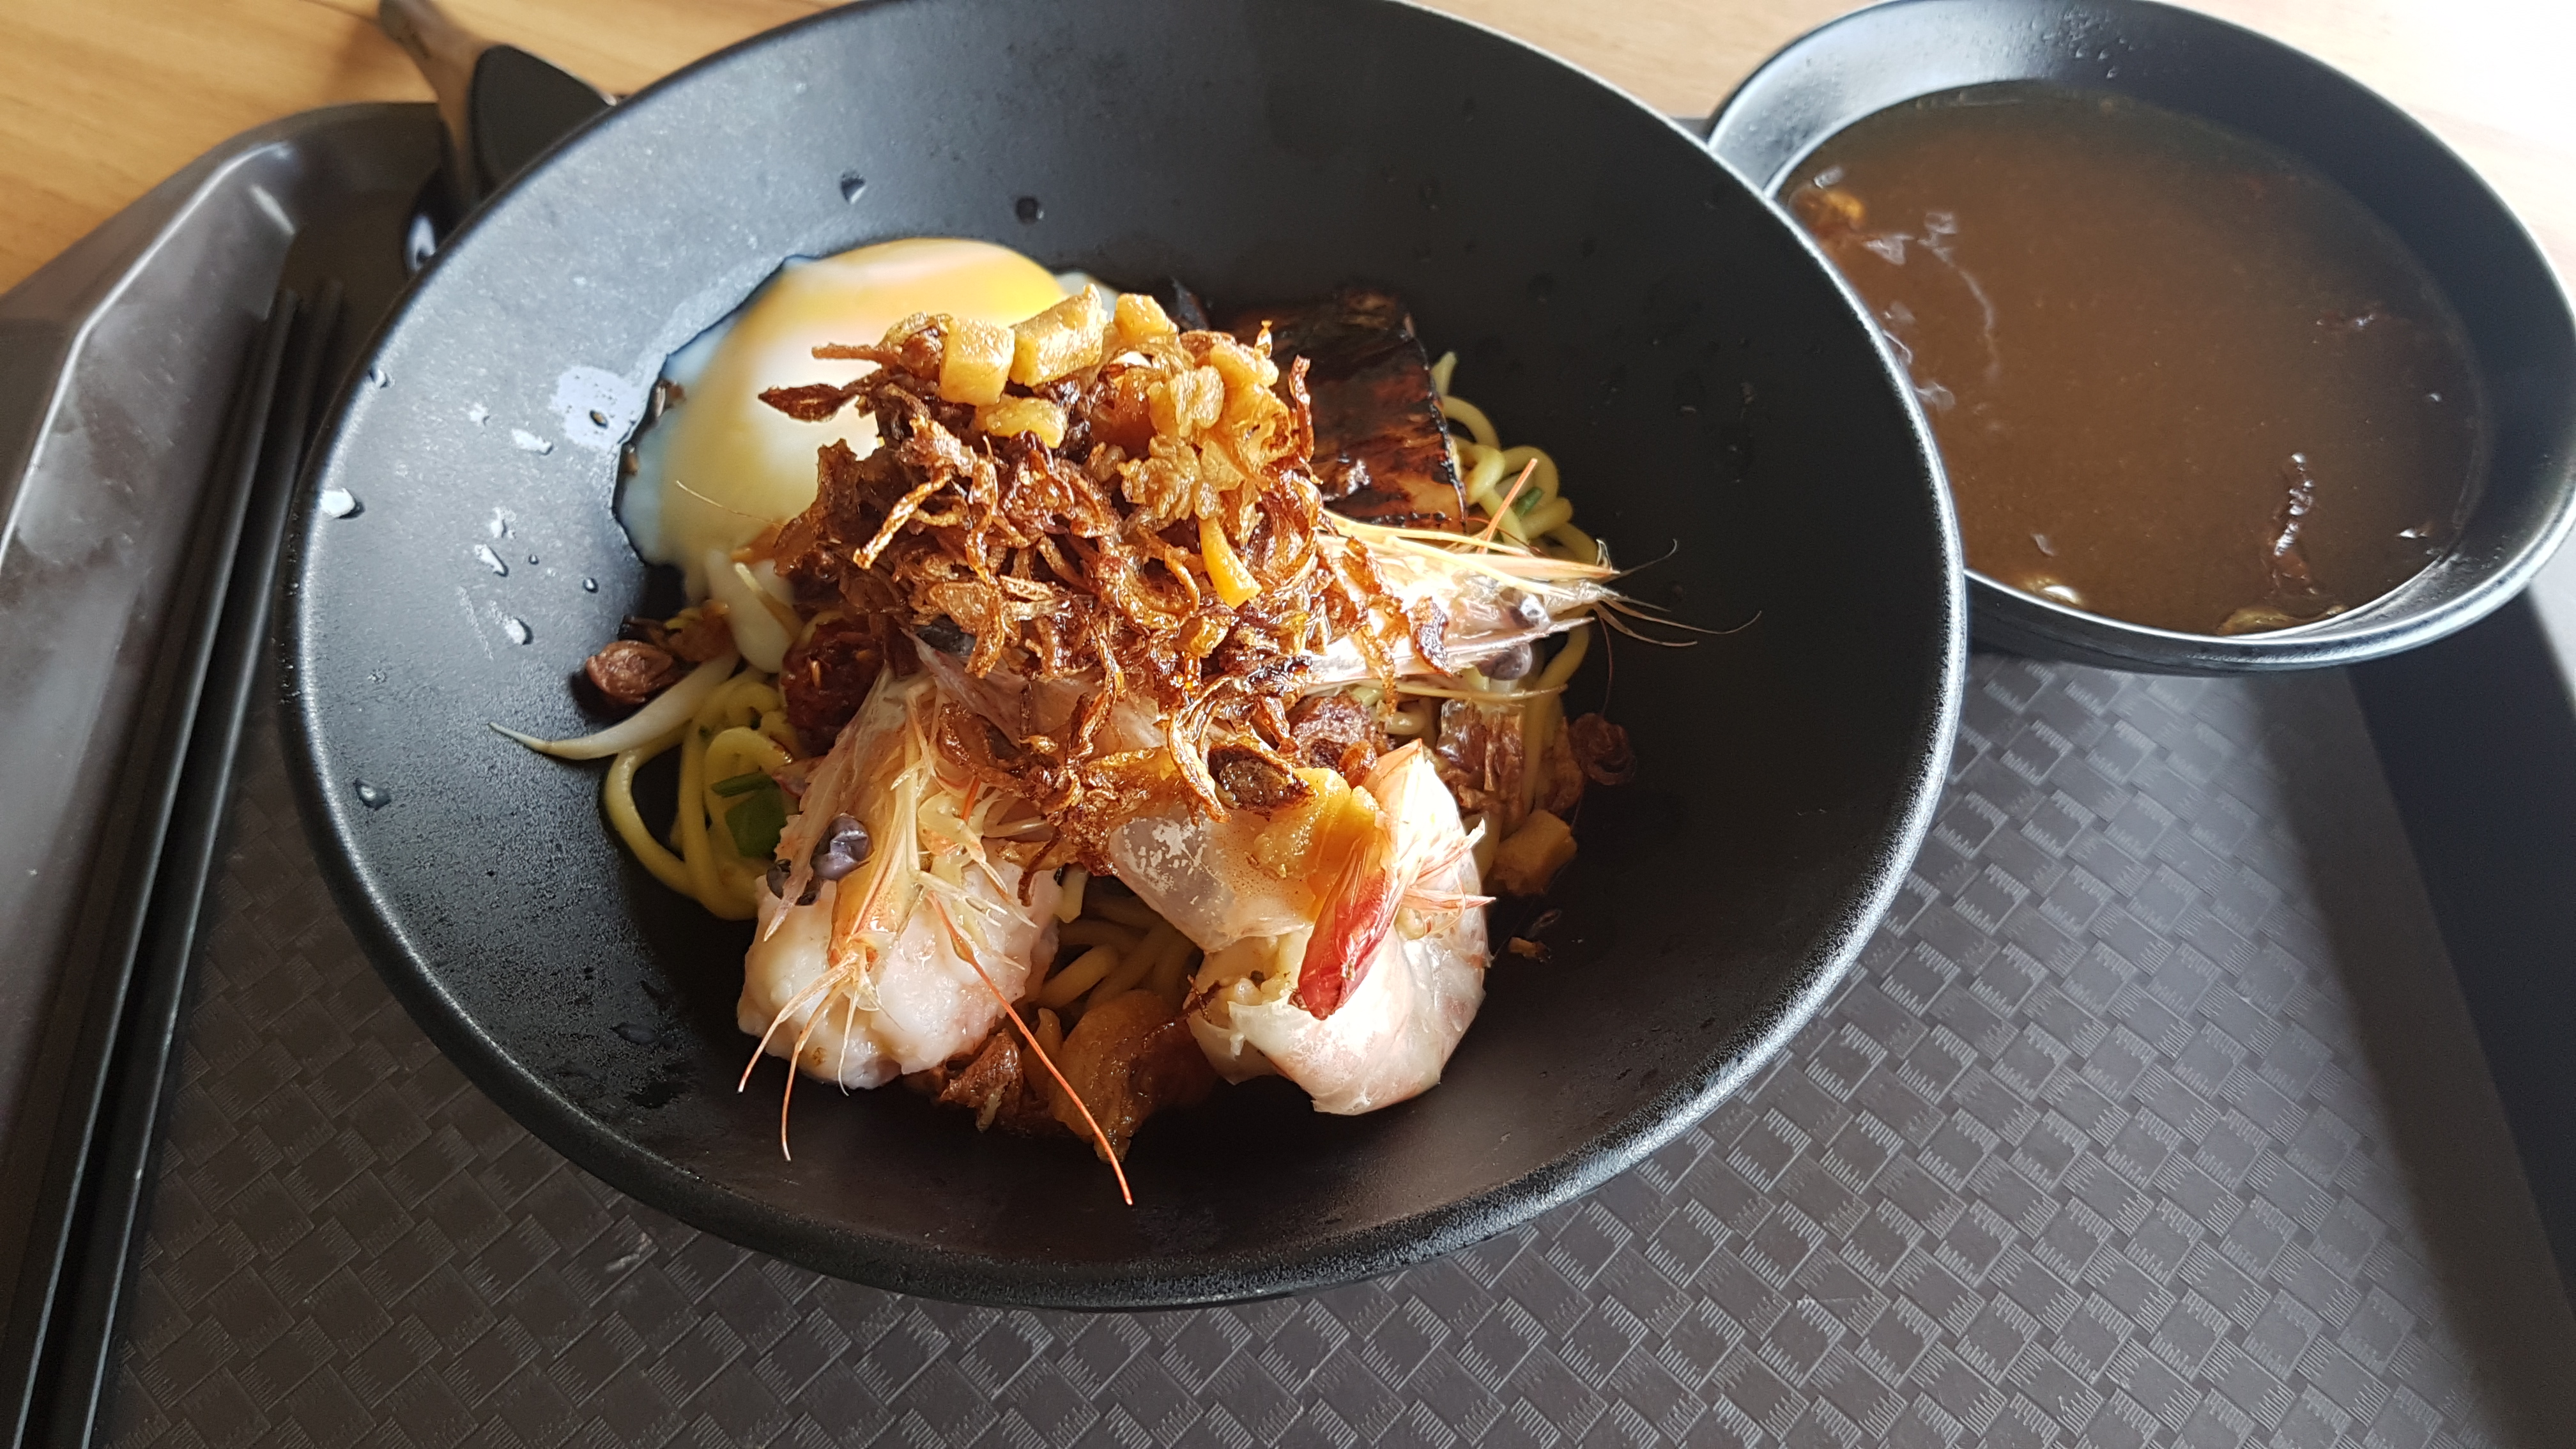
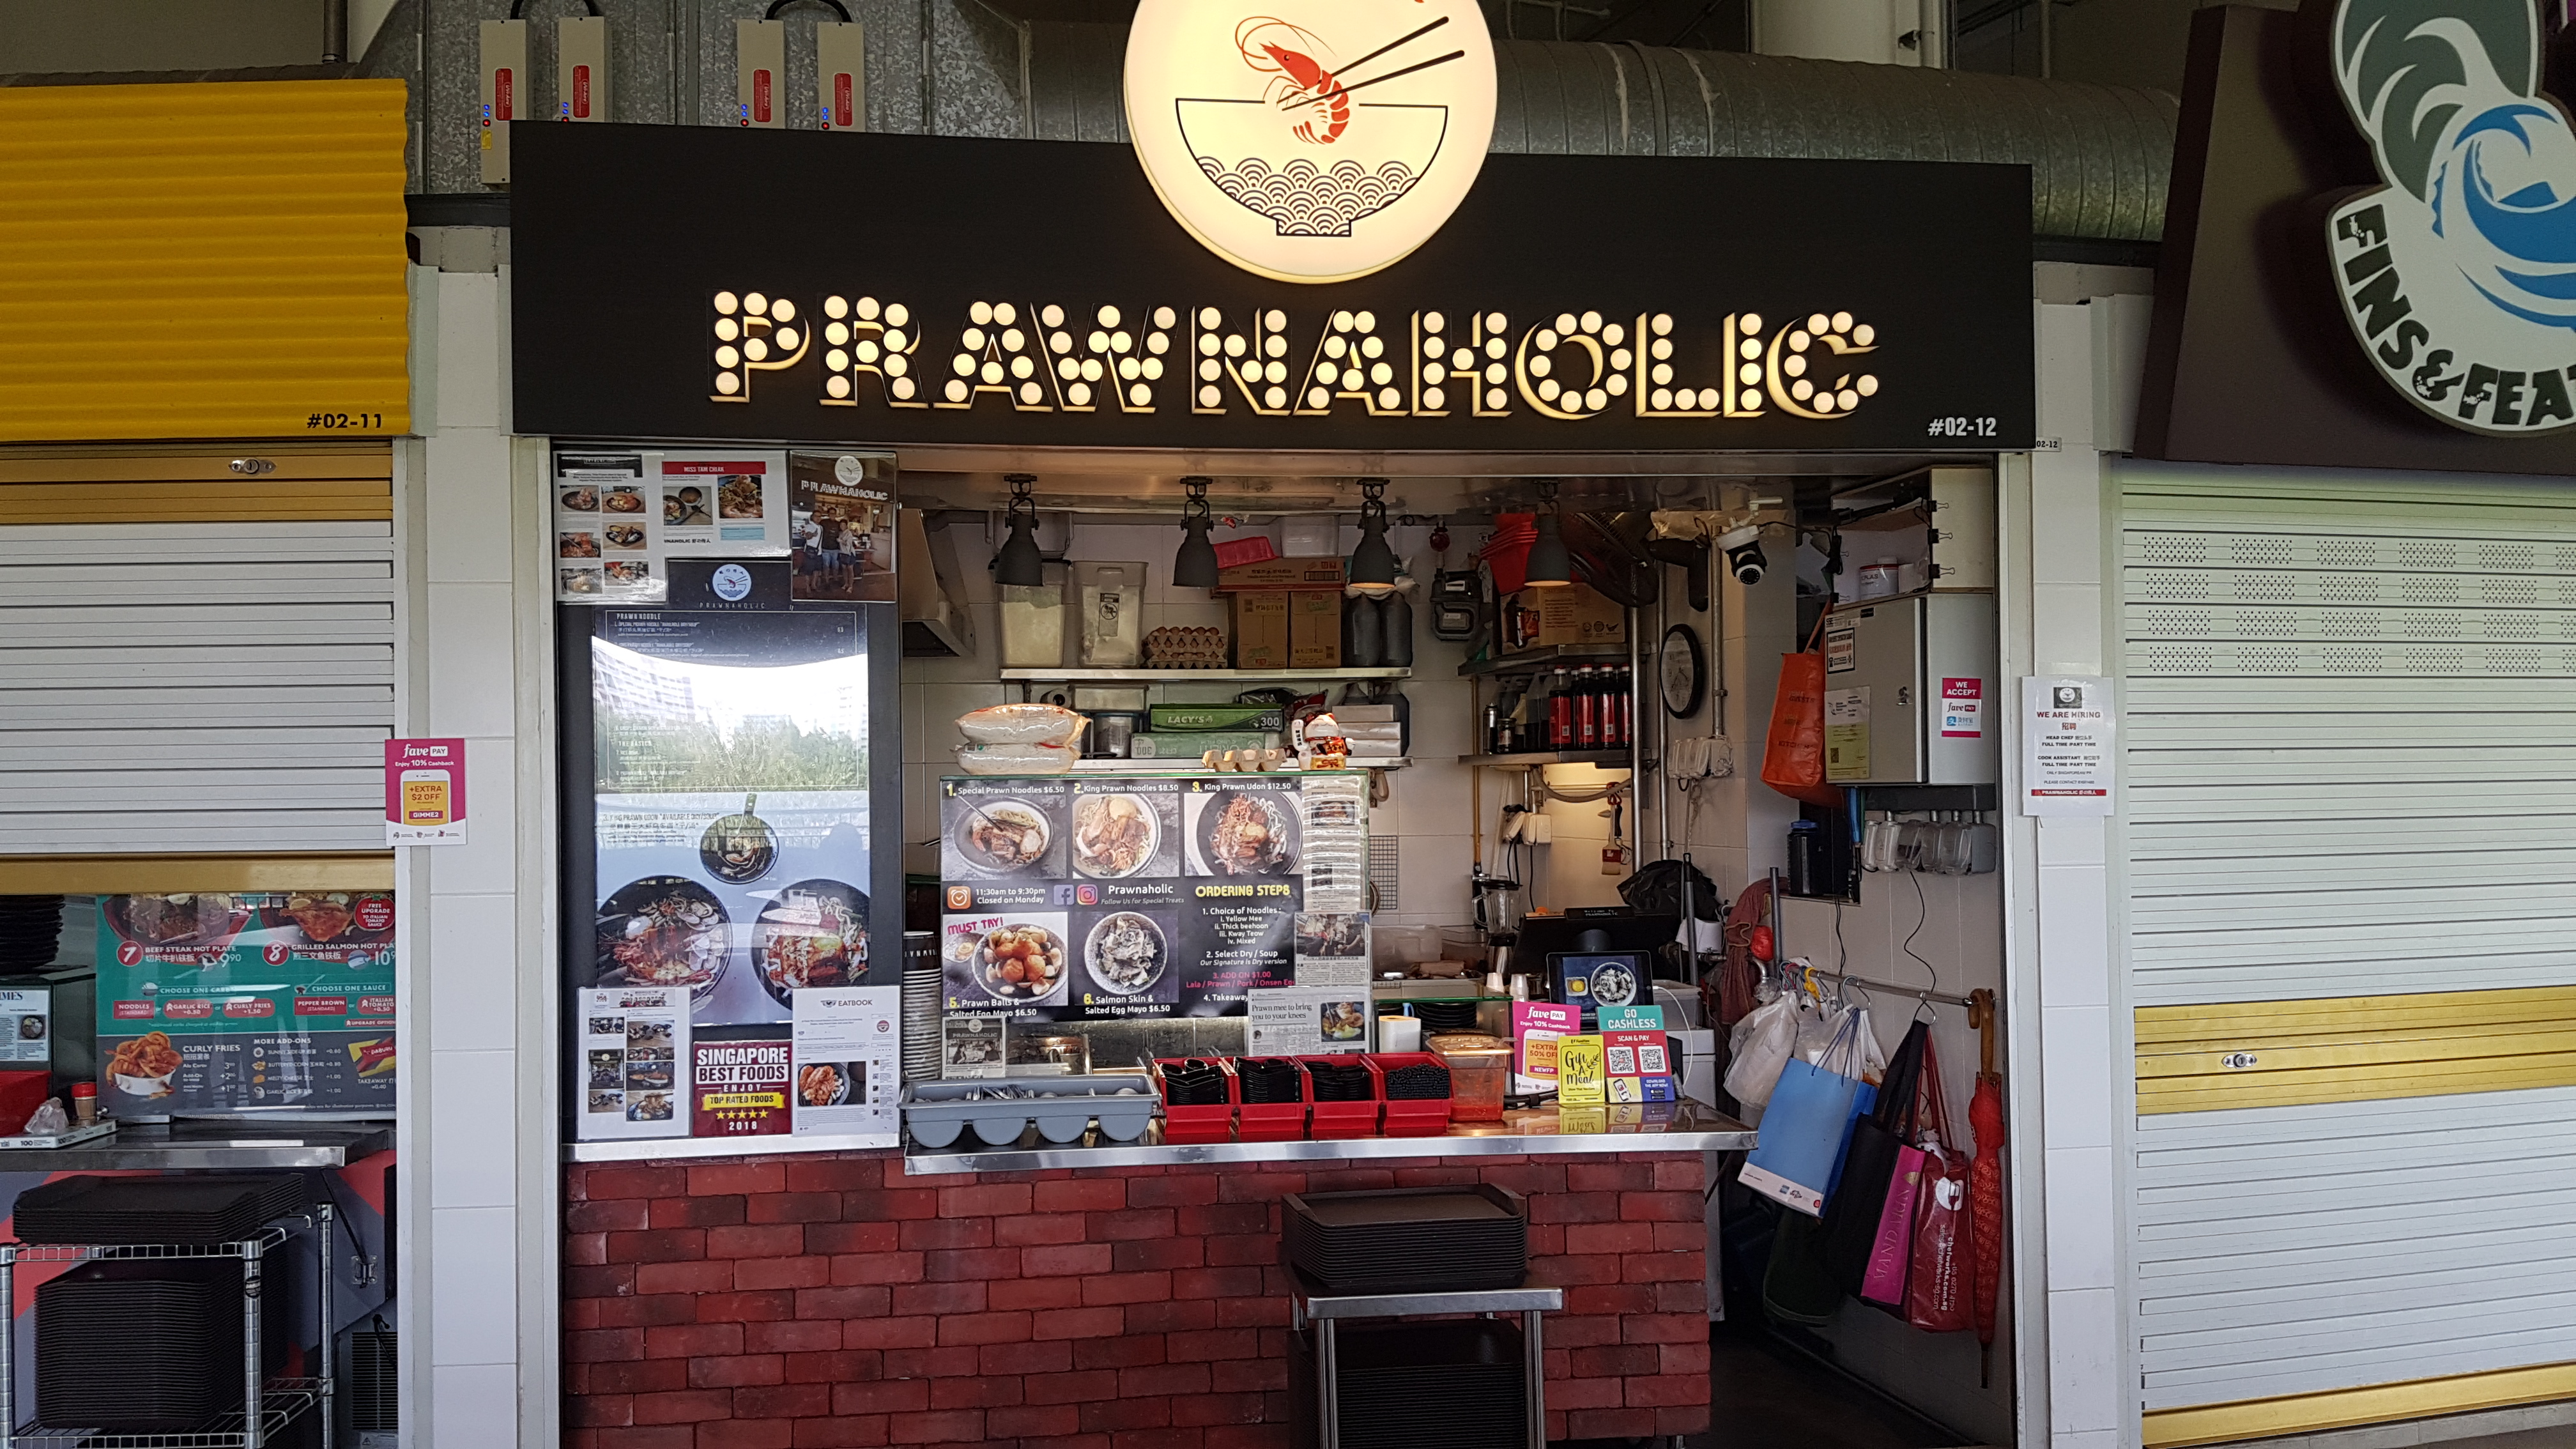
I had the opportunity to interview a hawker vendor as part of a film project and I took this opportunity to observe the chef cooking up his specialty, prawn noodles. It is interesting to see behind the scenes as to how it is being prepared and done. Something interesting about this prawn noodles is that it is no ordinary noodles but an innovation from the original.
Process Documentation
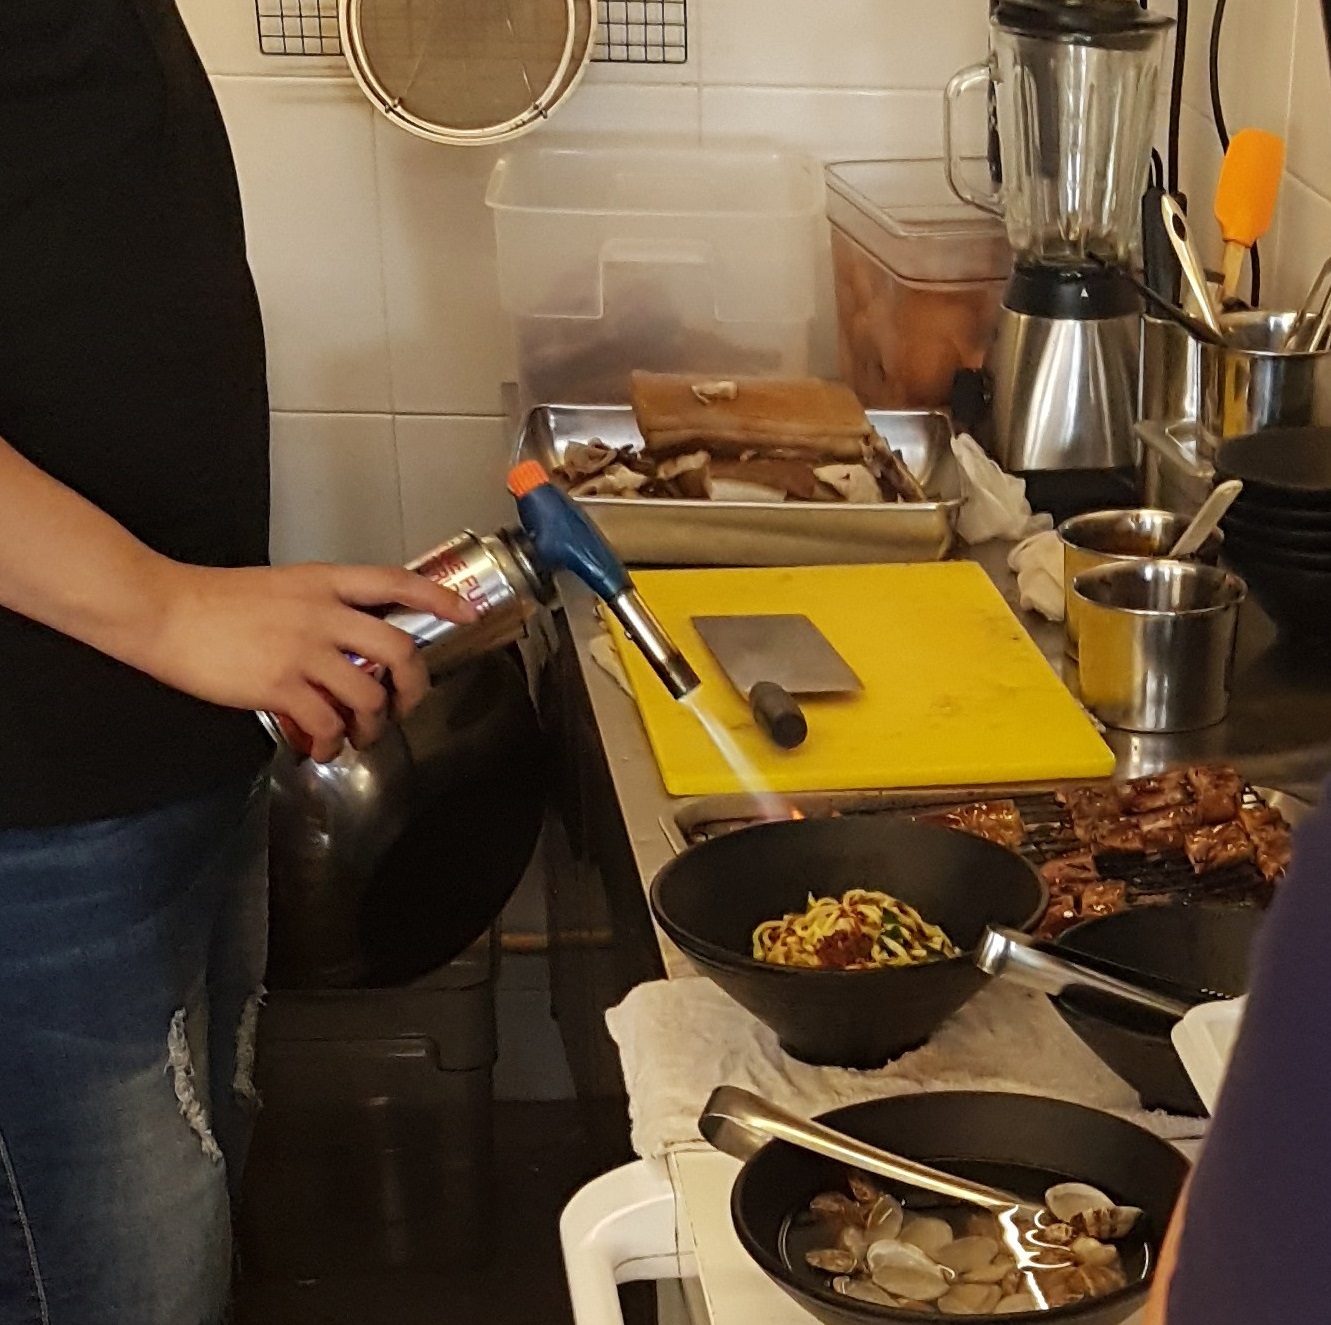
The process starts with the order from the customer and the chef proceeds to prepare the order. The chef goes on to do the necessary steps for the dish that the customer order. In my case, it was prawn noodles. The preparation sequence goes as follow; first cut the pork slices, then the chef will prepare the noodles. After which, he goes on to blow torch the pork slices and adds the rest of the condiments inside the bowl of noodles. This marks the end of the cooking process.
explanation of the processblow torching the pork slices
Steps
Orders from the customer
Cutting of the pork slices.
Preparation of the noodles
Blow torch the pork slices
Add pork slices into the bowl of noodles
Add half boiled egg and prawn into the bowl.
Add additional condiments into the bowl.
Final product
Worksite Documentation
The worksite features a typical hawker vendor store space with the unit having just enough space for at most three people inside. During the entire process, there was not much space for other people to move in and out of the unit. The worksite though has many parts to it, from a space to cut things; to the storage fridge; and the place to cook the noodles. There is a lot more than it meets the eye for the place.
Tools Used
tools used in the process
I was actually surprised at the number of tools needed to prepare one bowl of noodles. There are actually more tools that are used in the preparation phase but the ones that I drew here were observed during the cooking phase of the noodles.
Pain Points
Due to the limited space in the kitchen, there is no space for rest. The chef mentioned that it gets tiring especially on days whereby there is a large influx of customers. Having to stand the entire time, it gets quite tiring at times.
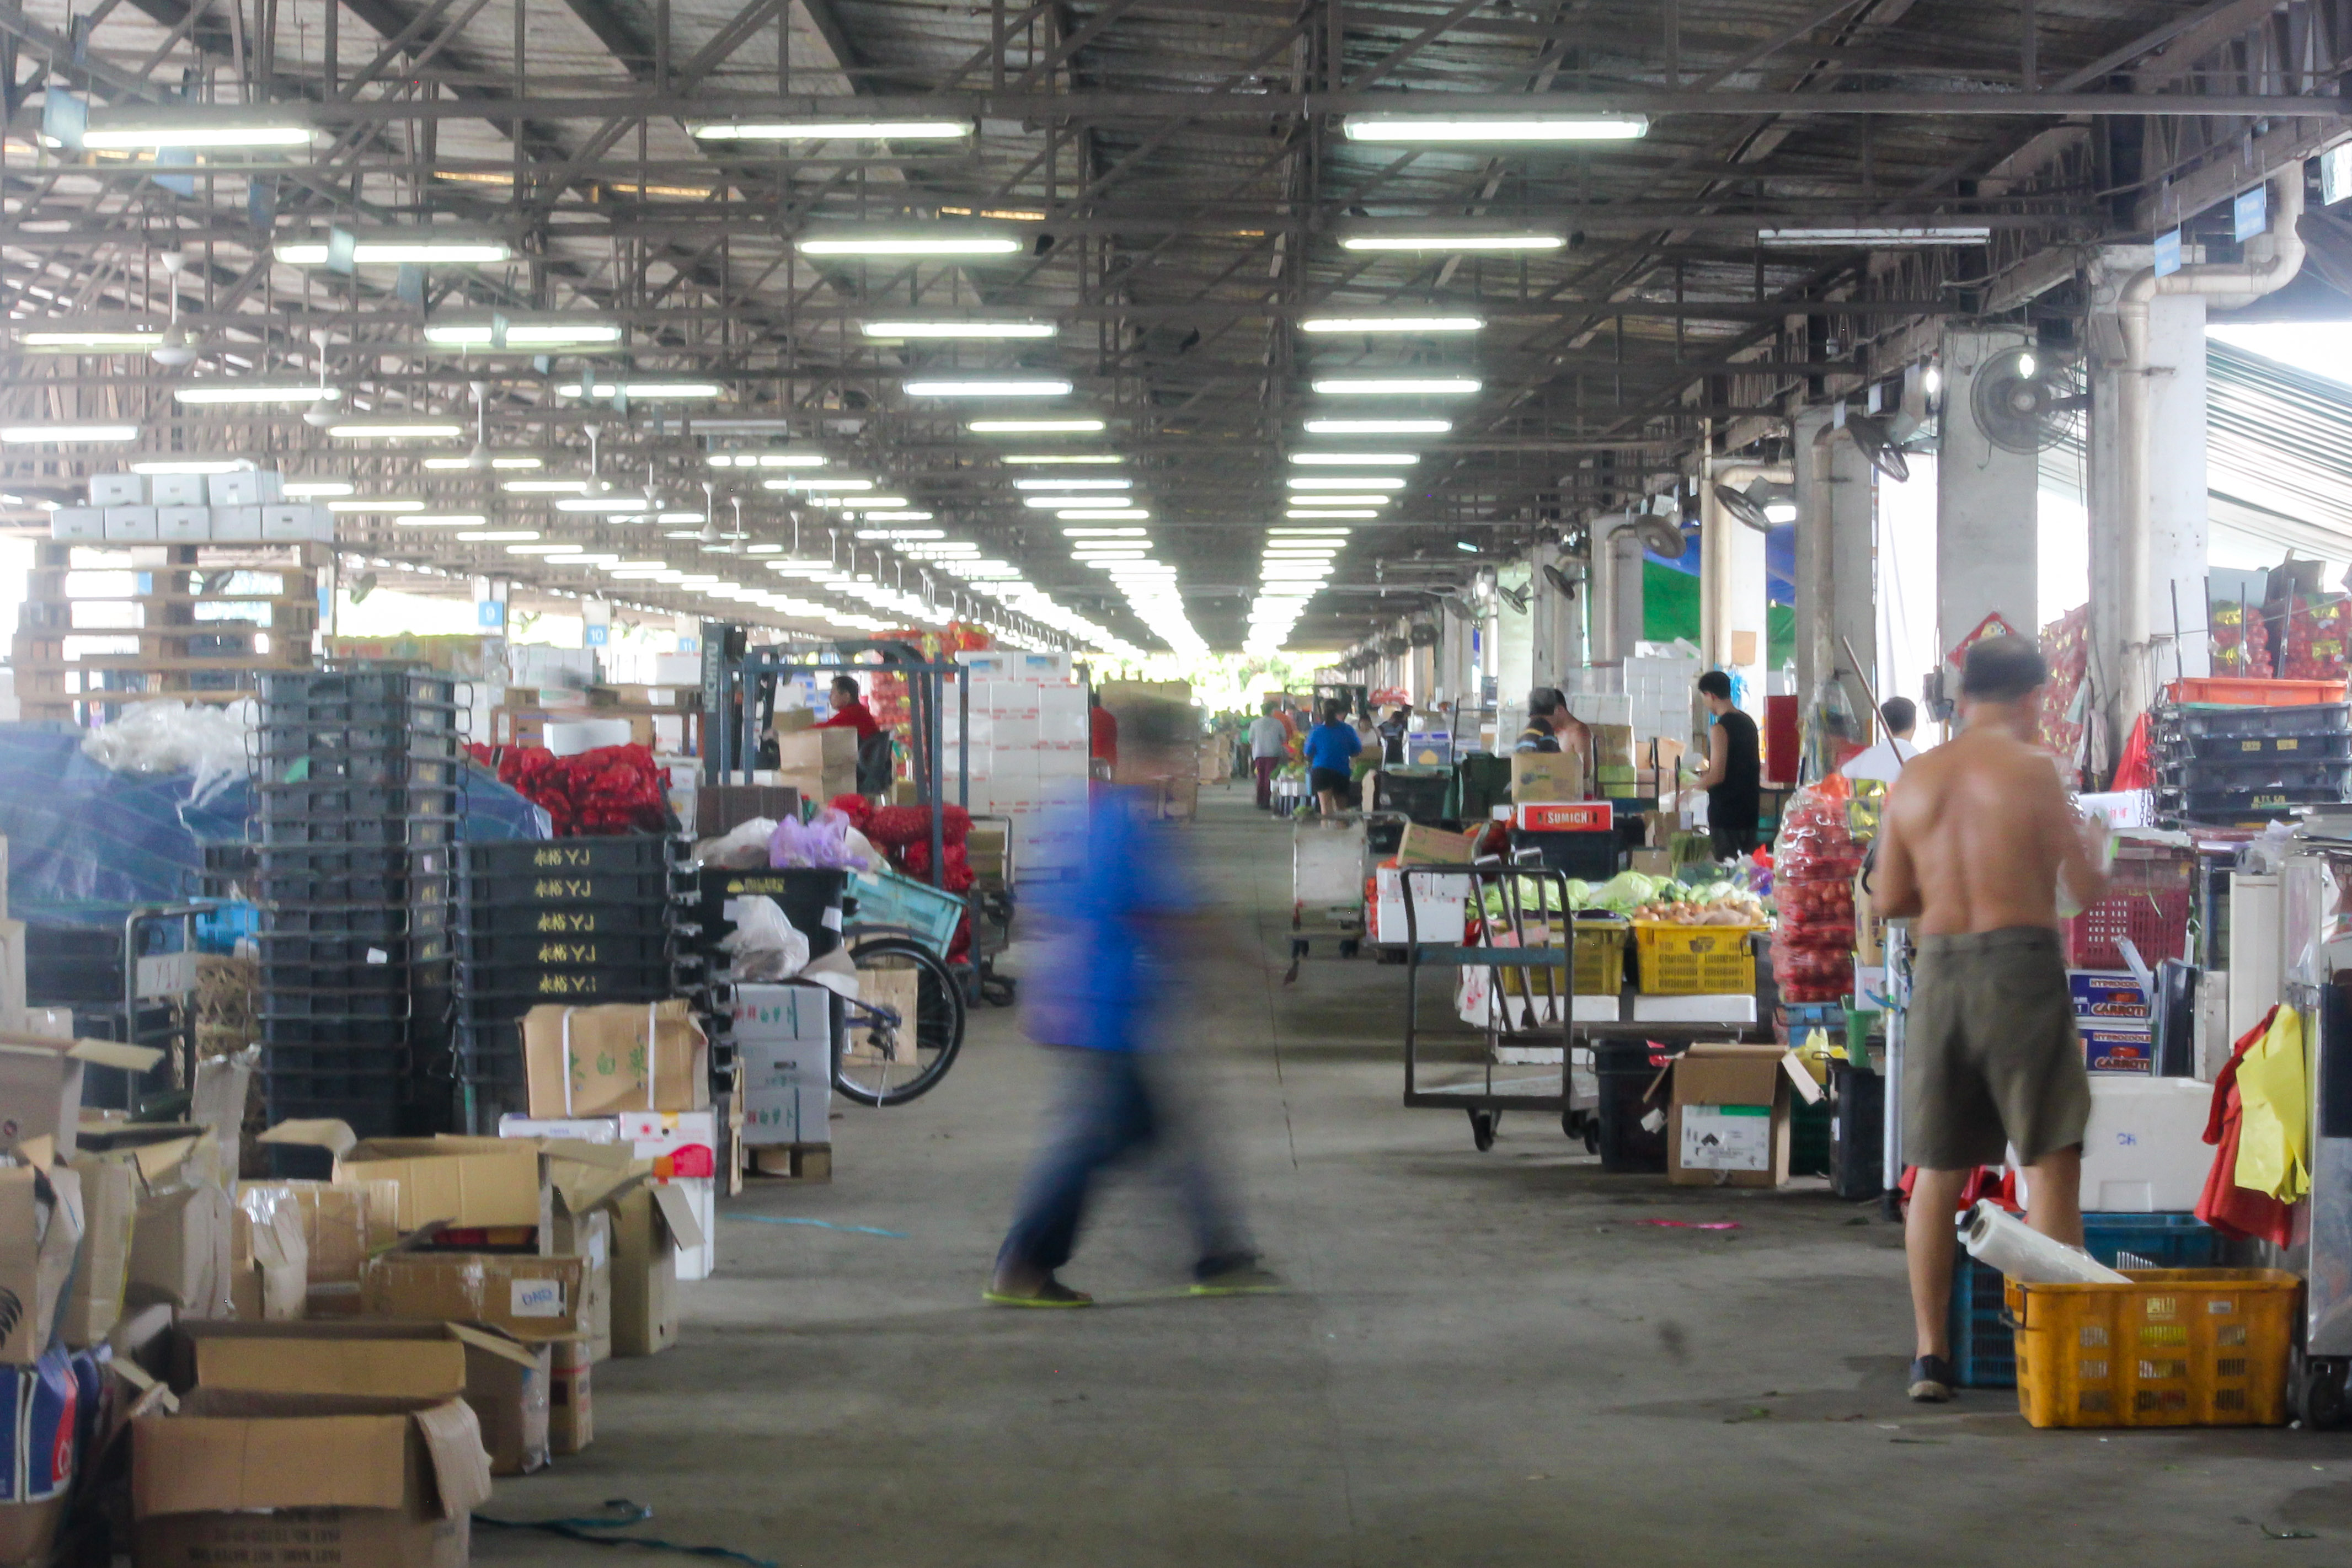
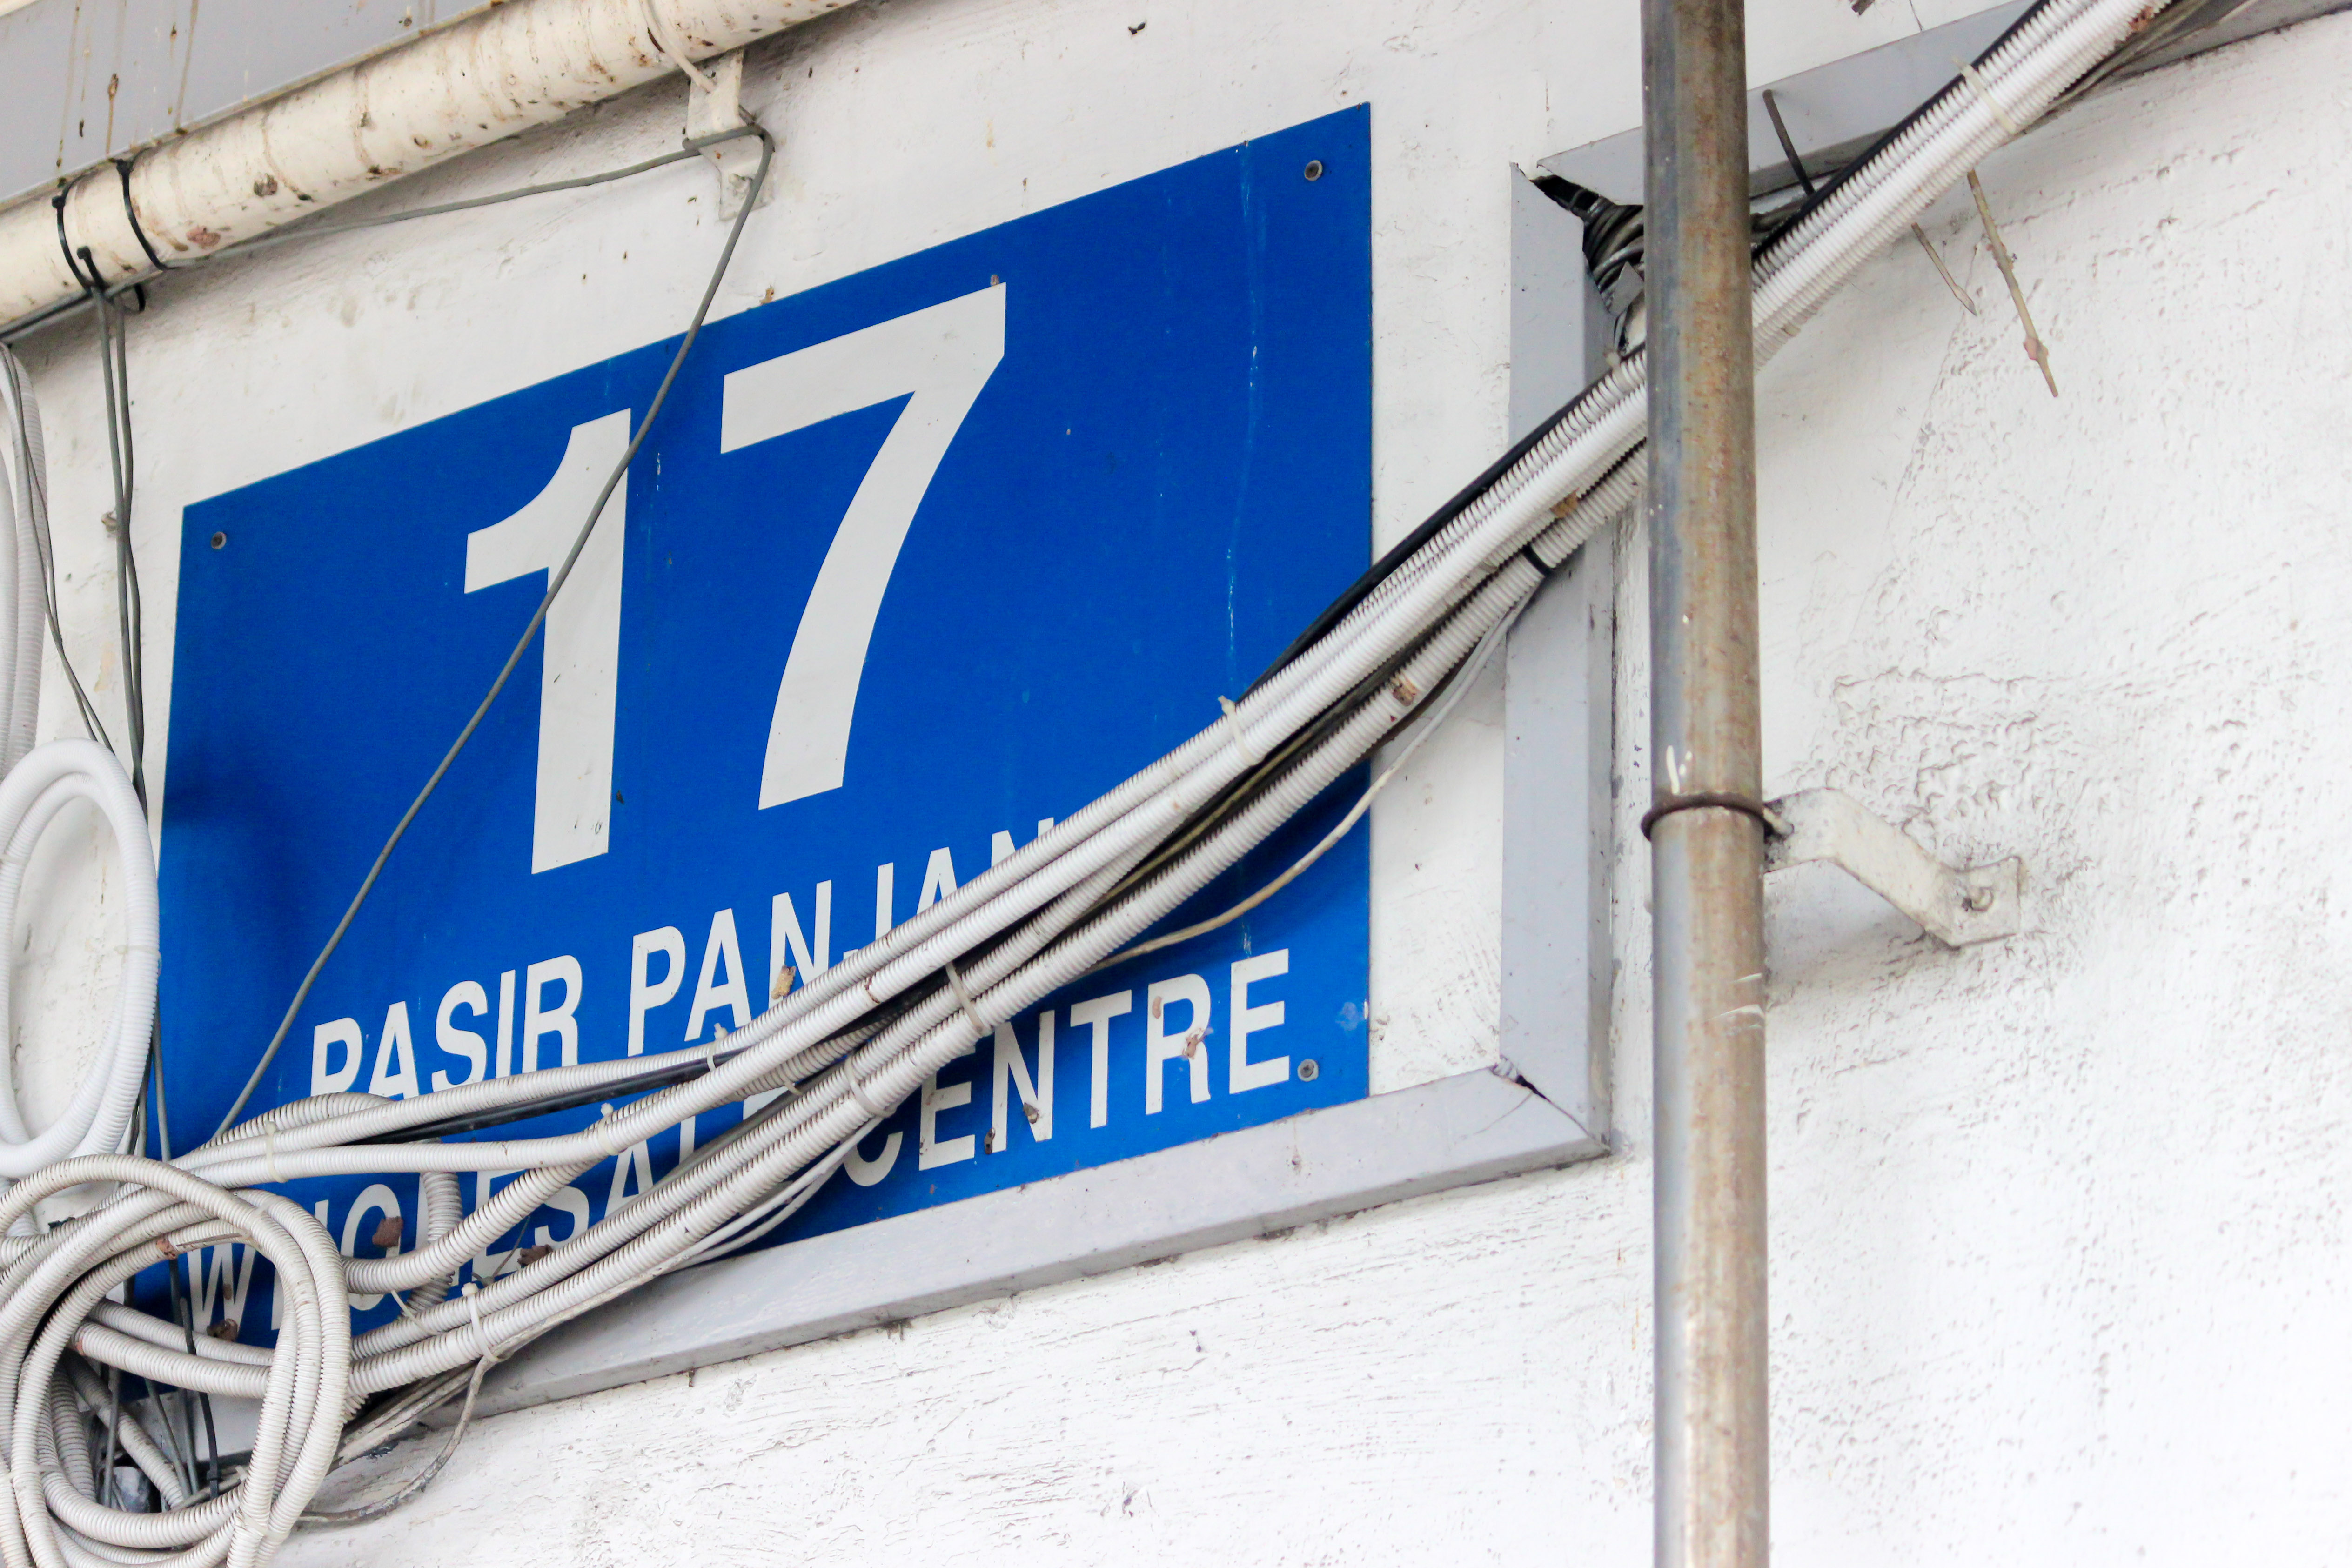
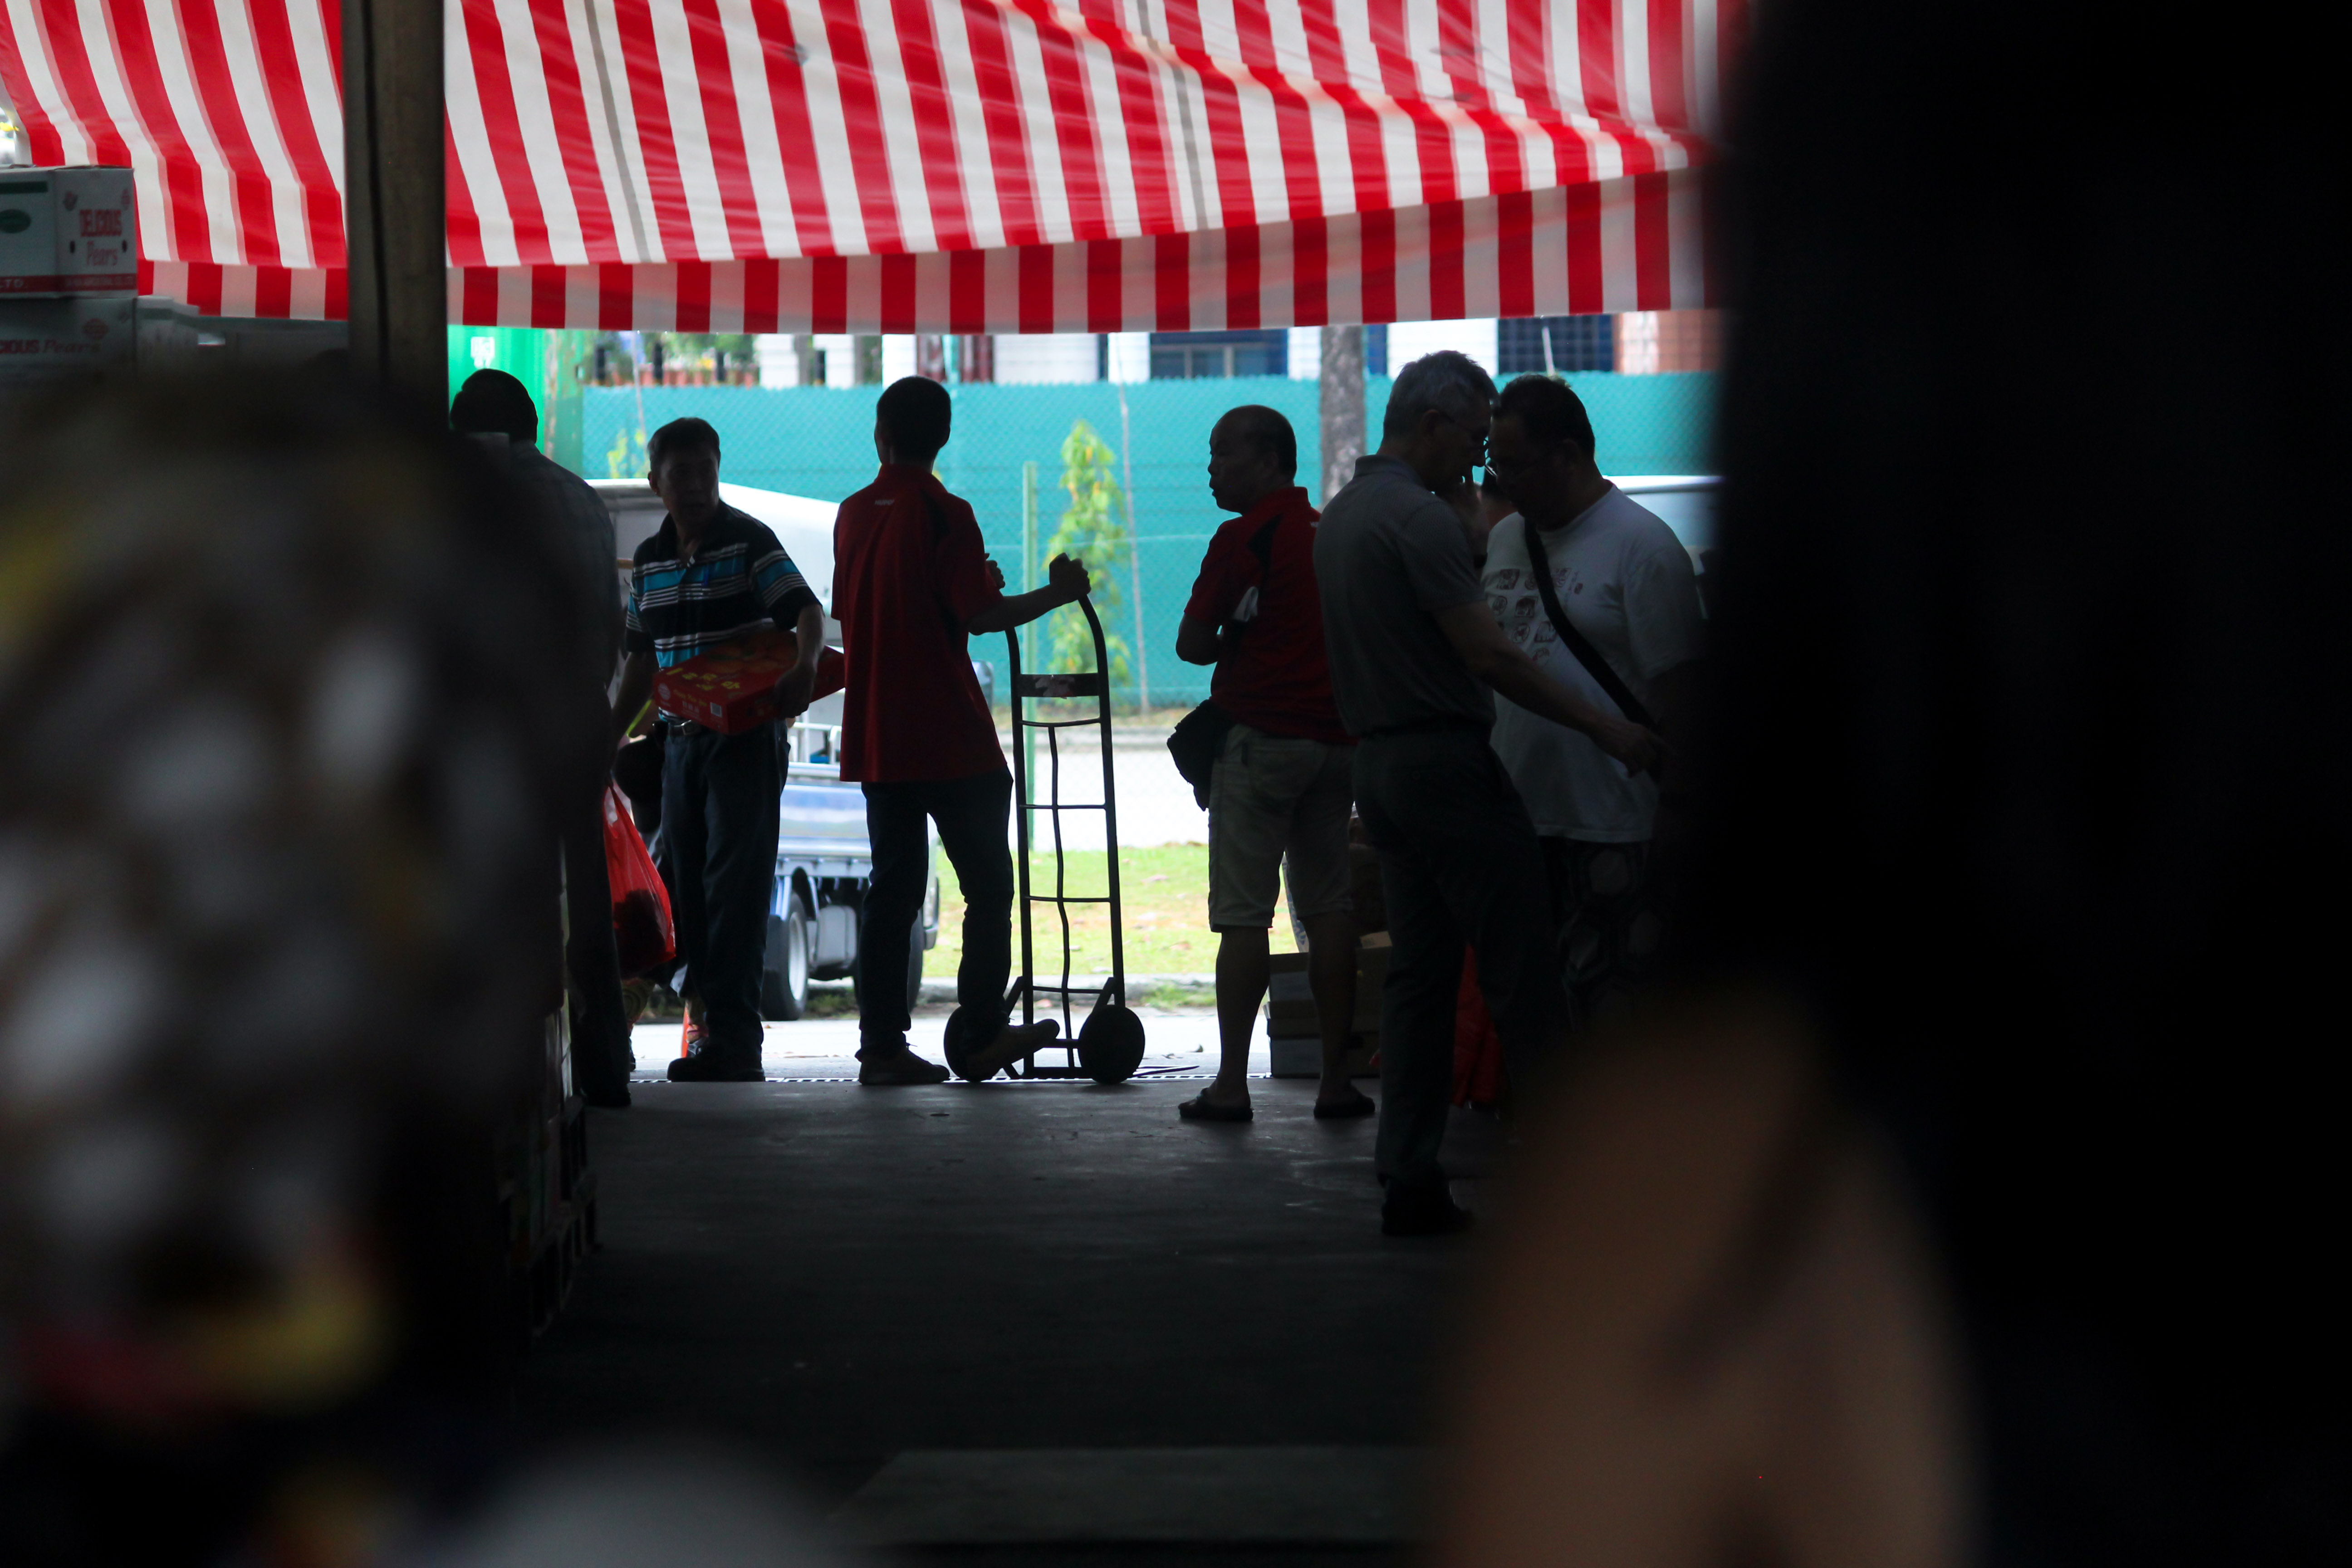
Practitioner #1: Veggie Rescue at Potong Pasir Wholesale Centre (PPWC)
I participated in the SG Veggie Rescue conducted at Pasir Panjang Wholesale Centre. Each Thursday (occasionally Saturday), the entire team of SG Food Rescue volunteers meet at PPWC.
Worksite Documentation
Breakfast before beginning the veggie rescue!
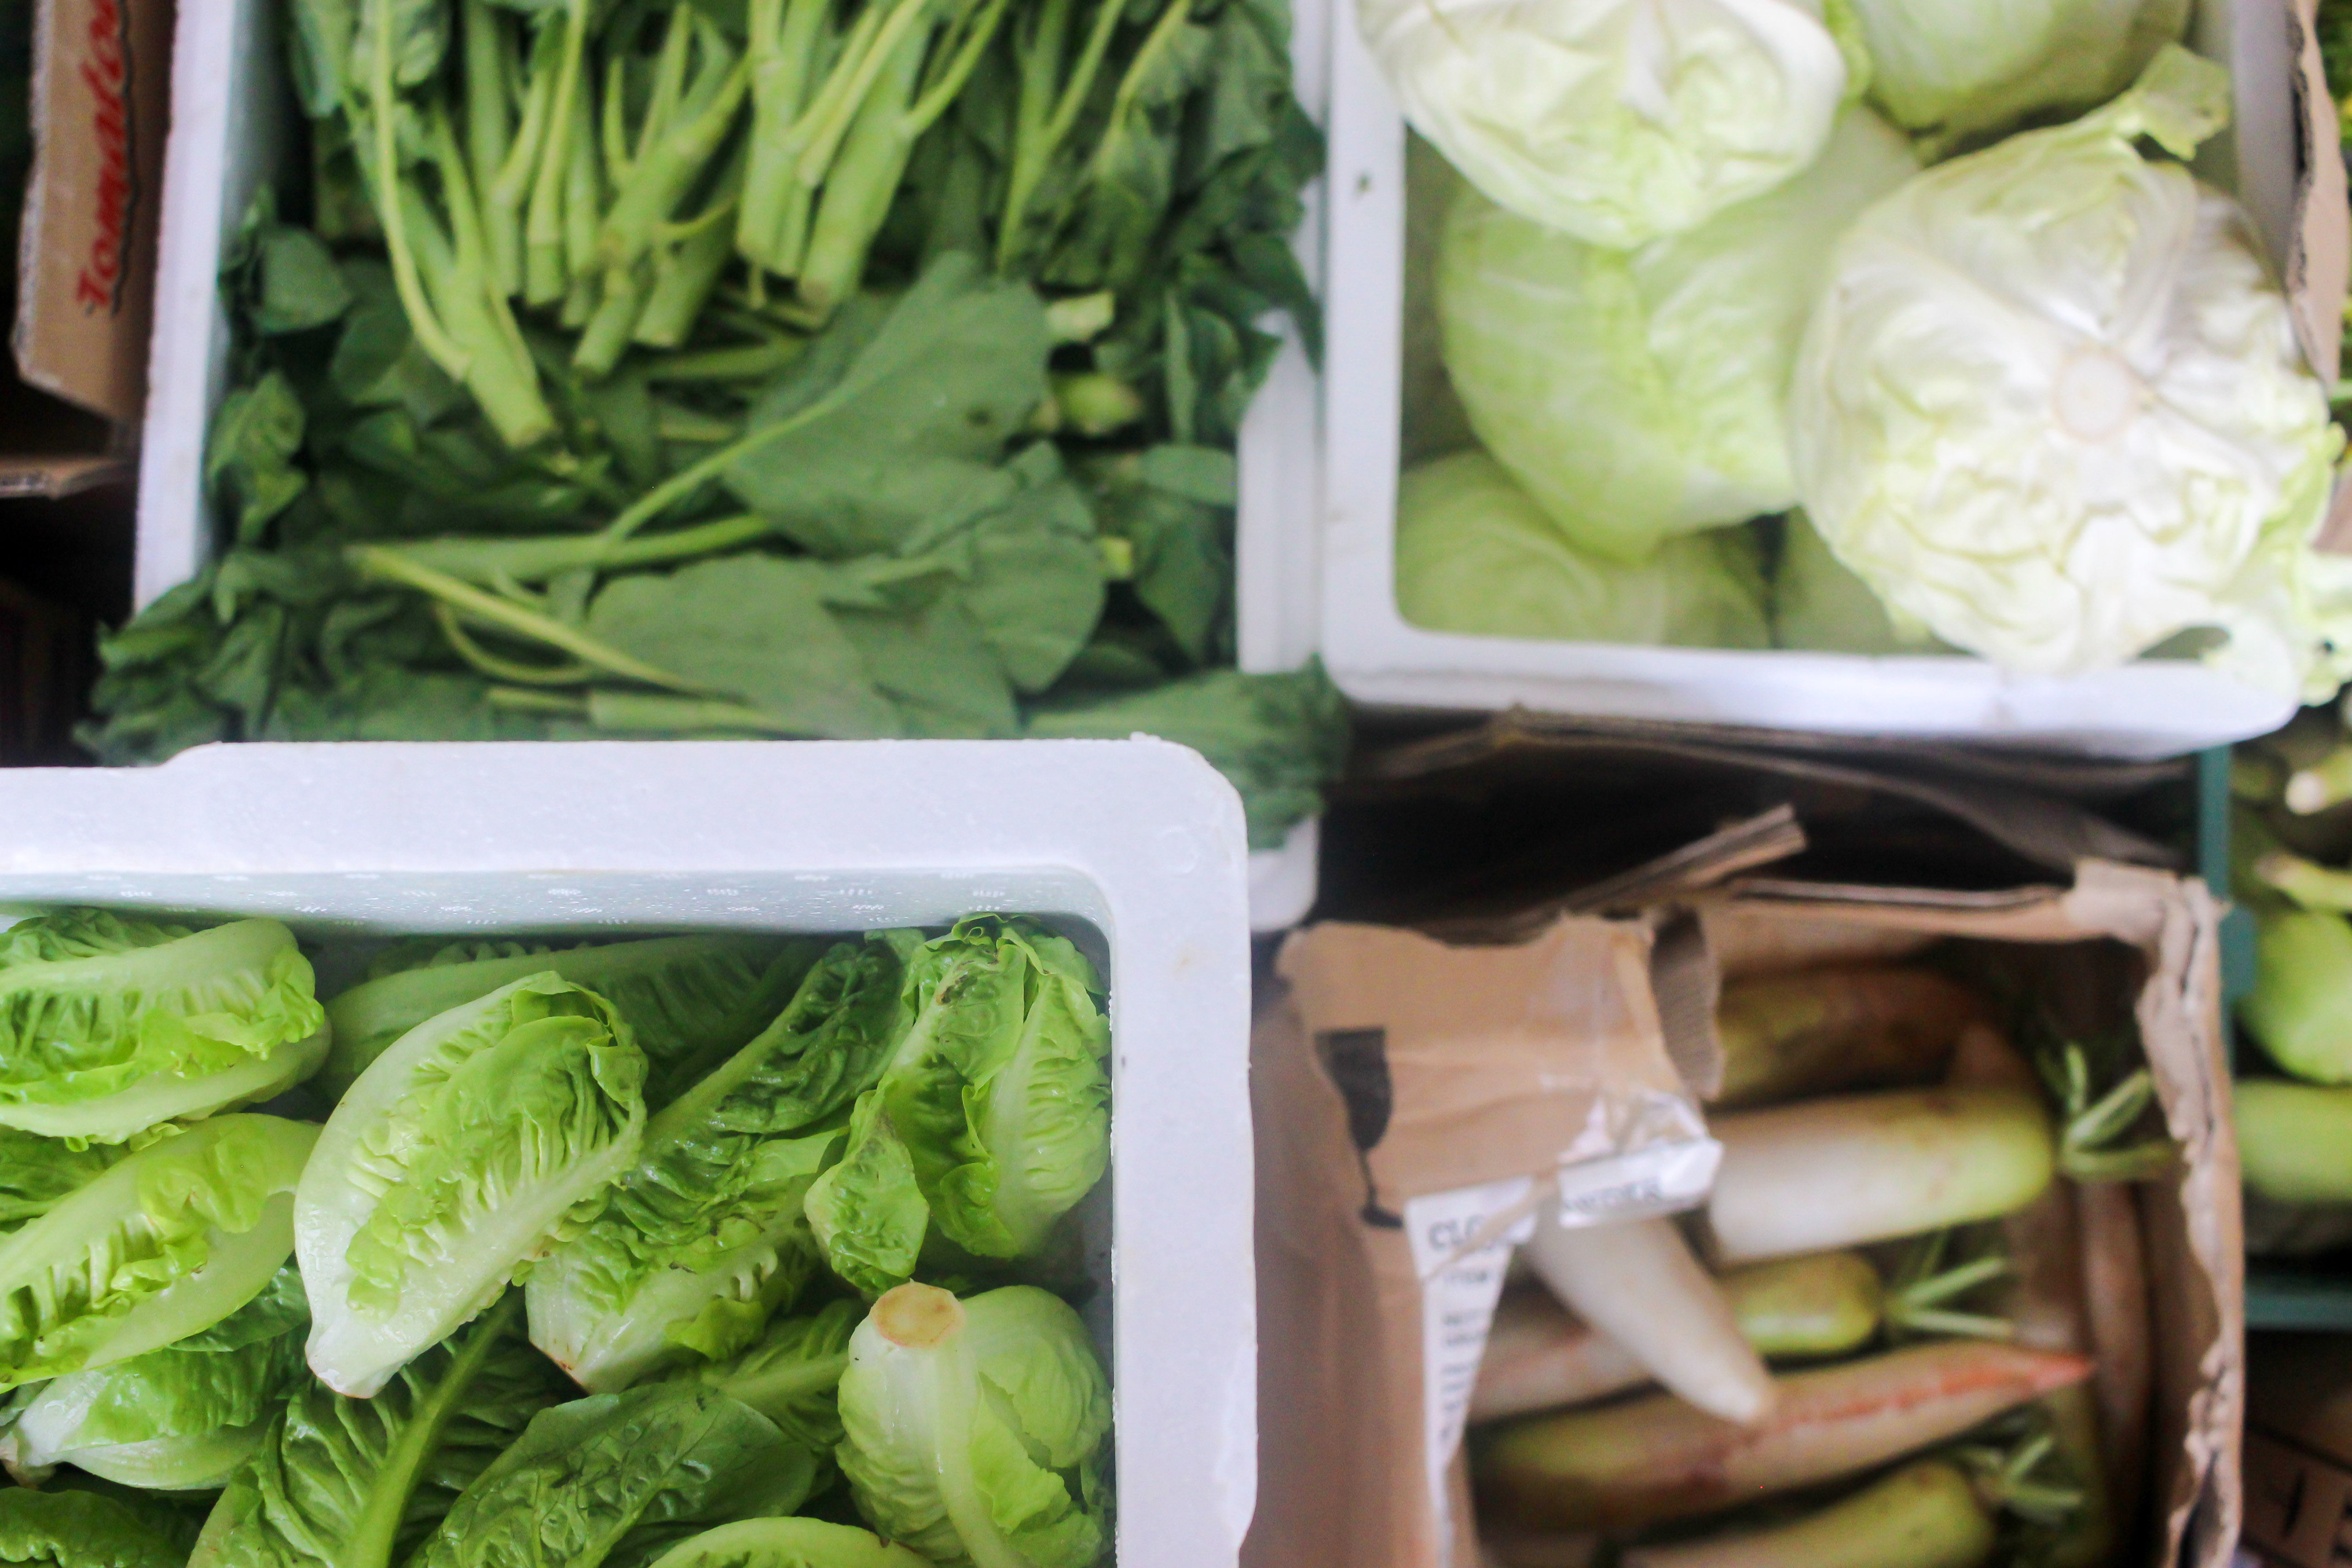
PPWC is a large wholesale centre that is split up into different blocks that focus on specific produce. There are blocks focusing on vegetables, fruits, dried foods and so on. It was an eye-opening sight, bustling with activity in the early morning as vendors sorted and sold their goods. Especially in the large auction hall, forklifts were constantly moving heavy boxes and people were shouting left and right. There were many container trucks, transporting and delivering goods. Within their own stores, each vendor had a team of staff that was working relentlessly to sort and pack produce.
ToolsUsed
SGFR lanyard
Mobile phone
Push trolley
Reusable bags/trolley (for volunteers to bring food home)
Delivery truck
ProcessDocumentation
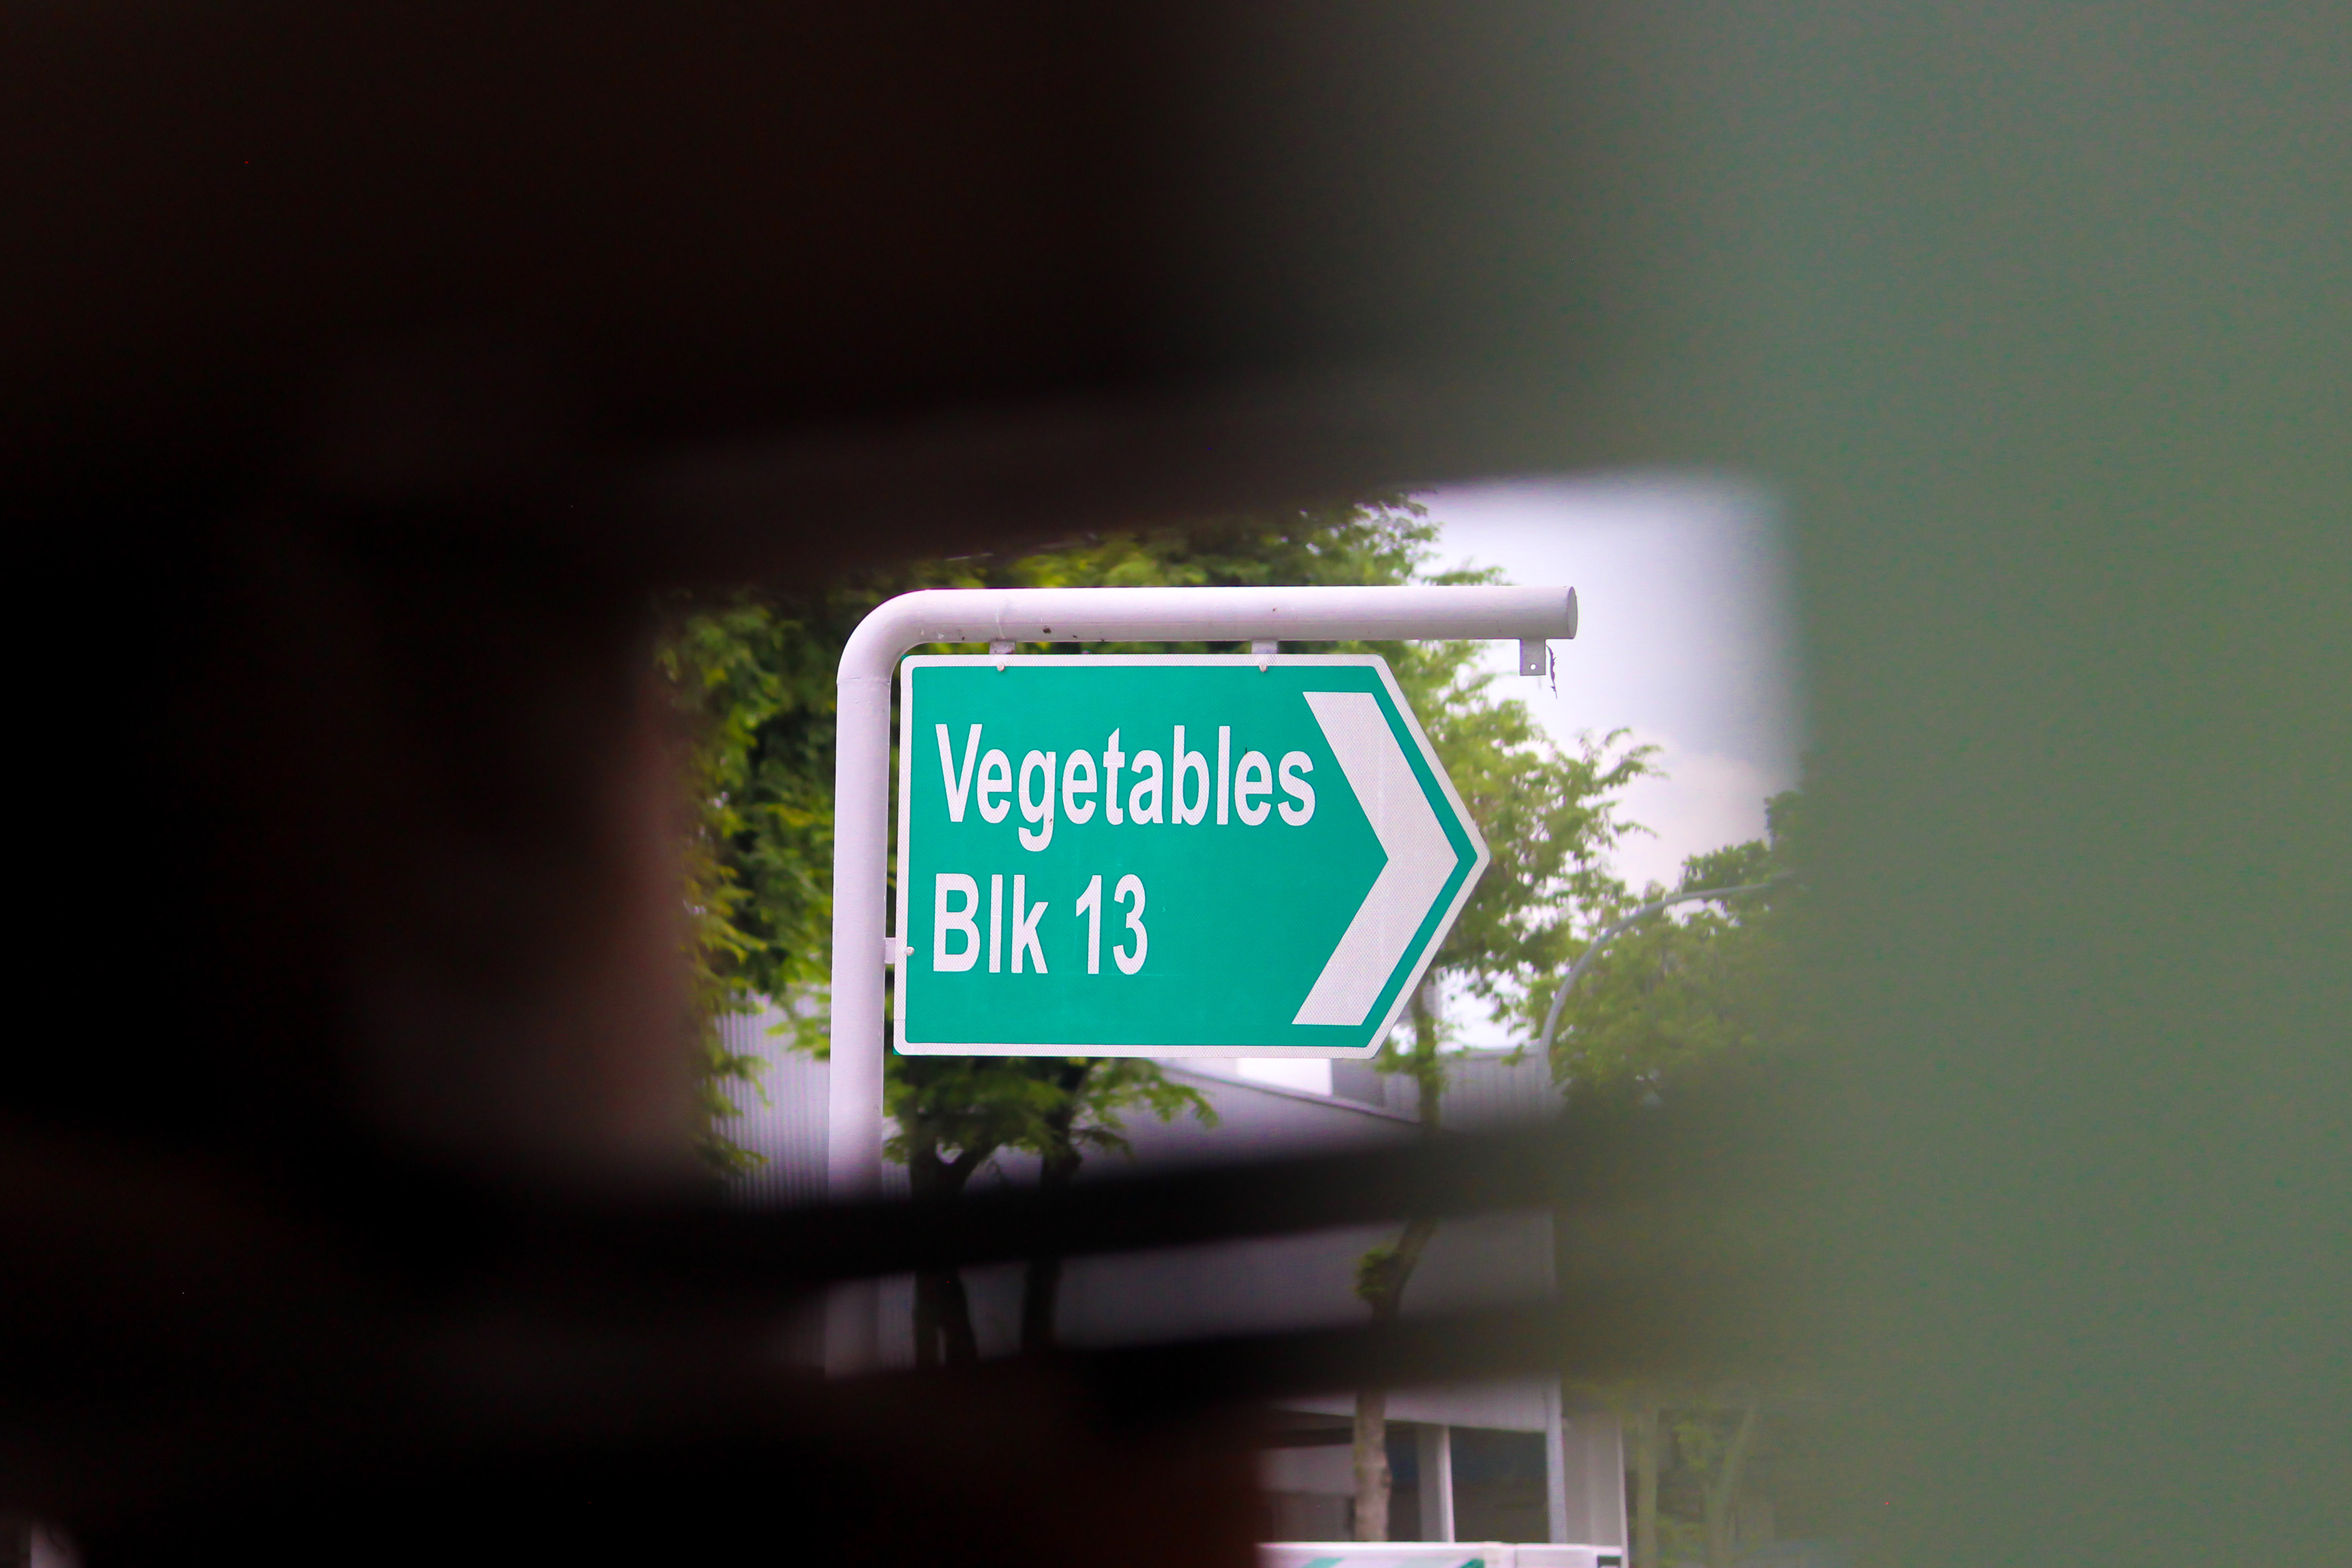
Block 17: The gathering point!Some of the veggies rescued!
The food rescue commences with a briefing to all volunteers, conducted by the team leader. The briefing informs volunteers about SGFR, what to do, how to approach vendors, how to persuade them and most importantly, the dos and don’ts. For instance, don’t take photographs of the vendors themselves without their permission. Always ask for permission before taking, even if you’re certain it looks like trash. The ground rules were established before we split up into our separate groups: fruit and vegetable. Each group would focus on rescuing produce from the respective blocks. A few people were also stationed at Block 17 (the gathering point) to be ready to receive, sort and look after the goods collected throughout the food rescue. Team leaders and volunteers would keep in contact via mobile phones and WhatsApp chat groups set up ahead of time.
After splitting up to our respective blocks (I was in vegetables!), team leaders (and experienced volunteers) would approach vendors and ask for produce that could not be sold for whatever reason. Some cited the produce as ugly, or not up to standard, even if they were perfectly edible. The rest of the volunteers would then load up the trolley with boxes of whatever the vendors gave, and then push it back to the gathering point. Some vendors recognized the SGFR lanyards and had already set aside items to give, and most of them were super friendly! There was also a time limit to the collection process, and after an hour and a half, we made our way back to Block 17.
We were then debriefed and were allowed to bring home as much produce as we could carry. During the debrief, the SGFR team gathered feedback from participants to find out why vendors threw away the produce. Some volunteers also gave vendor details to SGFR, so the team could contact them to participate in the future PPWC Veggie Rescues. Subsequently, volunteers packed their bags with the rescued food and helped to load up the delivery truck, which would transport the food to communities in need.
Pain Points + Thoughts
Every time the trolley was full, volunteers would have to make the trip back to deposit the collected goods. This often resulted in many trips (and PPWC is quite big!) back and forth vendors and the gathering point. In my opinion, it wasted energy and time – as compared to being able to collect all the goods before making one trip back. Additionally, some times people are slow to check/pick up their phones, so there may be a lapse in communication.
Overall, I thought the veggie rescue was a great initiative started by Daniel (the freegan dude!) and some volunteers. Not only does it teach volunteers how to help with rescuing produce, but also opens their eyes to the food waste prevalent around us. Plus, you get rewarded by helping out with free food! What’s not to like?
Practitioner #2: Film making
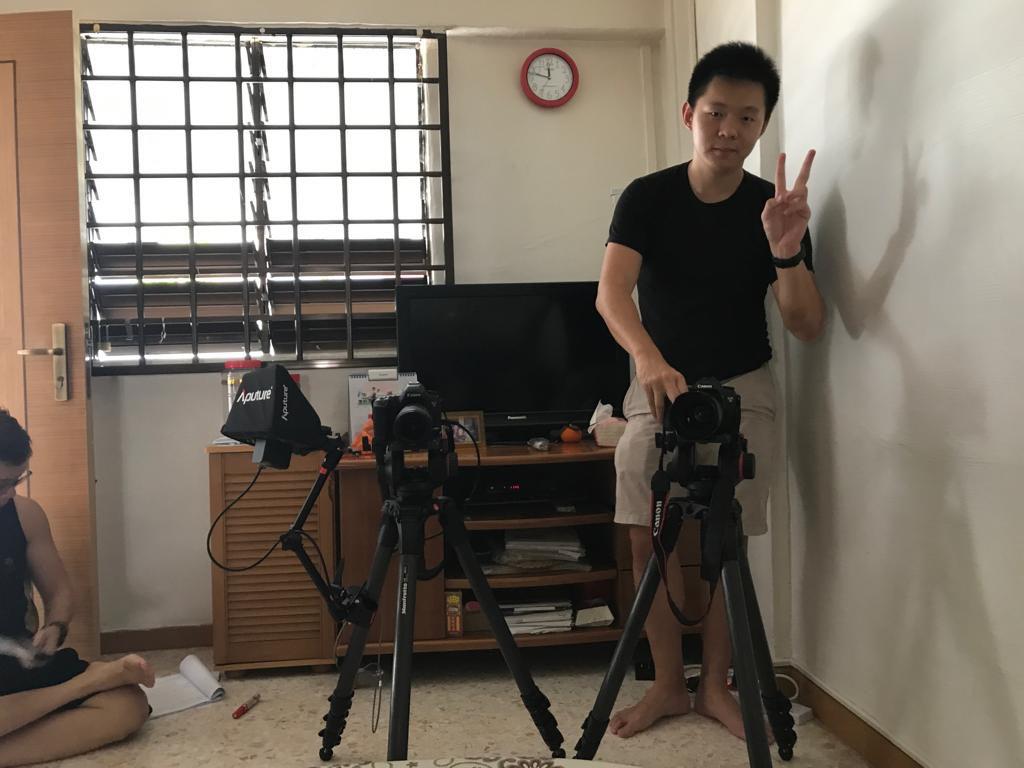
I participated in filming a fictional short film with some experienced film makers.
Worksite Documentation
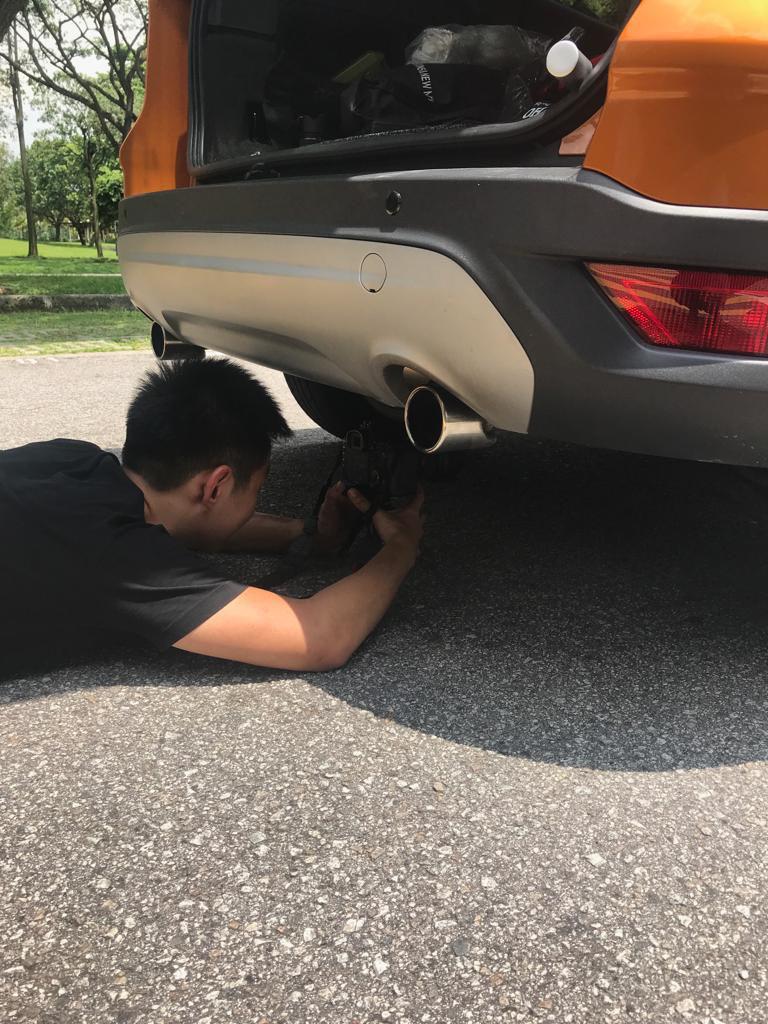
Filming @ the HDB flatFilming @ the fishmonger in the wet marketFilming @ random carpark
The worksite changes often, depending on the day of the shoot and what scenes we’re shooting. For instance, we can shoot scenes in a flat, at a wet market, and at a car park all in one day.Due to this, there was a lot of shifting about and the team had to pack up all the equipment quickly and move to the next filming location. On top of that, since the ‘worksite’ changes, this means that we either plan things out before hand (location scouting/recee) or be able to adapt on the spot.
Tools Used
Tripods
Handheld stabilizer
Gimble
Cameras
Monitor
Fresnel lights
LED lightbox
Boom microphone
Lapel microphone
Zoom microphone
Process Documentation
We arrived a few hours before the cast to begin setting things up. We had scouted the place before, so we knew what to do upon arriving (e.g. where to place the tripods for which scenes, what areas to block out for certain shots, where to put props). The tripods were set up, then put into position (one main camera, one secondary camera) and other team mates would prep the set. This involved putting props into specific positions (following a photograph snapped on a phone) to ensure there was continuity in the film.
When the cast arrived, the director would talk to them to settle them down, before briefing them on what was to be shot for the day. After which, the cast would run through their lines and the director would advise them on what to change, or what emotions to convey.
After a few practice runs and blocking out shots (to help check the framing on the camera), we began filming. Most scenes took one to three takes to complete, and we had to work fast in order to ensure that the light did not change much from shot to shot. It was a constant race against time. Additionally, every time we were filming a scene with dialogue or specific sounds, we had to ensure there was silence on set. This proved to be difficult especially when in public areas that had influencing factors we couldn’t control (e.g. the flat was located near the MRT tracks, the microphone kept picking up the rumbling of the train).
Throughout the entire filming, team mates had to work together to back up the files on the laptop, change and charge batteries for the camera and microphones, change and empty out SD cards, shift lights, tripods and carry sound equipment. After finishing the scenes at one location, every one had to rush to pack up and shift items back to their original positions, before moving on to the next location and redoing the whole process.
Pain Points + Thoughts
The SD cards fill up fast, especially when filming for the whole day. Since we had limited SD cards, every time a card was full – the camera man had to pause filming, remove the card, pass it to a team mate and replace it with another SD card. Meanwhile, the team mate would insert the SD card into a laptop, back up the files, clear the card and then return it to the camera man. This was a cyclical process. A lot of time was spent waiting to back up the files and pausing to switch SD cards.
Another pain point is the sound equipment. The lapel and boom microphones had to have wires connected to the main zoom microphone. As we had two lapel mics and one boom, this resulted in a mess of long wires that often got tangled up. It was difficult to manage them, however, if they were color-coded, it would make things a lot easier. Additionally, similar to the SD cards, the batteries in the mics and cameras ran out quickly and had to constantly be swapped out to charge.
All in all, it was a fun and hectic experience that taught me a lot about film making. Especially with regard to the logistical process behind it (setting up, putting props in specific spots, resetting scenes, manipulating light to make it look like certain times of the day, etc).
Practitioner #3: Watercolor painting
I went to observe a friend who does commissioned watercolor paintings at her home.
Worksite Documentation
She works from the desk in her room. For privacy reasons, I didn’t take any photos. But her desk is just a plain IKEA study table, white in color (she says it’s good for taking photos of her pieces against a white background). When she wants to do her watercolor painting, she makes space on the table and leaves her laptop there, and brings out her watercolor tool box.
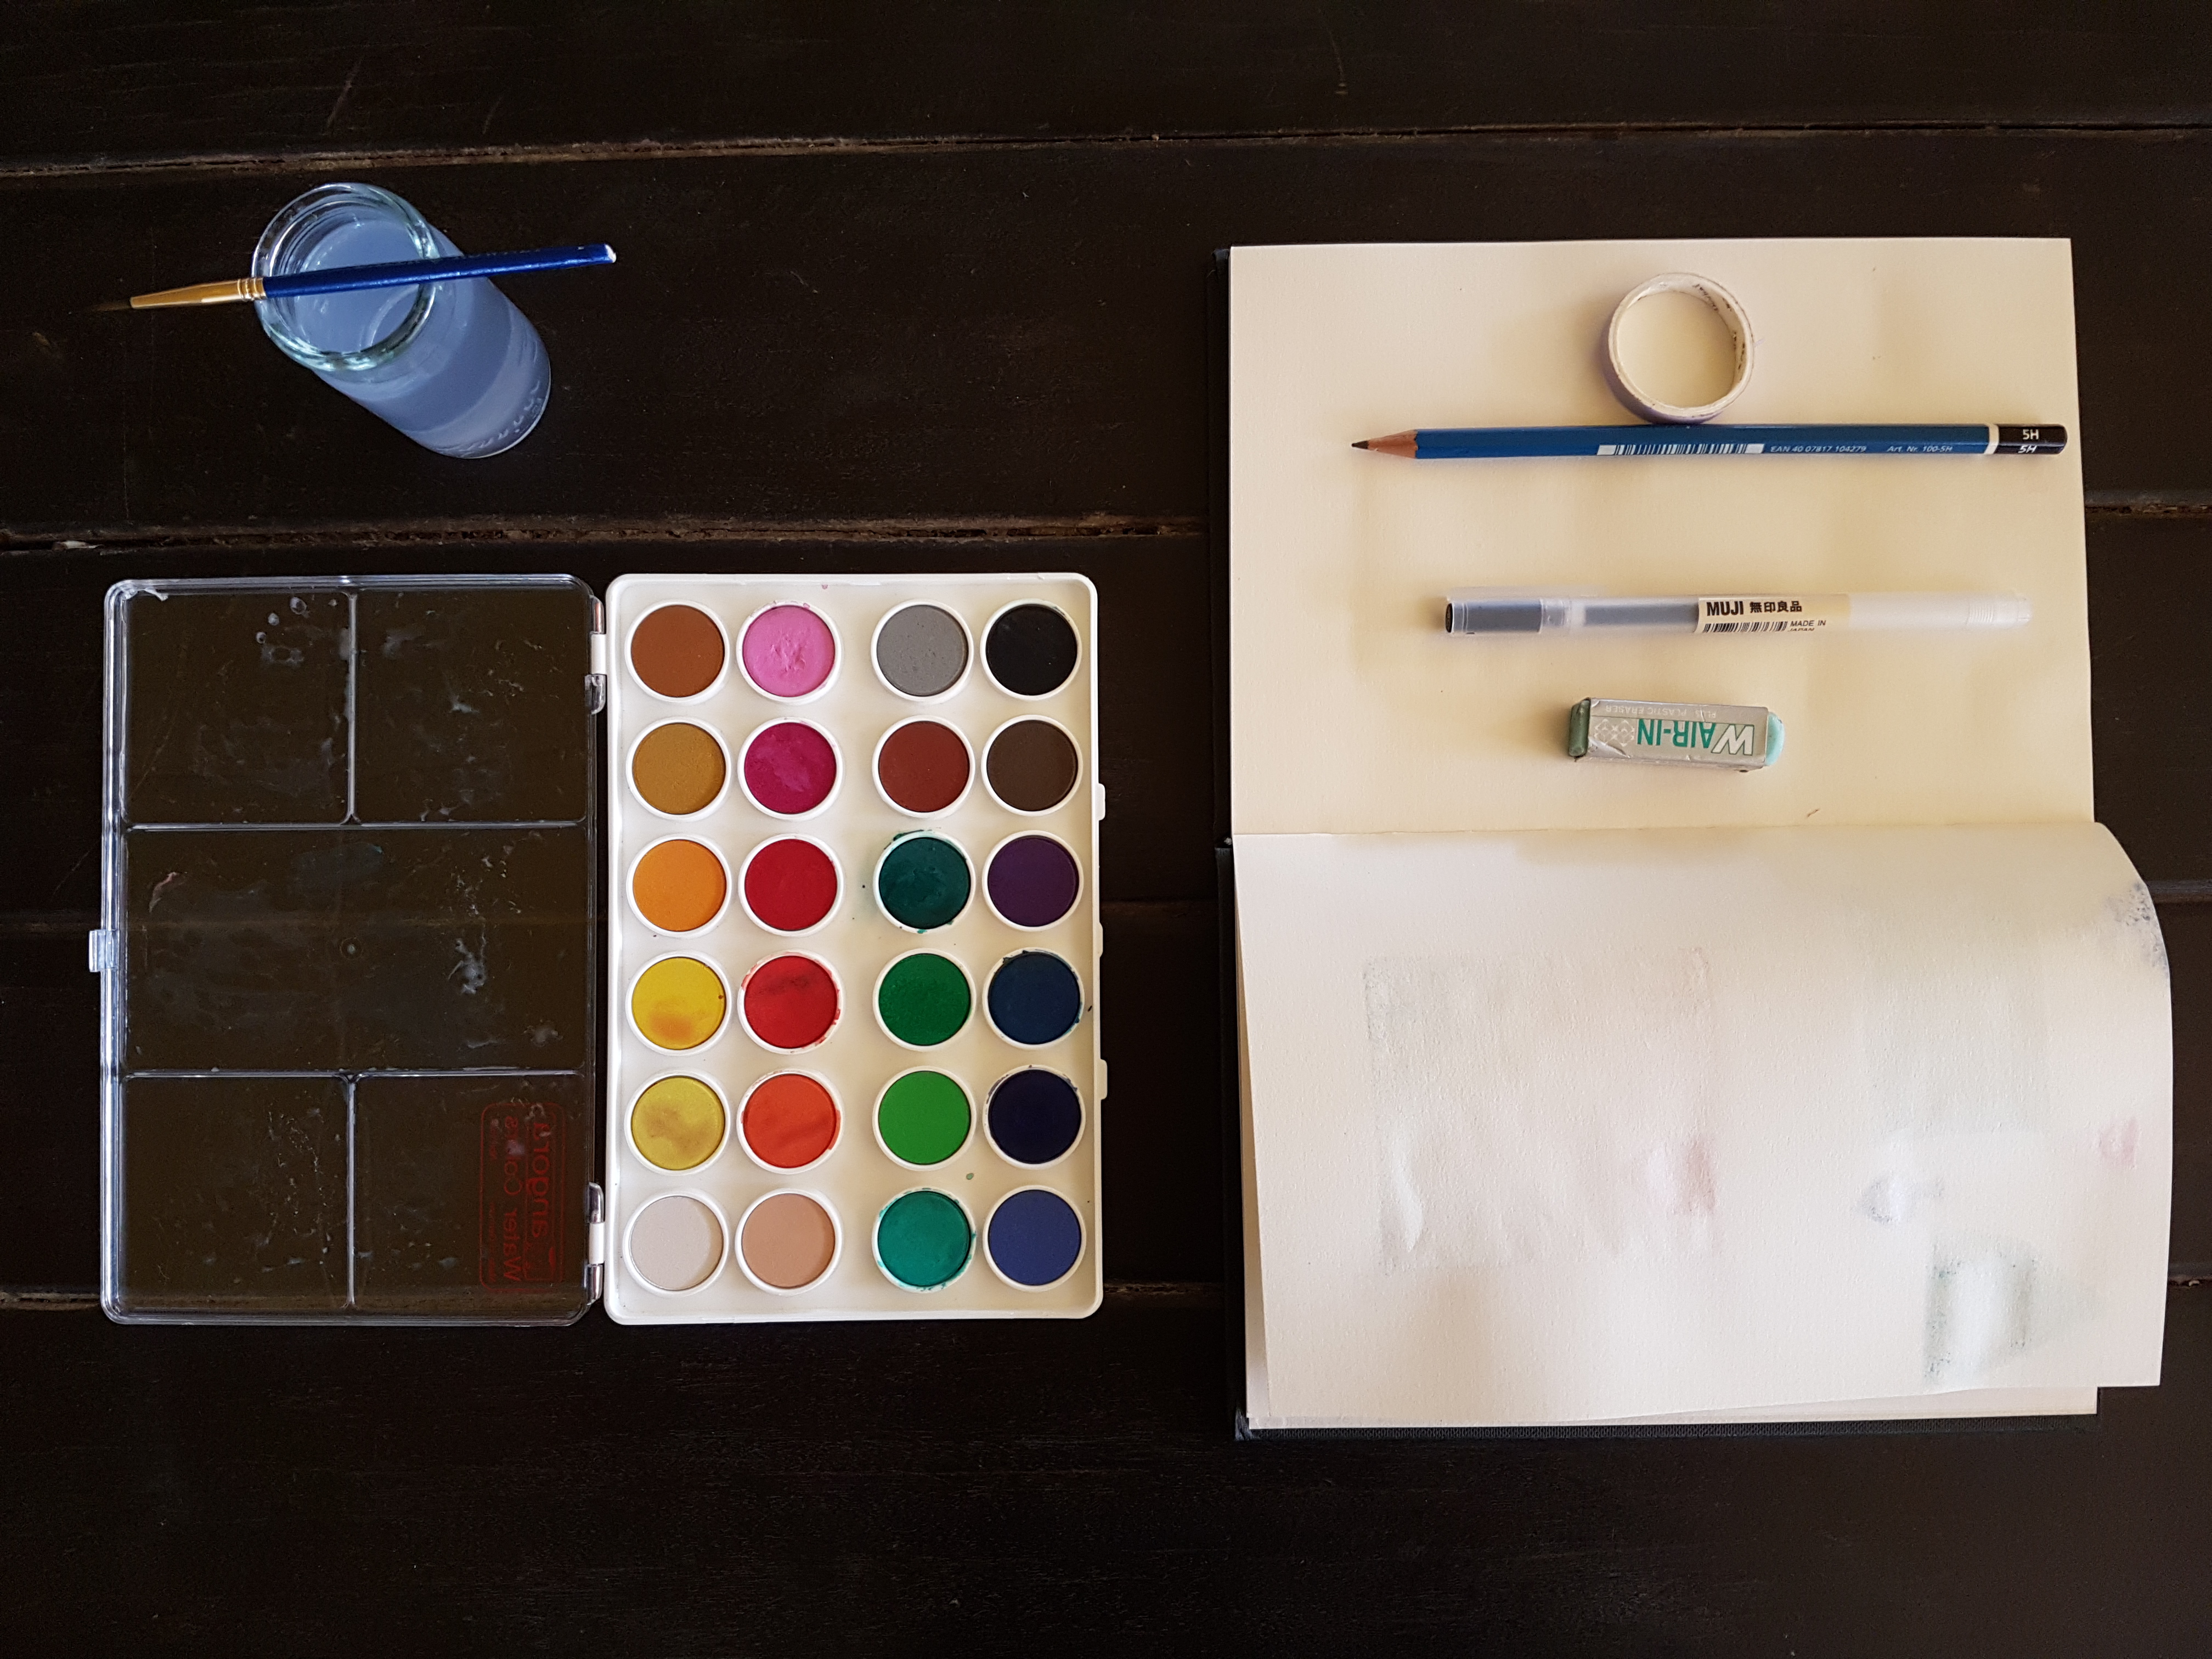
Tools Used
Paint brushes of various sizes
Watercolor paint tubes
Palette
Watercolor paper
India ink (for lining the piece when it’s done)
Rough paper (for testing out colors)
Jar of water
Towel (she has a paint cloth that she wipes her paint brushes on, after every session she washes it so she can reuse it!)
Pencil
Eraser
Ruler
Process Documentation
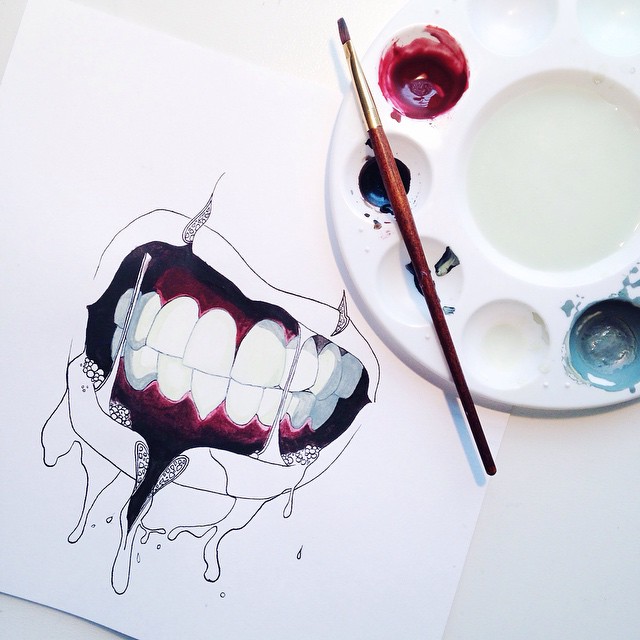
She starts painting from the ‘bottom’ or ‘inner’ layer. Adding details and depth! Finished product!
Before she starts, she lays out her paints and fills her jar with water. Everything is set up so she doesn’t have to get up from her seat during the painting process. After that, she begins by drawing the image onto a piece of watercolor paper. When she’s done, she uses india ink and goes over it to bring out the details. It’s not conventional to do so, as most people will go over the entire drawing with india ink after painting – but she does two coats of india ink in order to be precise and make the details pop. India ink is used as it doesn’t get diluted by the watercolor that goes over.
Once the line art is done, she begins mixing all her colors out. She measures and squeezes out the pain onto her palette, then mixes the paint and tests it out on a piece of scrap paper to see if it’s to her liking. Only after she’s mixed all the paint, does she finally start painting. She says she prefers to mix all her paints at the start so that there’s consistency in the color and the hues and shades don’t differ – as compared to if she had mixed several different batches throughout the entire process.
She works from the ‘inner’ most layer, as she described. I likened the process to photoshop, where you have different layers. She starts with the base, which in this case is inside the mouth. Then she works upwards, to paint the gums, the teeth, the plague on the teeth, then the lips. It was very therapeutic watching her work and blend the colors! My favourite part was when she added details to really make the painting pop off the paper.
After all that, she used india ink and went over all the lines once more to finish off the piece.
Pain Points + Thoughts
Throughout the process, she had to get up to make a few trips to refresh and refill her water jar. As she was using dark paints, the water got dirty quickly – and didn’t clean her brushes as effectively.
Additionally, when she going over the lines for a final time during india ink with a calligraphy pen, there was zero room for error. If the nib got caught and extra ink flowed onto the paper, especially on the lighter parts (e.g. teeth, lips), there was almost no way to salvage the piece.
The watercolor paint also took time to dry, and she had to be careful not to smudge some parts while detailing others. However, it was difficult to tell which parts were dry and which were not. It would be pretty cool if there was a sensor that could tell you so.
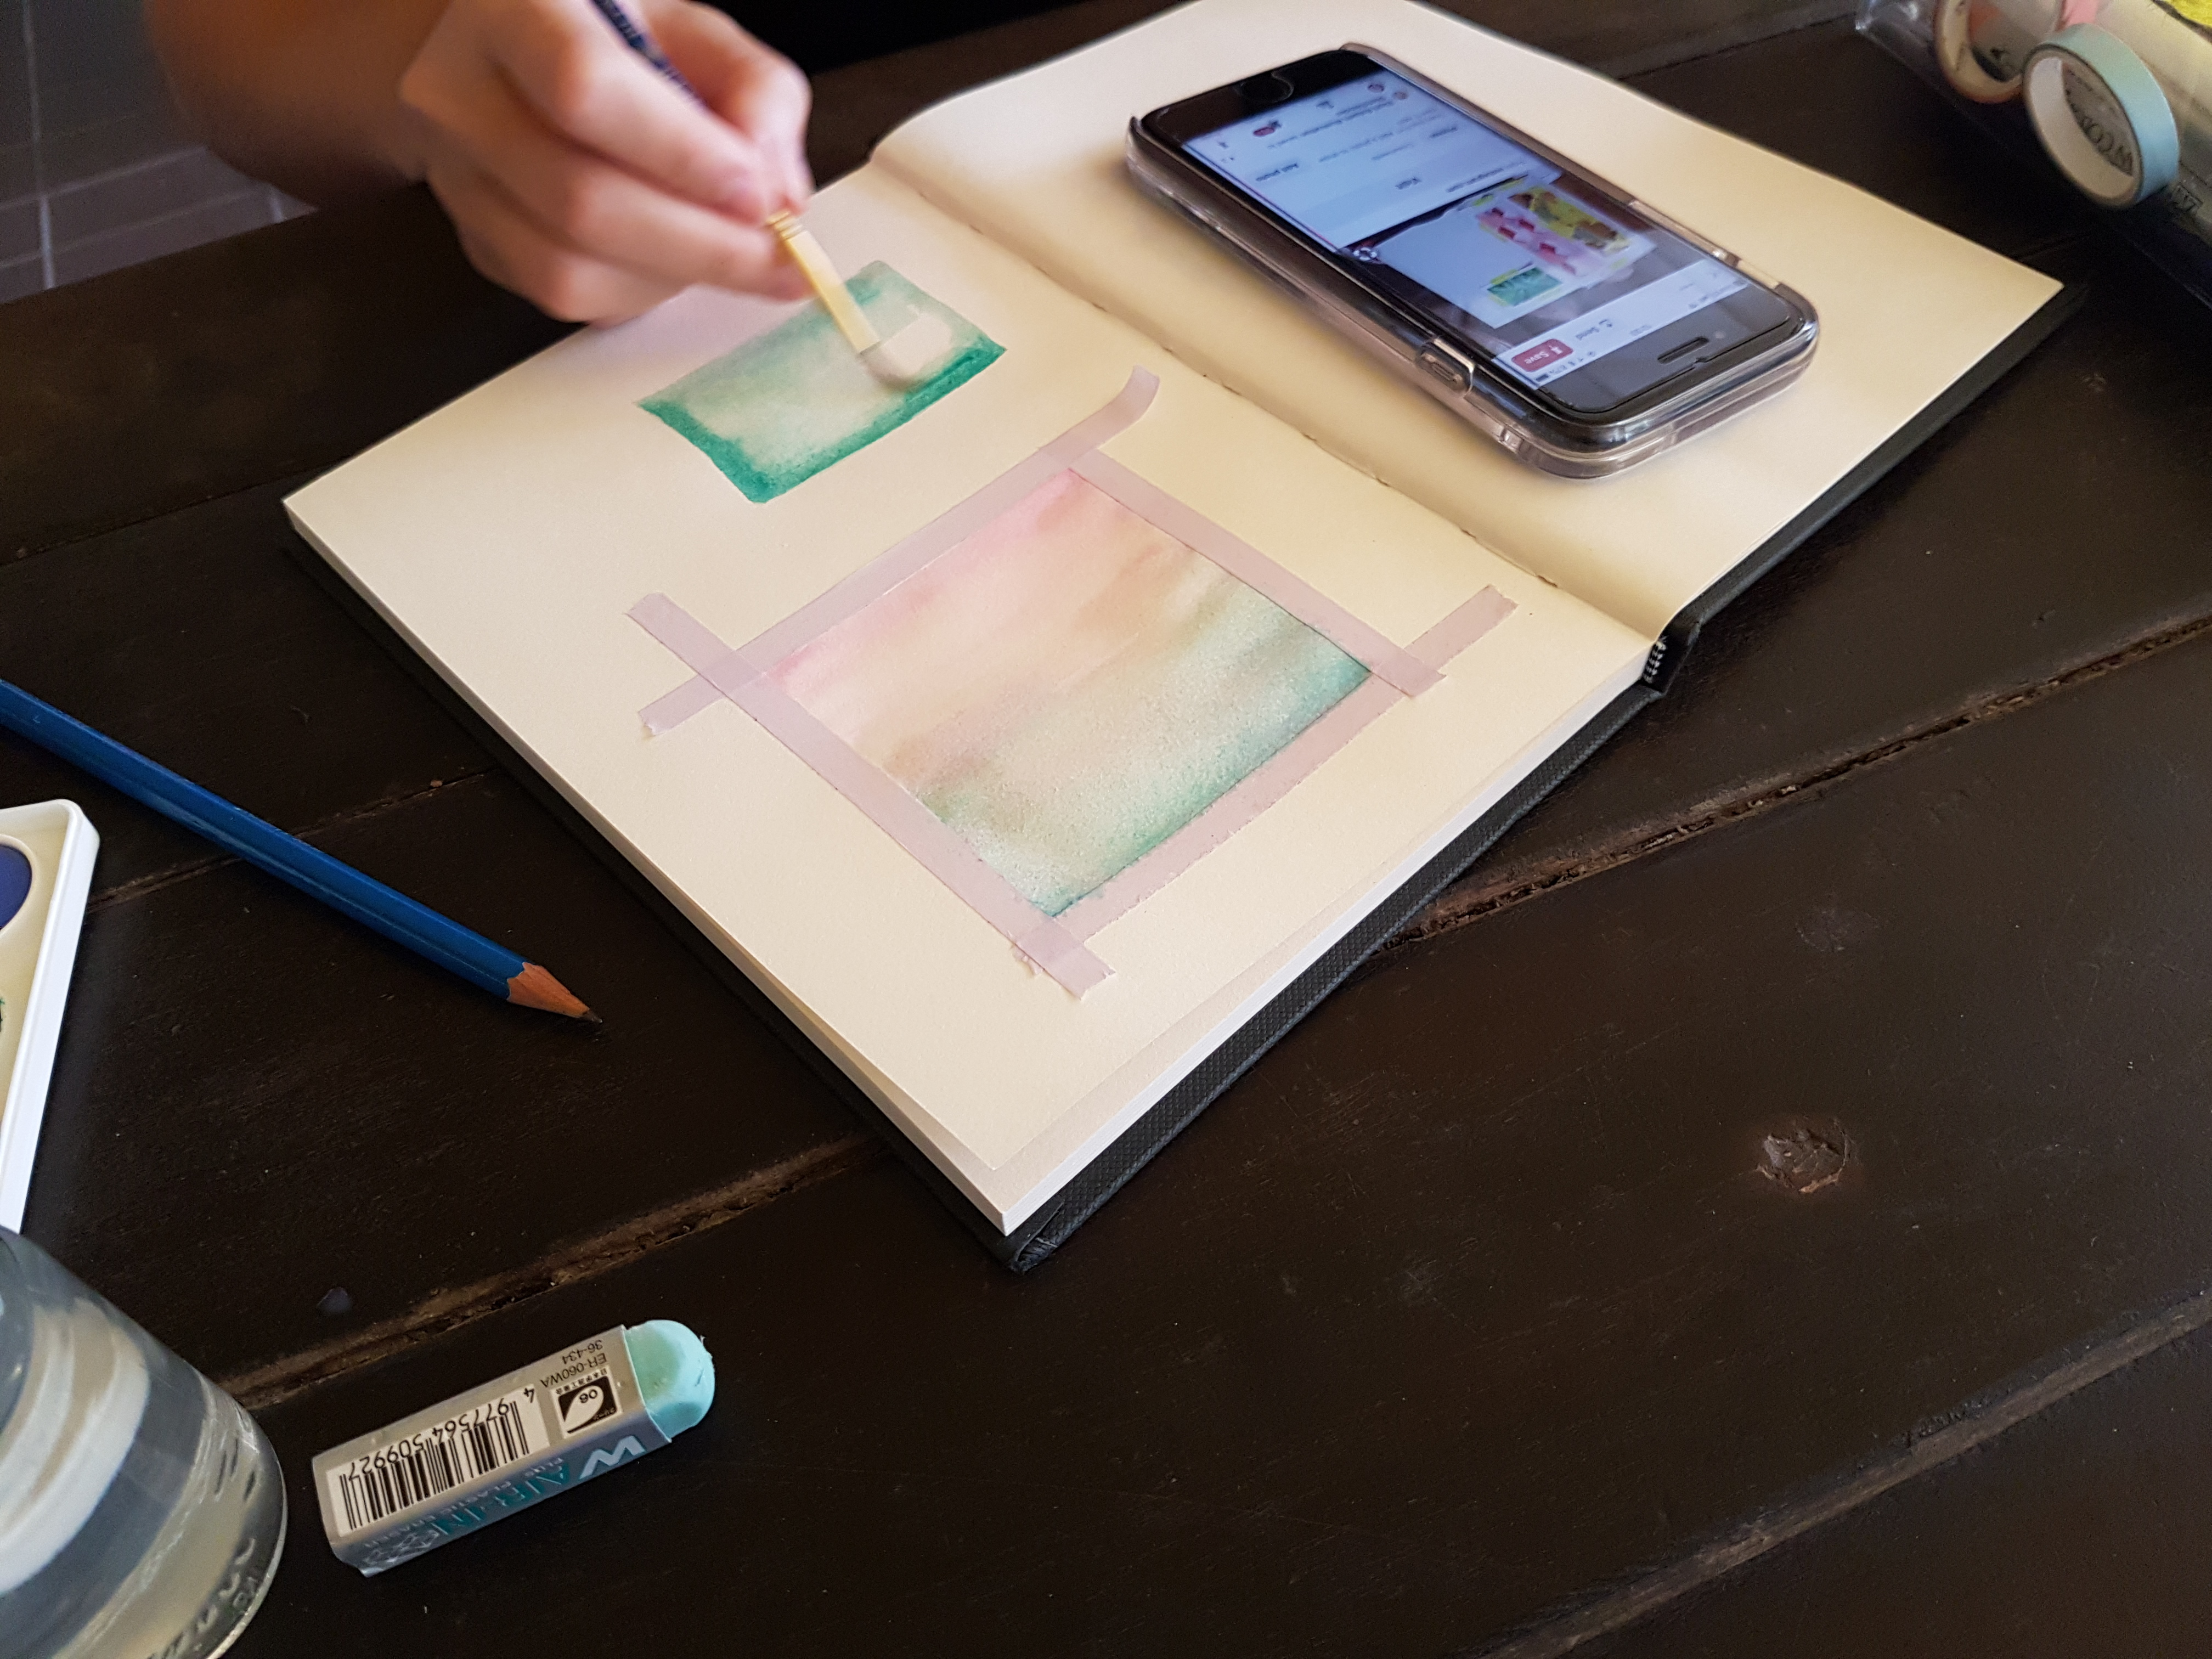
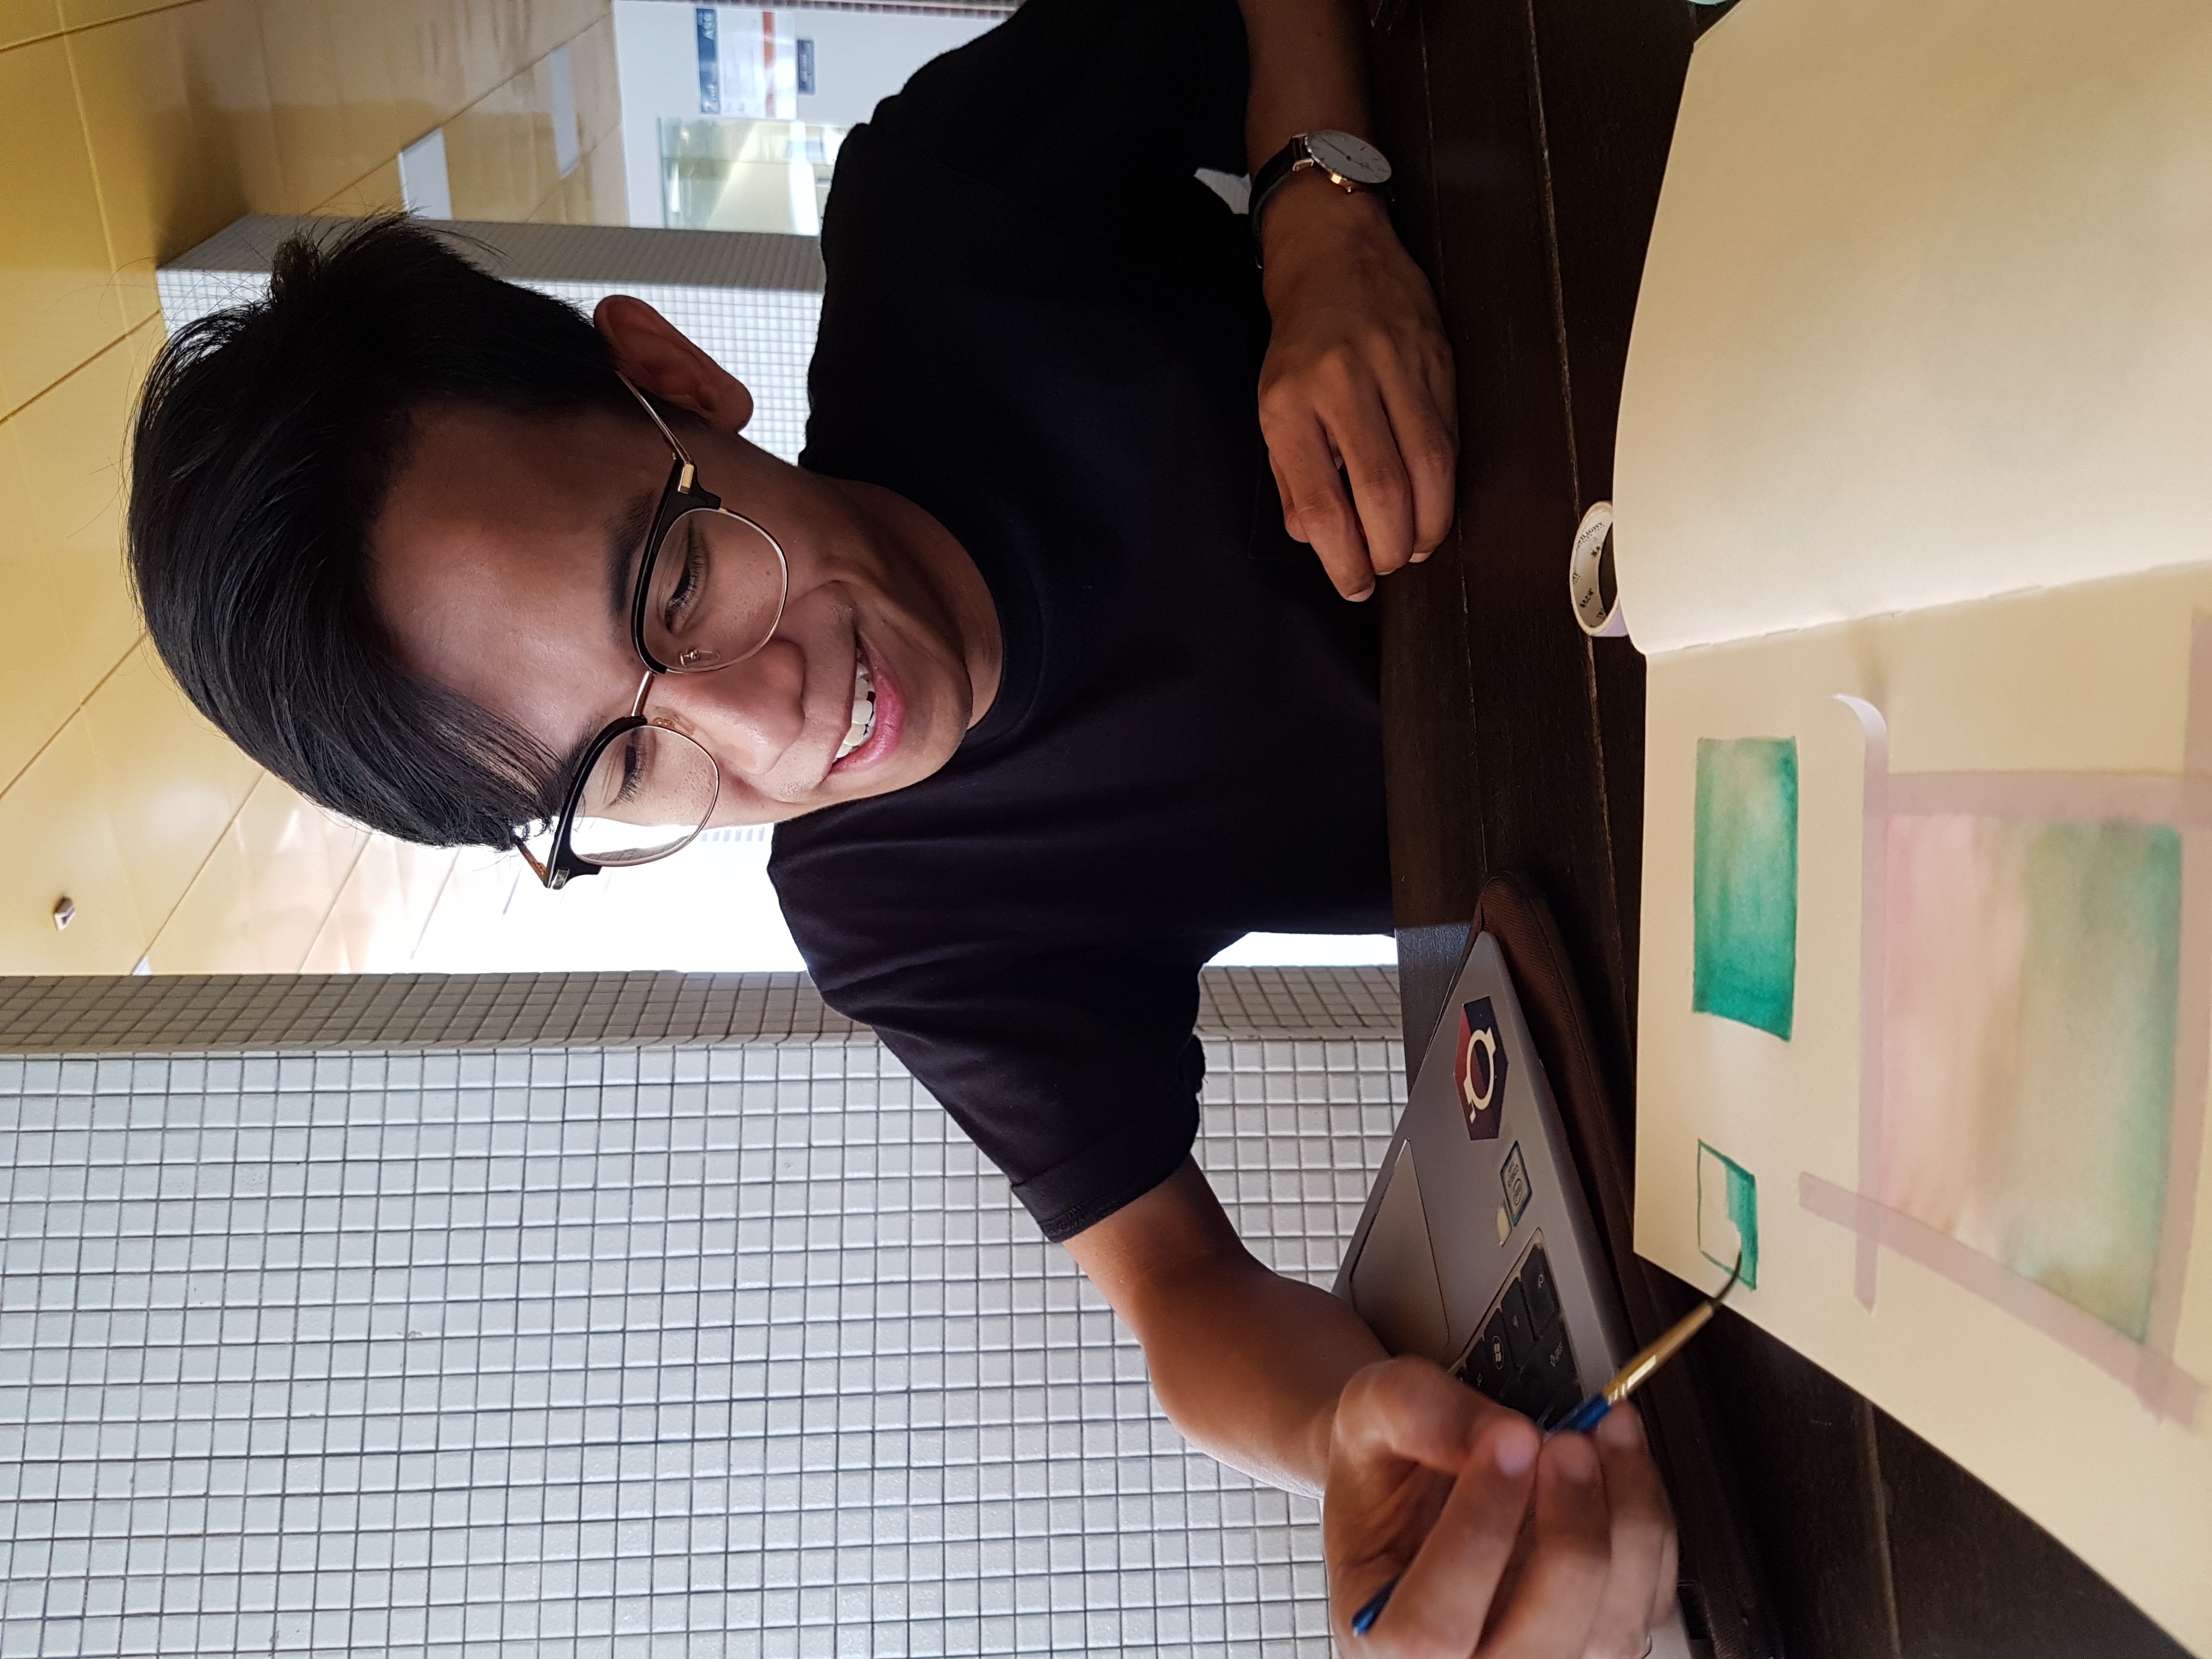
I also went to observe a friend who does watercolour painting in her leisure time! She was nice enough to meet up with me, walked me through the process and let me try some watercolour painting of my own.
Tools Used:
Paintbrush
Sketchbook
Watercolour palette
Washi tape
Glass full of water
Pencils, eraser, markers.
The Process:
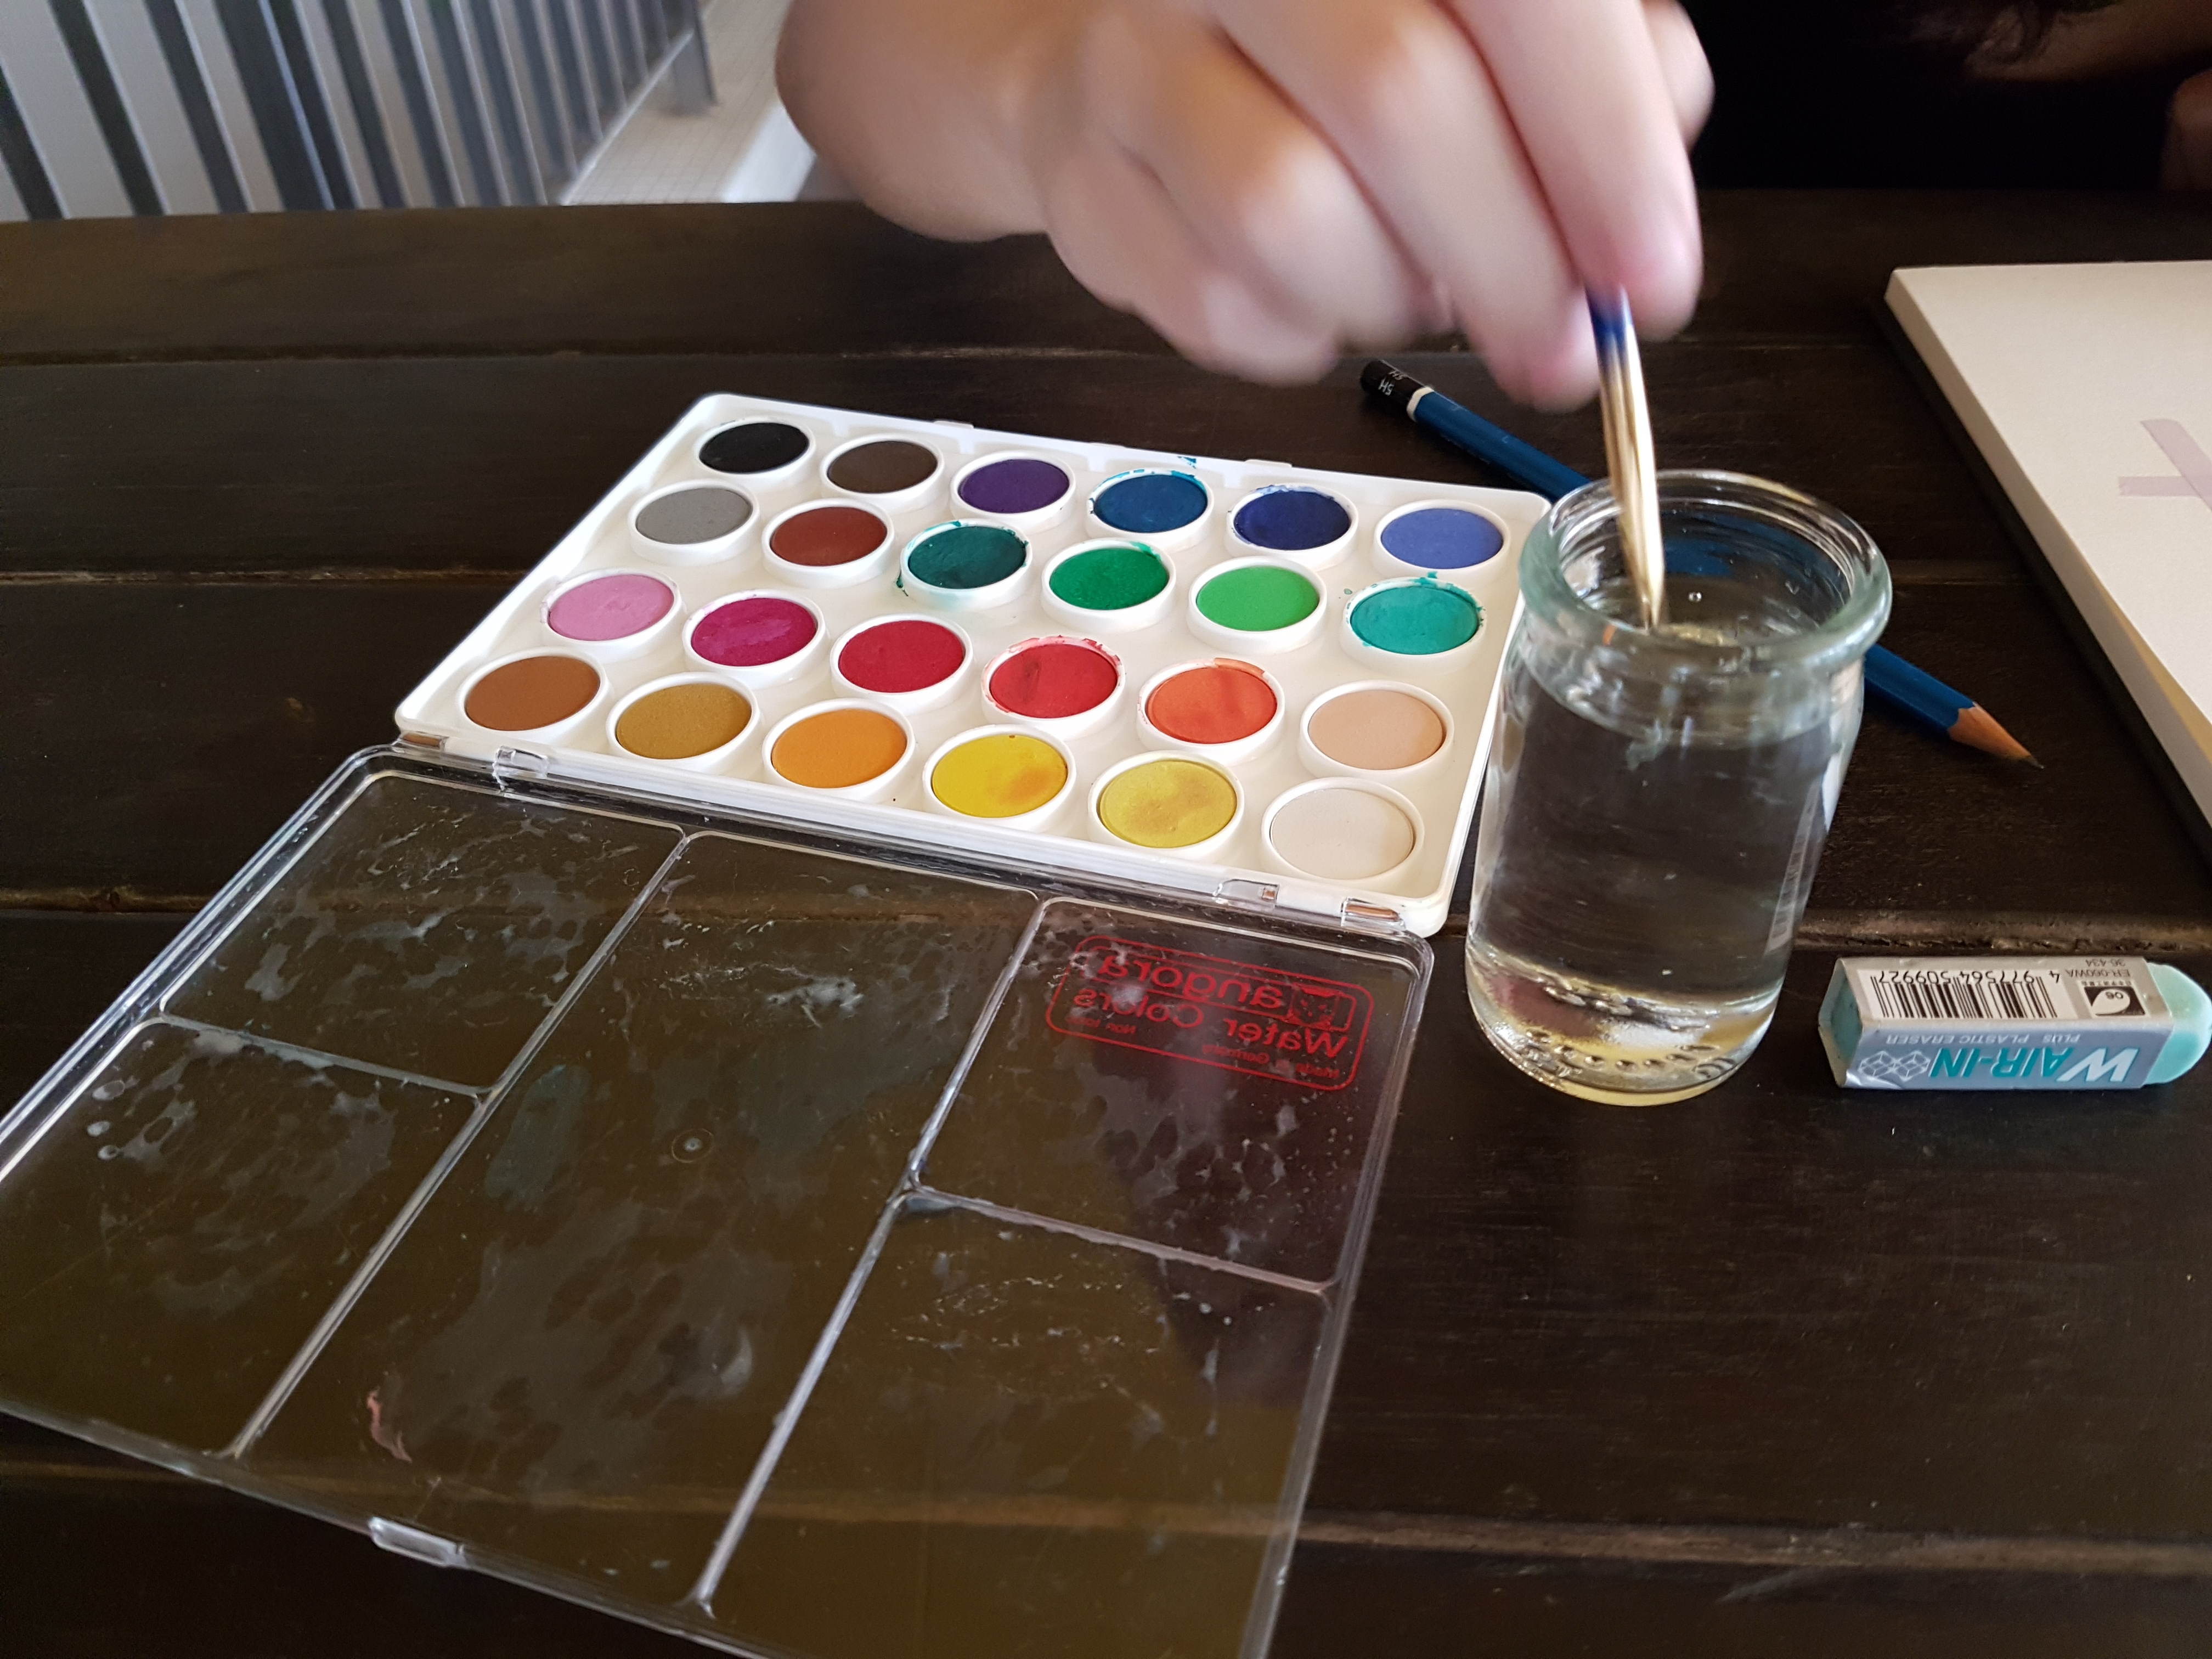
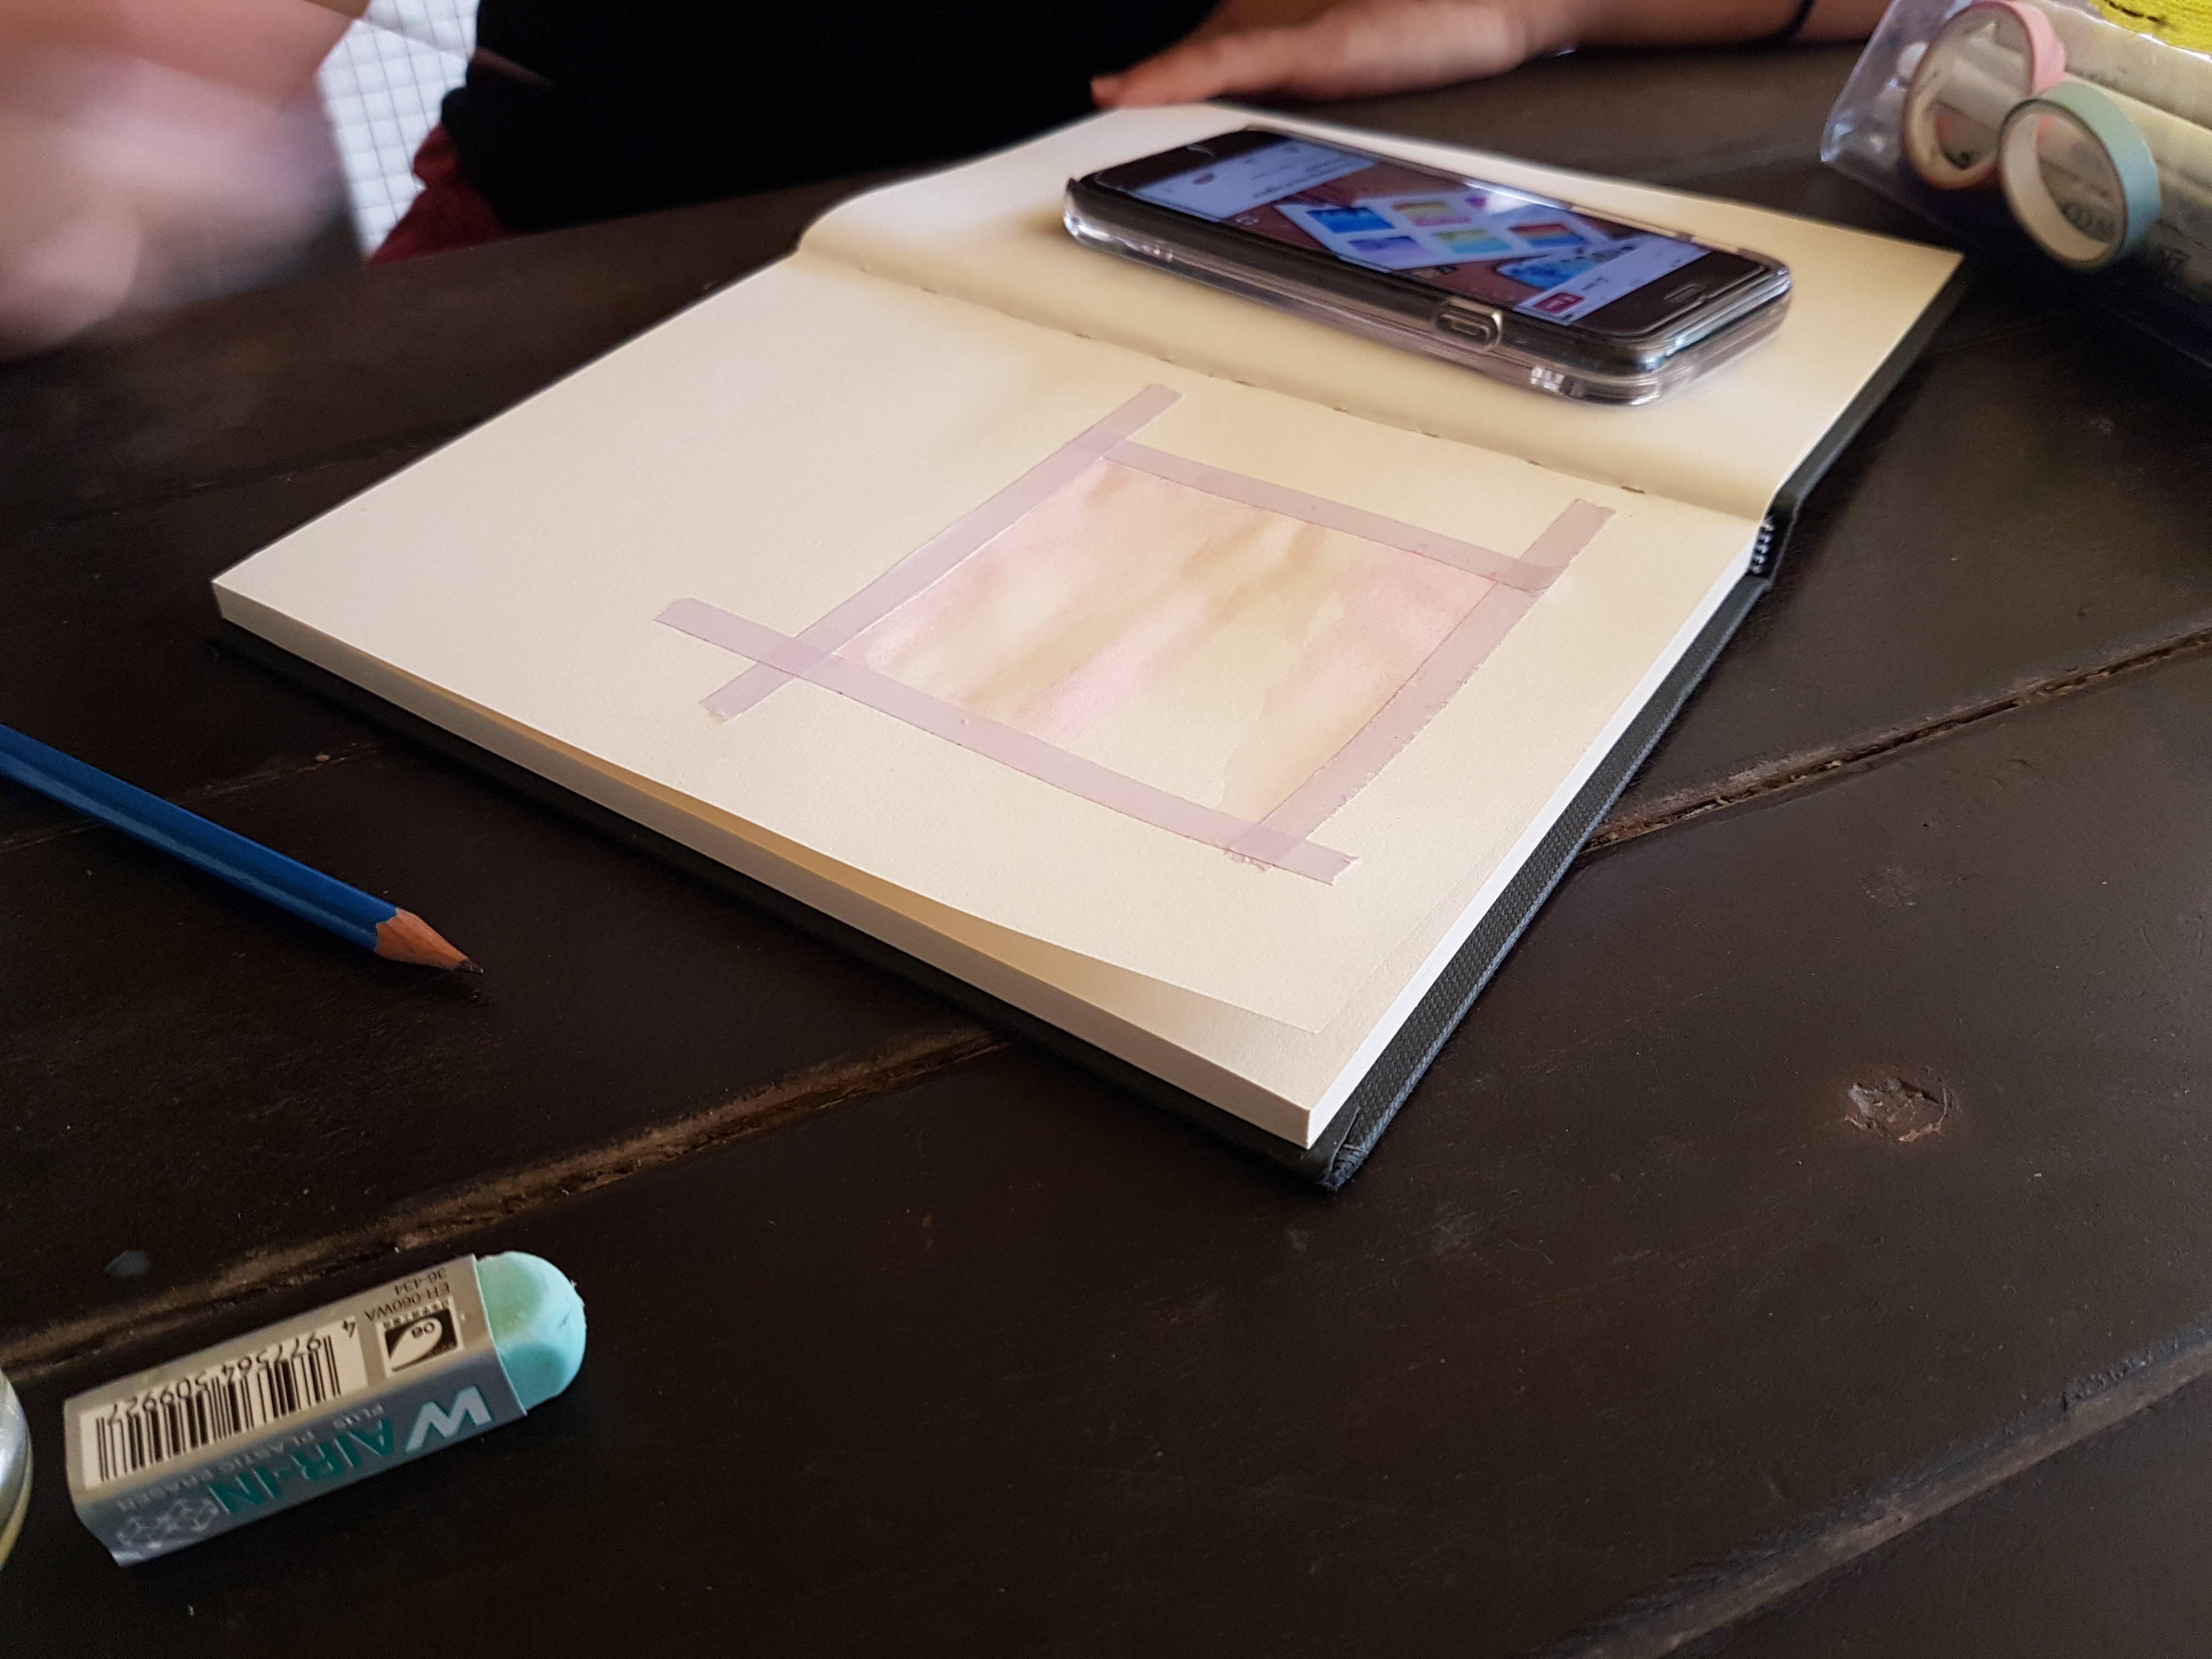
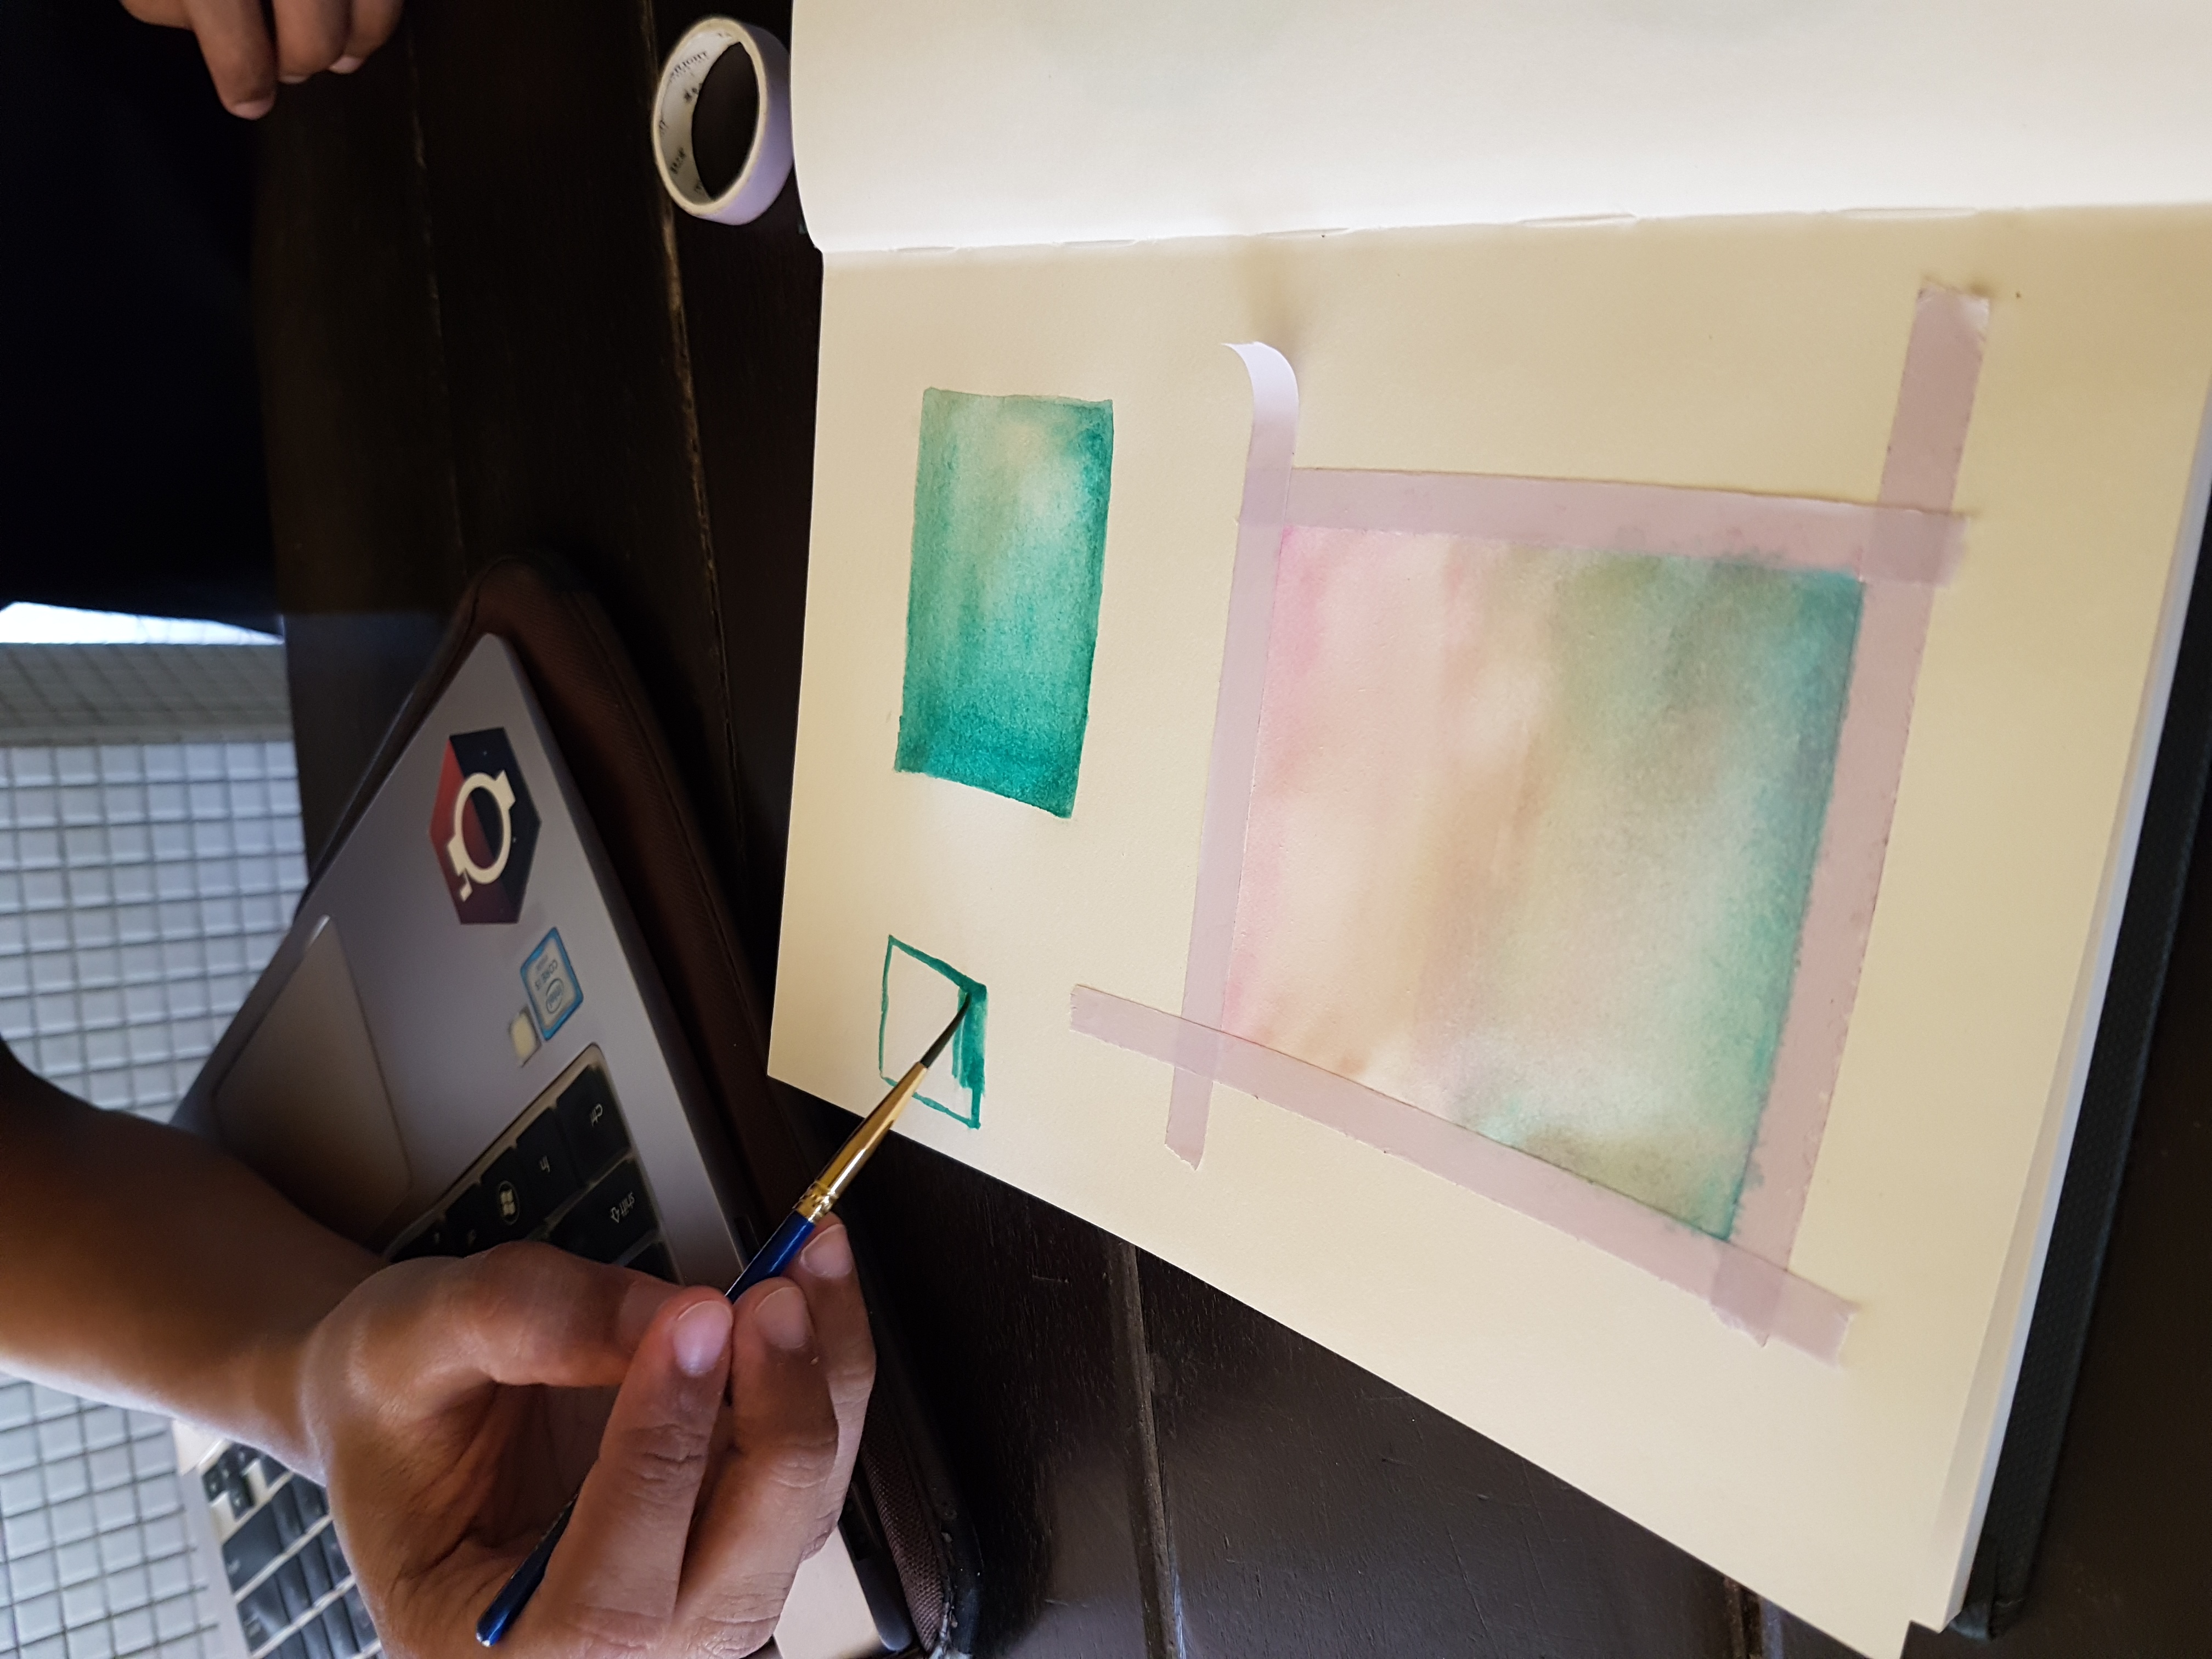
She started off by asking me if I have anything in mind that I wanted to paint out, but in the end we decided to use an image from the internet as reference. Some prep work was done first and she used the washi tape to create a square border. This is done so that the parameter of her painting will look neat and “clean”. She then proceeded to show me the actual painting process – always painting towards the same direction at a time.
Soon enough, I tried it out for myself. It’s definitely not as easy as it looks, as my attempts looked far from what I imagined them to look like. What I wanted to do was to paint a triangle that is solid at the base, and its colour fading as it reaches the tip. Didn’t manage to do it well.
Also I was told that I can add more paint to it to make it look more saturated, and add dab water to the painting if I want to make it look less intense – in a way diluting the paint and spreading it out.
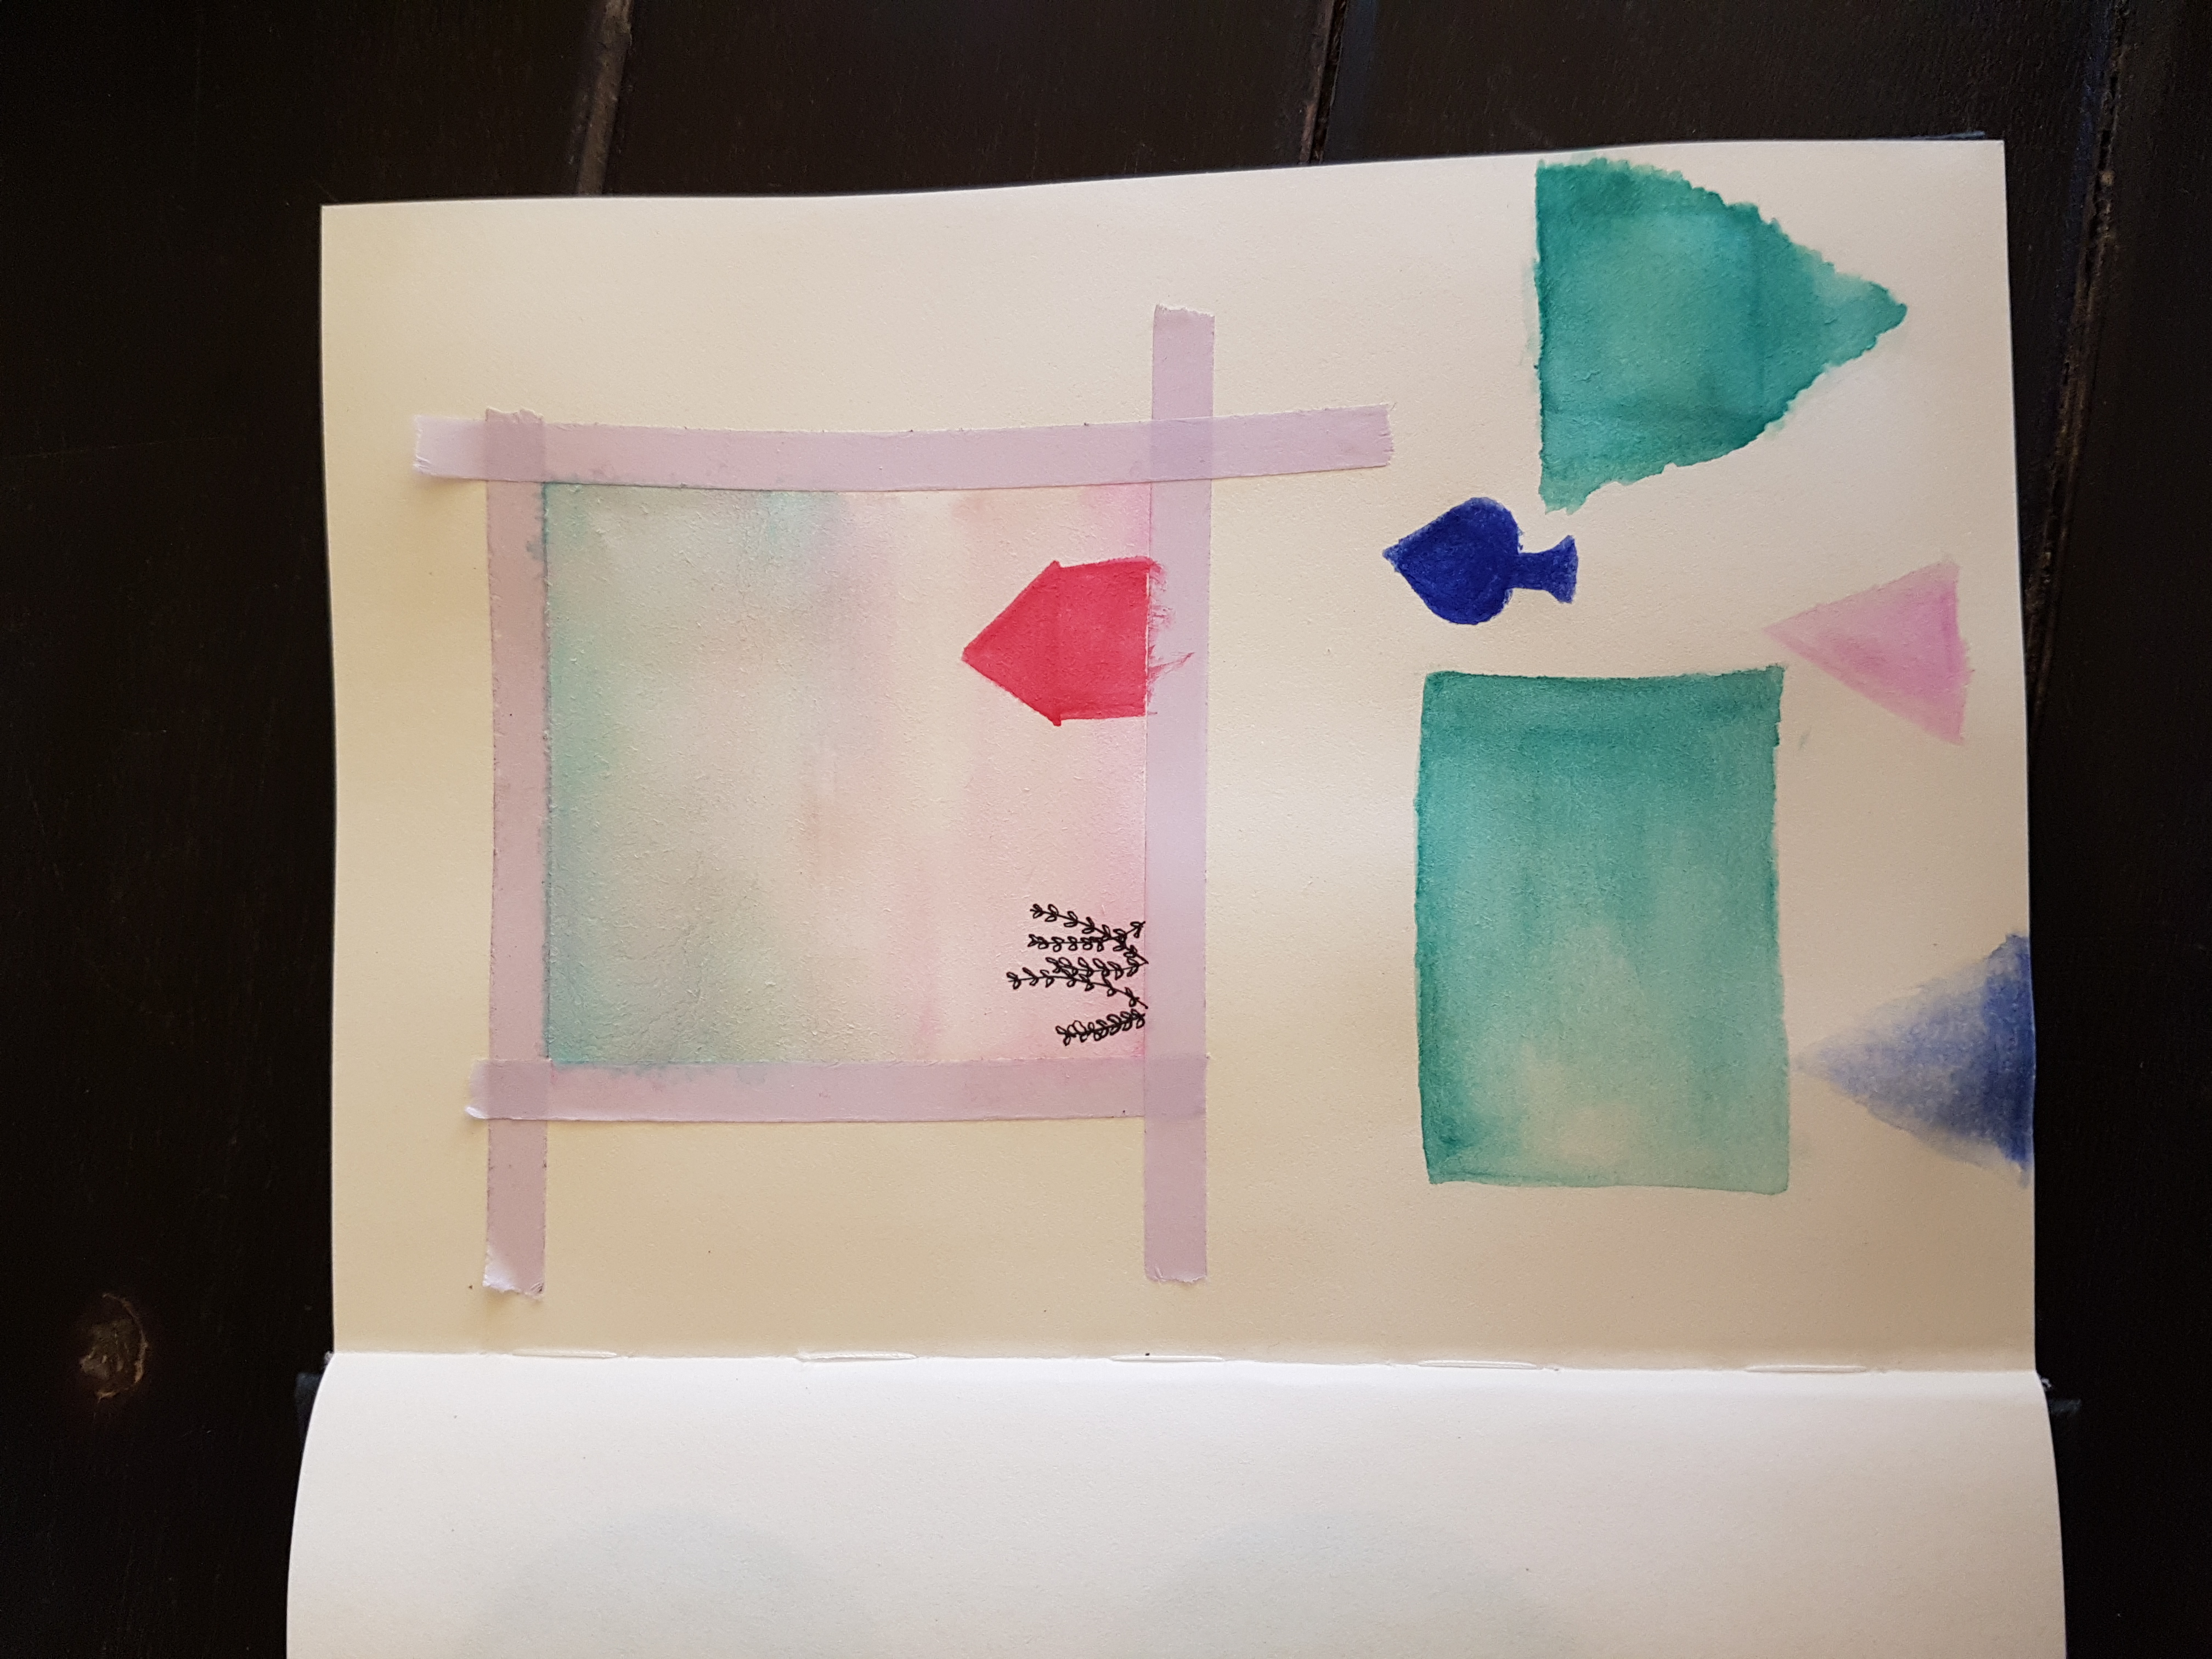
ithoughtialreadyrotatedthepicture… samehere…
In the end, below was what we came up with. No prizes for guessing which ones were painted by me. But if you really dont know, the green triangle was started by me and damage control-led by my friend, the blue spade, pink triangle and blue triangle were done by me. The rest were my friend’s painting.
Pain(t) Points
Water in the container turning murky very quickly, which could affect the colours that appear on the canvas. One solution to this is to use at least two glasses of water – one to wash off paint from the previous stroke, and one to prep the brush for the next stroke/ colour.
Actually bringing out the water container can be quite a hassle on its own.
The paper we painted on wasn’t the best for watercolour. She mentioned that using actual watercolour paper would be best as it would be easier to paint on.
PRO TIP: if you have a frayed paintbrush, don’t throw it away, it can still be used! Dip your brush in hot water, and it will solve itself out. Soon enough, your brush tips will return back to normal 🙂
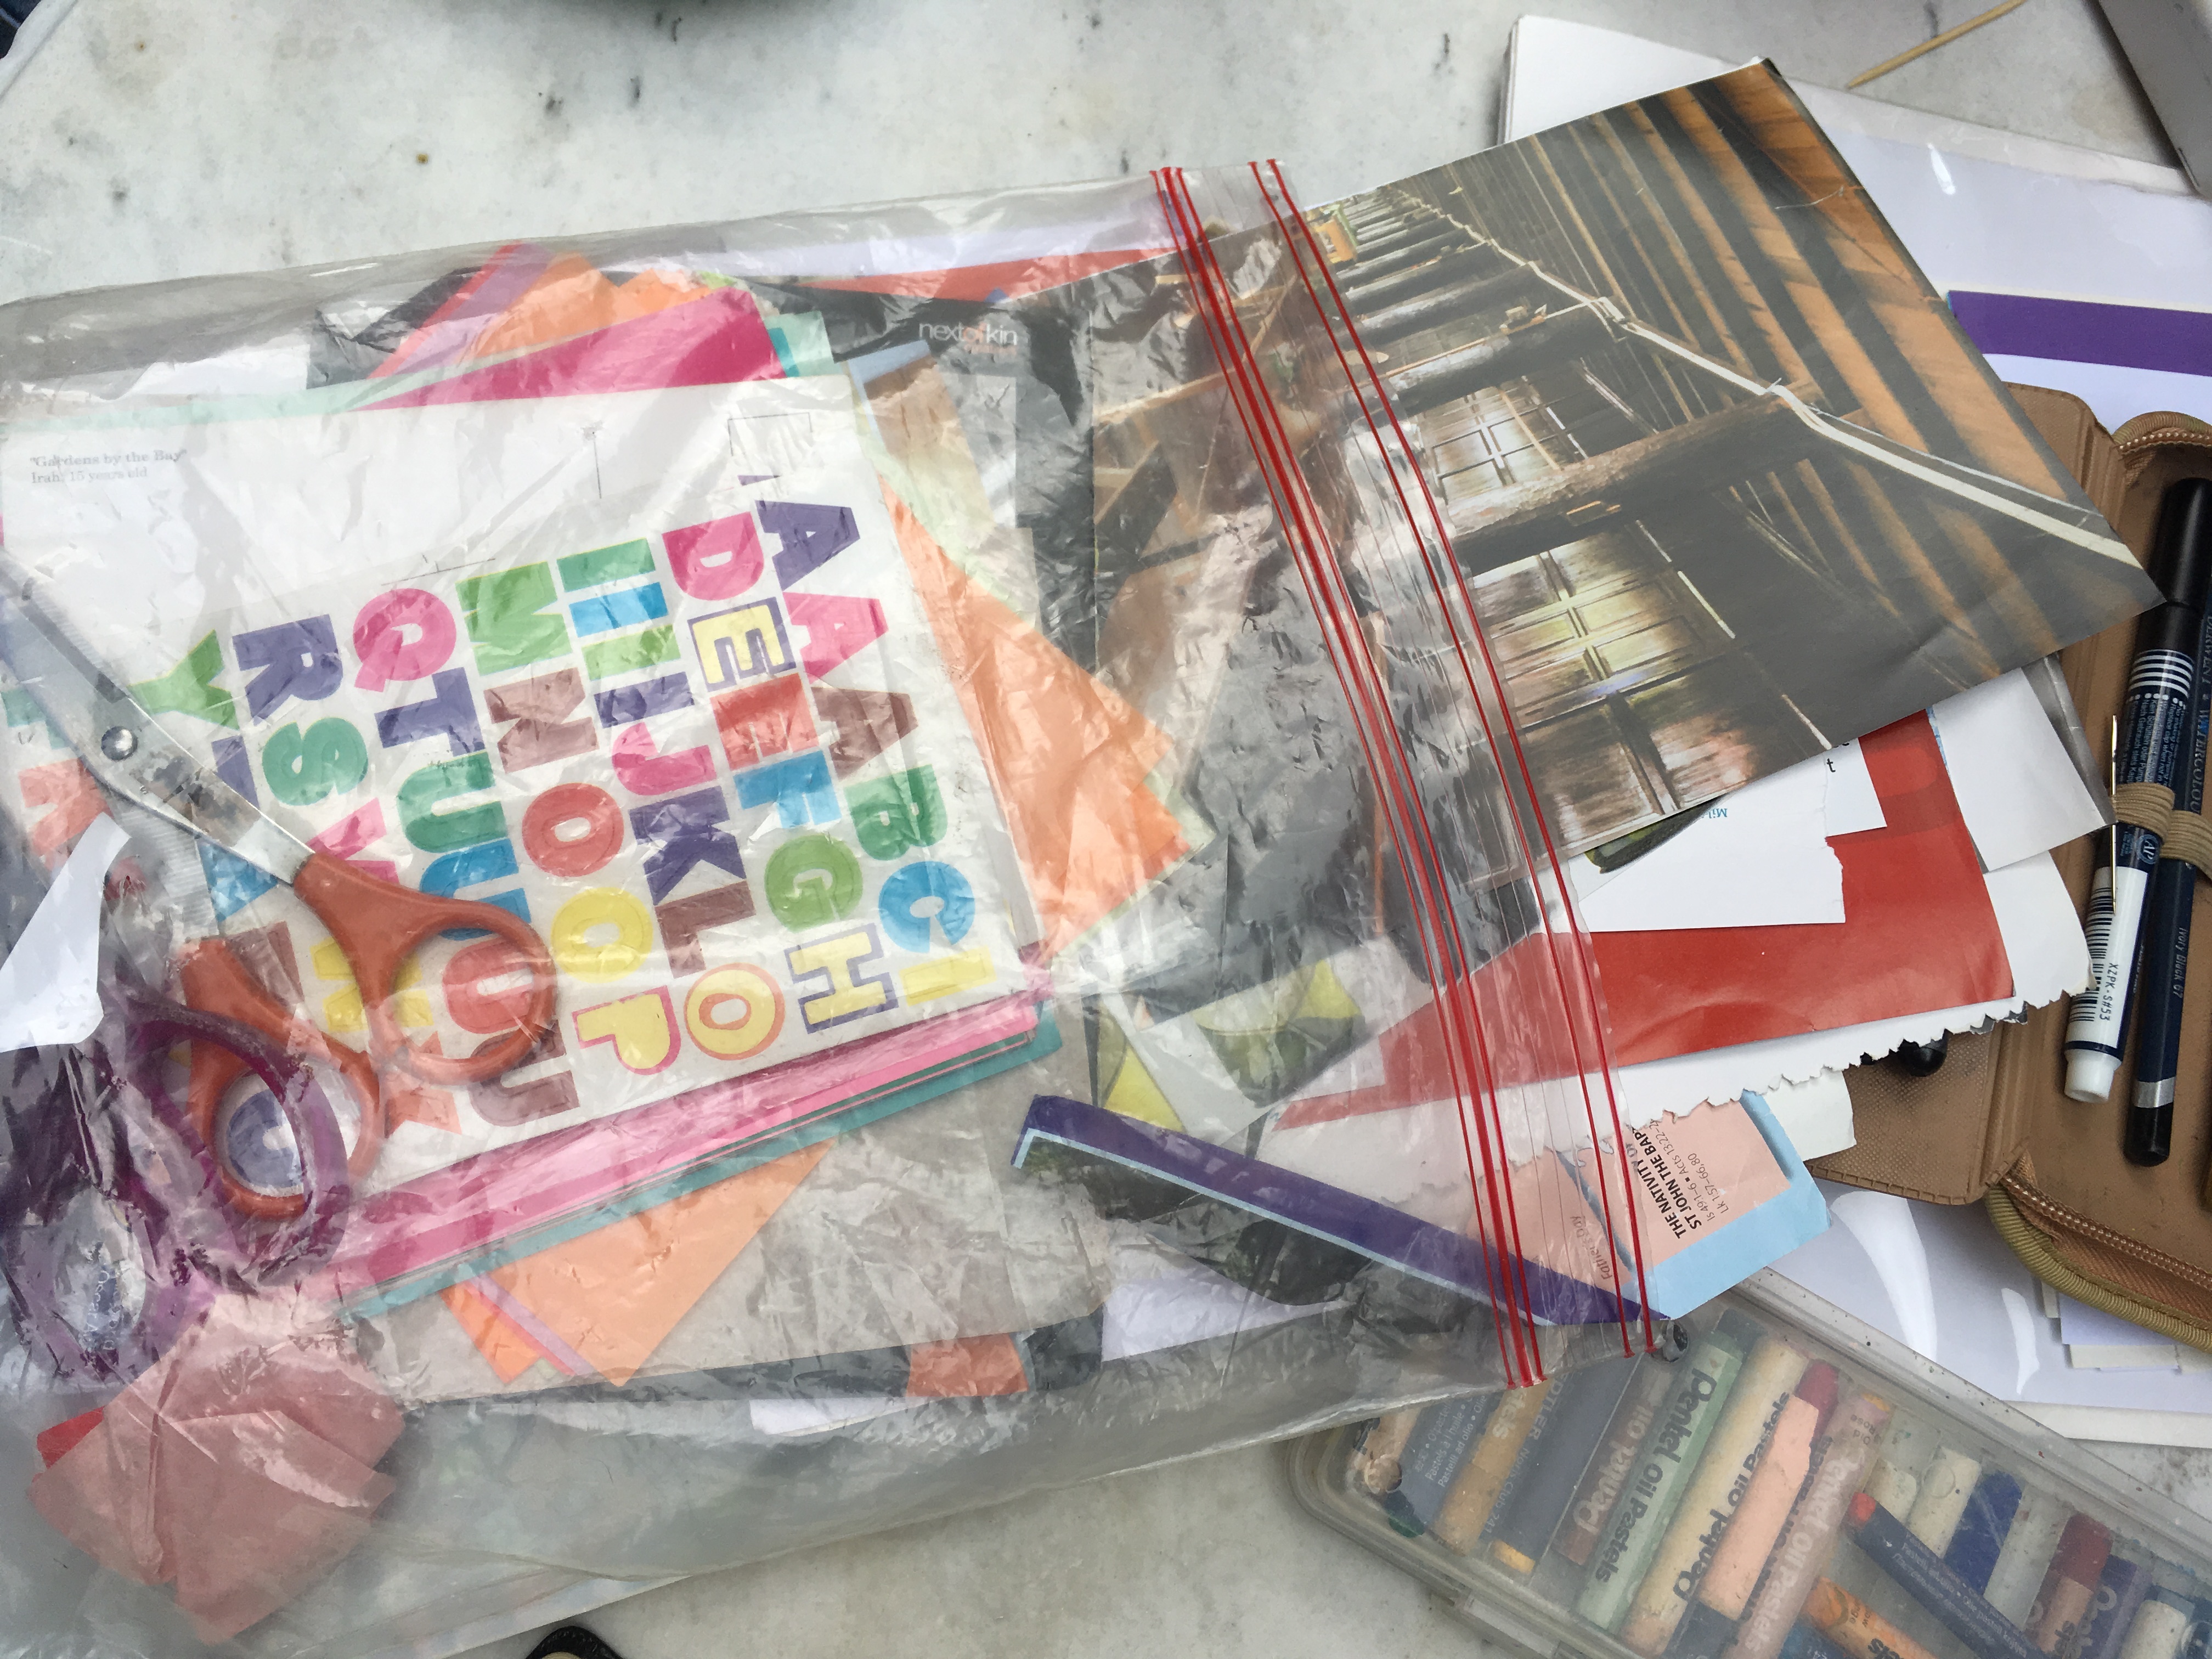
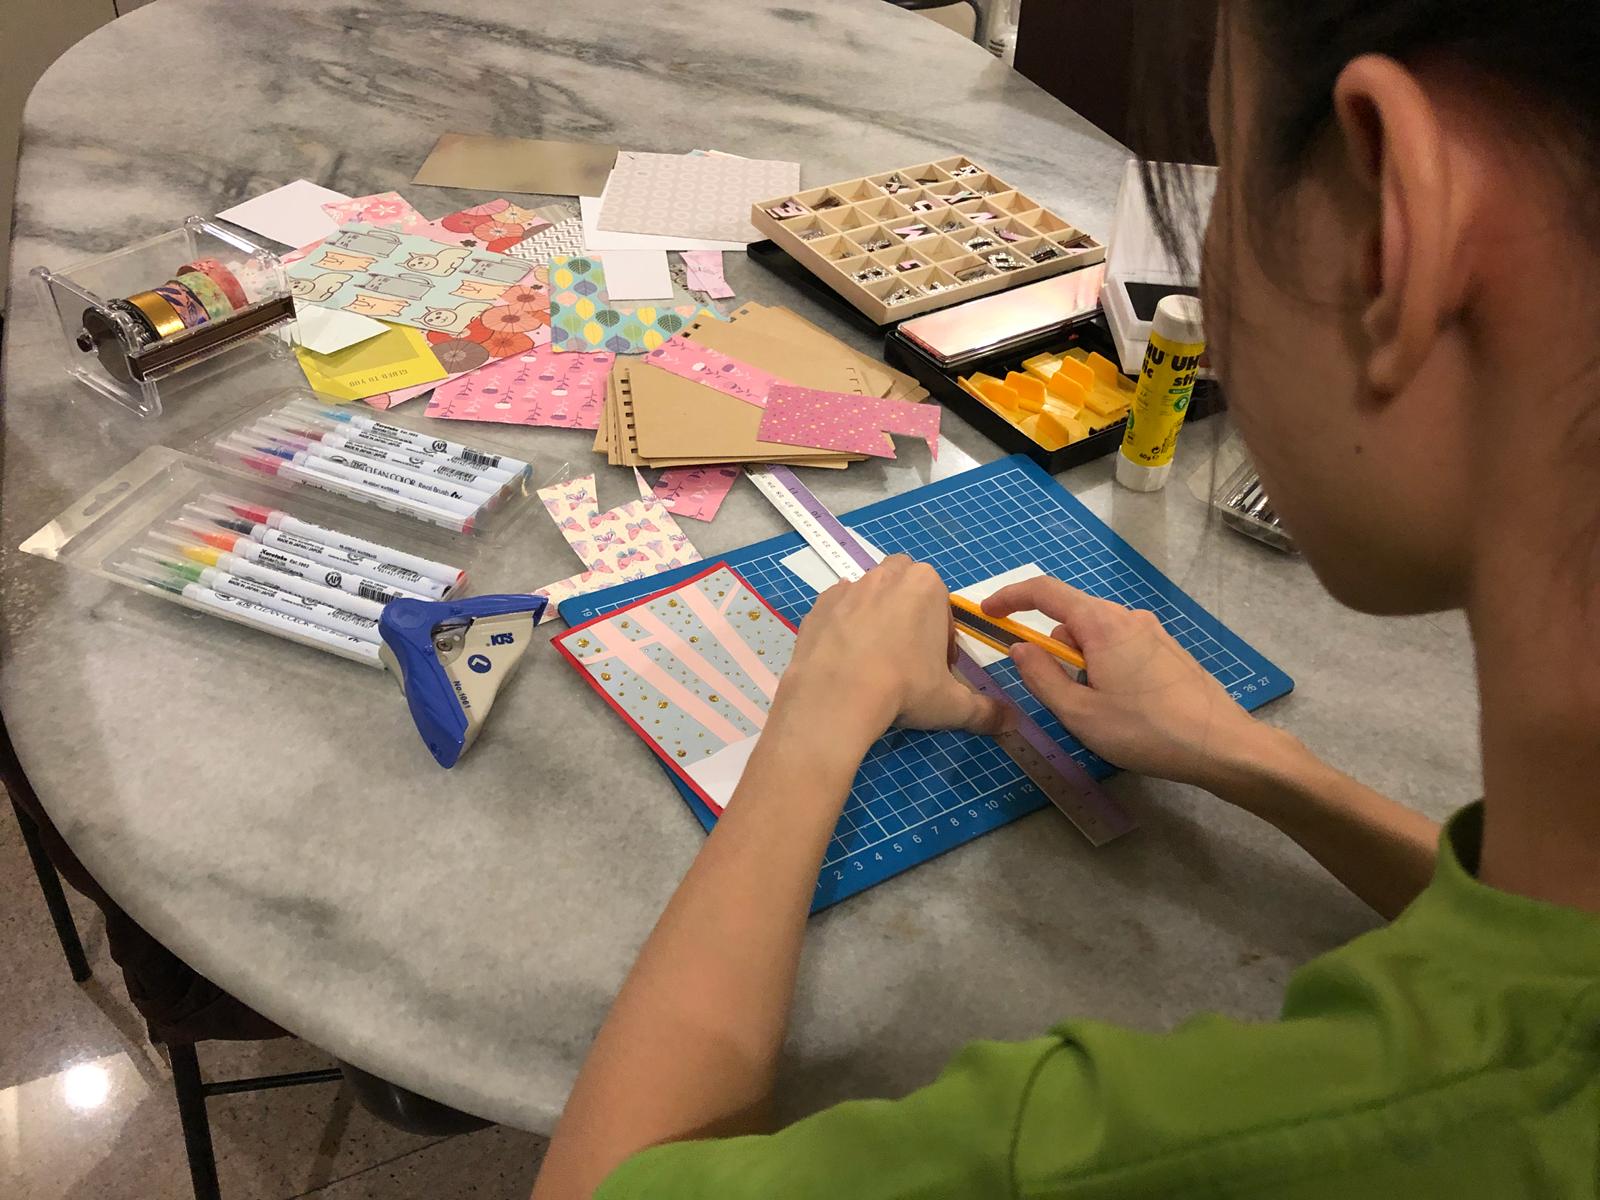
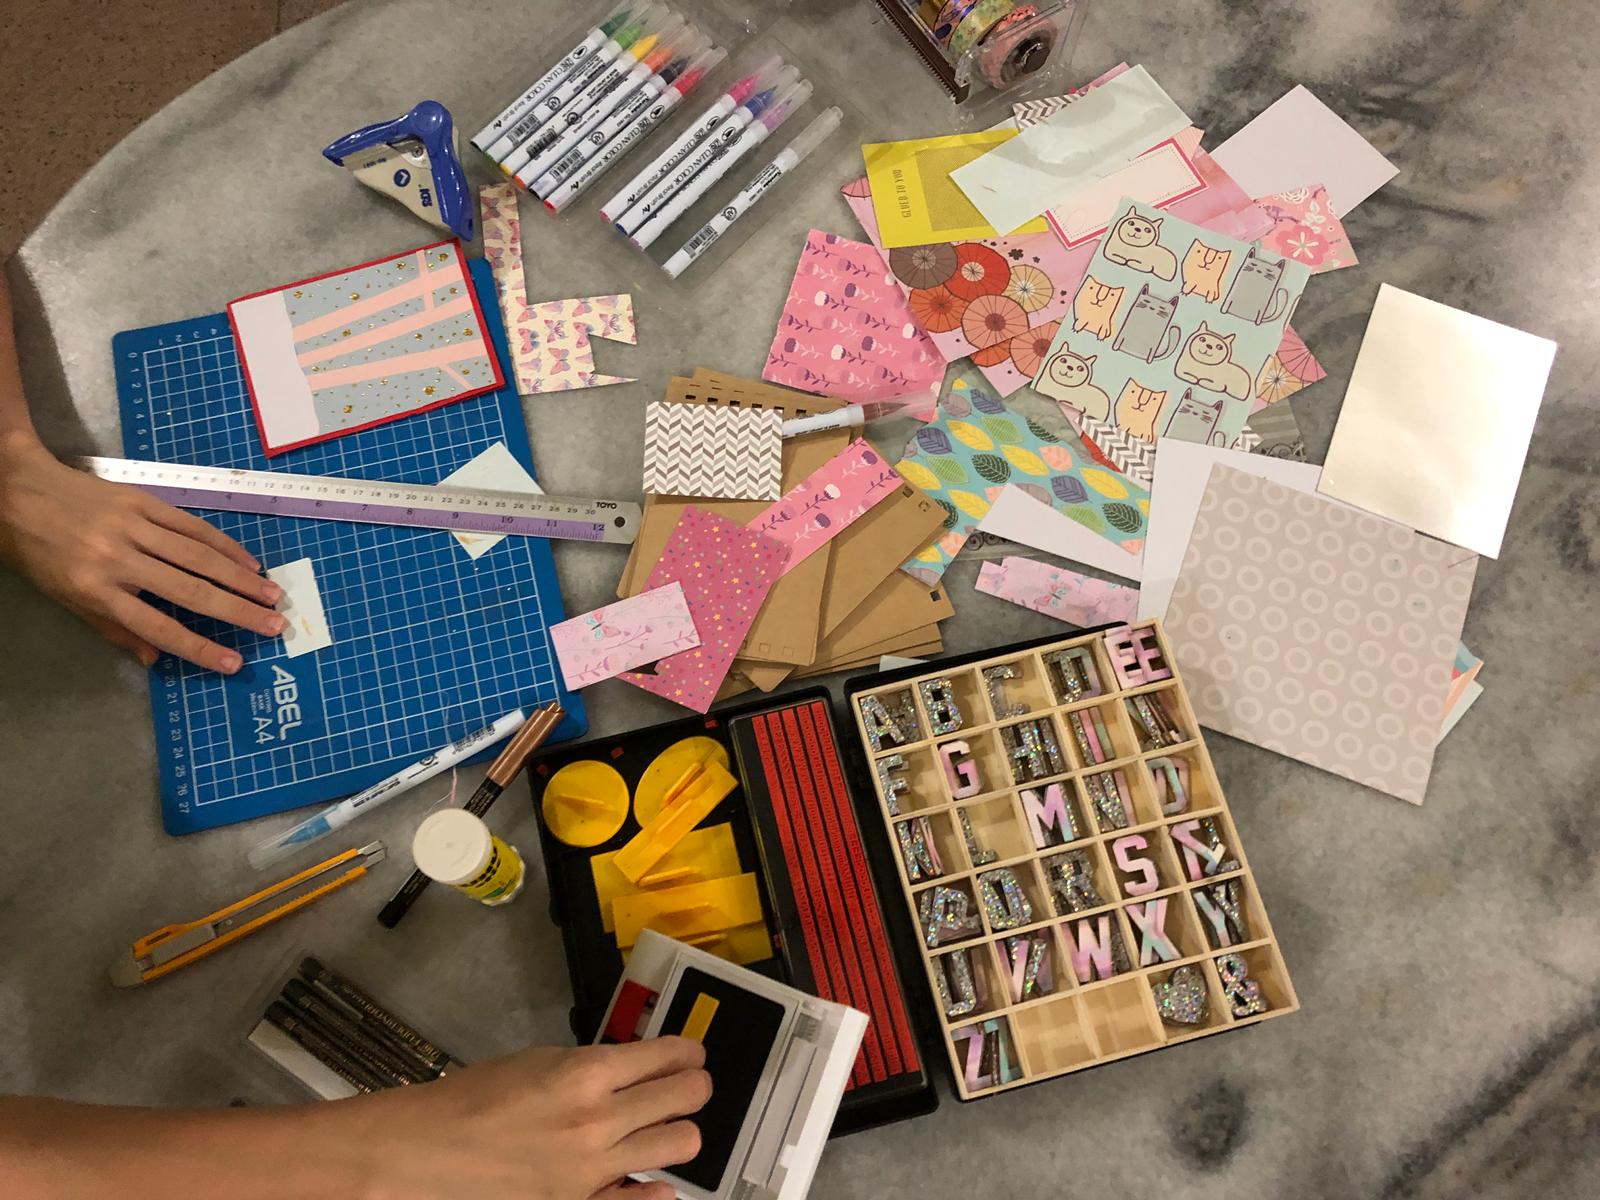
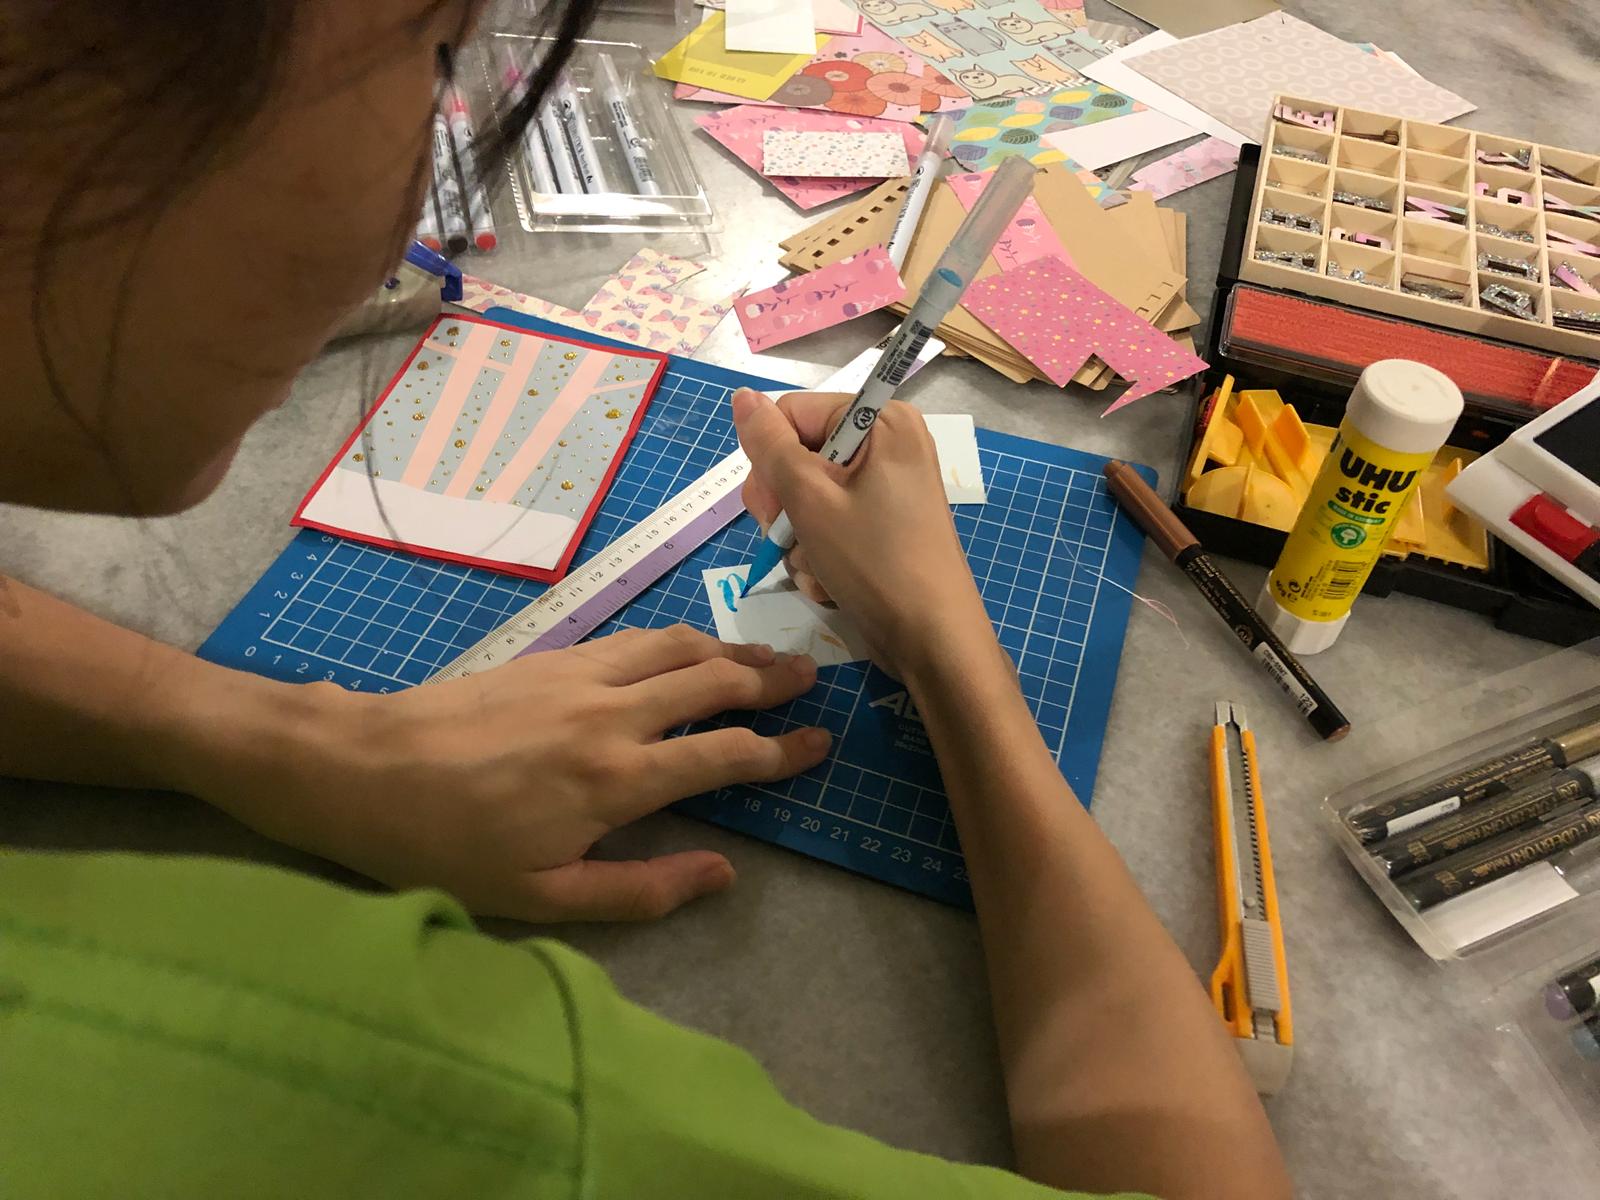
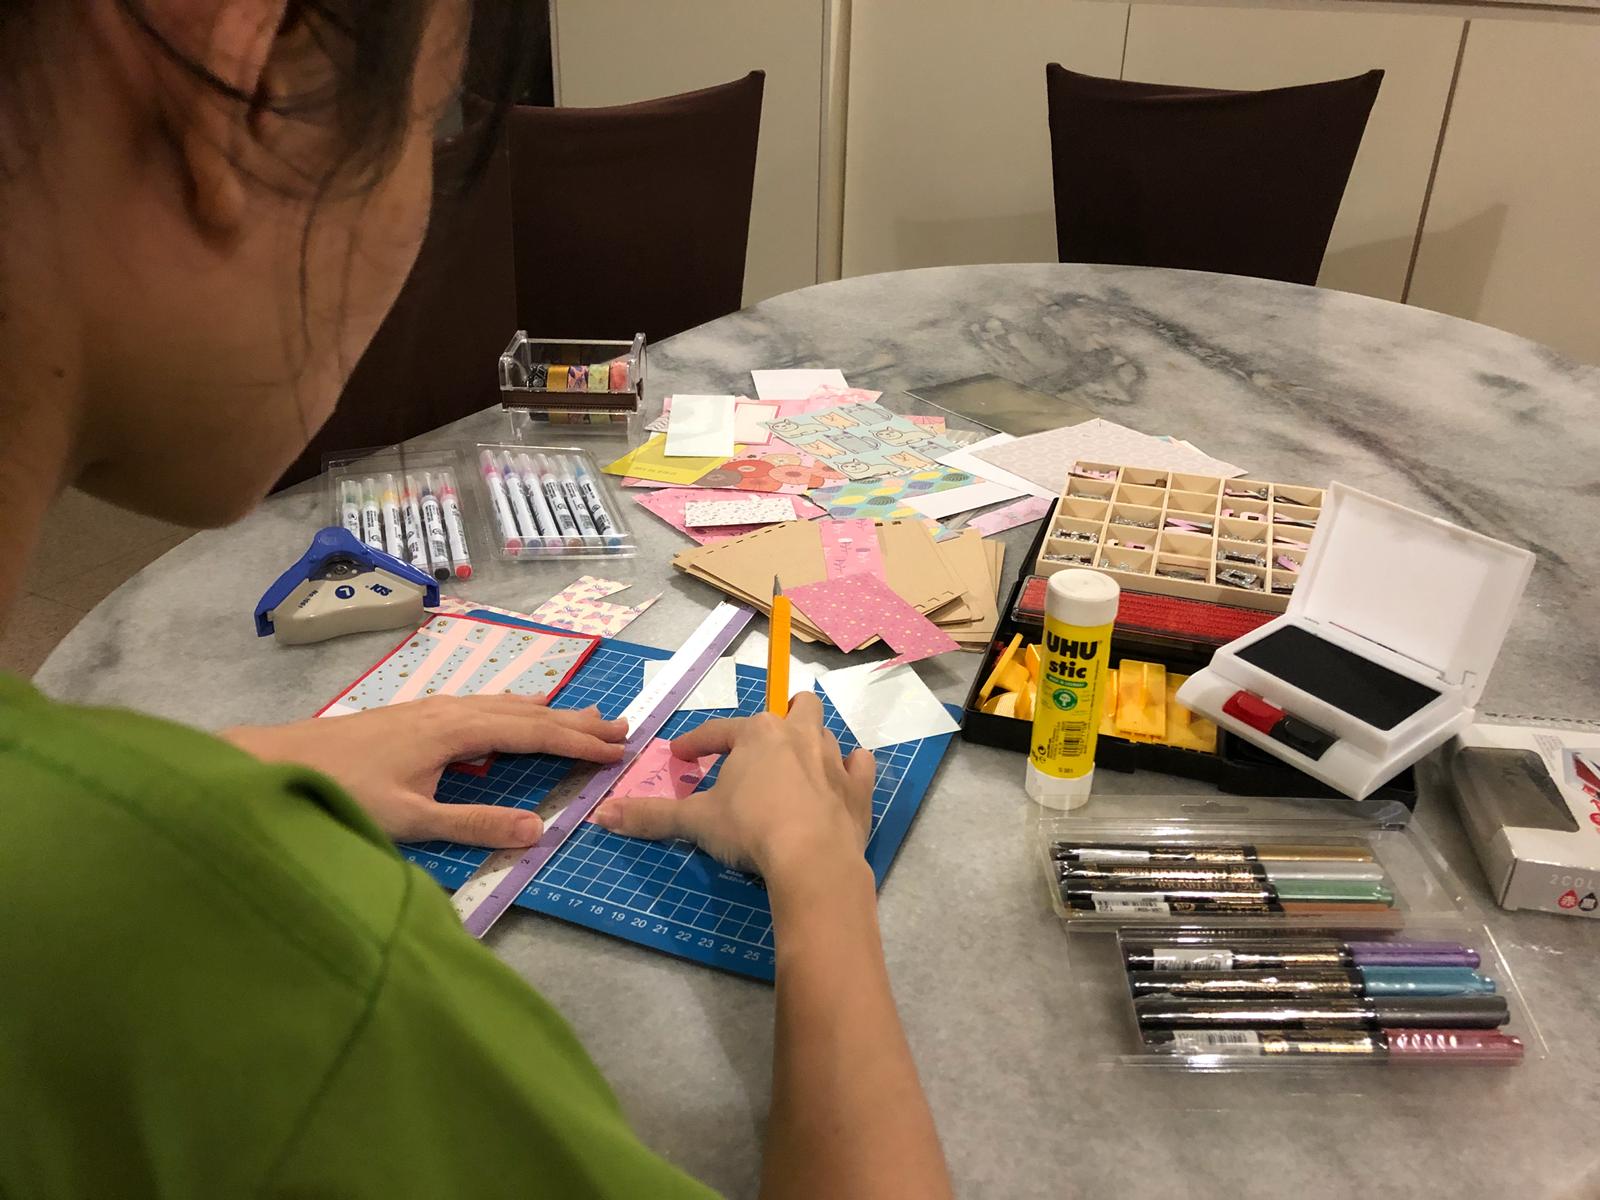
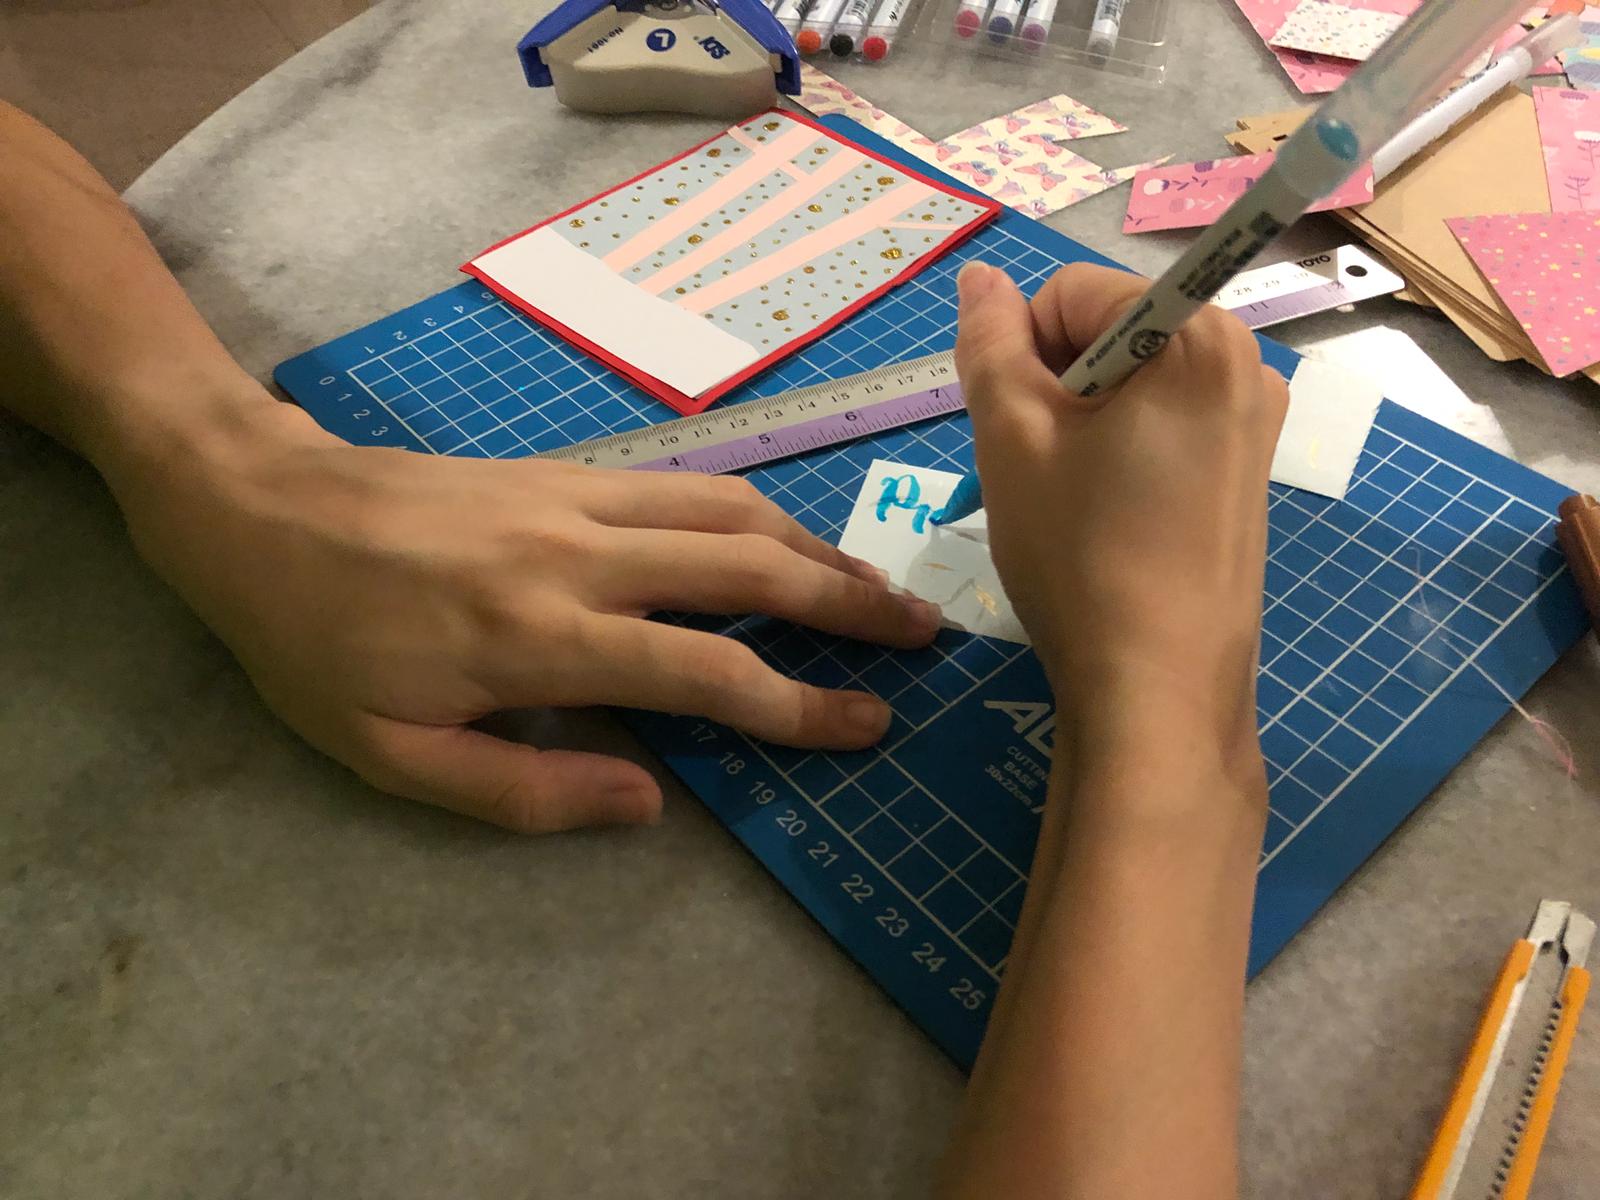
Tools: Paper cutting board Ruler Pen knife Scissors Coloured markers Glue Various decorative materials such as patterned tapes, alphabet & craft stickers, craft papers, stamps
Practice documentation: My friend makes interactive greeting cards for special occasions. According to her, one simple A5 card with 3 faces usually takes 6 to 7 hours as she has to make each part individually before sticking them all together on the main piece, and every single piece has to be cut to precision or the interactive aspect would not turn out working.