Cultural Probe: Design and Findings – Teo Zi Lin

Design probes (concept)

Inspired by Kevin Chiam, who designed and invented kitchenware to allow the blind and visually impaired to cook safely (read more here: https://www.channelnewsasia.com/news/cnainsider/designer-folks-kevin-chiam-invents-kitchen-products-blind-10762318), I decided to come up with a scrapbooking template that allows the blind to write and make their own gift cards. This will be based on my experience when I partook in the scrapbooking practice with my friend Elena.

Design probes (kit)

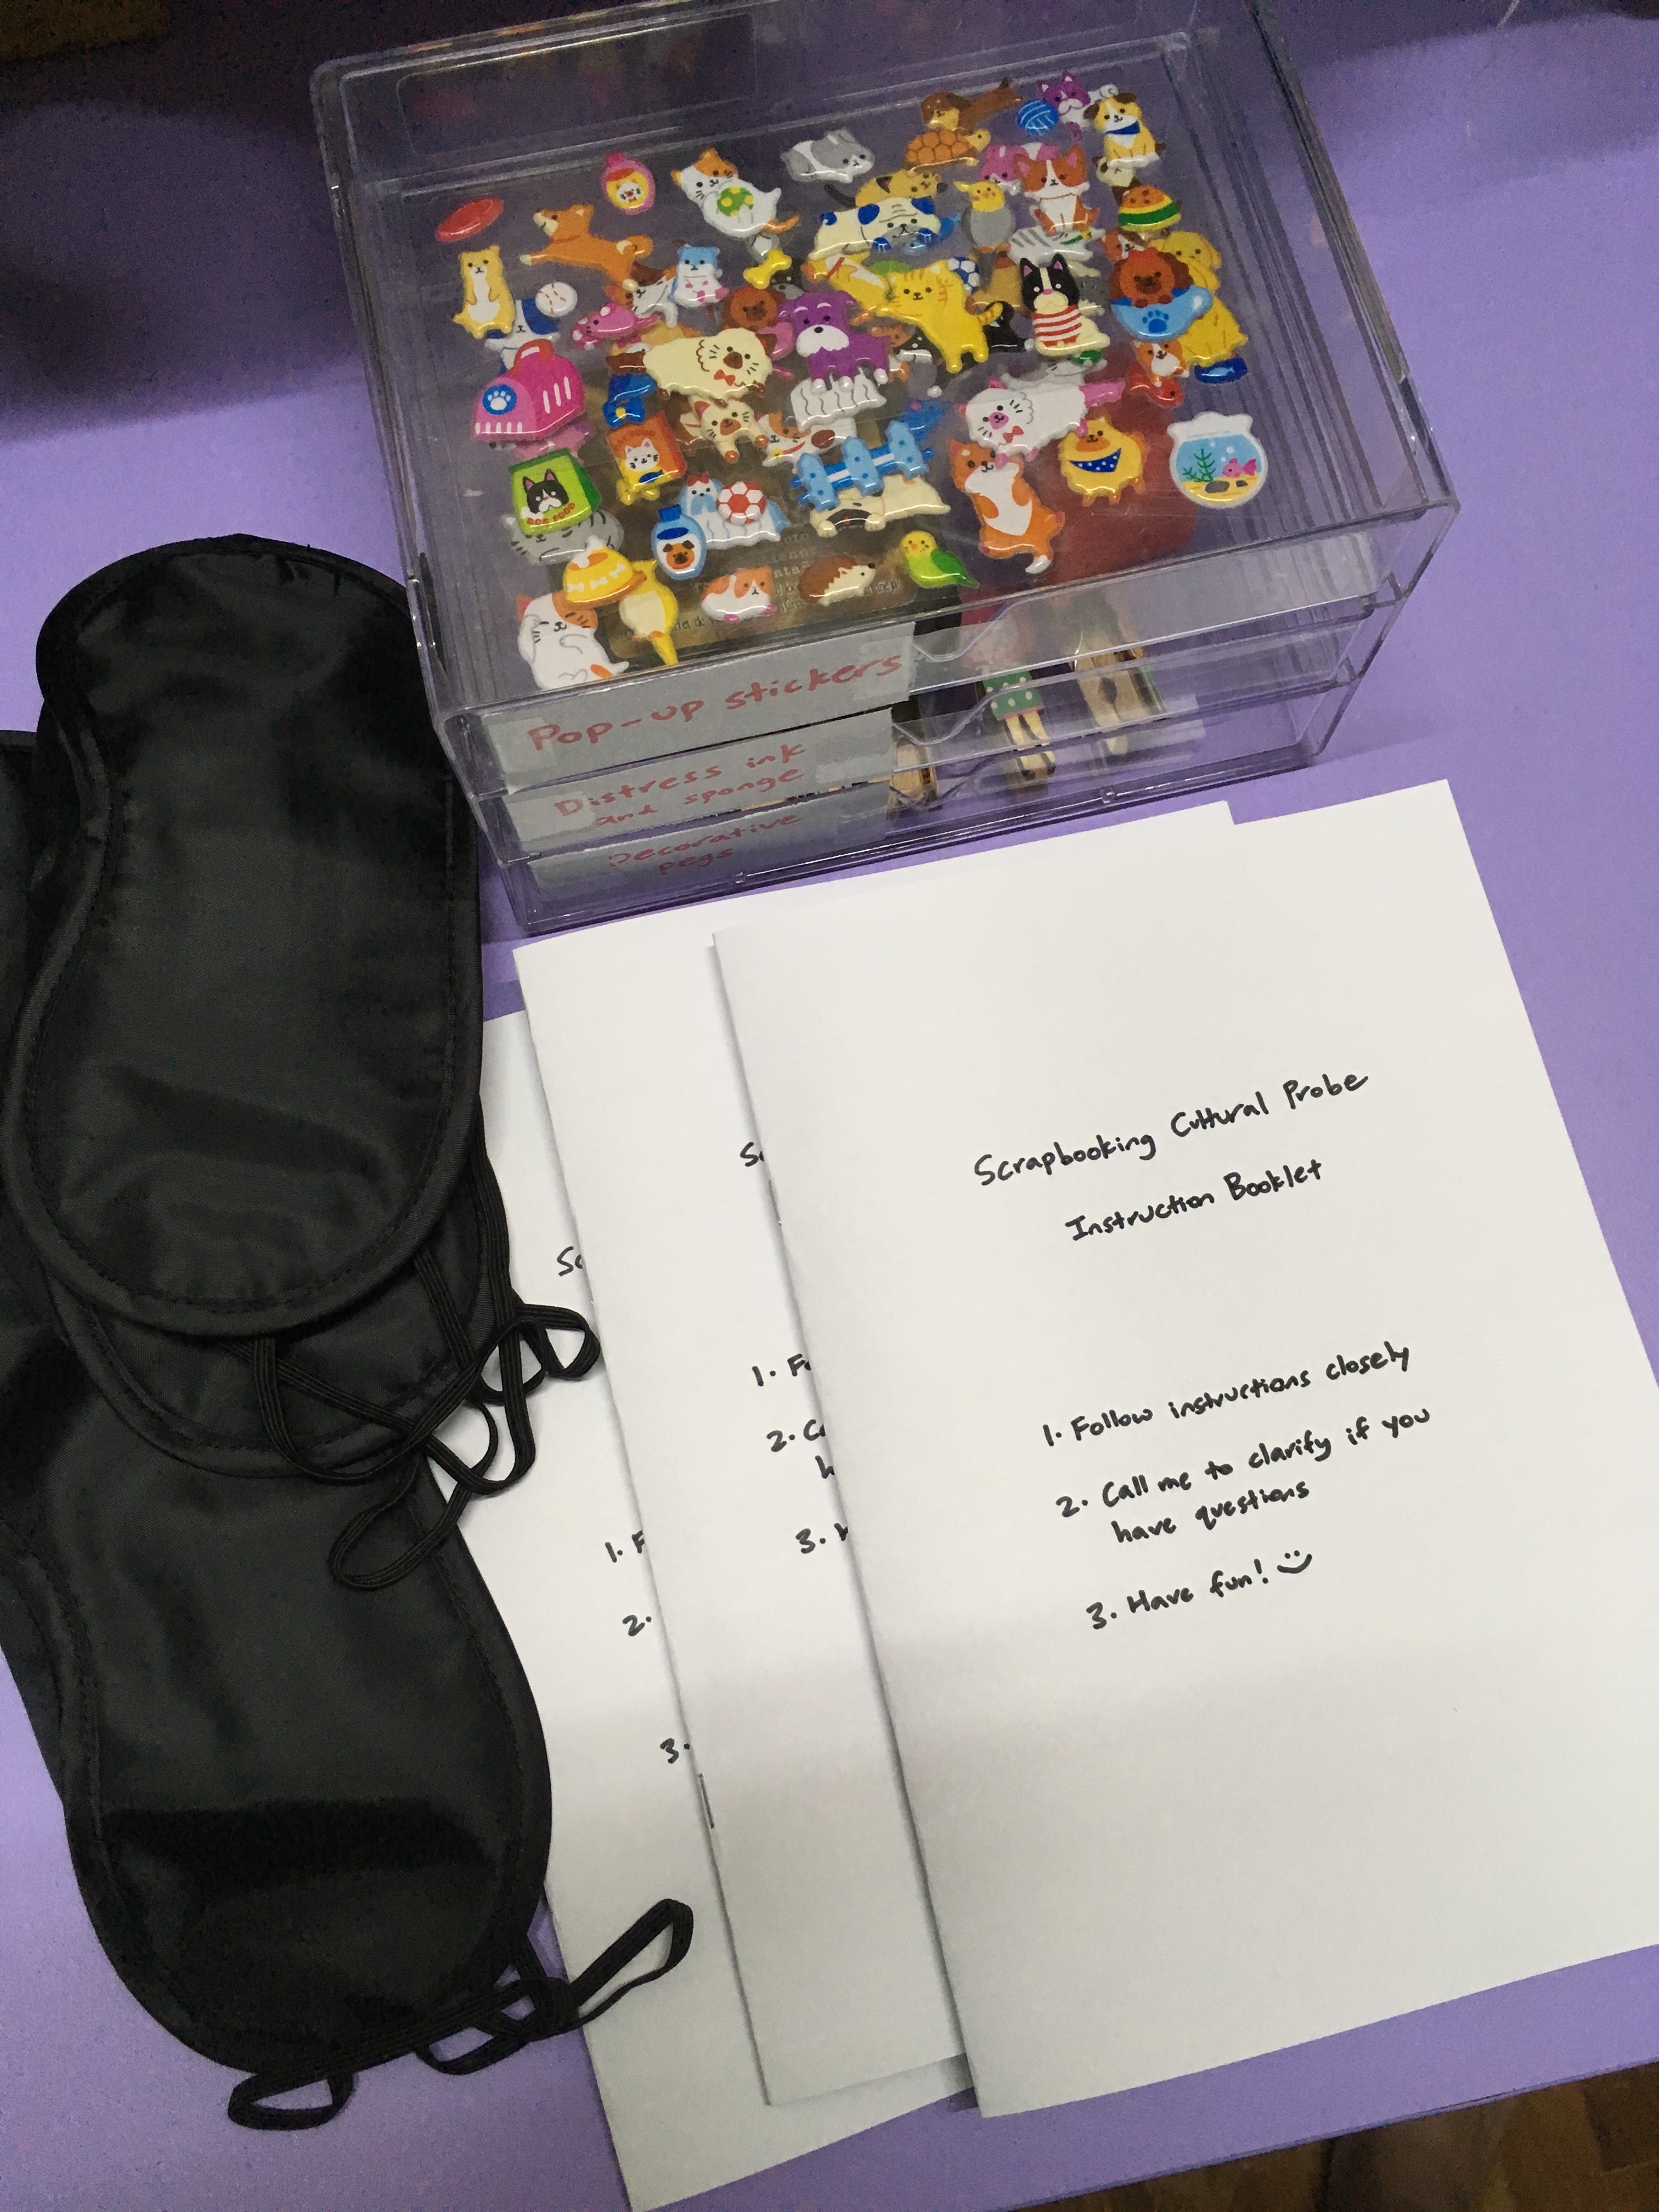
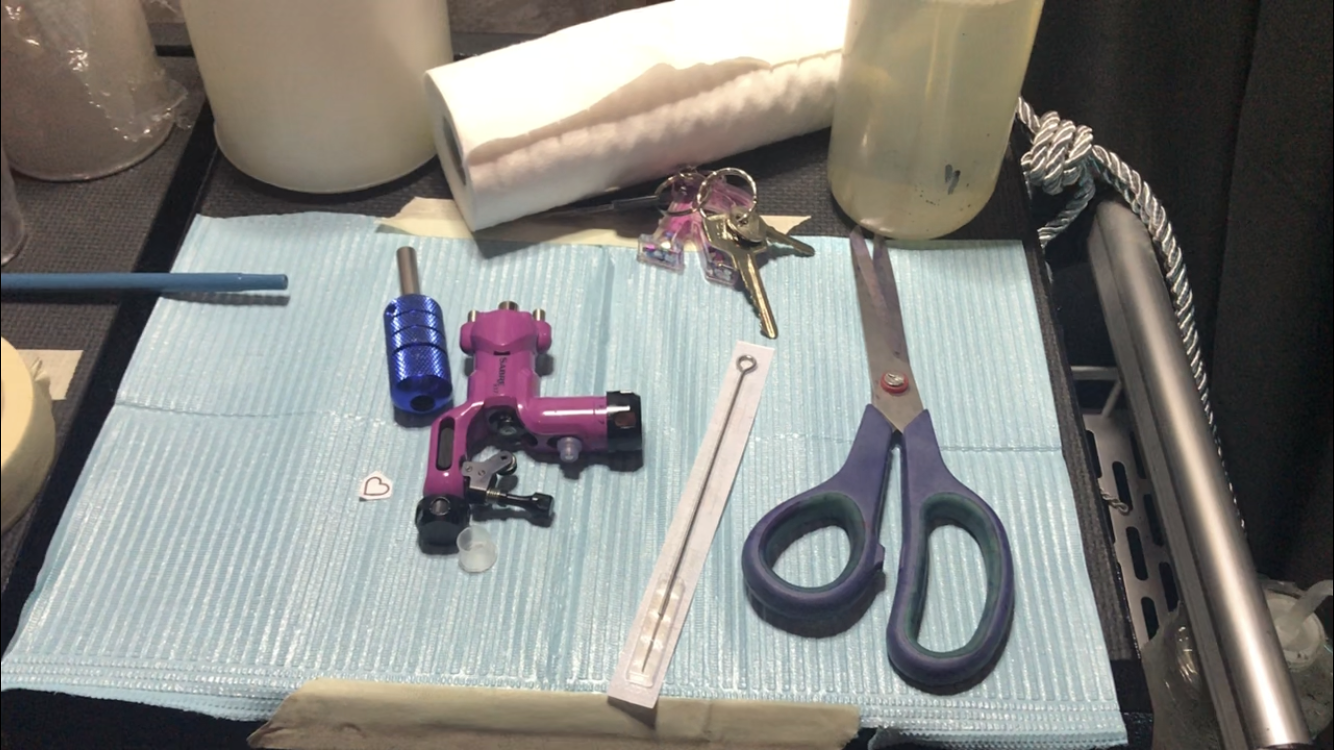
My probe kit includes the following items:

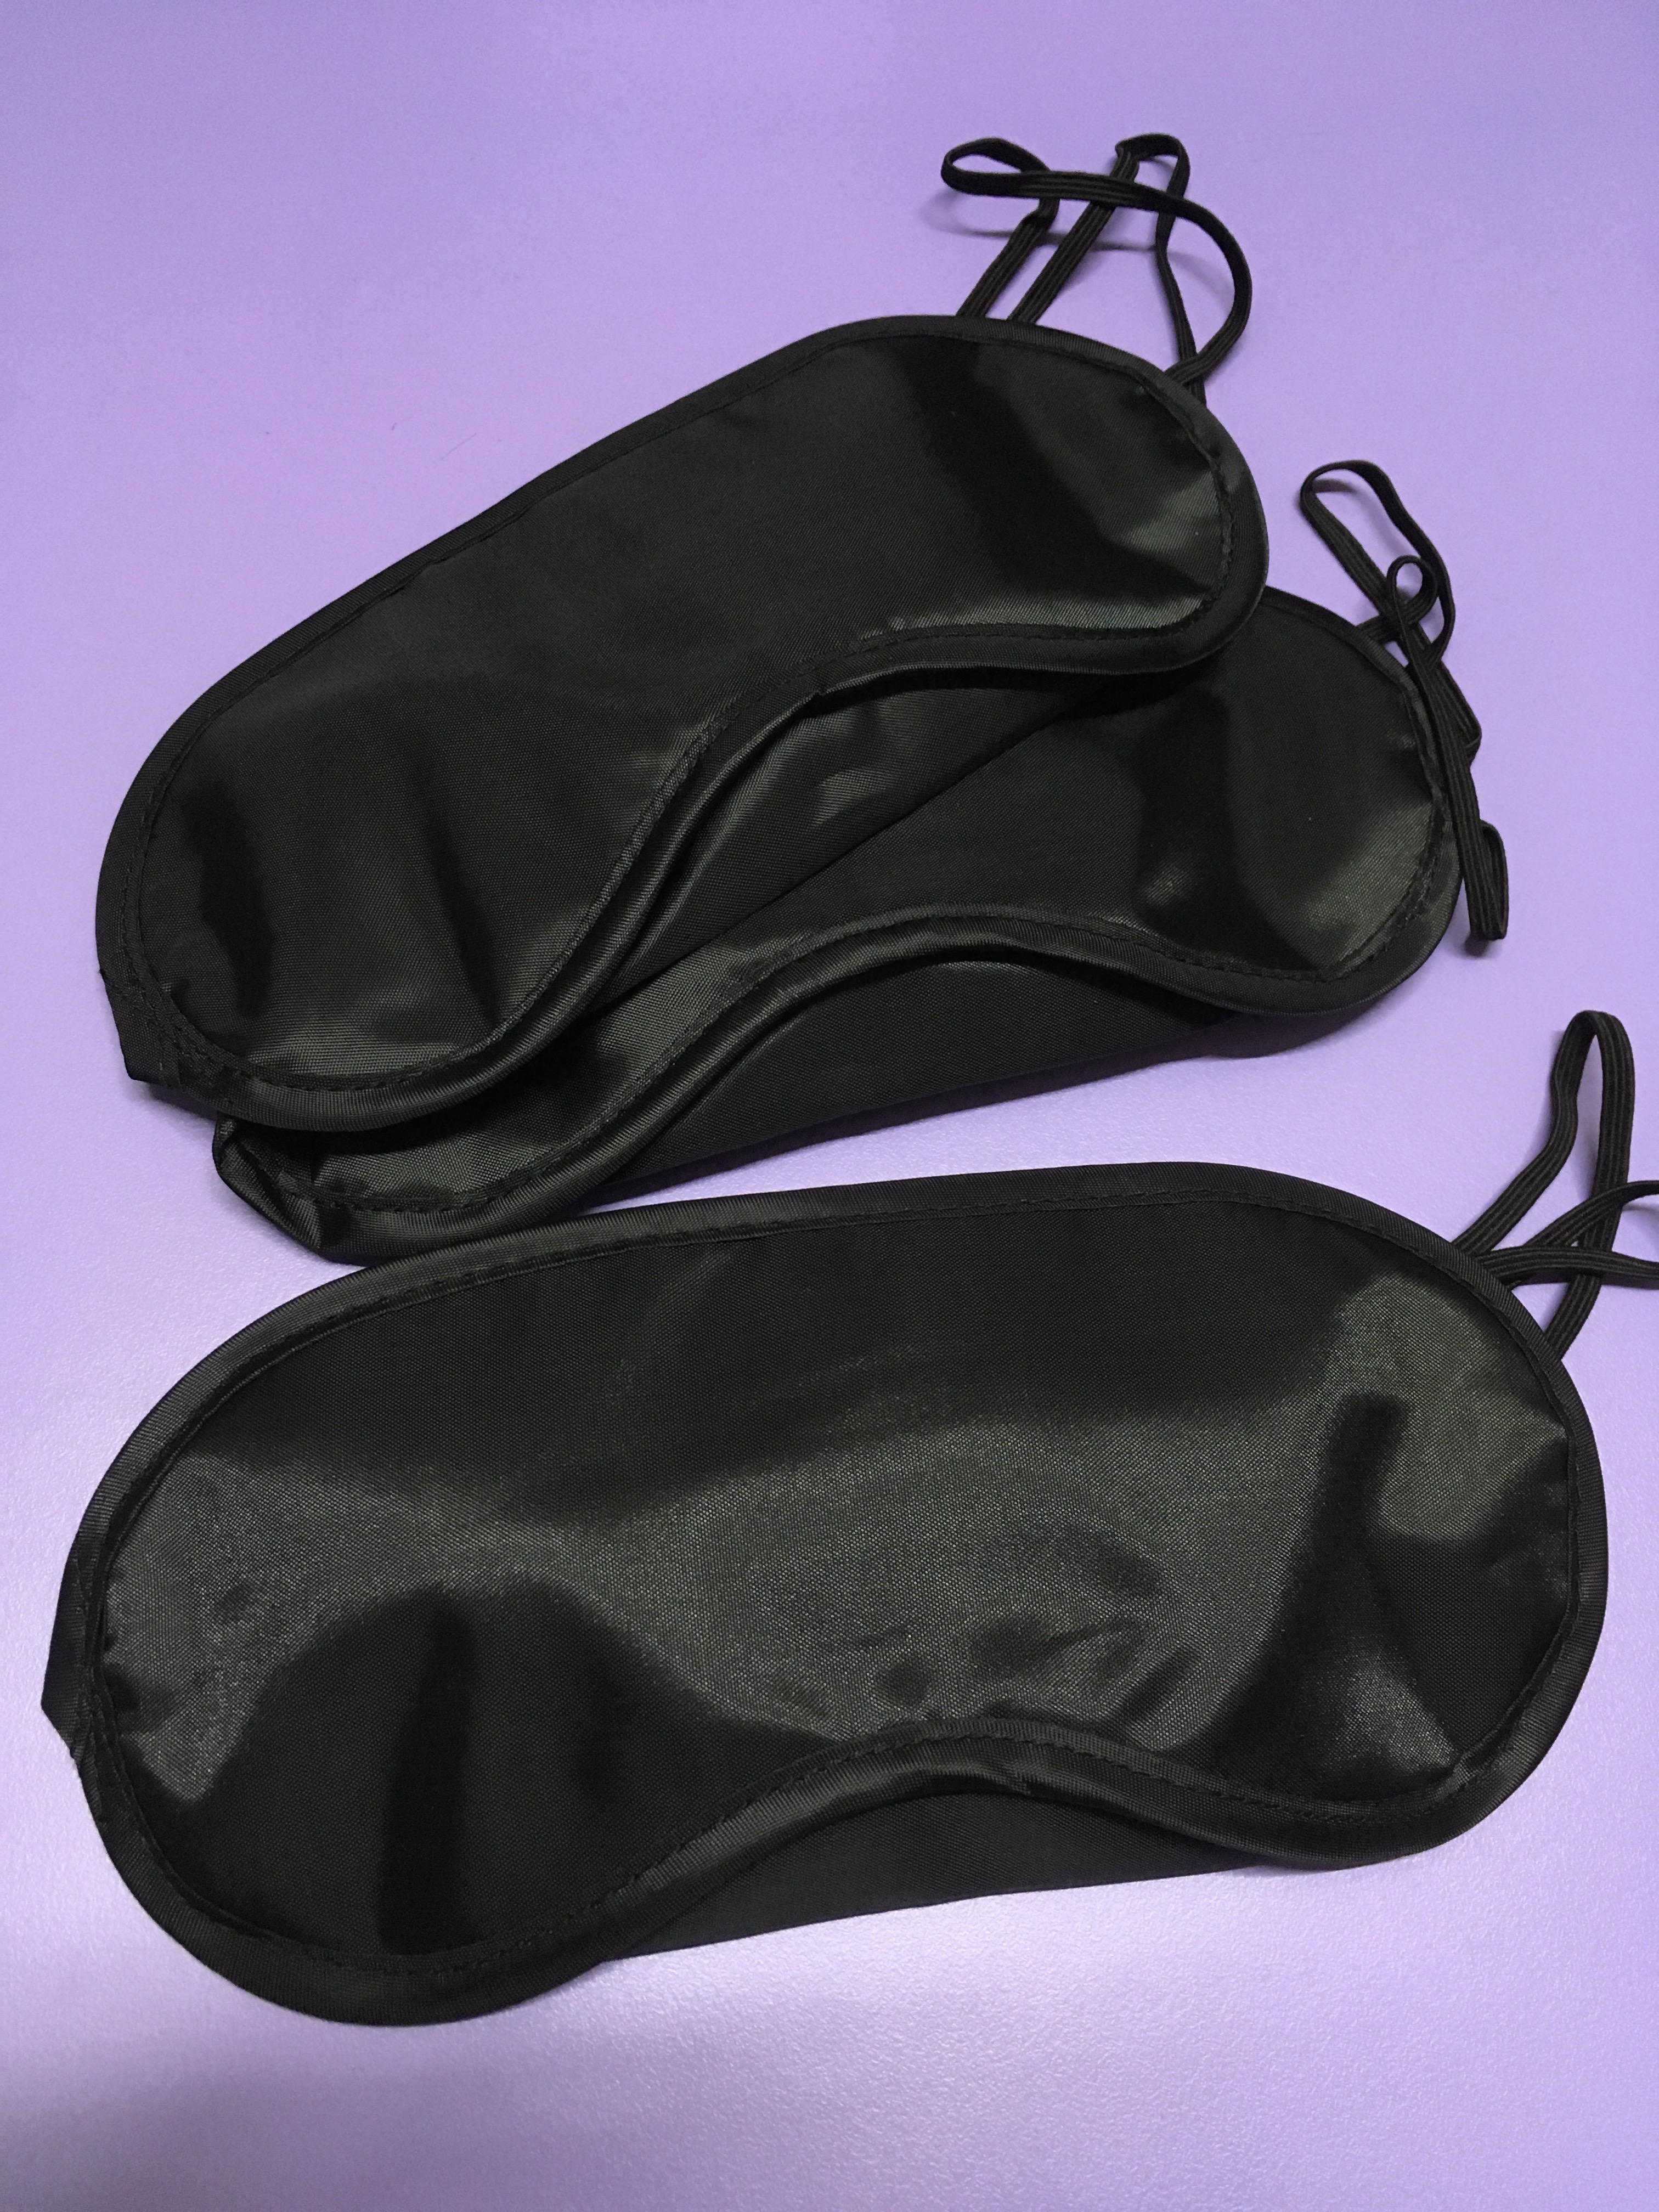
  1. Blindfold (to simulate blindness)

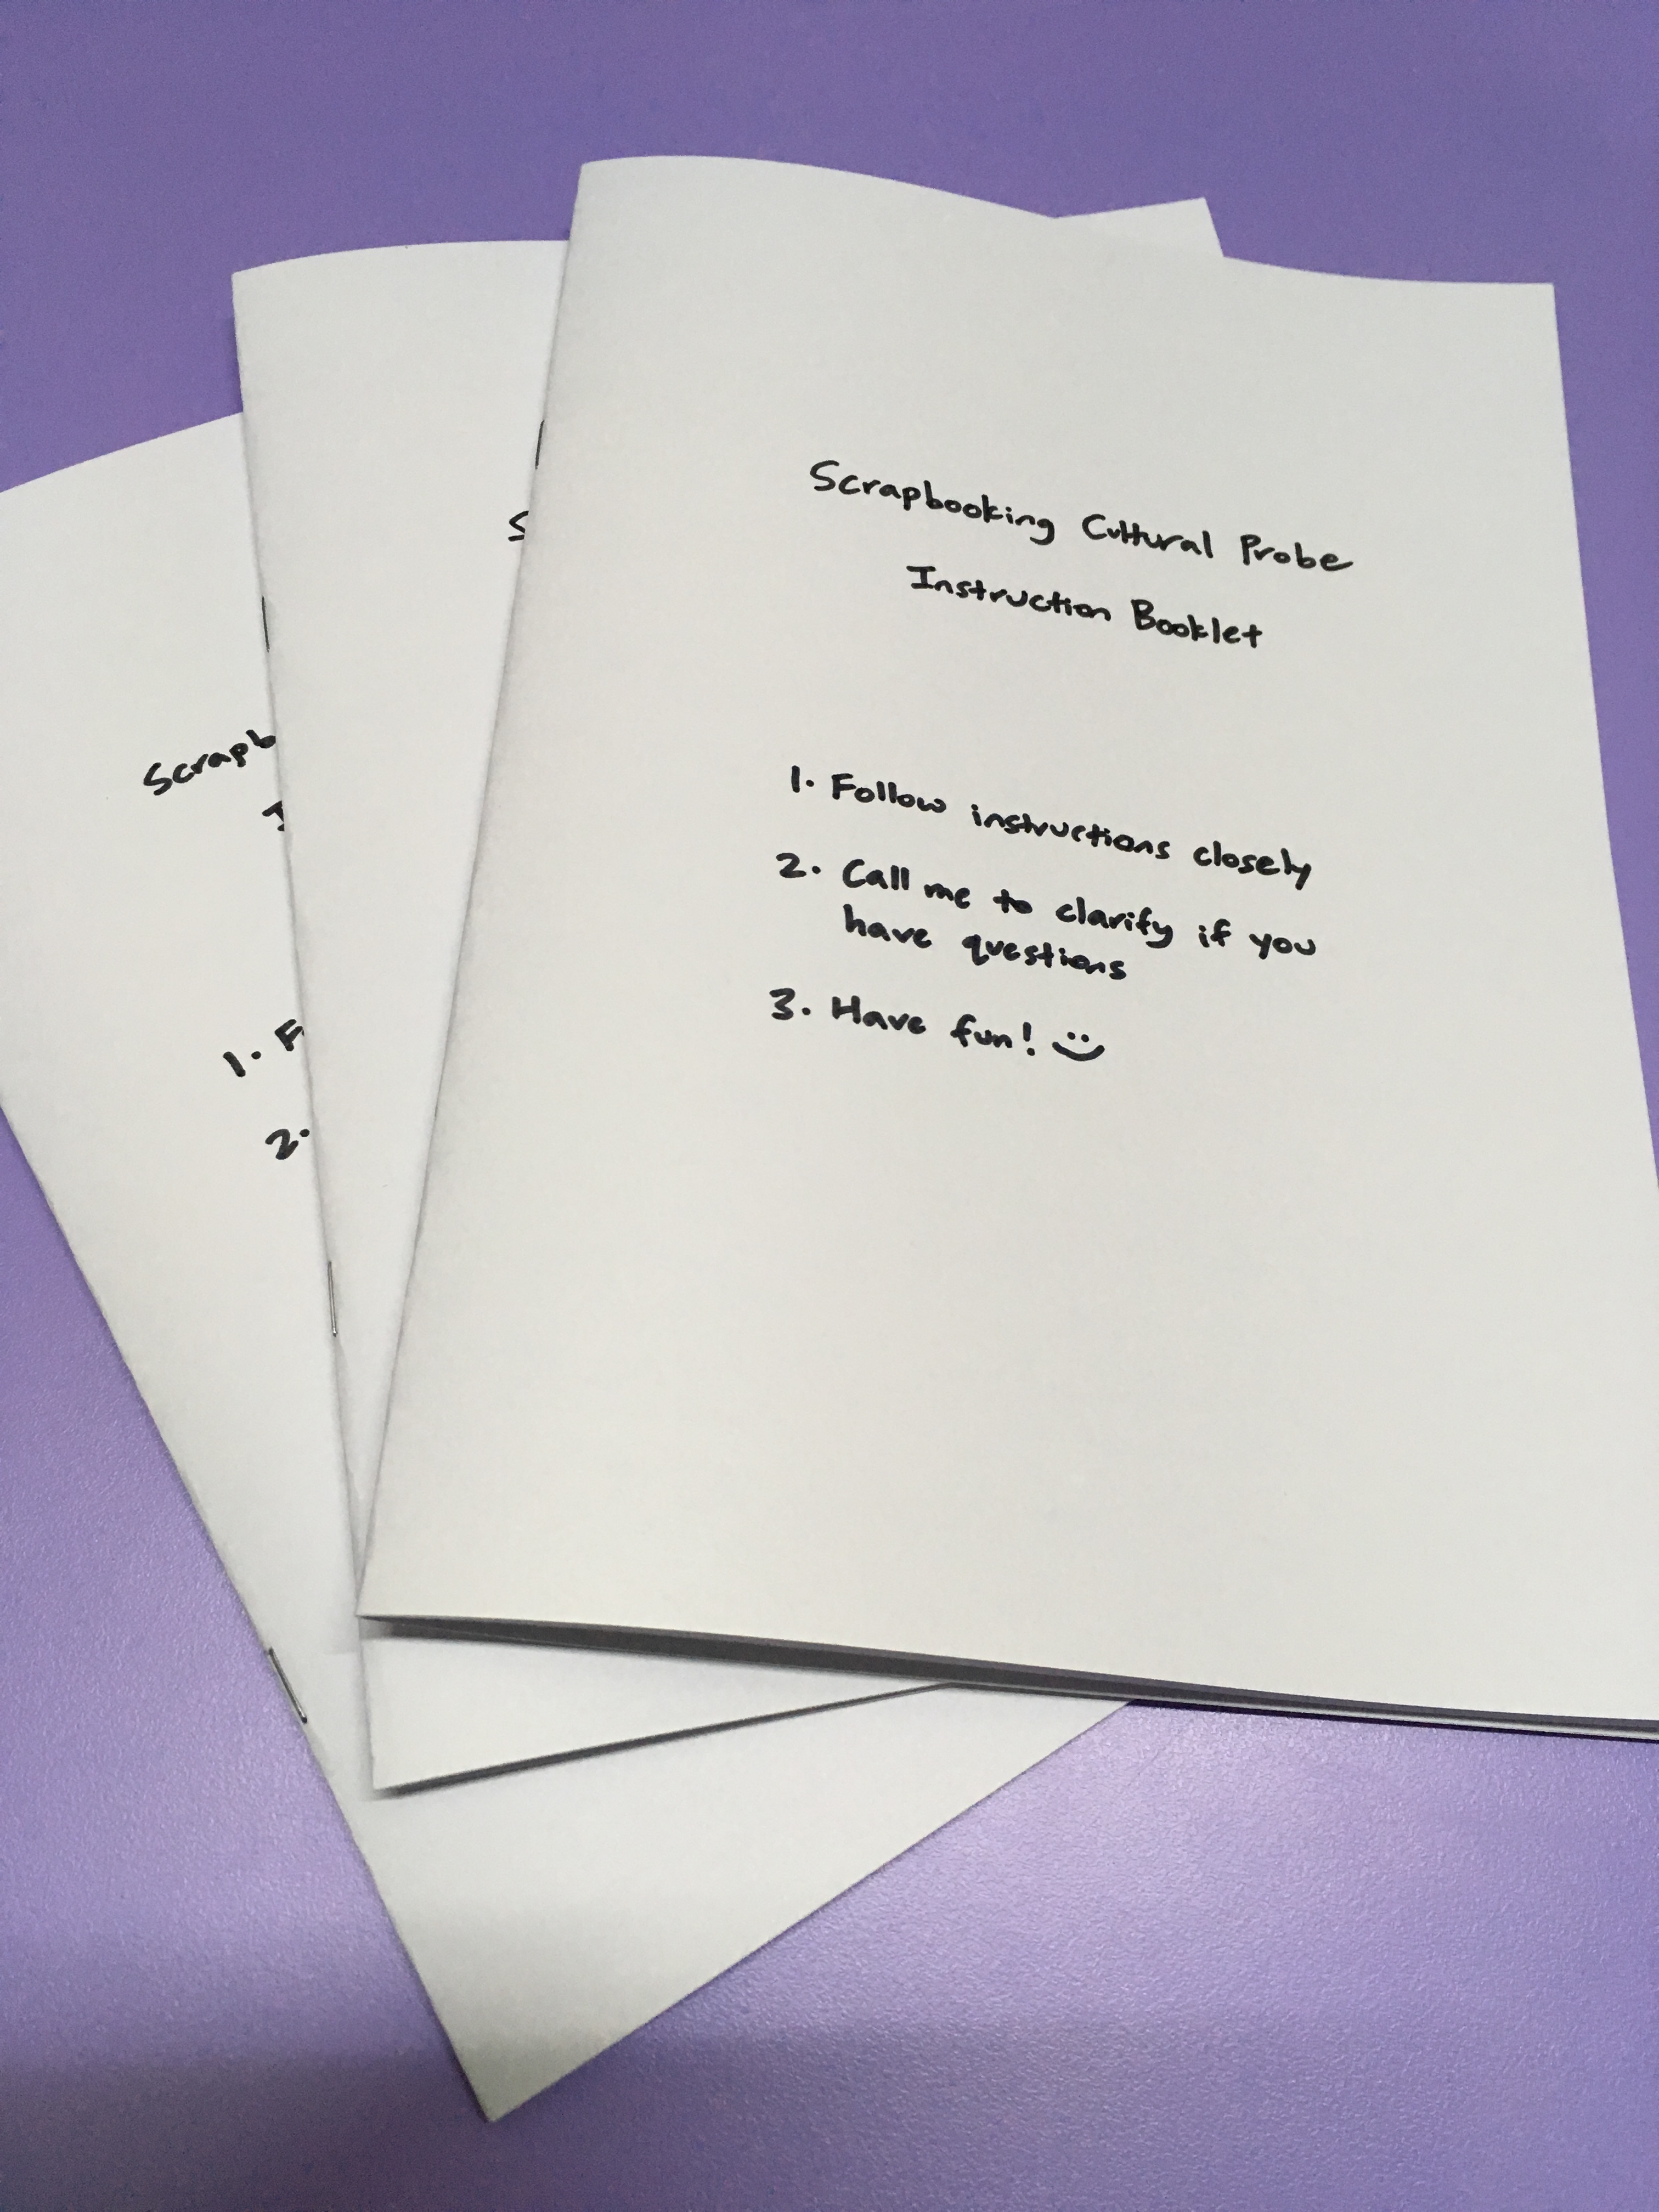
2. Instruction booklet with various tasks

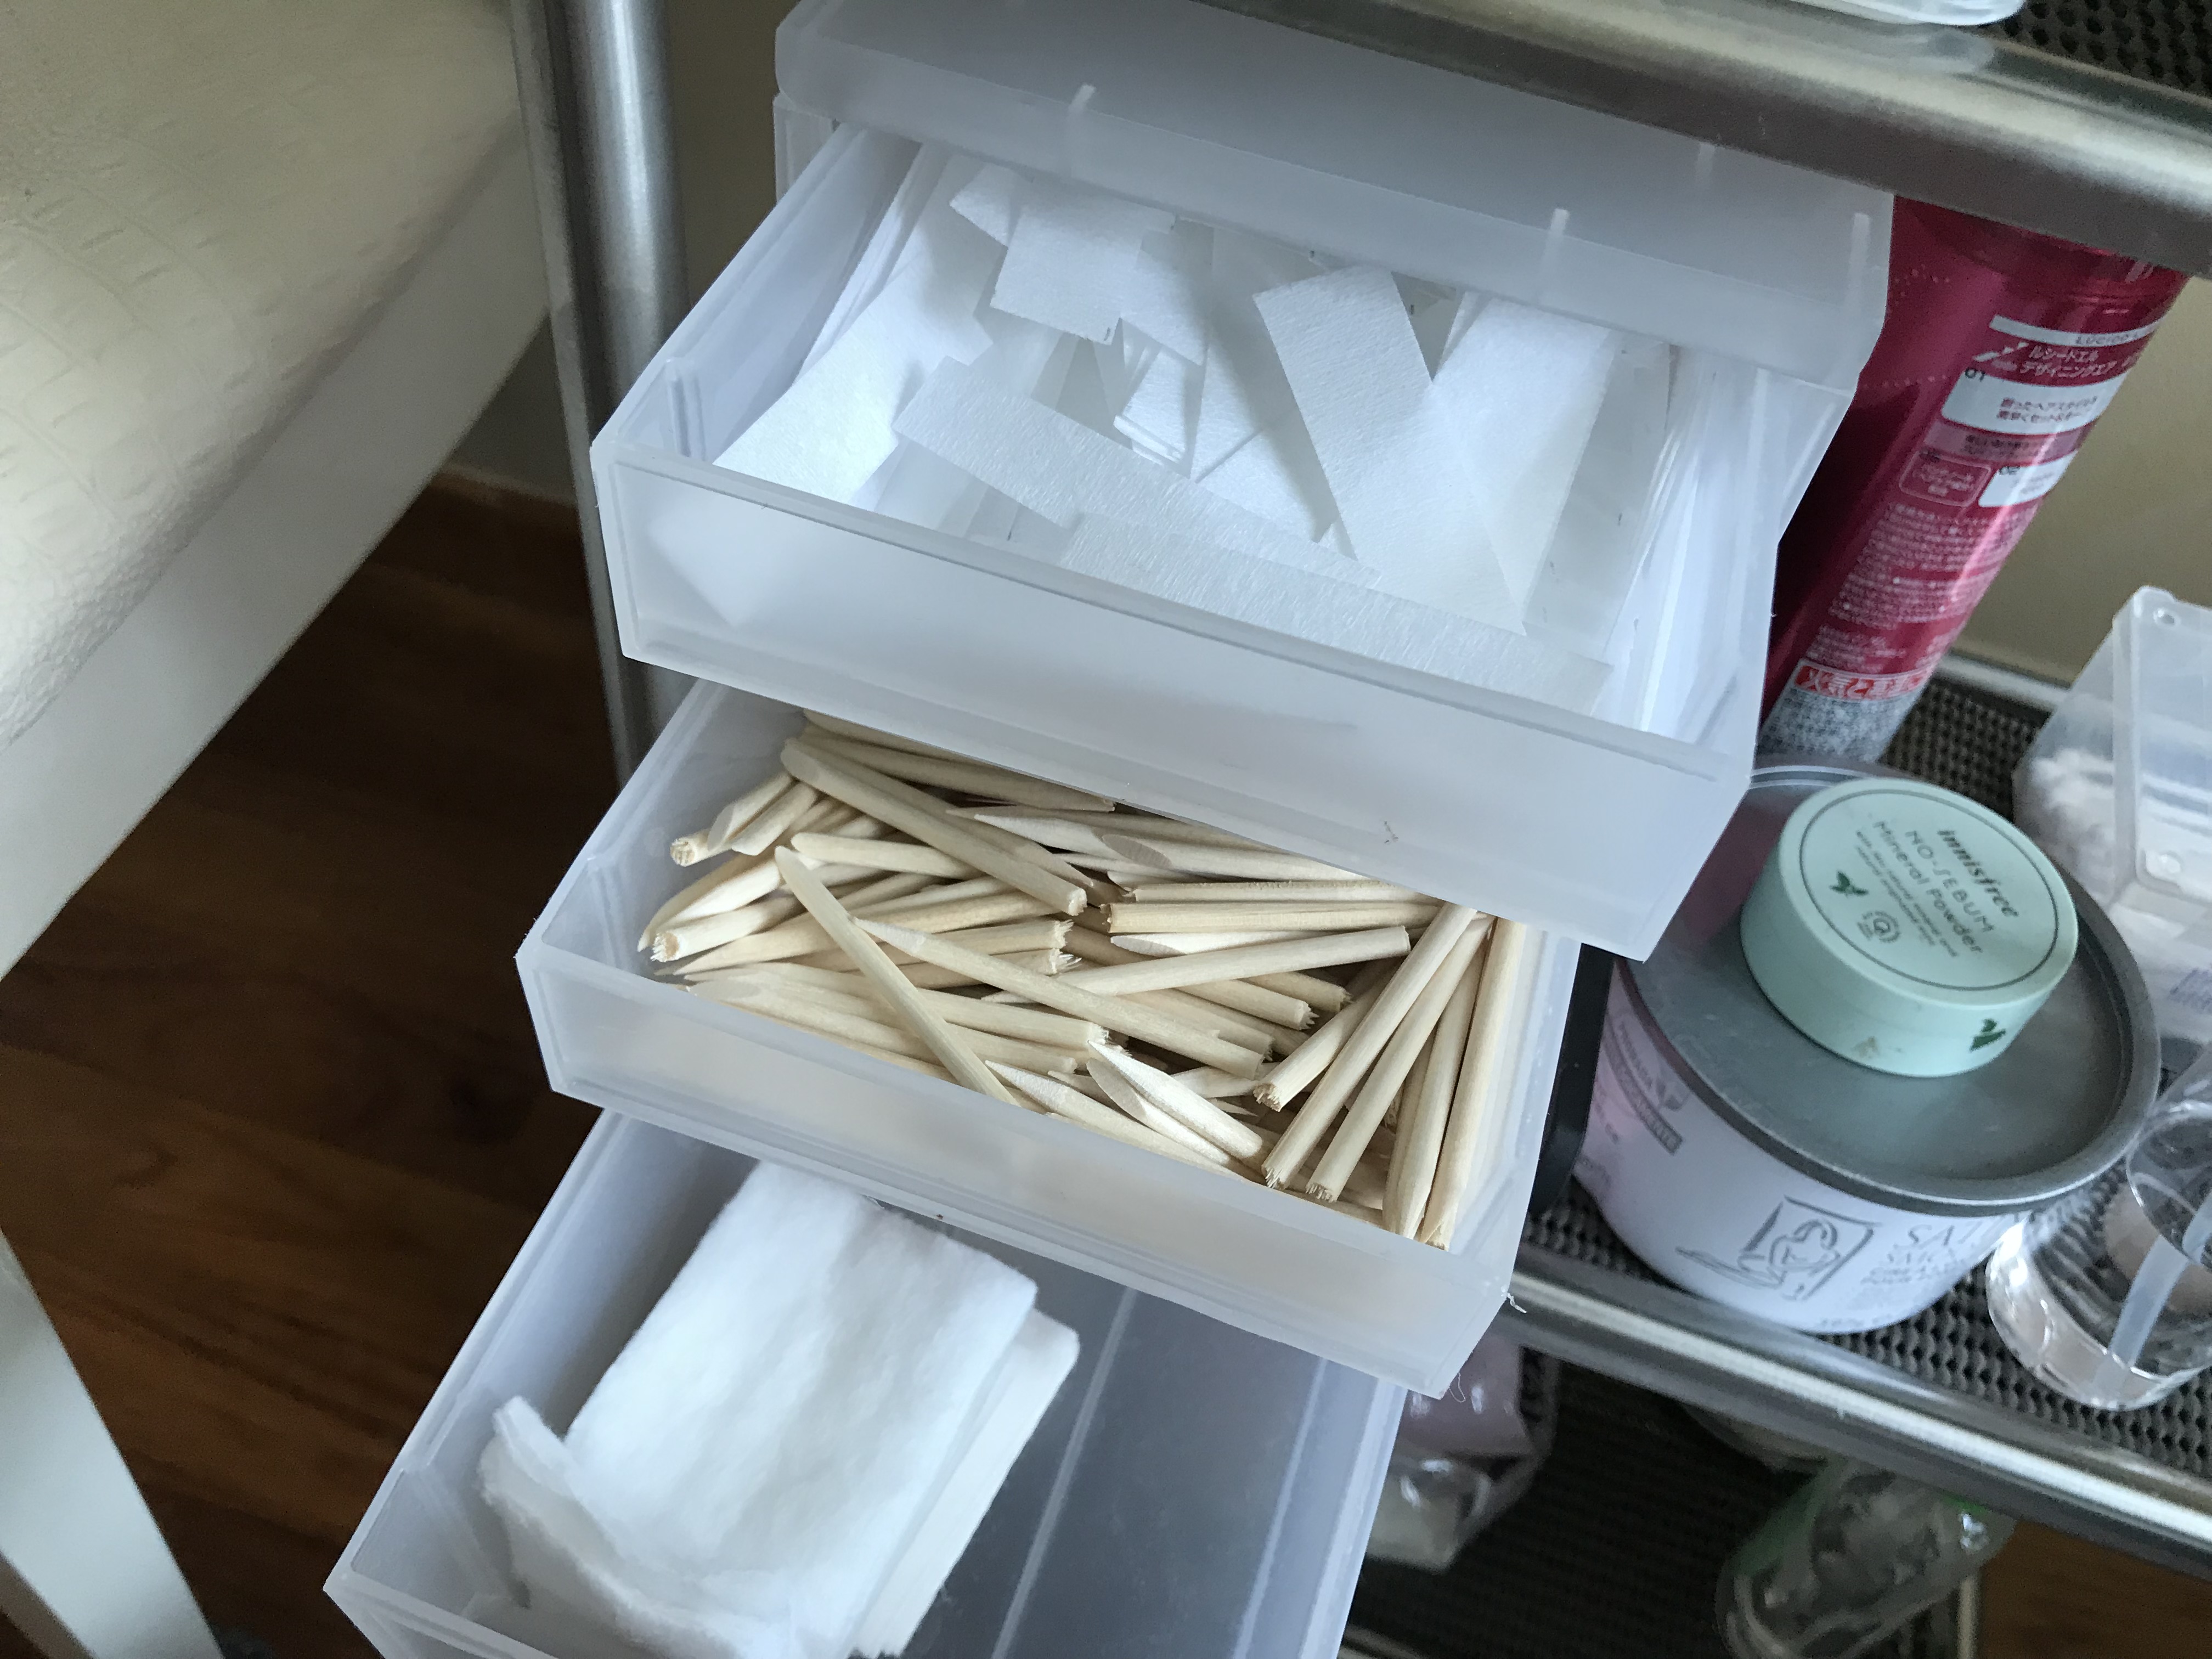
3. 3-drawer case (to act as an organisation system for scrapbooking, as one of my pain points when participating in the practice included the organisation of the many tools/decorative stuffs used in scrapbooking, which can potentially be a huge problem for those who are blind. Without an organisation system, the blind may take very long to find the item he/she wants to use for a card, especially without their sense of sight. However, a mini drawer case labelled with braille will help them find the item they want to use easily, such as stickers or distress ink. For this probe, I labelled the drawer with normal paper labels as my participants cannot read braille)

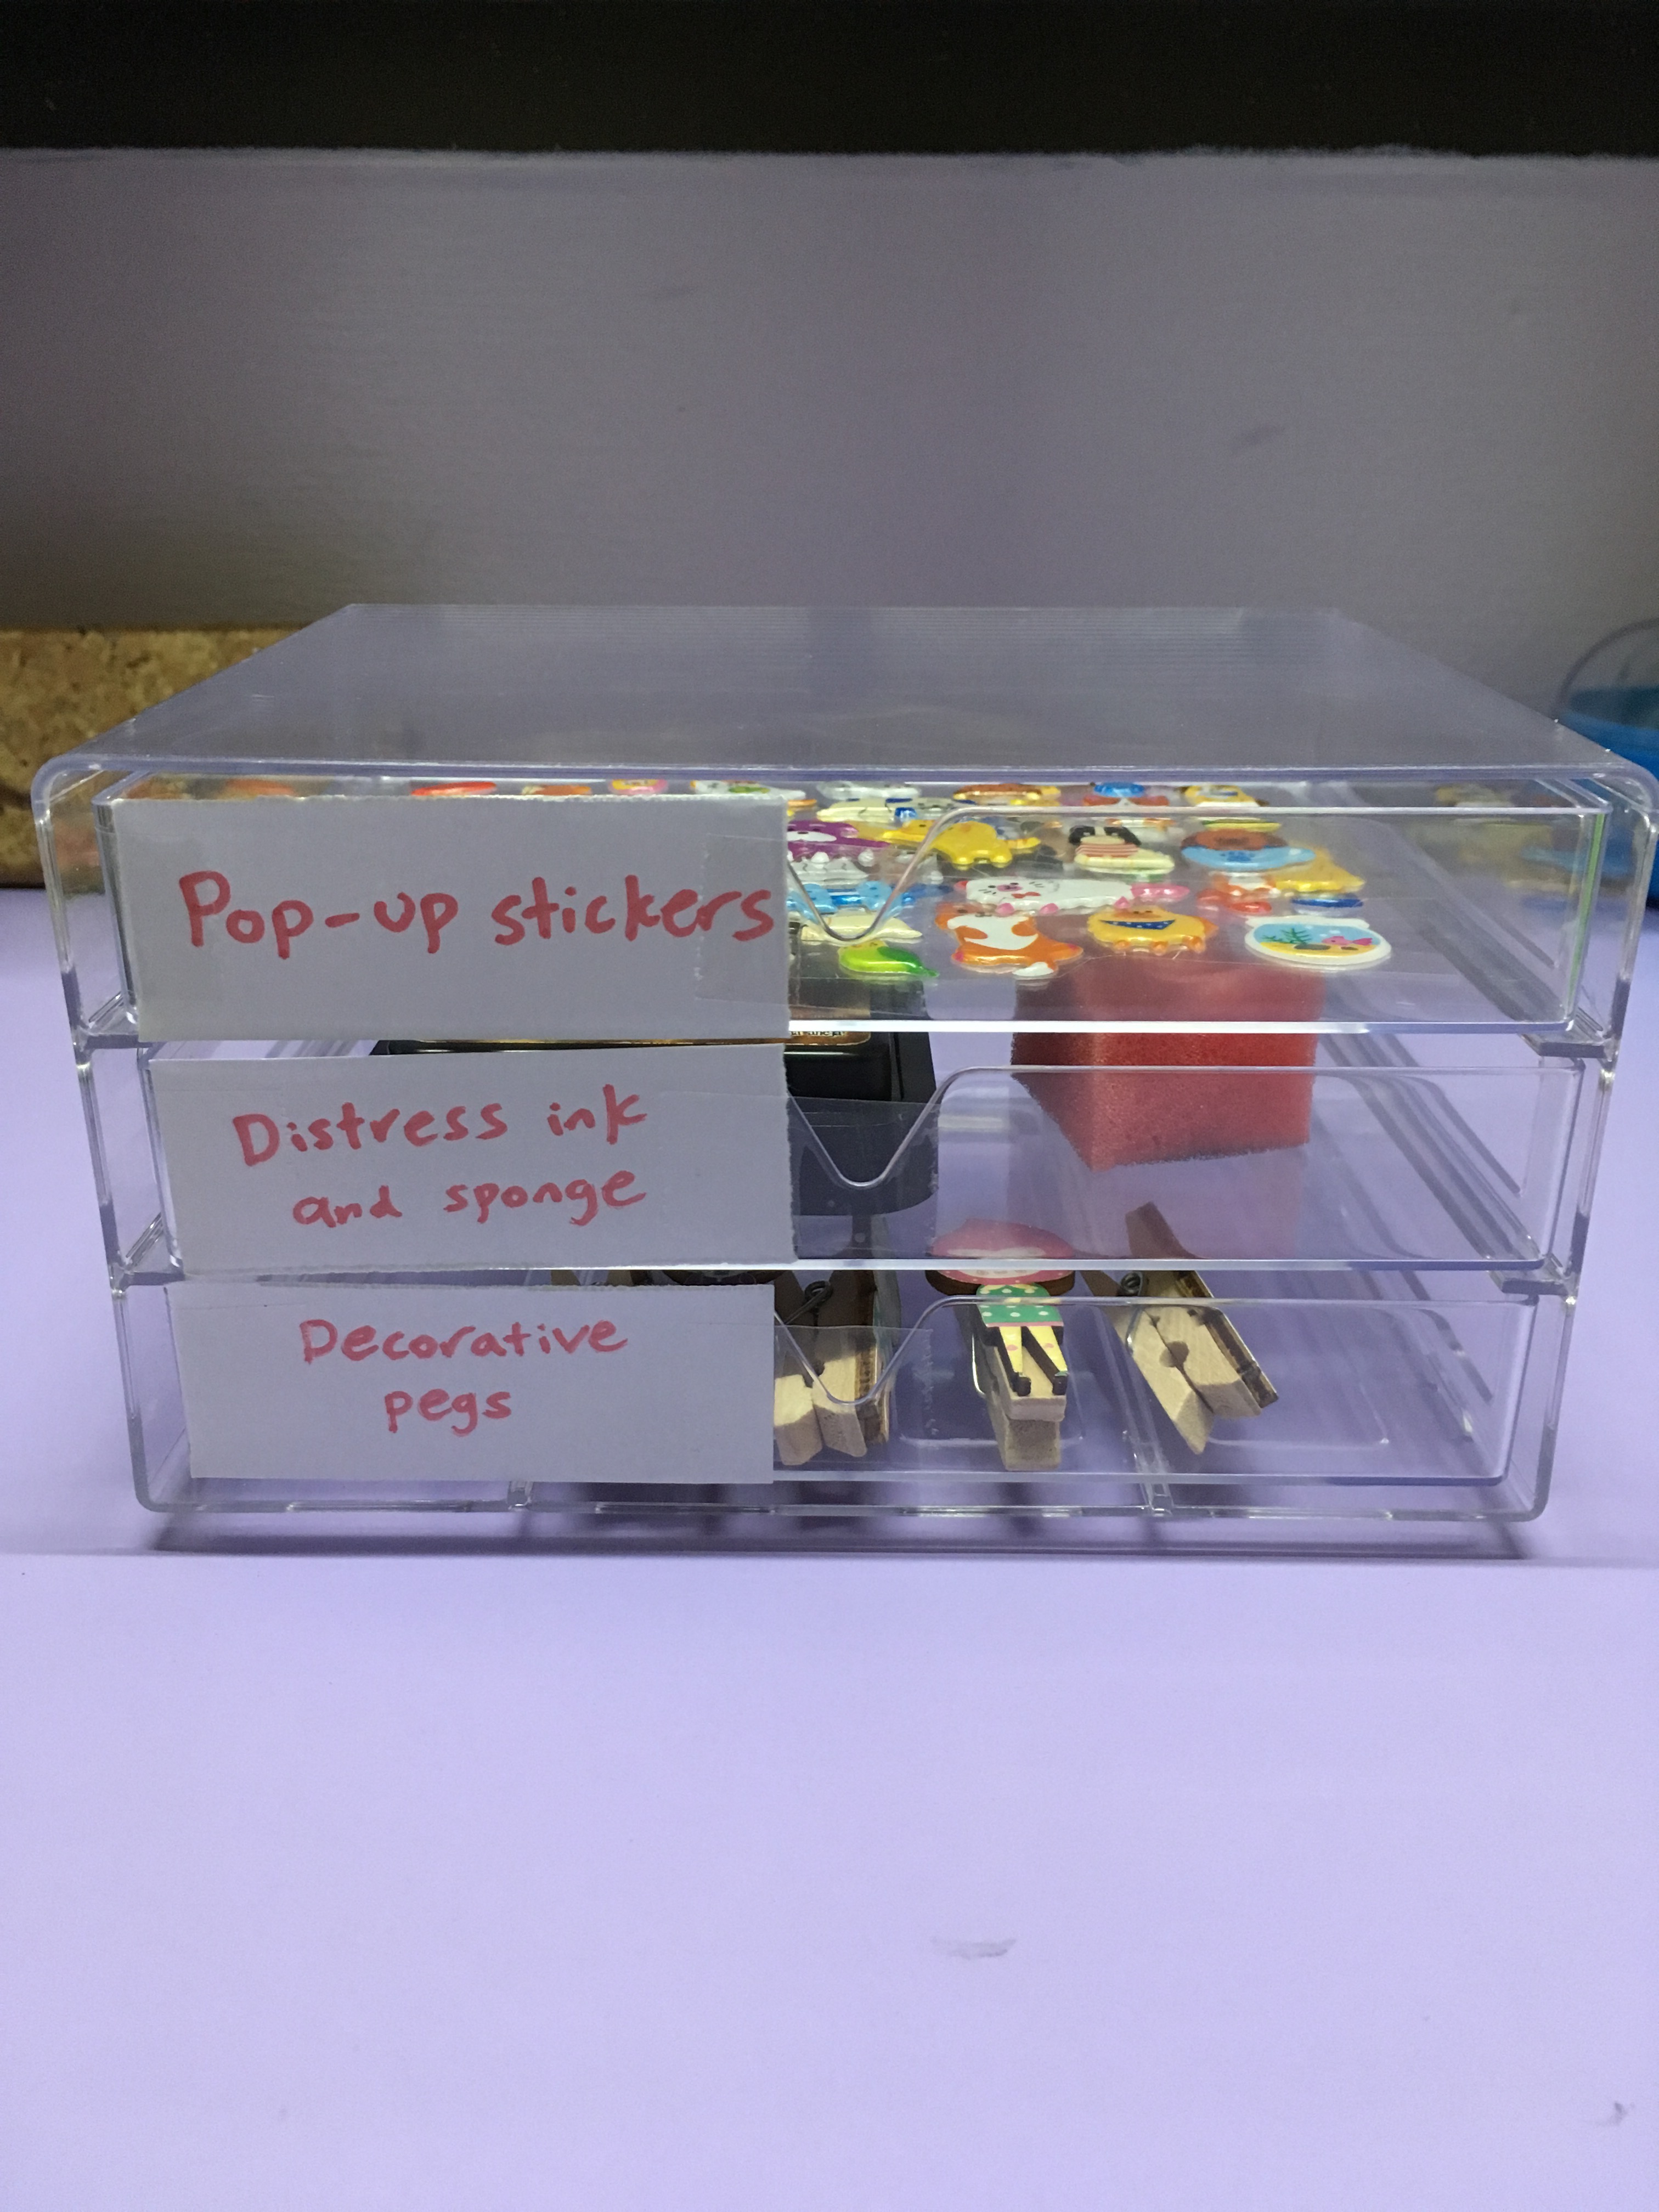
4. Pop-up stickers in drawer 1 (it is important to use pop-up stickers so that the blind can figure out what the sticker is and its orientation more easily. If flat stickers were used, it can be quite challenging to do so)

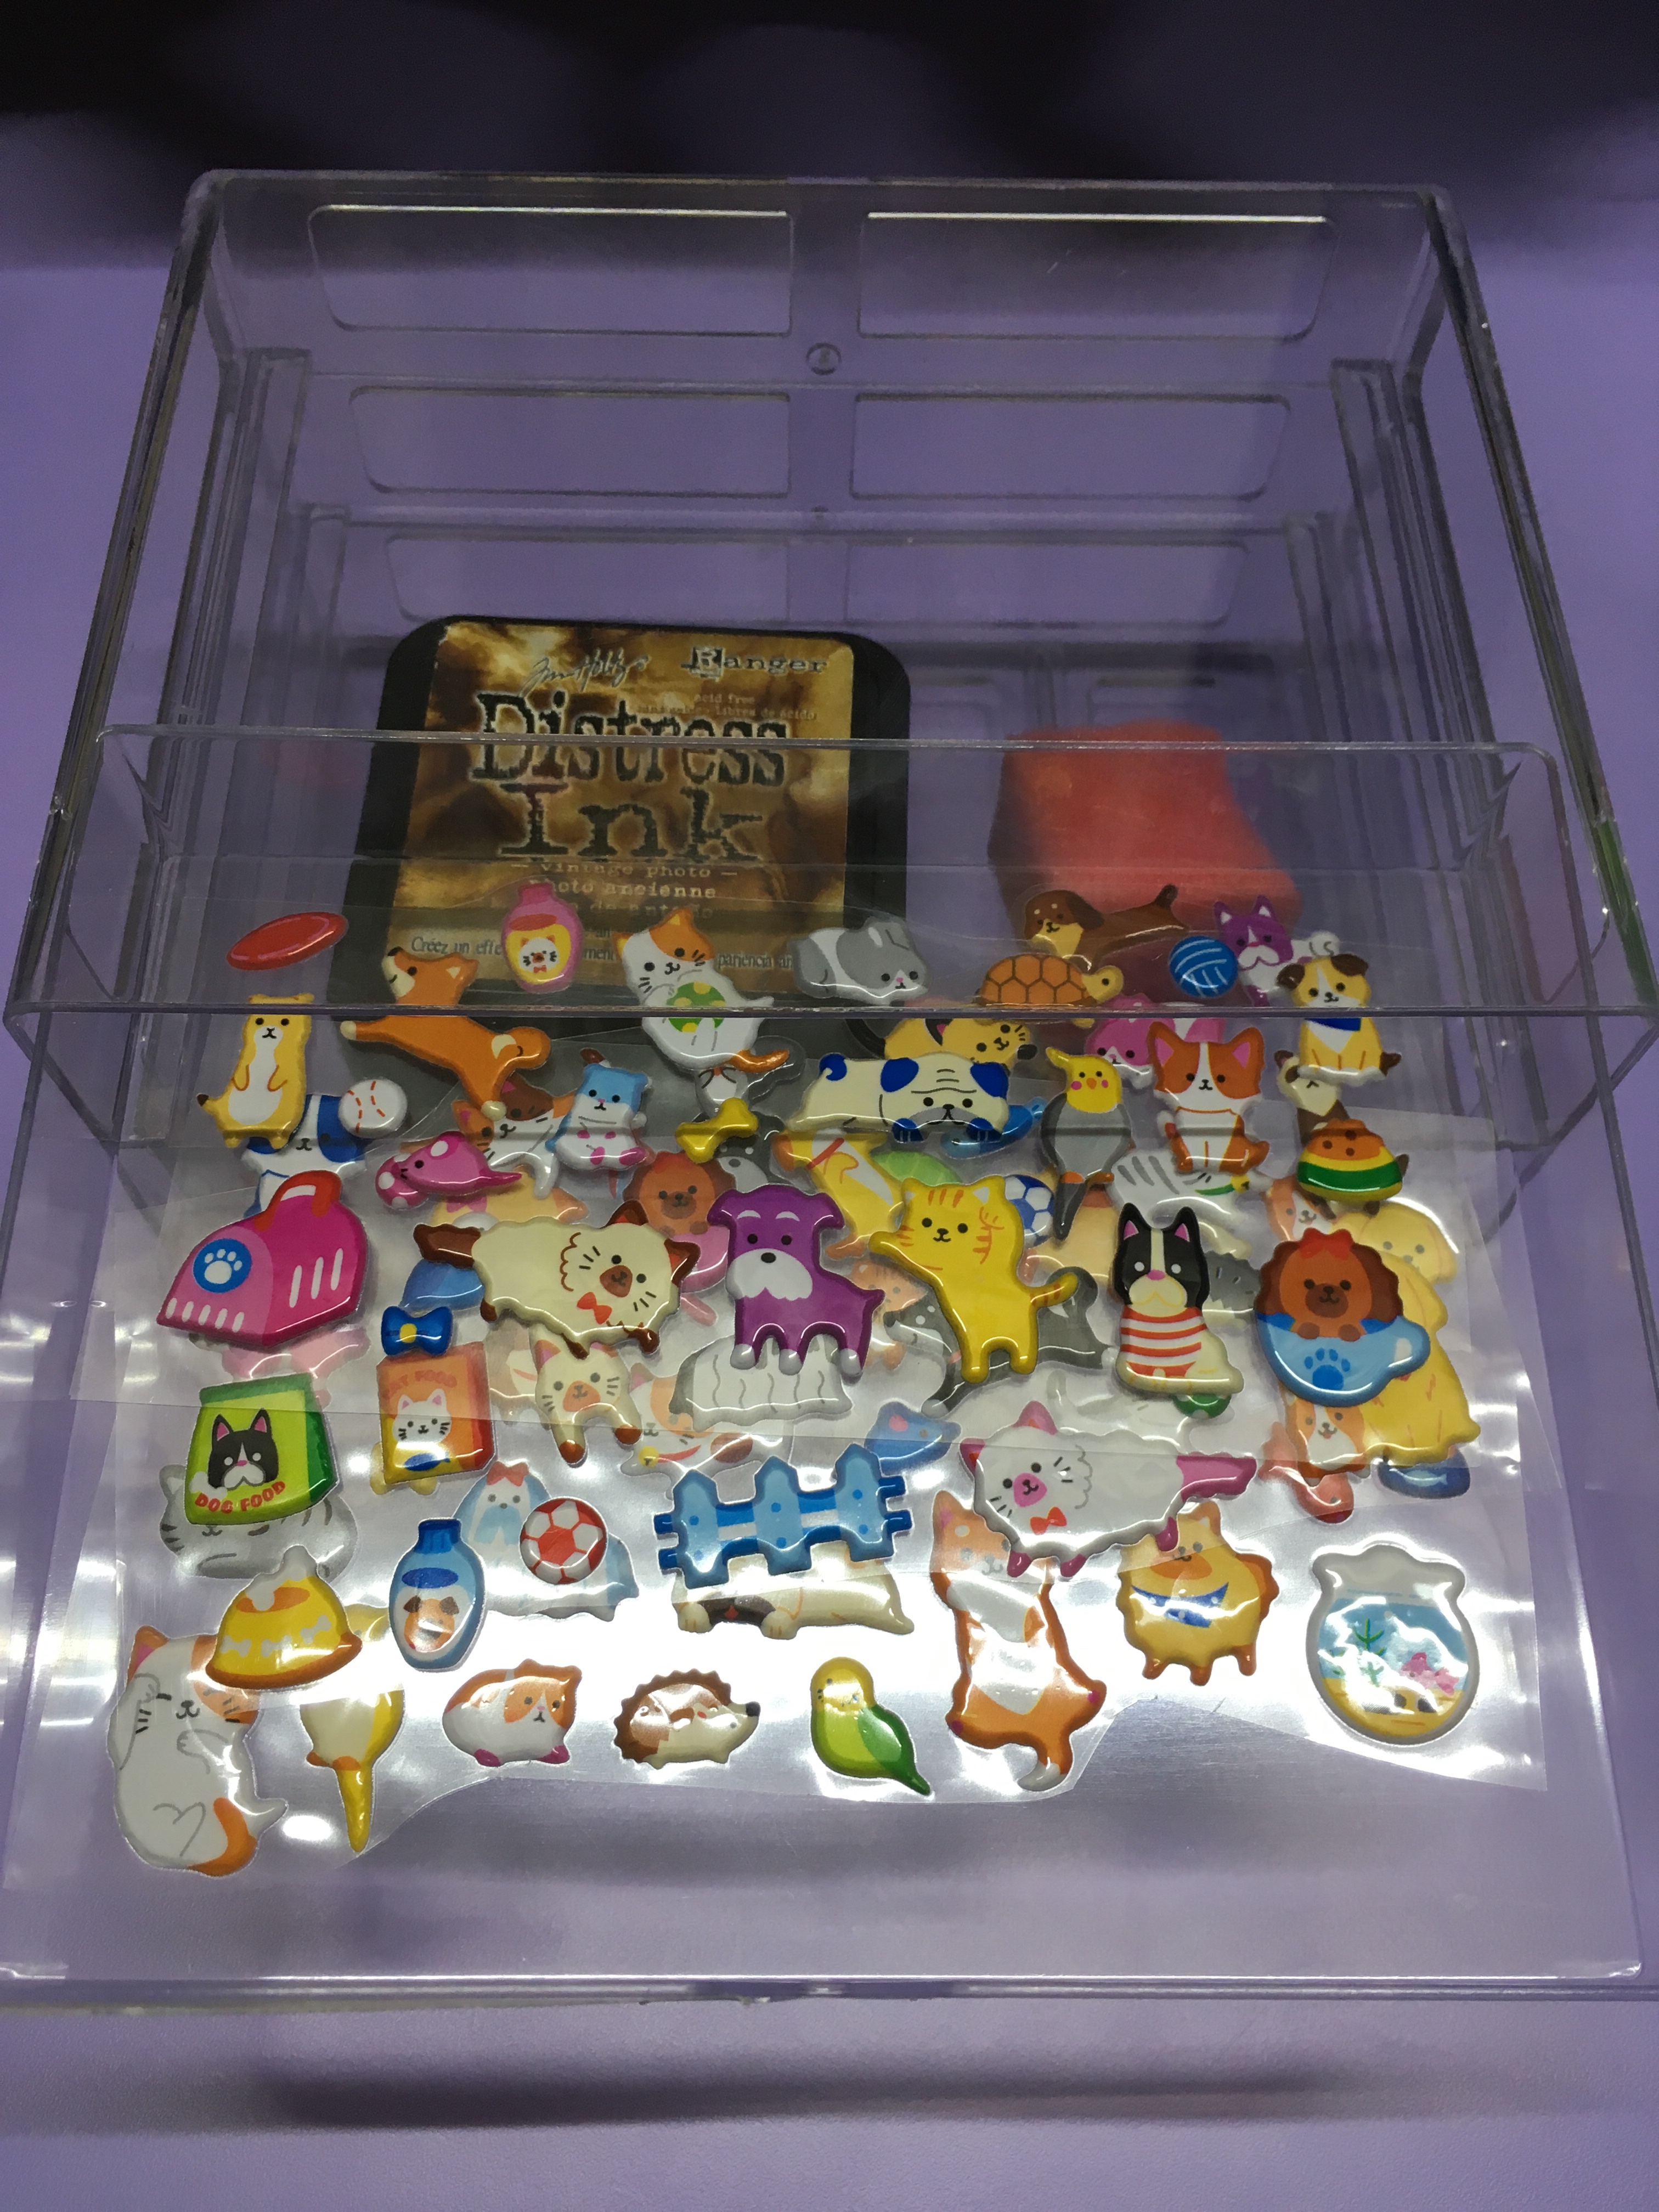
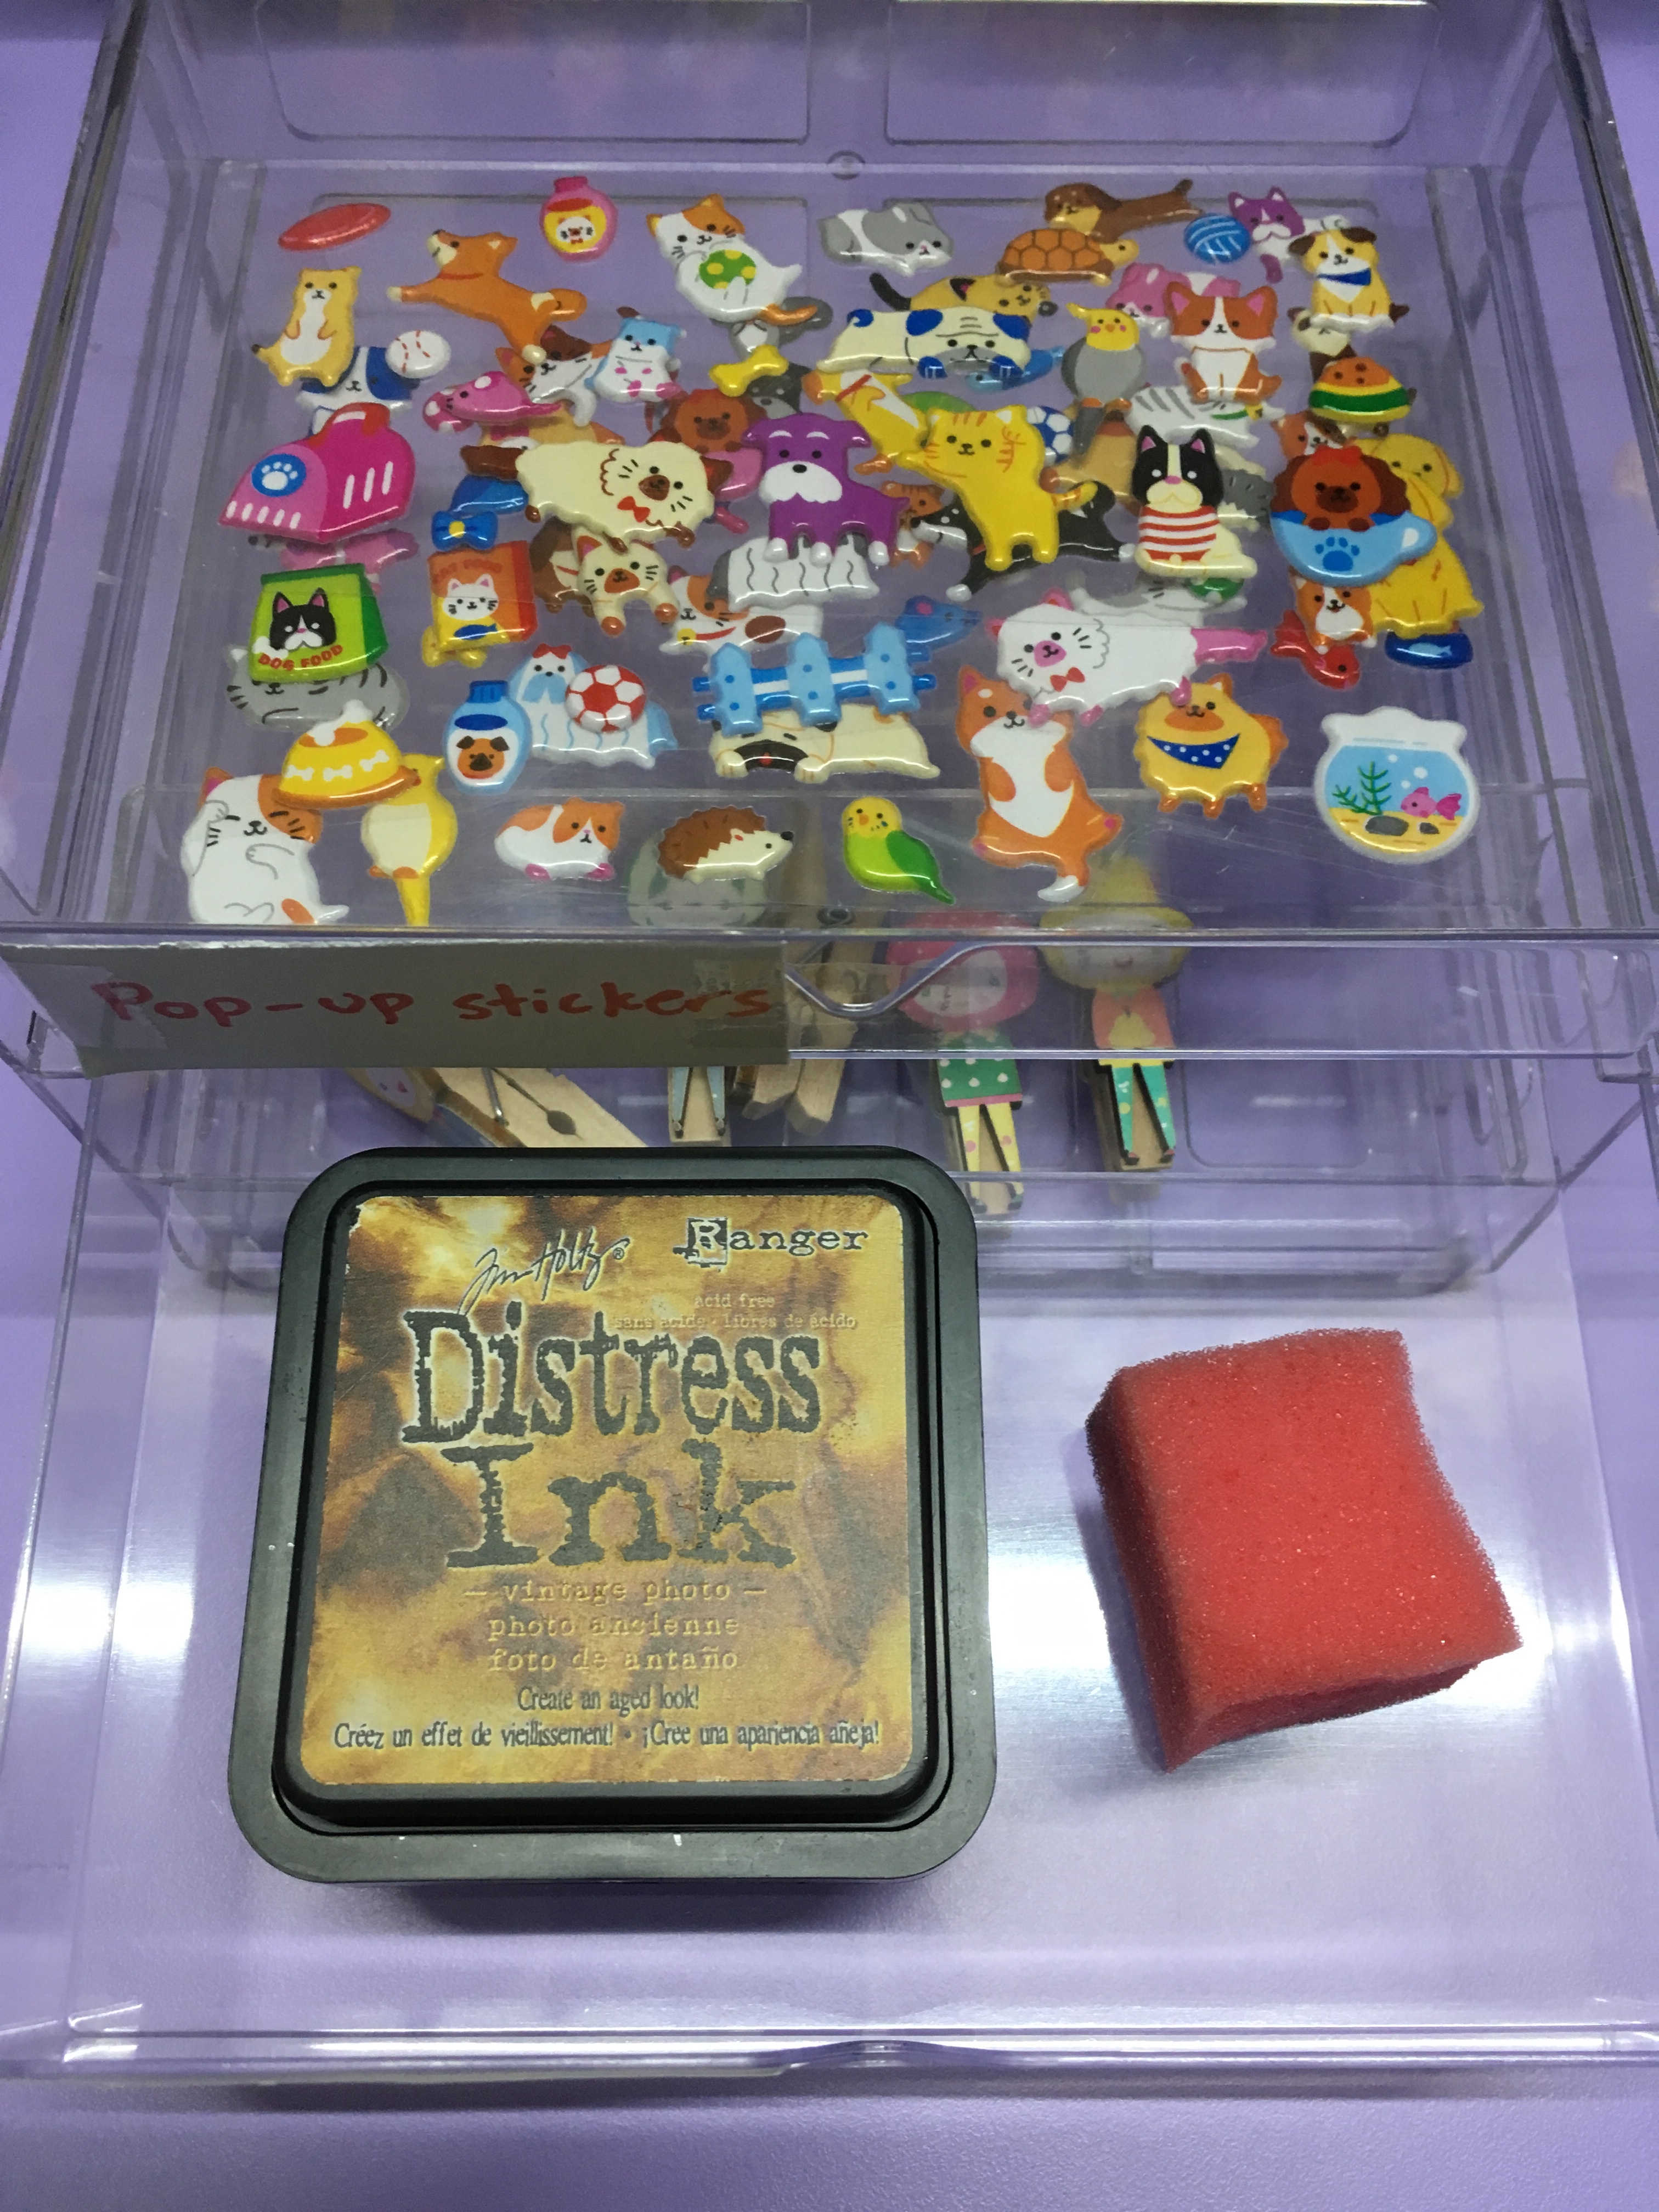
5. Distress ink and sponge in drawer 2

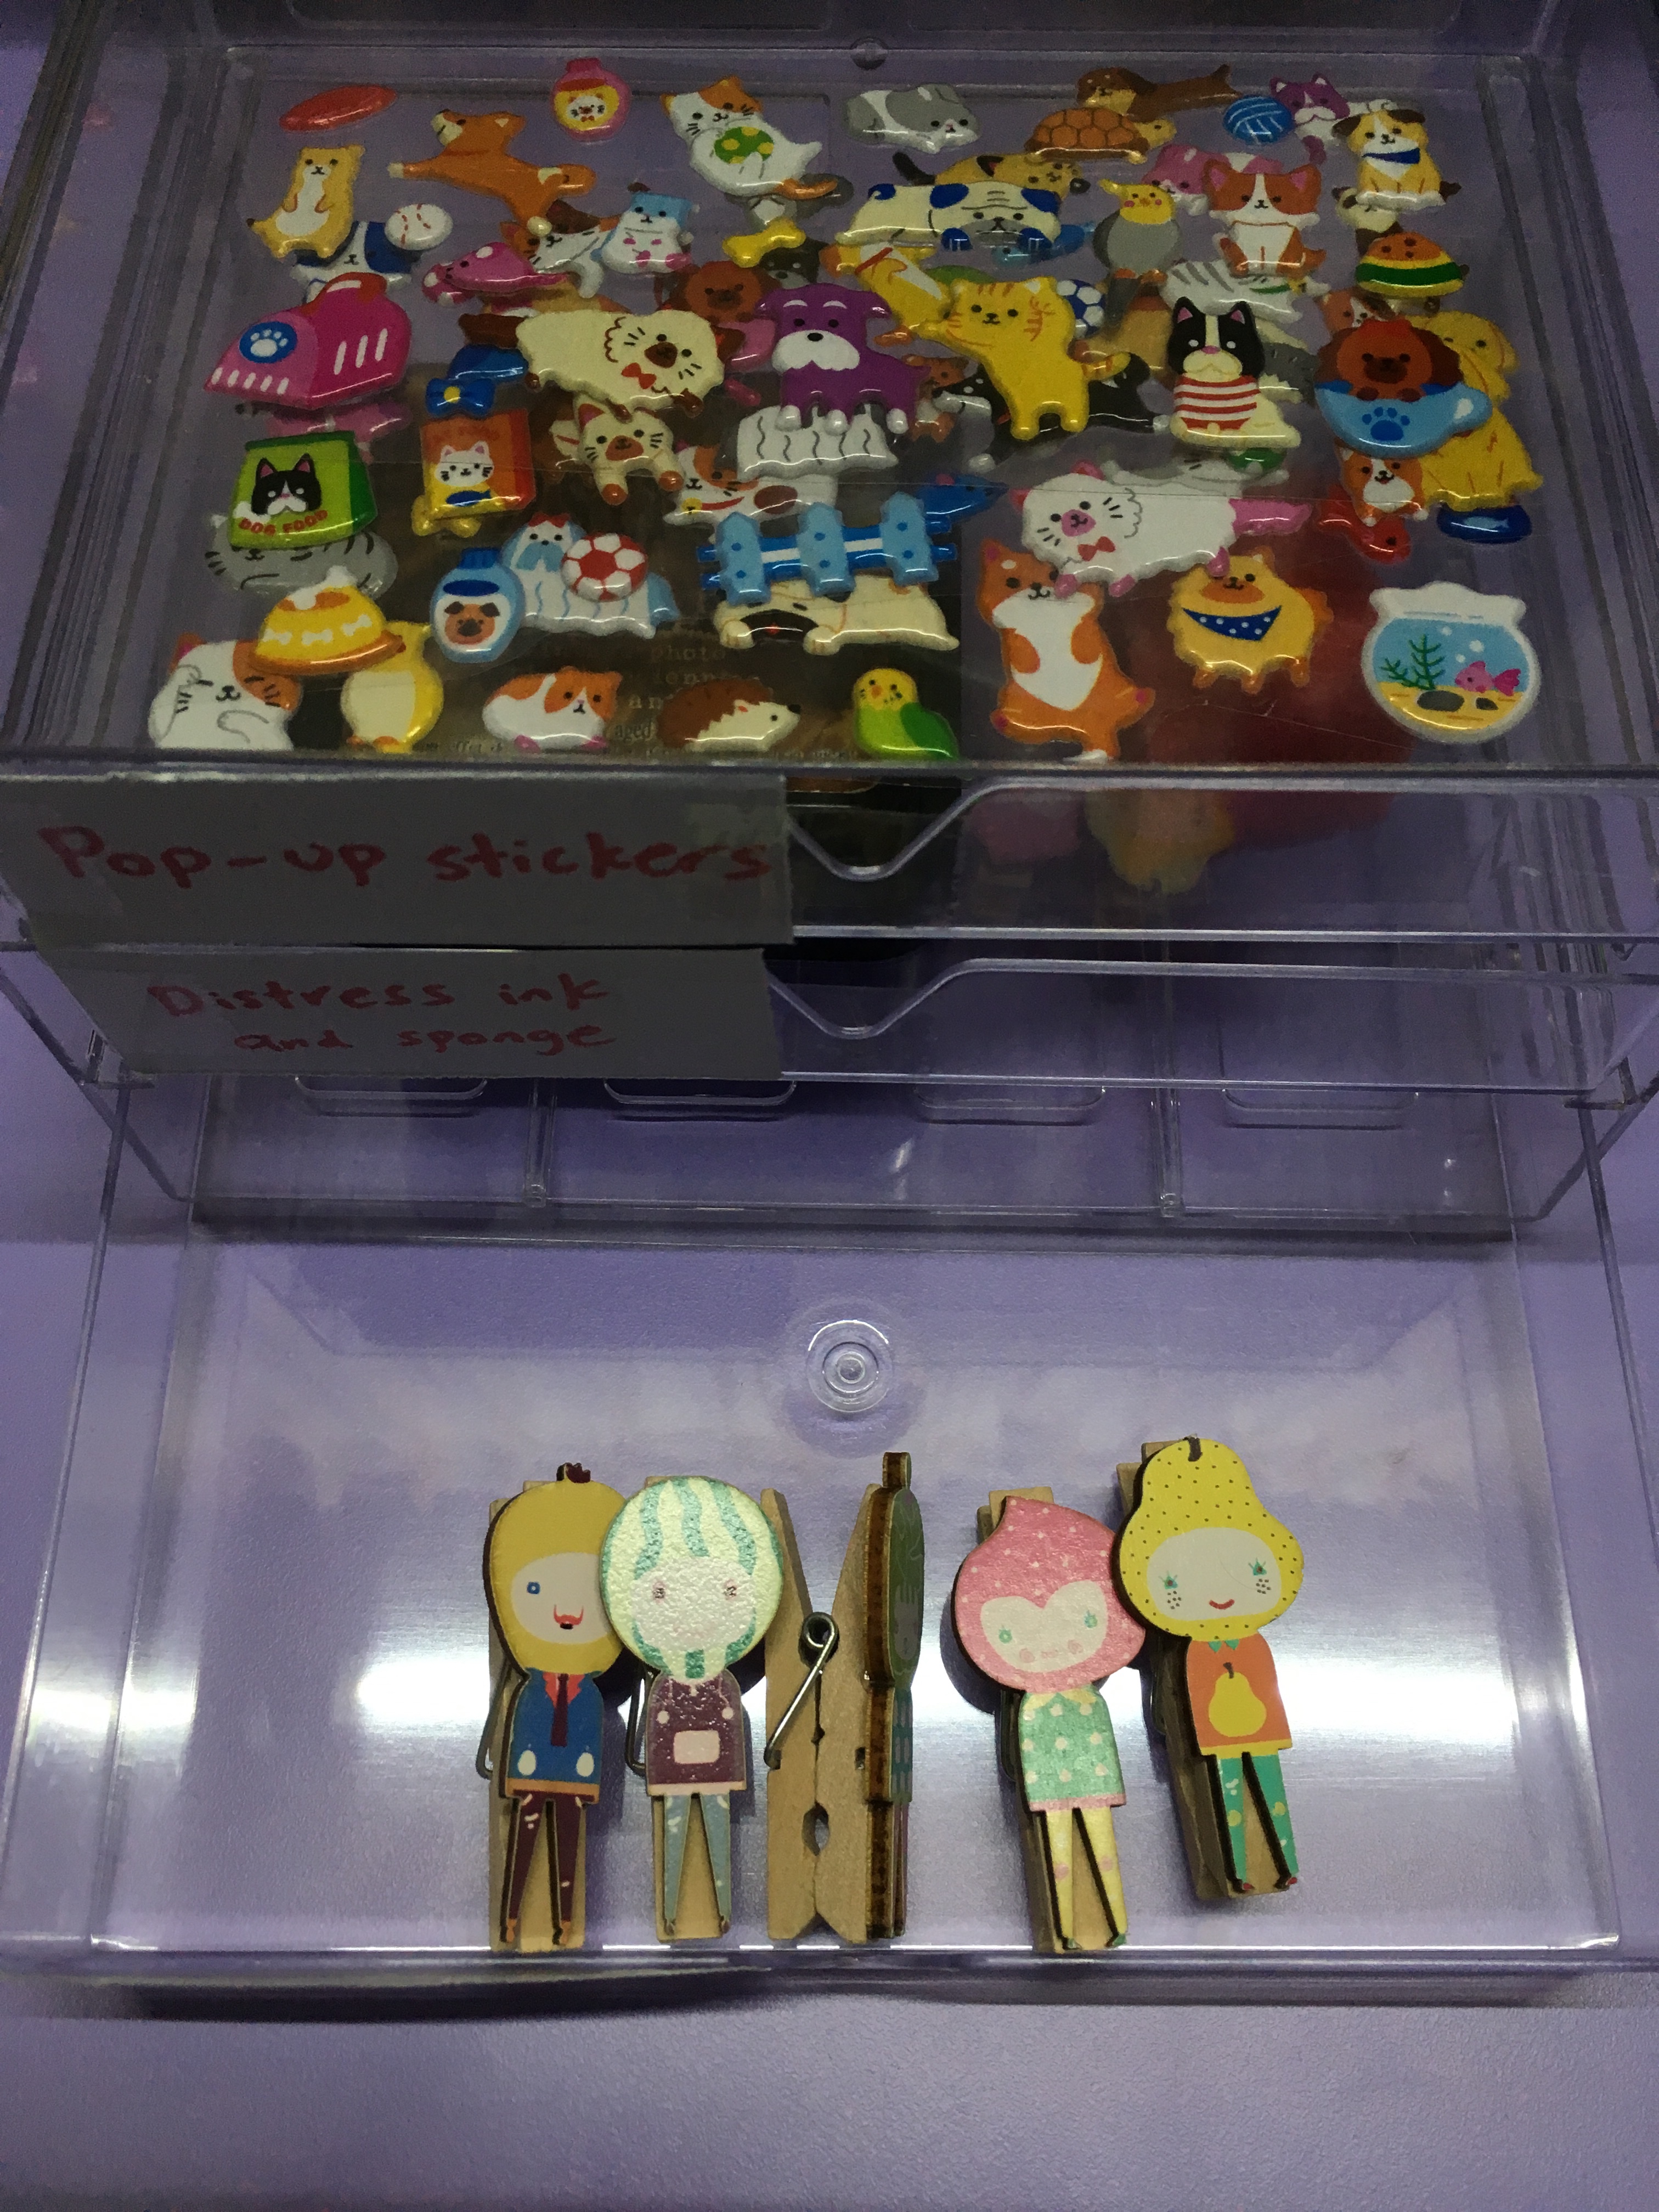
6. Decorative pegs in drawer 3

As the blind rely on other senses, such as sense of touch, hearing, smelling, to go about completing tasks, I decided to capitalise on the individual’s sense of touch in my probes. Below are the tasks that I included in the instruction booklet, which have to be completed blindfolded.

Design probes (tasks)

Front page

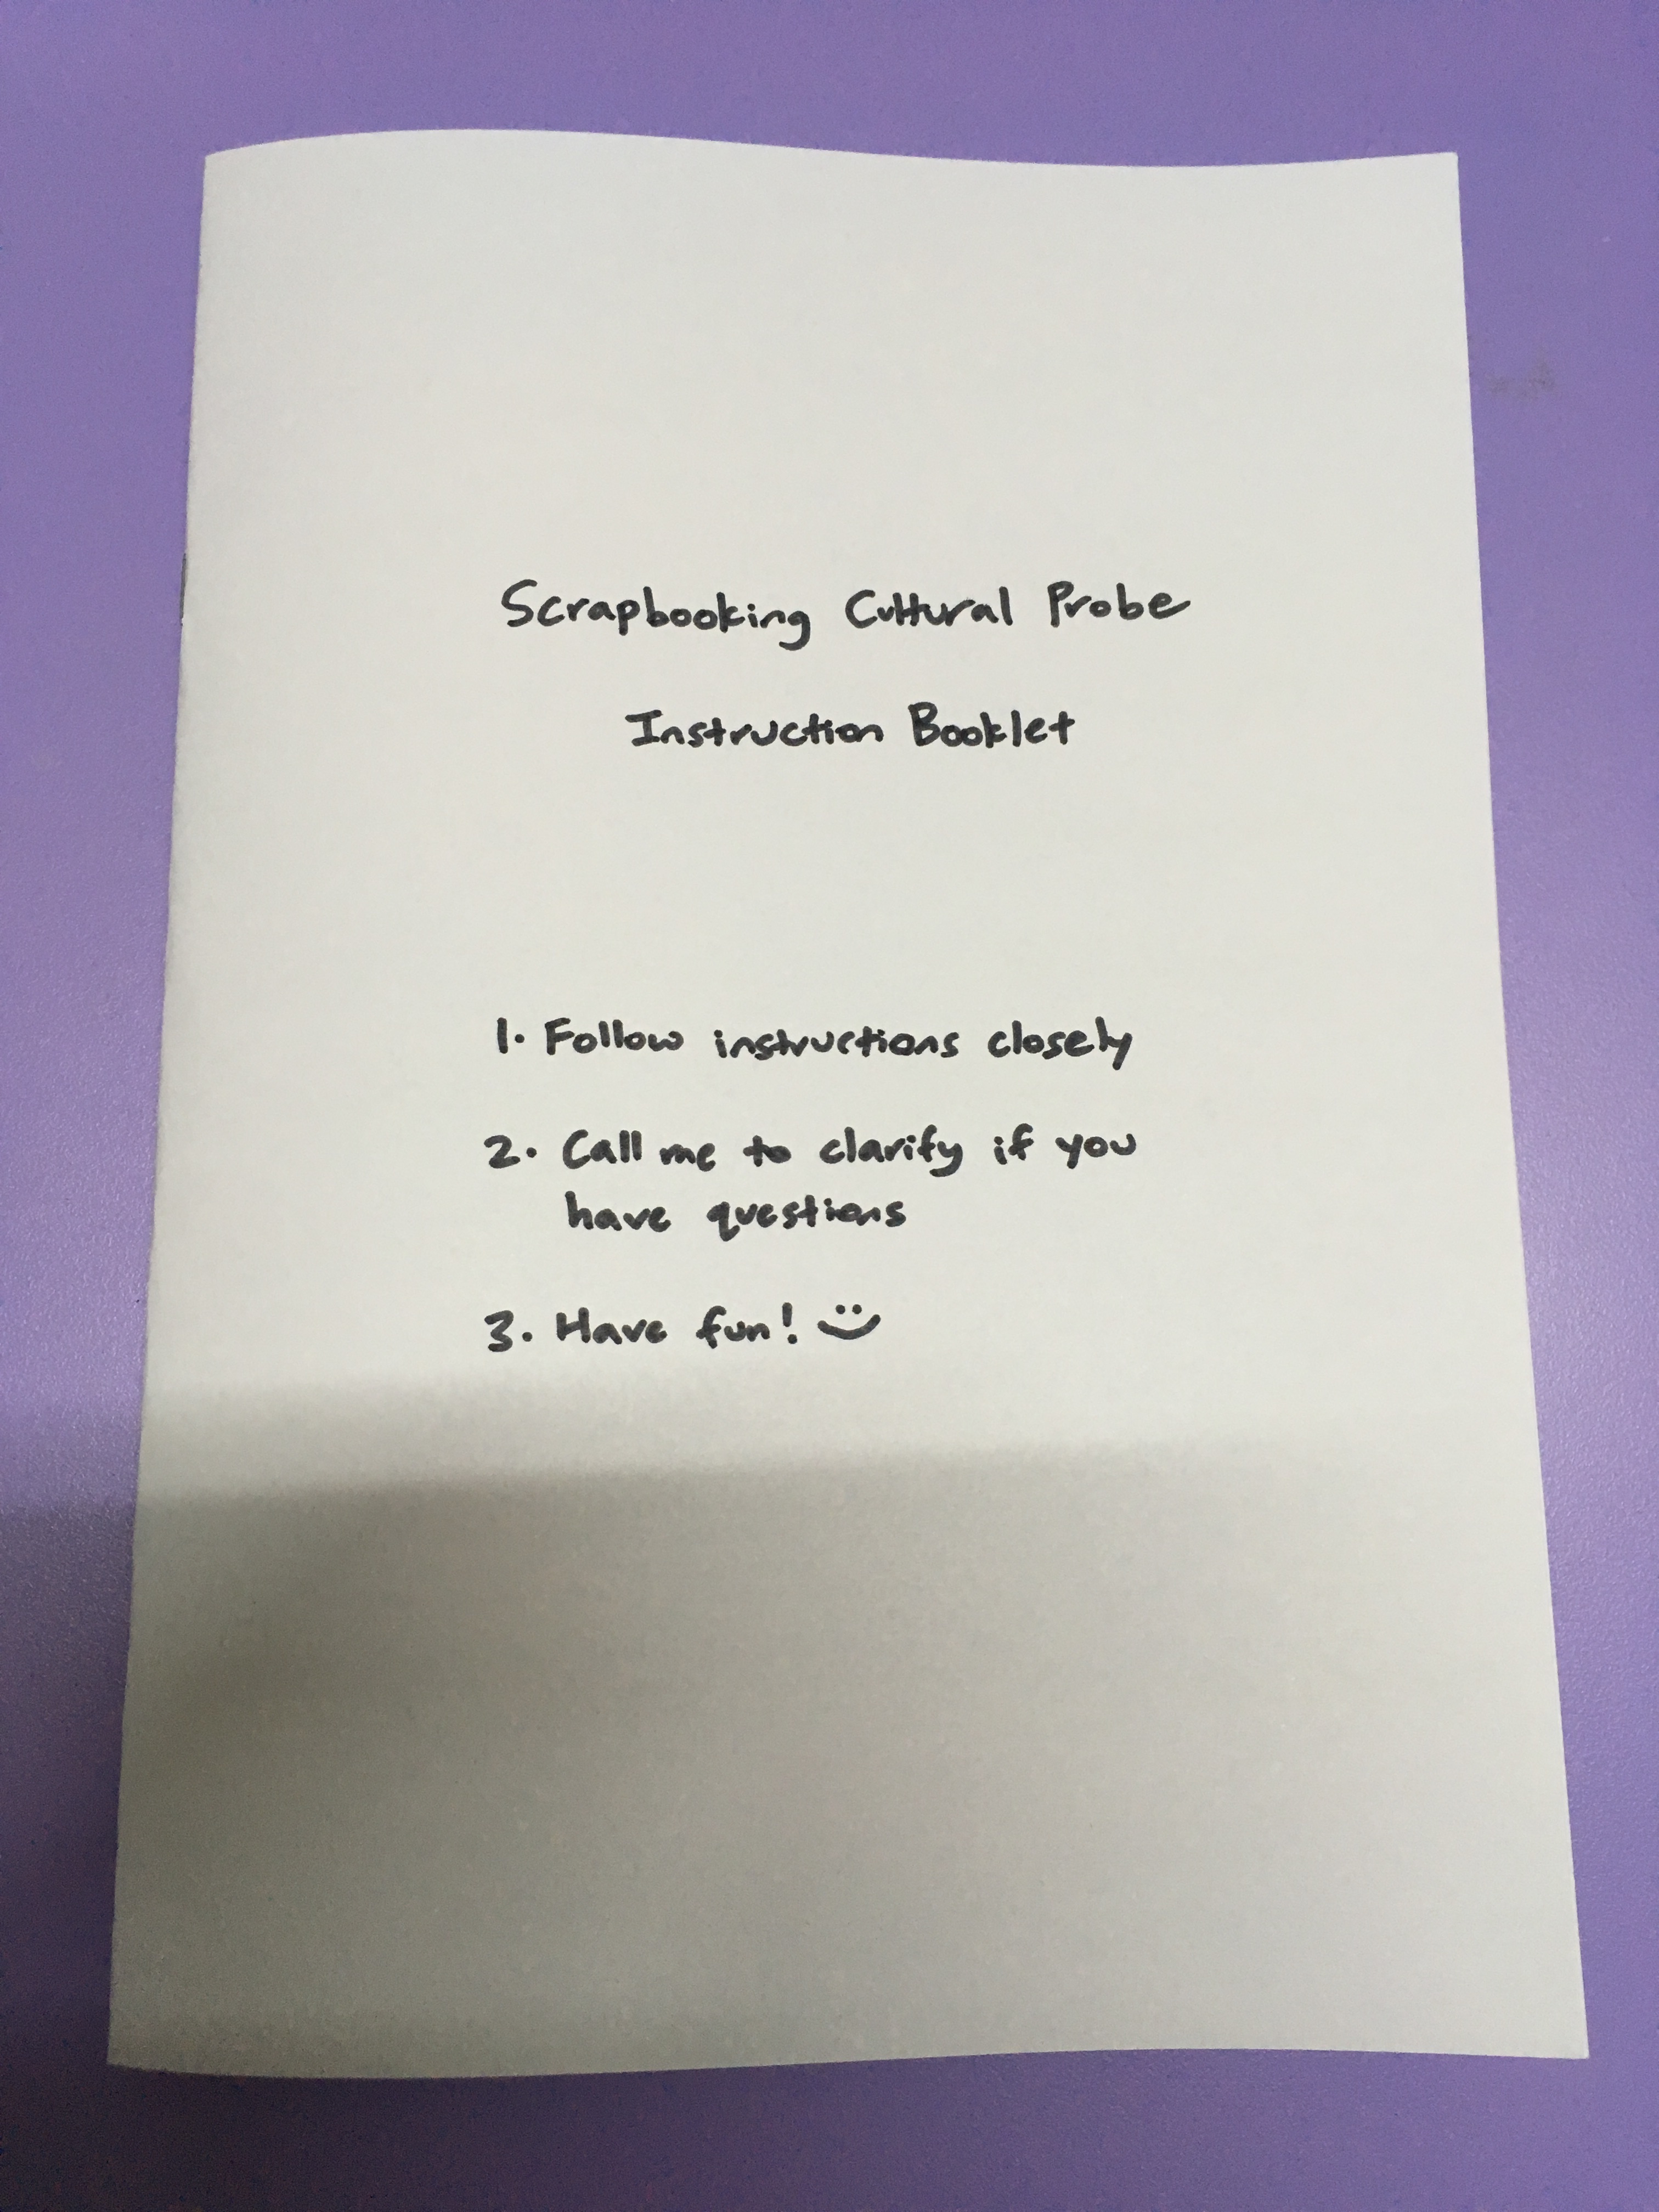
Basic instructions: 1. Follow instructions closely. 2. Call me to clarify if you have questions. 3. Have fun! 🙂

Task 1

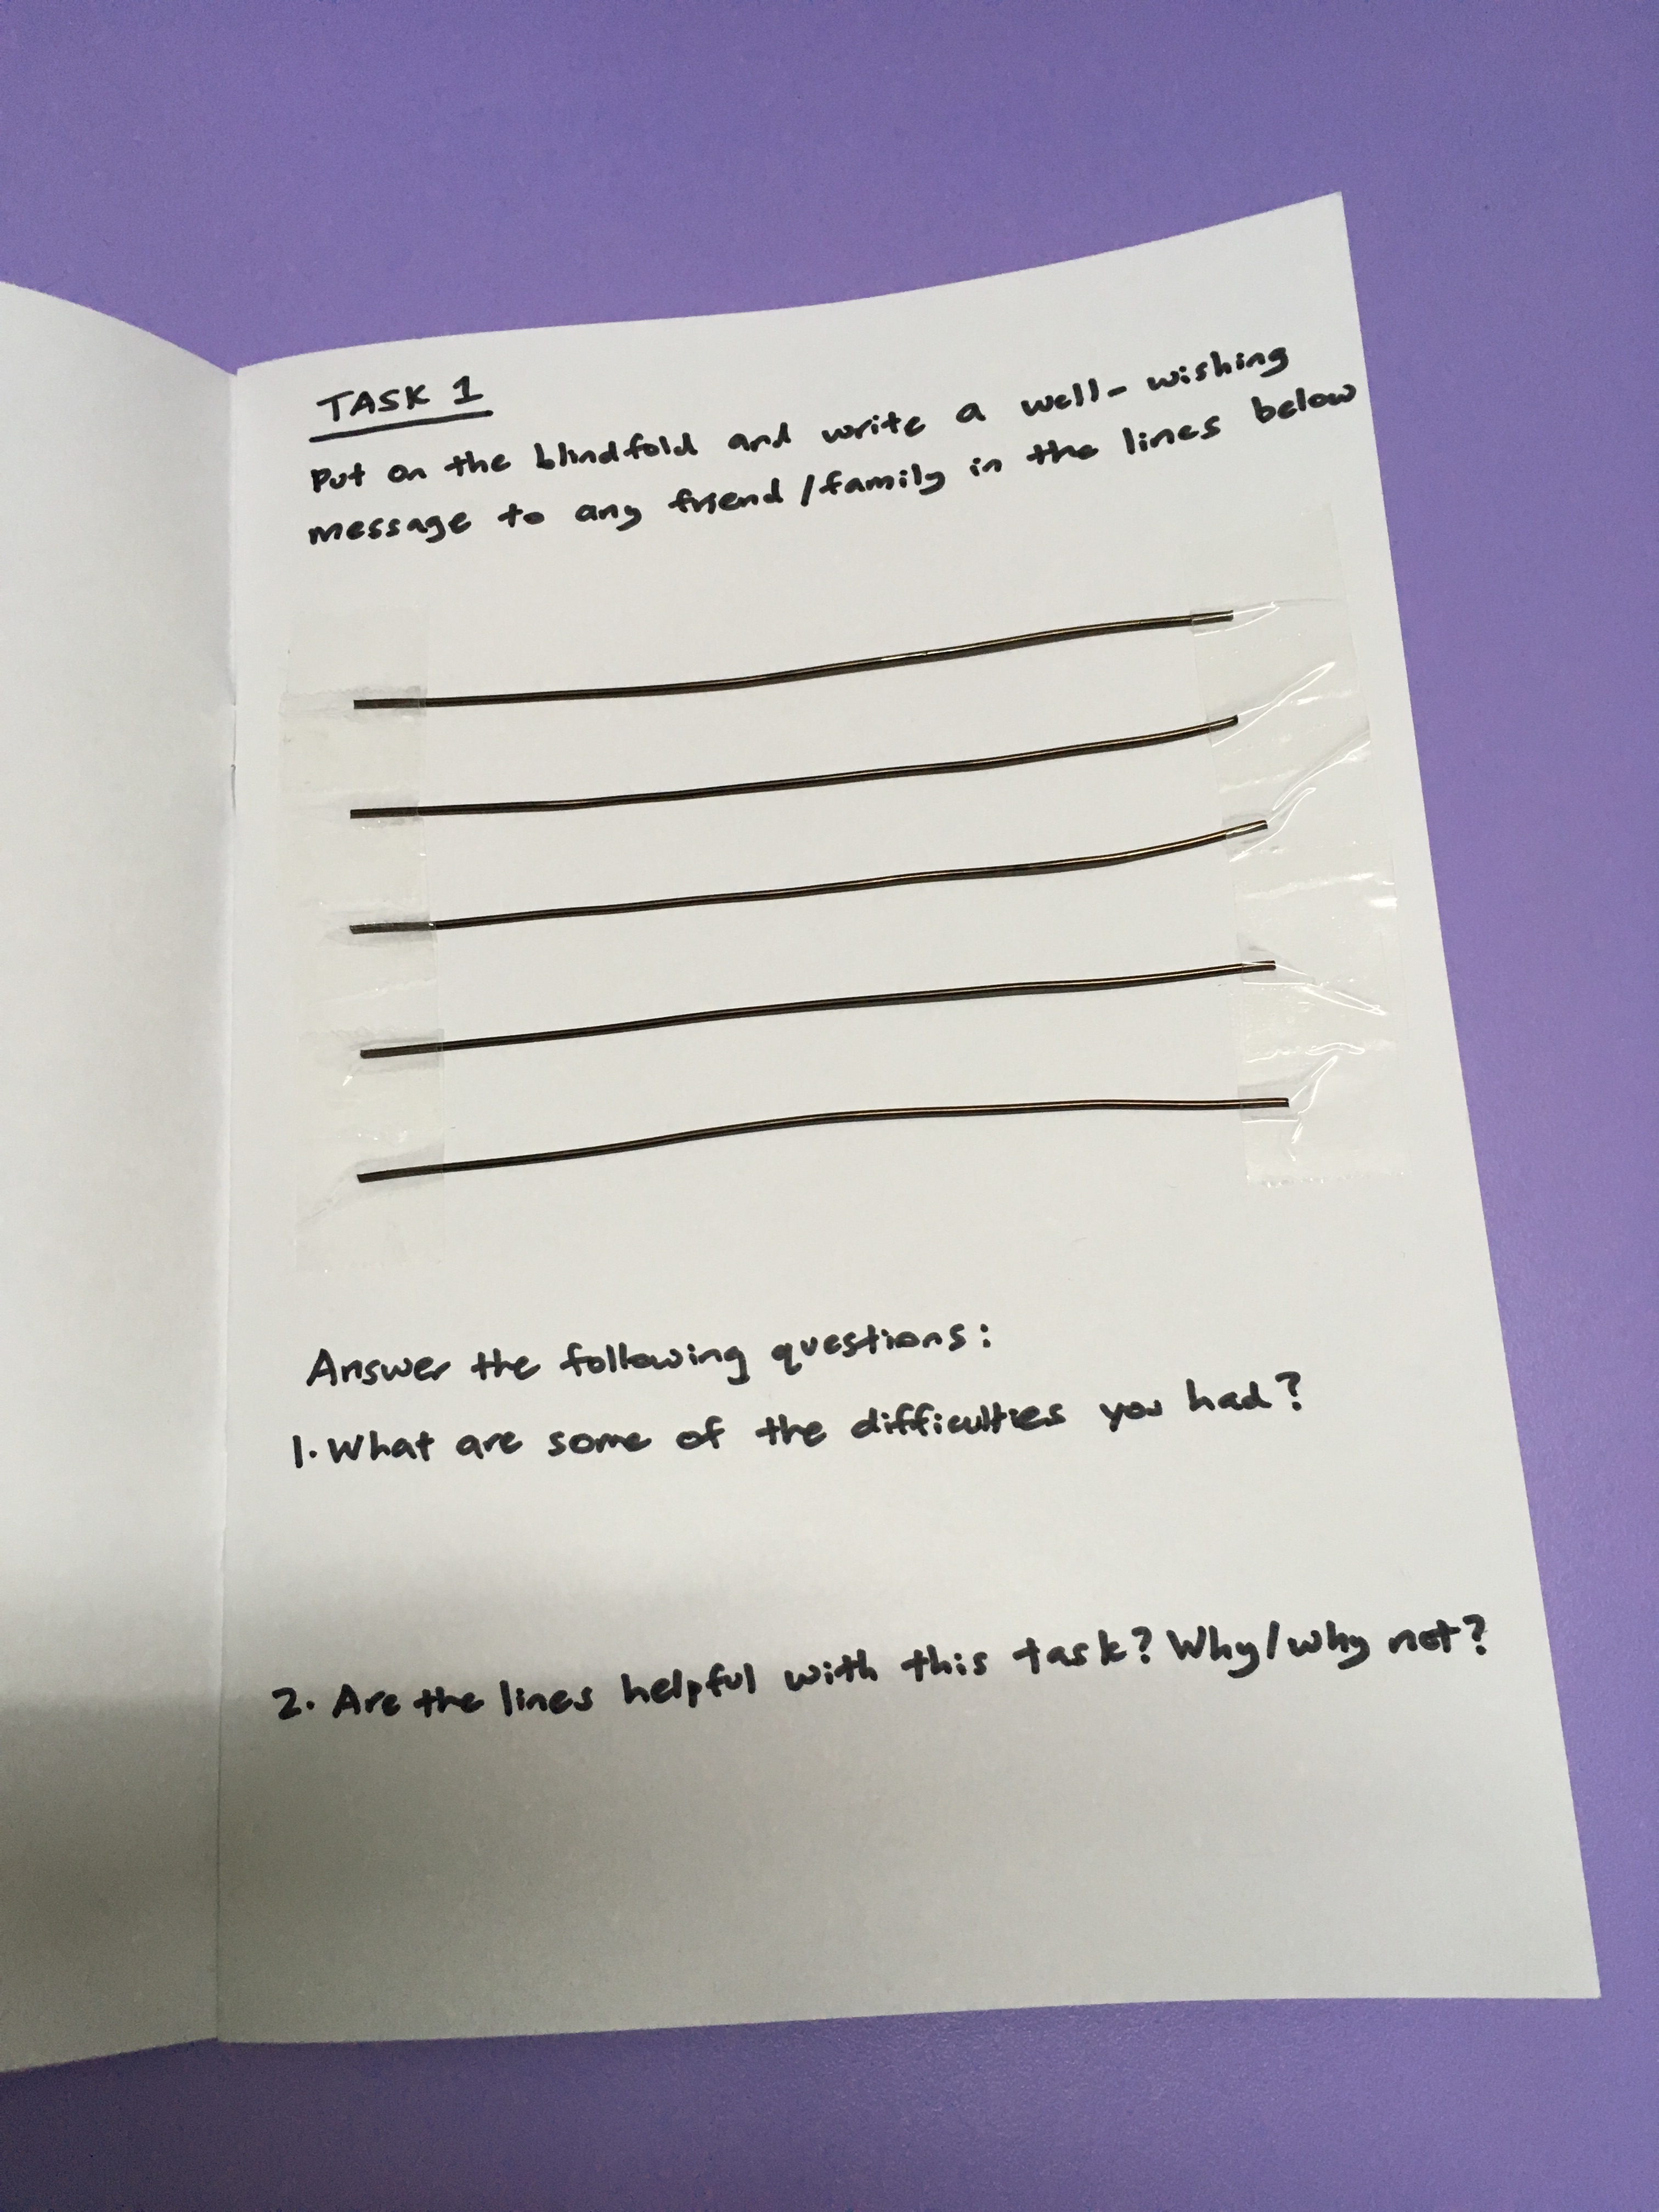
Instructions: Put on the blindfold and write a well-wishing message to any friend/family in the lines below. Answer the following questions: 1. What are some of the difficulties you had? 2. Are the lines helpful with this task? Why/why not?

Rationale for this task: To find out whether lines constructed with aluminimum wire helps the blind write a message more neatly, as they can use their sense of touch to guage the writing area and write in straighter lines.

Task 2

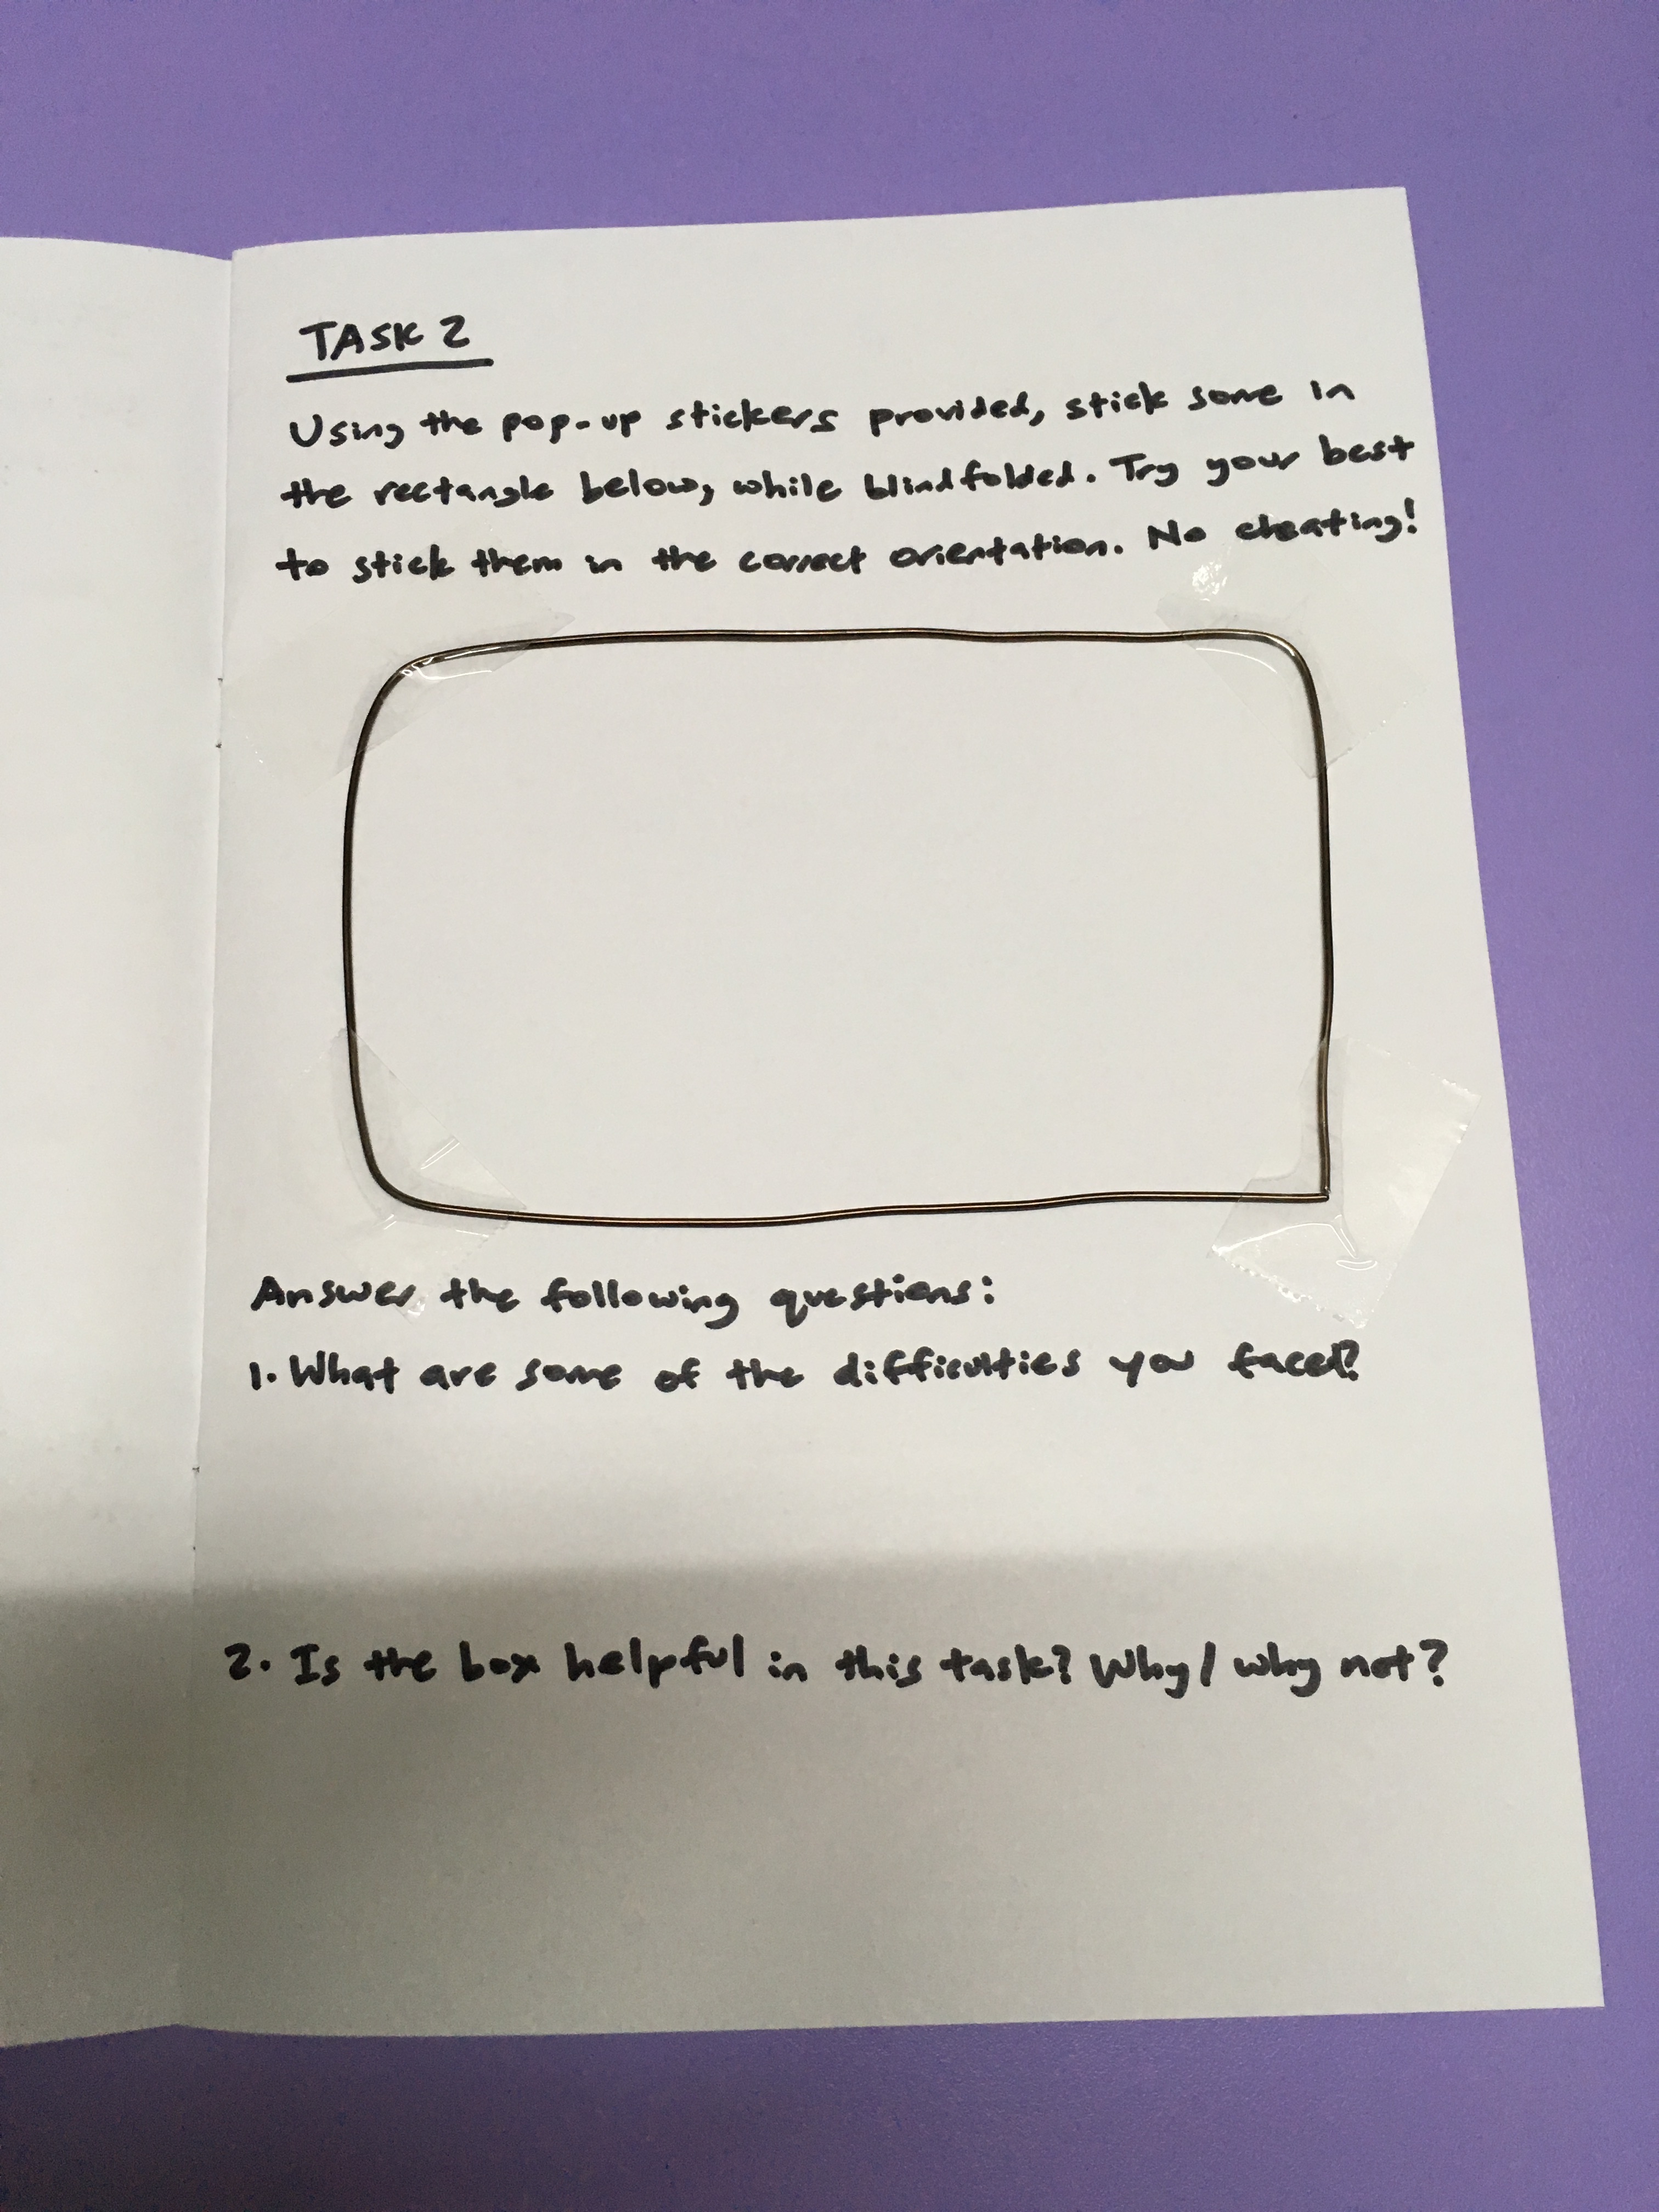
Instructions: Using the pop-up stickers provided, stick some in the rectangle below, while blindfolded. Try your best to stick them in the correct orientation. No cheating! Answer the following questions: 1. What are some of the difficulties you had? 2. Is the box helpful in this task? Why/why not

Rationale for this task: To find out whether a box constructed with aluminimum wire helps the blind paste stickers more easily, as they can use their sense of touch to guage the pasting area.

Task 3

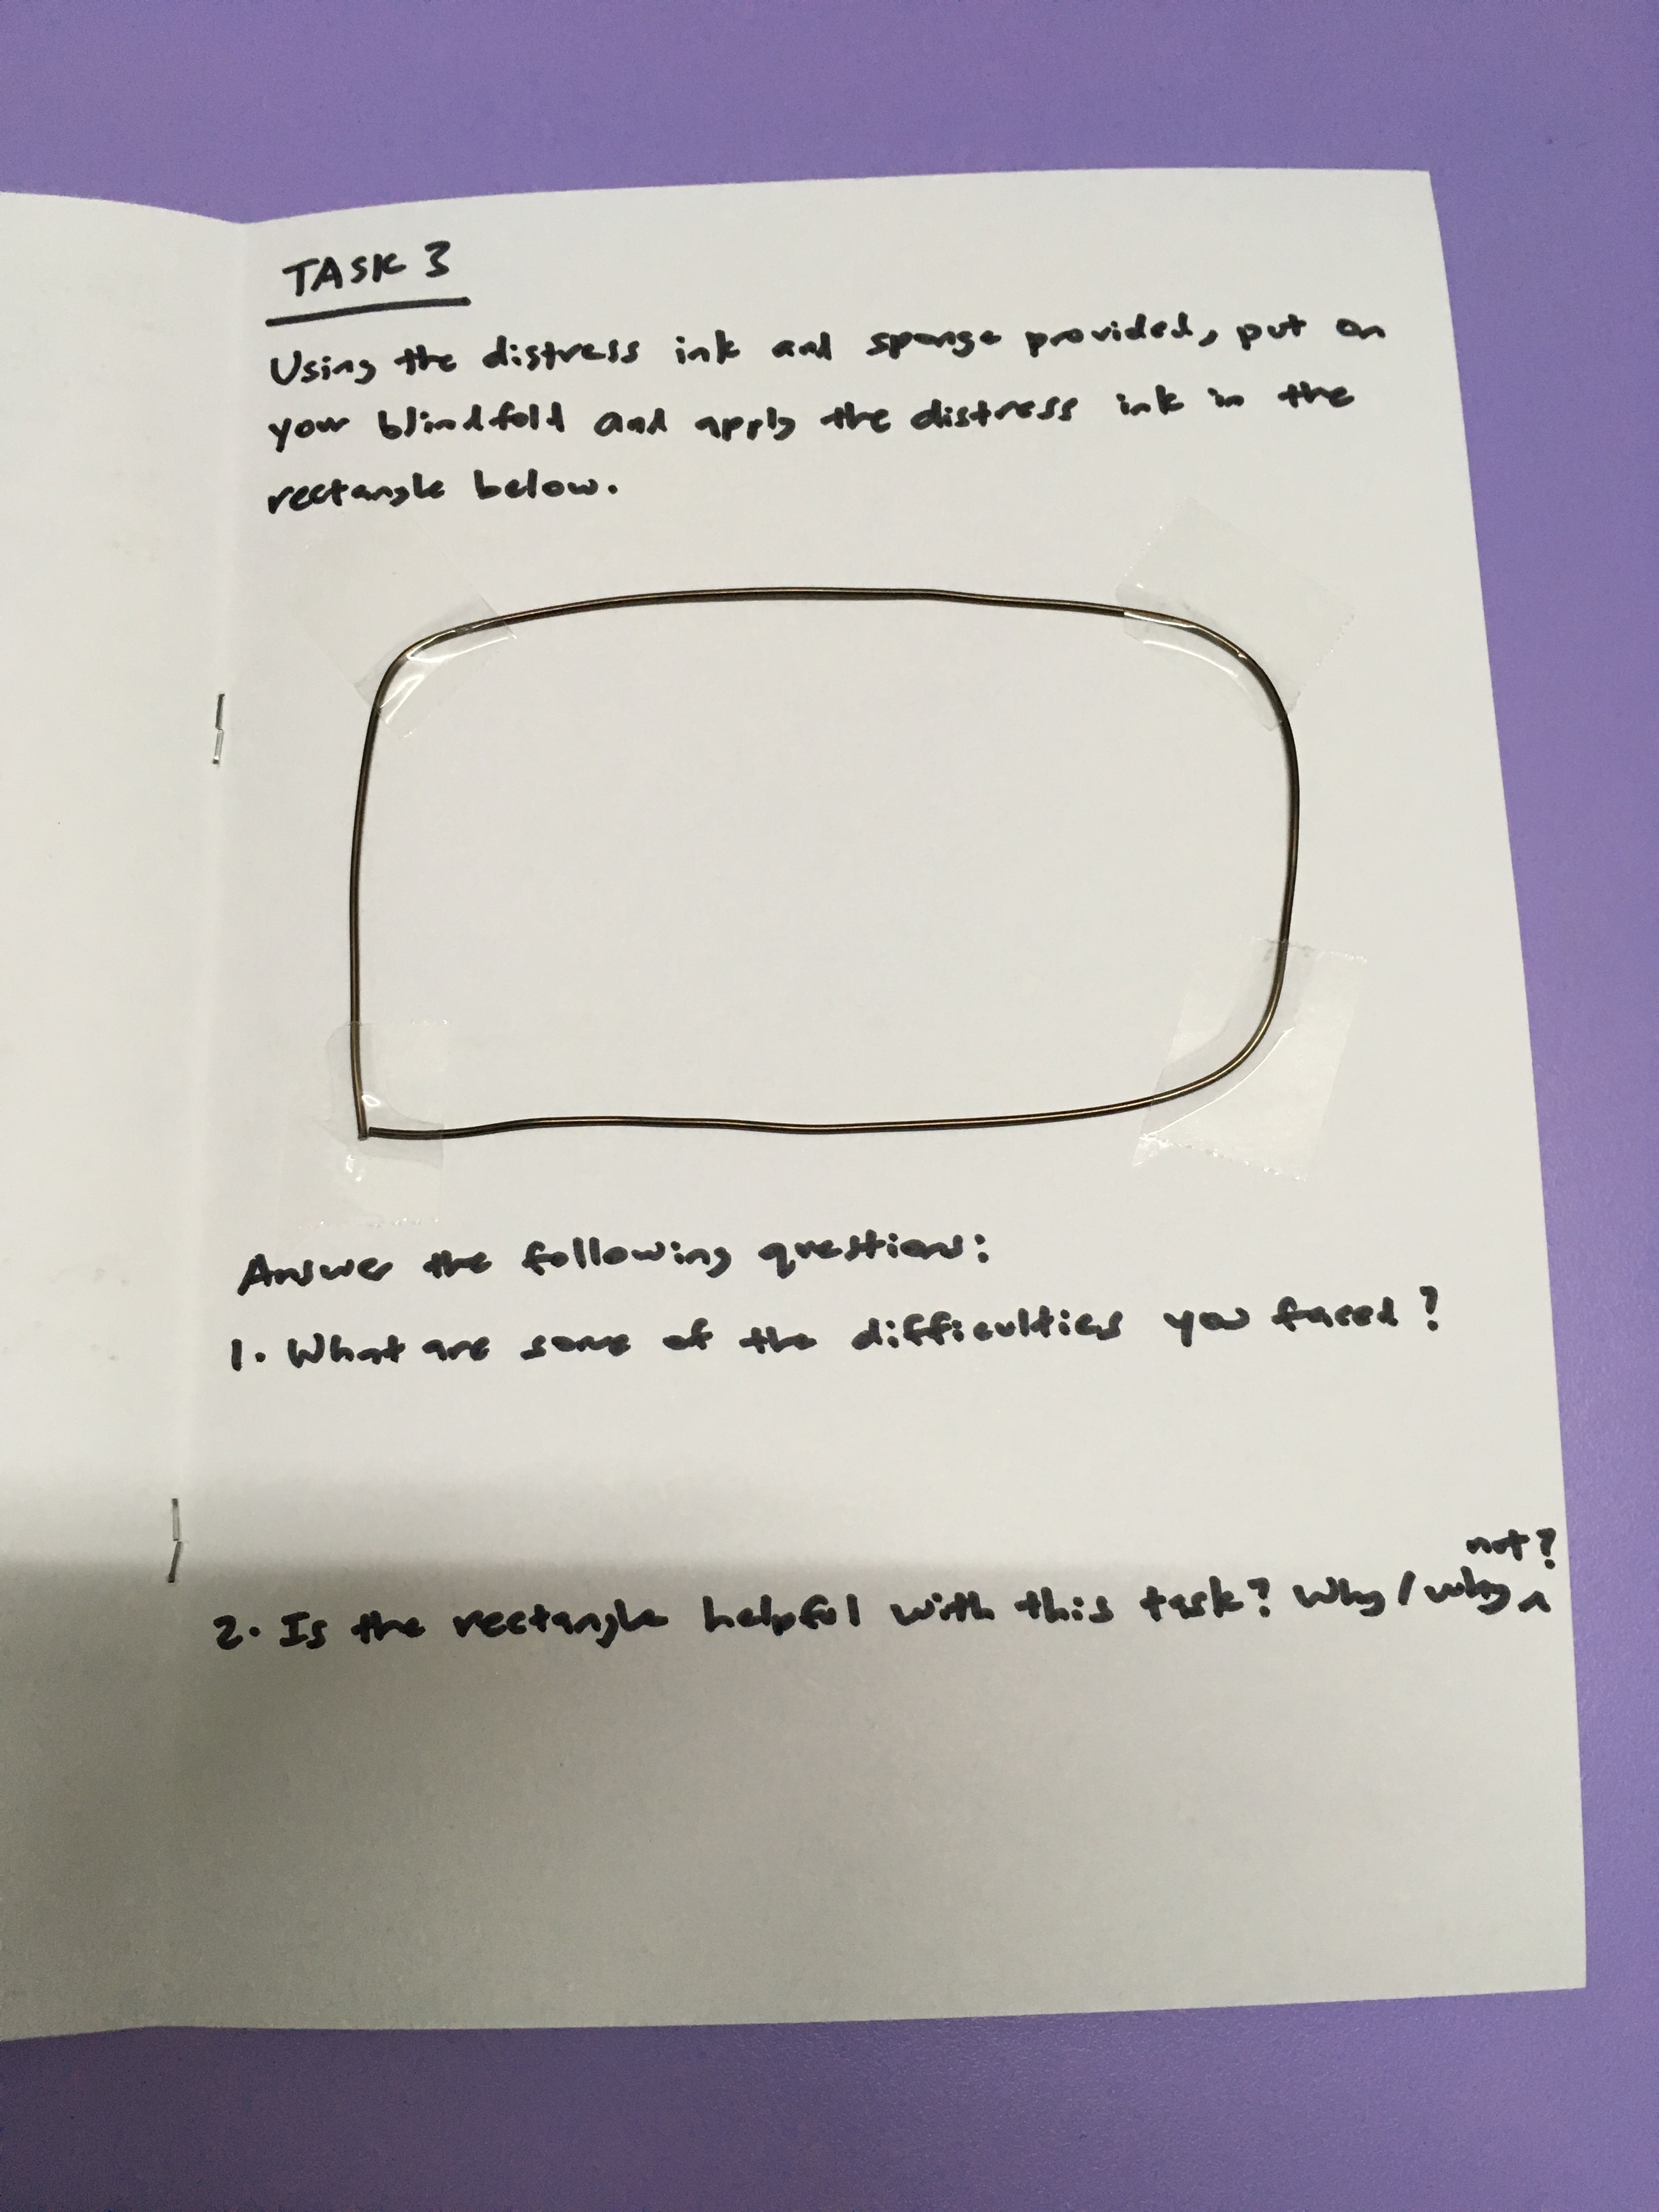
Instructions: Using the distress ink and sponge provided, put on your blindfold and apply the distress ink in the rectangle below. Answer the following questions: 1. What are some of the difficulties you had? 2. Is the rectangle helpful with this task? Why/why not?

Rationale for this task: To find out whether a rectangle constructed with aluminimum wire helps the blind distress paper more easily, as they can use their sense of touch to guage the distressing area.

Task 4

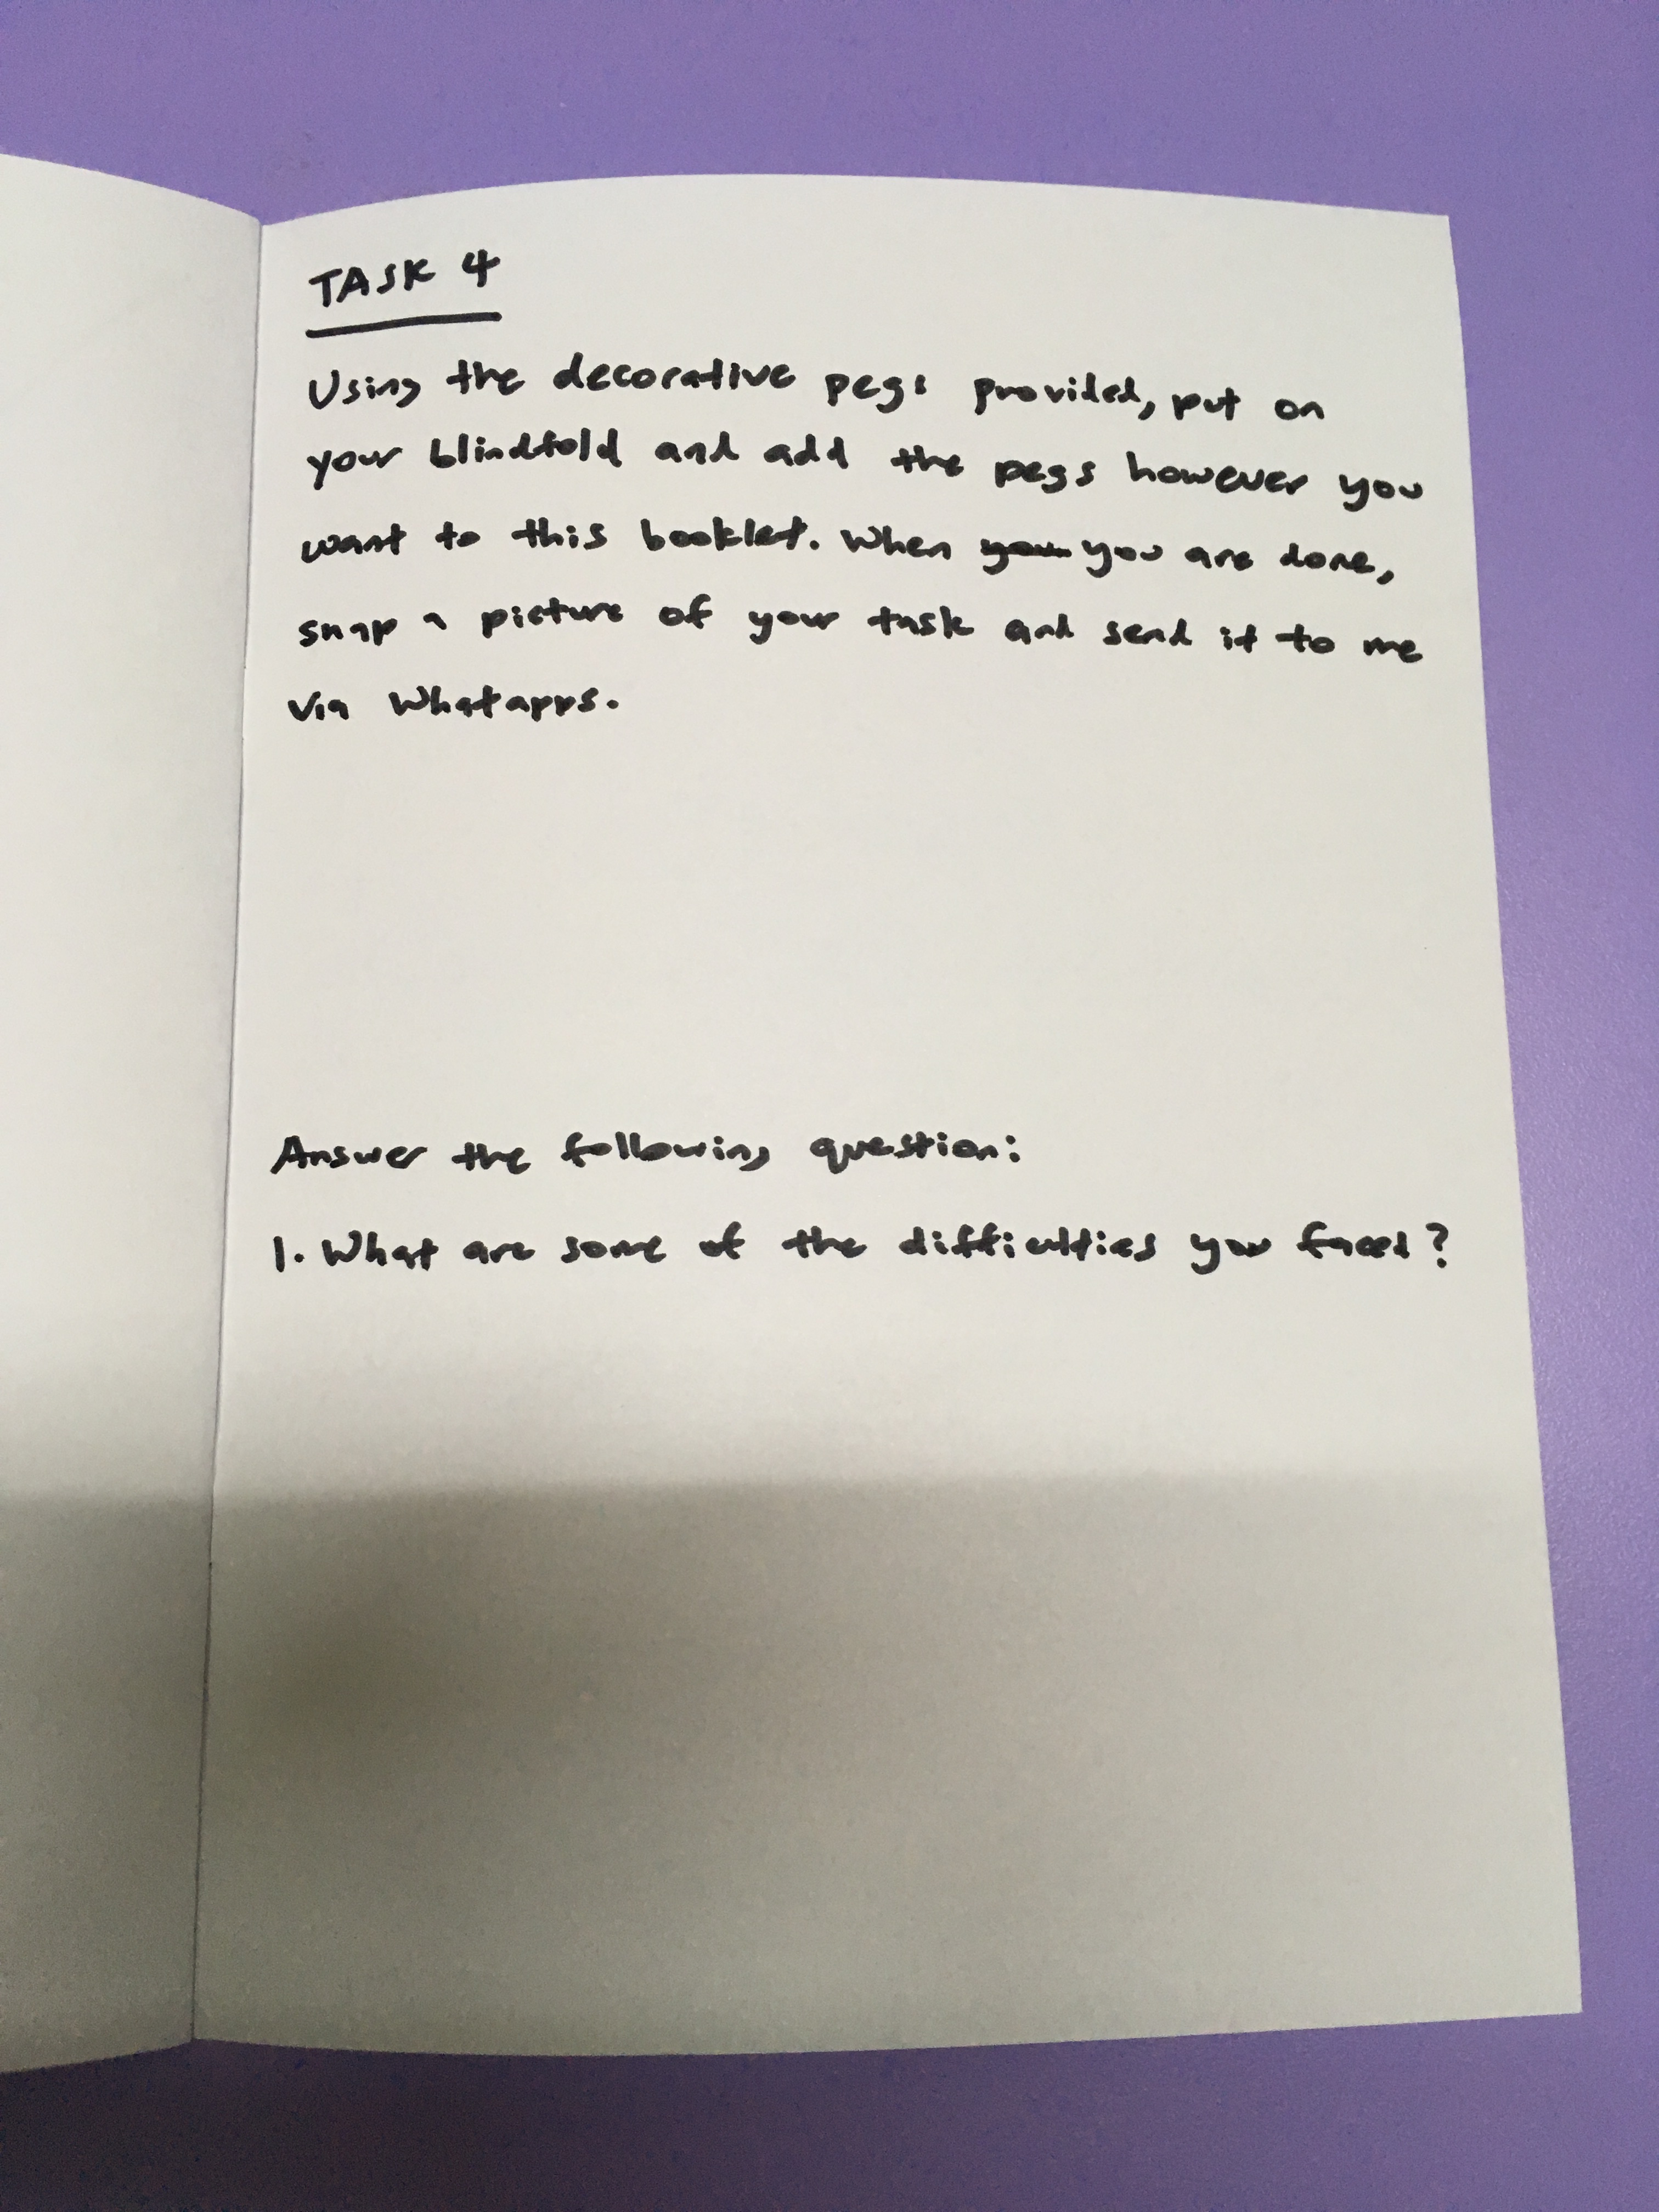
Instructions: Using the decorative pegs provided, put on your blindfold and add the pegs however you want to this booklet. When you are done, snap a picture of your task and send it to me via Whatapps. Answering the following question: 1. What are some of the difficulties you faced?

Rationale for this task: To find out how a blind person utilises decorative pegs when scrapbooking, and to see if it is feasible to include decorative items in the final scrapbooking template.

Findings

I coducted my probes with 3 person, including my friend Elena who is the original practitioner of scrapbooking. The other 2 persons are my younger sister who is 12 years old, and another friend who is 25 years old. I conducted the probe with my younger sister as I wanted to see whether the tasks are too difficult for a younger person. This is because I hope that the final scrapbooking template can be used by the blind of all ages so that they too can make cards for their loved ones.

Task 1 (findings)

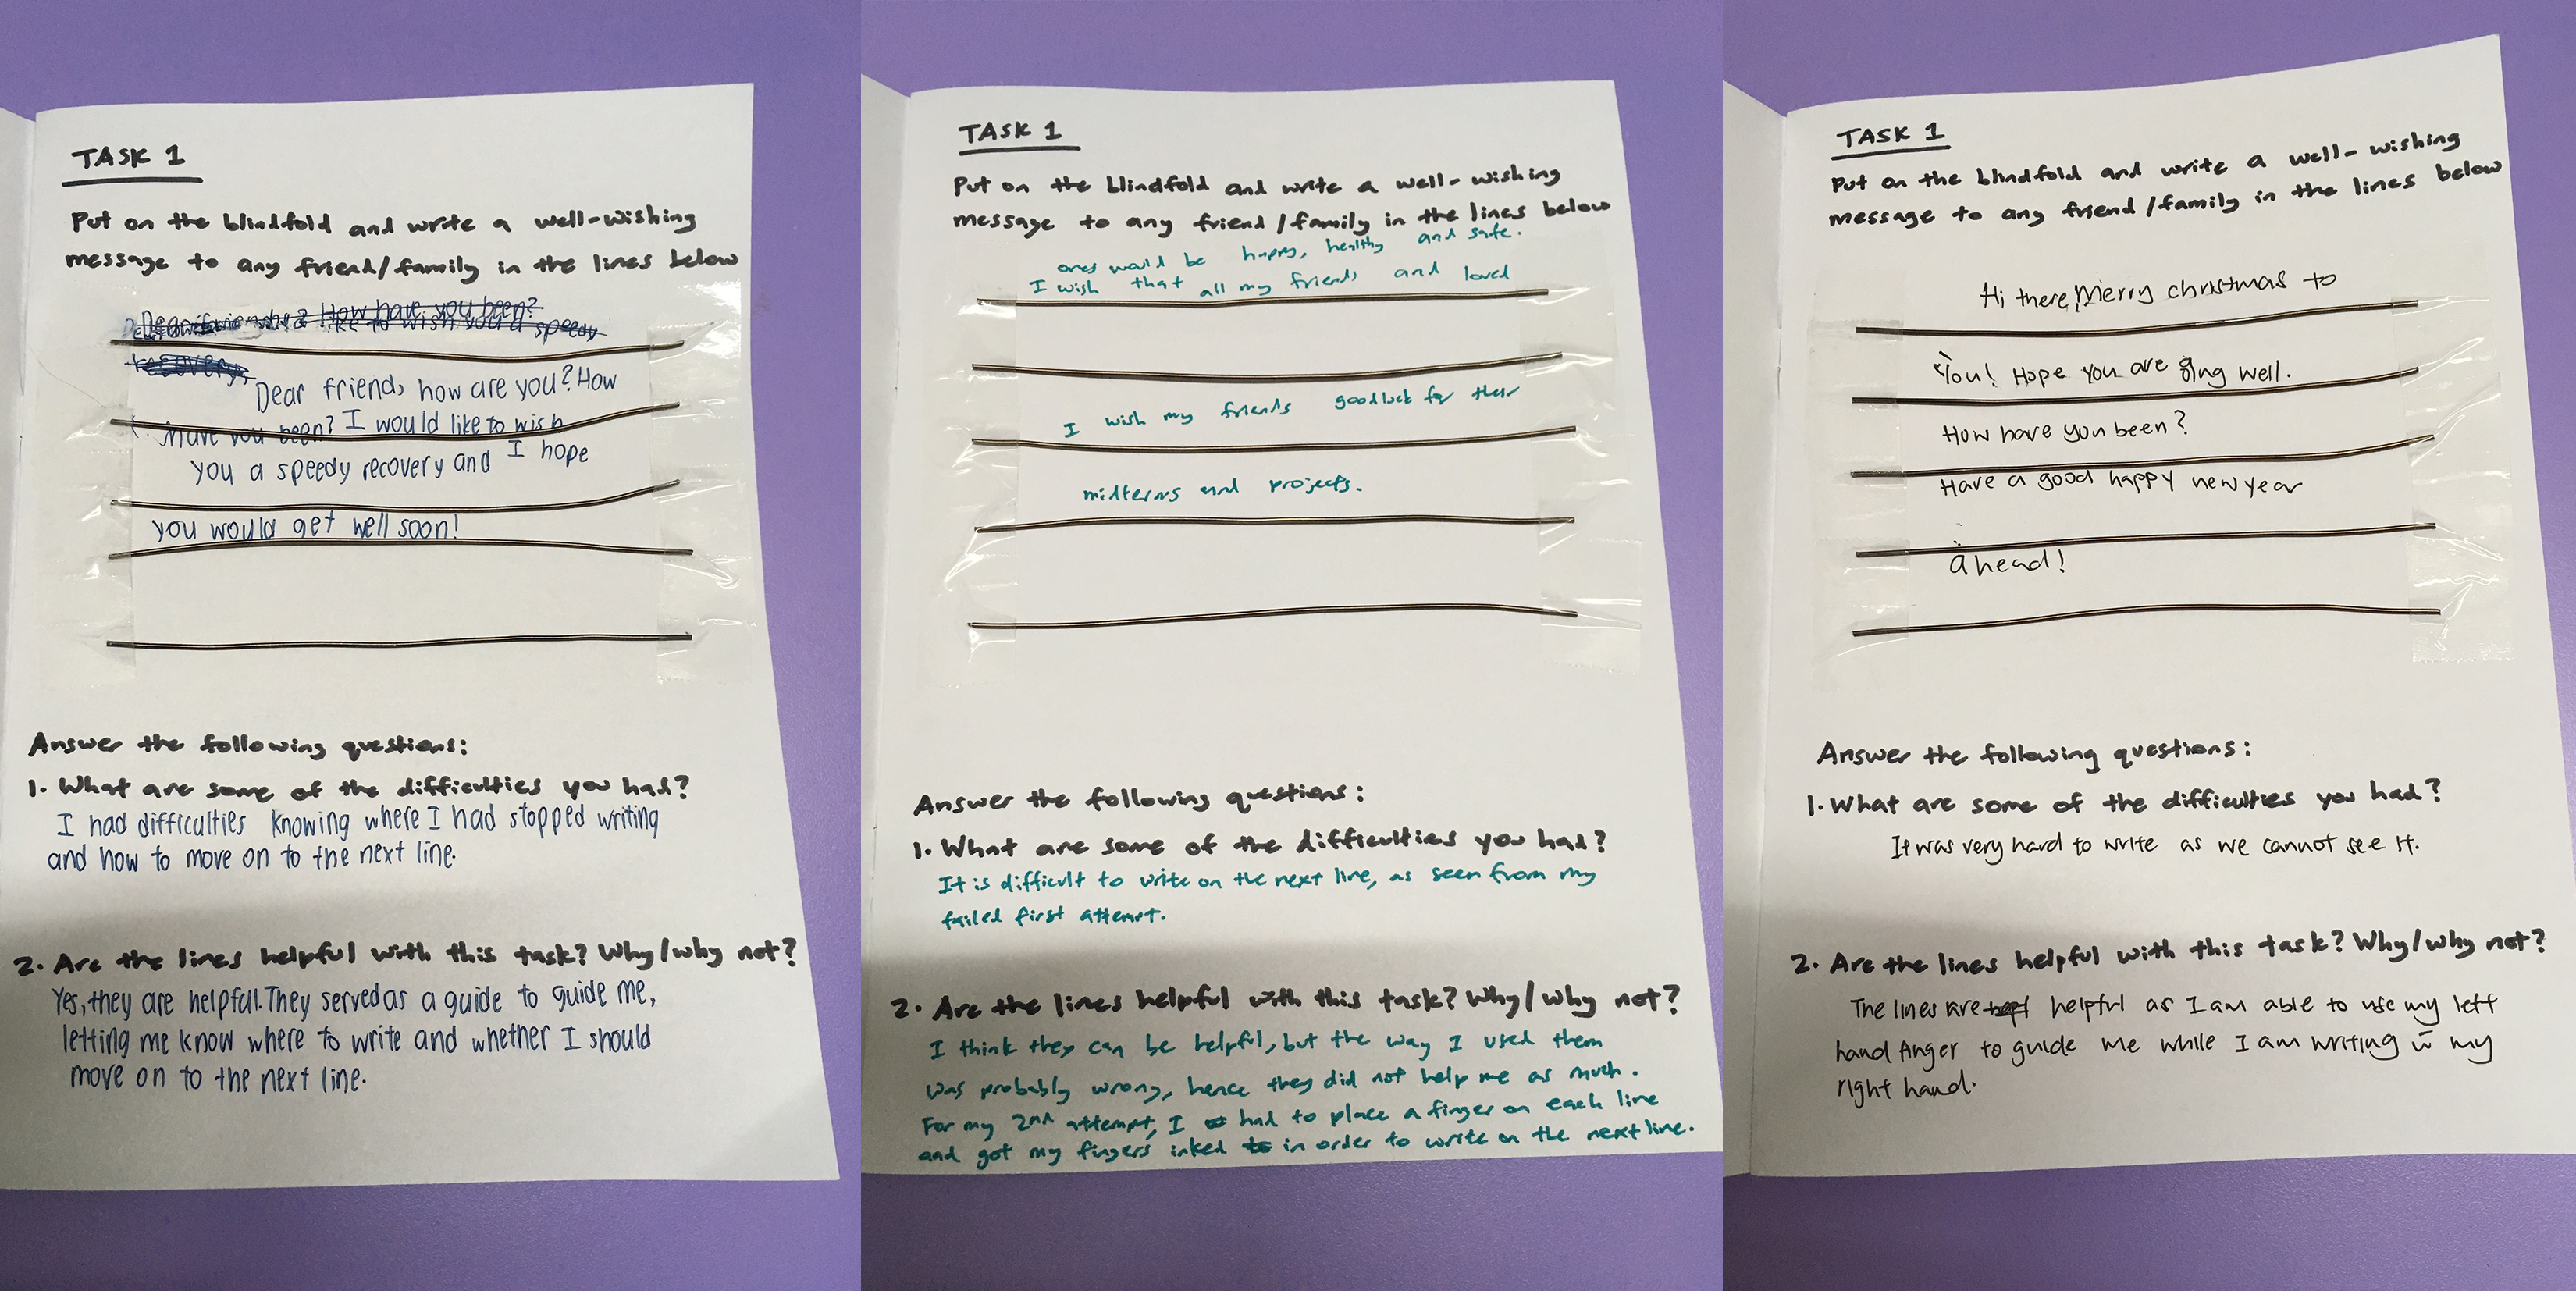
2 out of 3 persons said that it is difficult to move to and write on the next line, although the lines were somewhat useful as a guide. Based on the comments, I think I underestimated the difficulty of this task. I have to come up with a better guide in order to improve the performance of this task.

Task 2 (findings)

All 3 said that the box was useful in allowing them to guage the pasting area, but the box was not helpful in allowing them to figure out the orientation of the pop-up stickers (i.e. they do not know whether the cat is sitting upright or upside down). One notable comment is to make the guide (wire) the shape of the sticker, so the user just have to paste the right sticker into the right shape without having to worry about orientation.

Task 3 (findings)

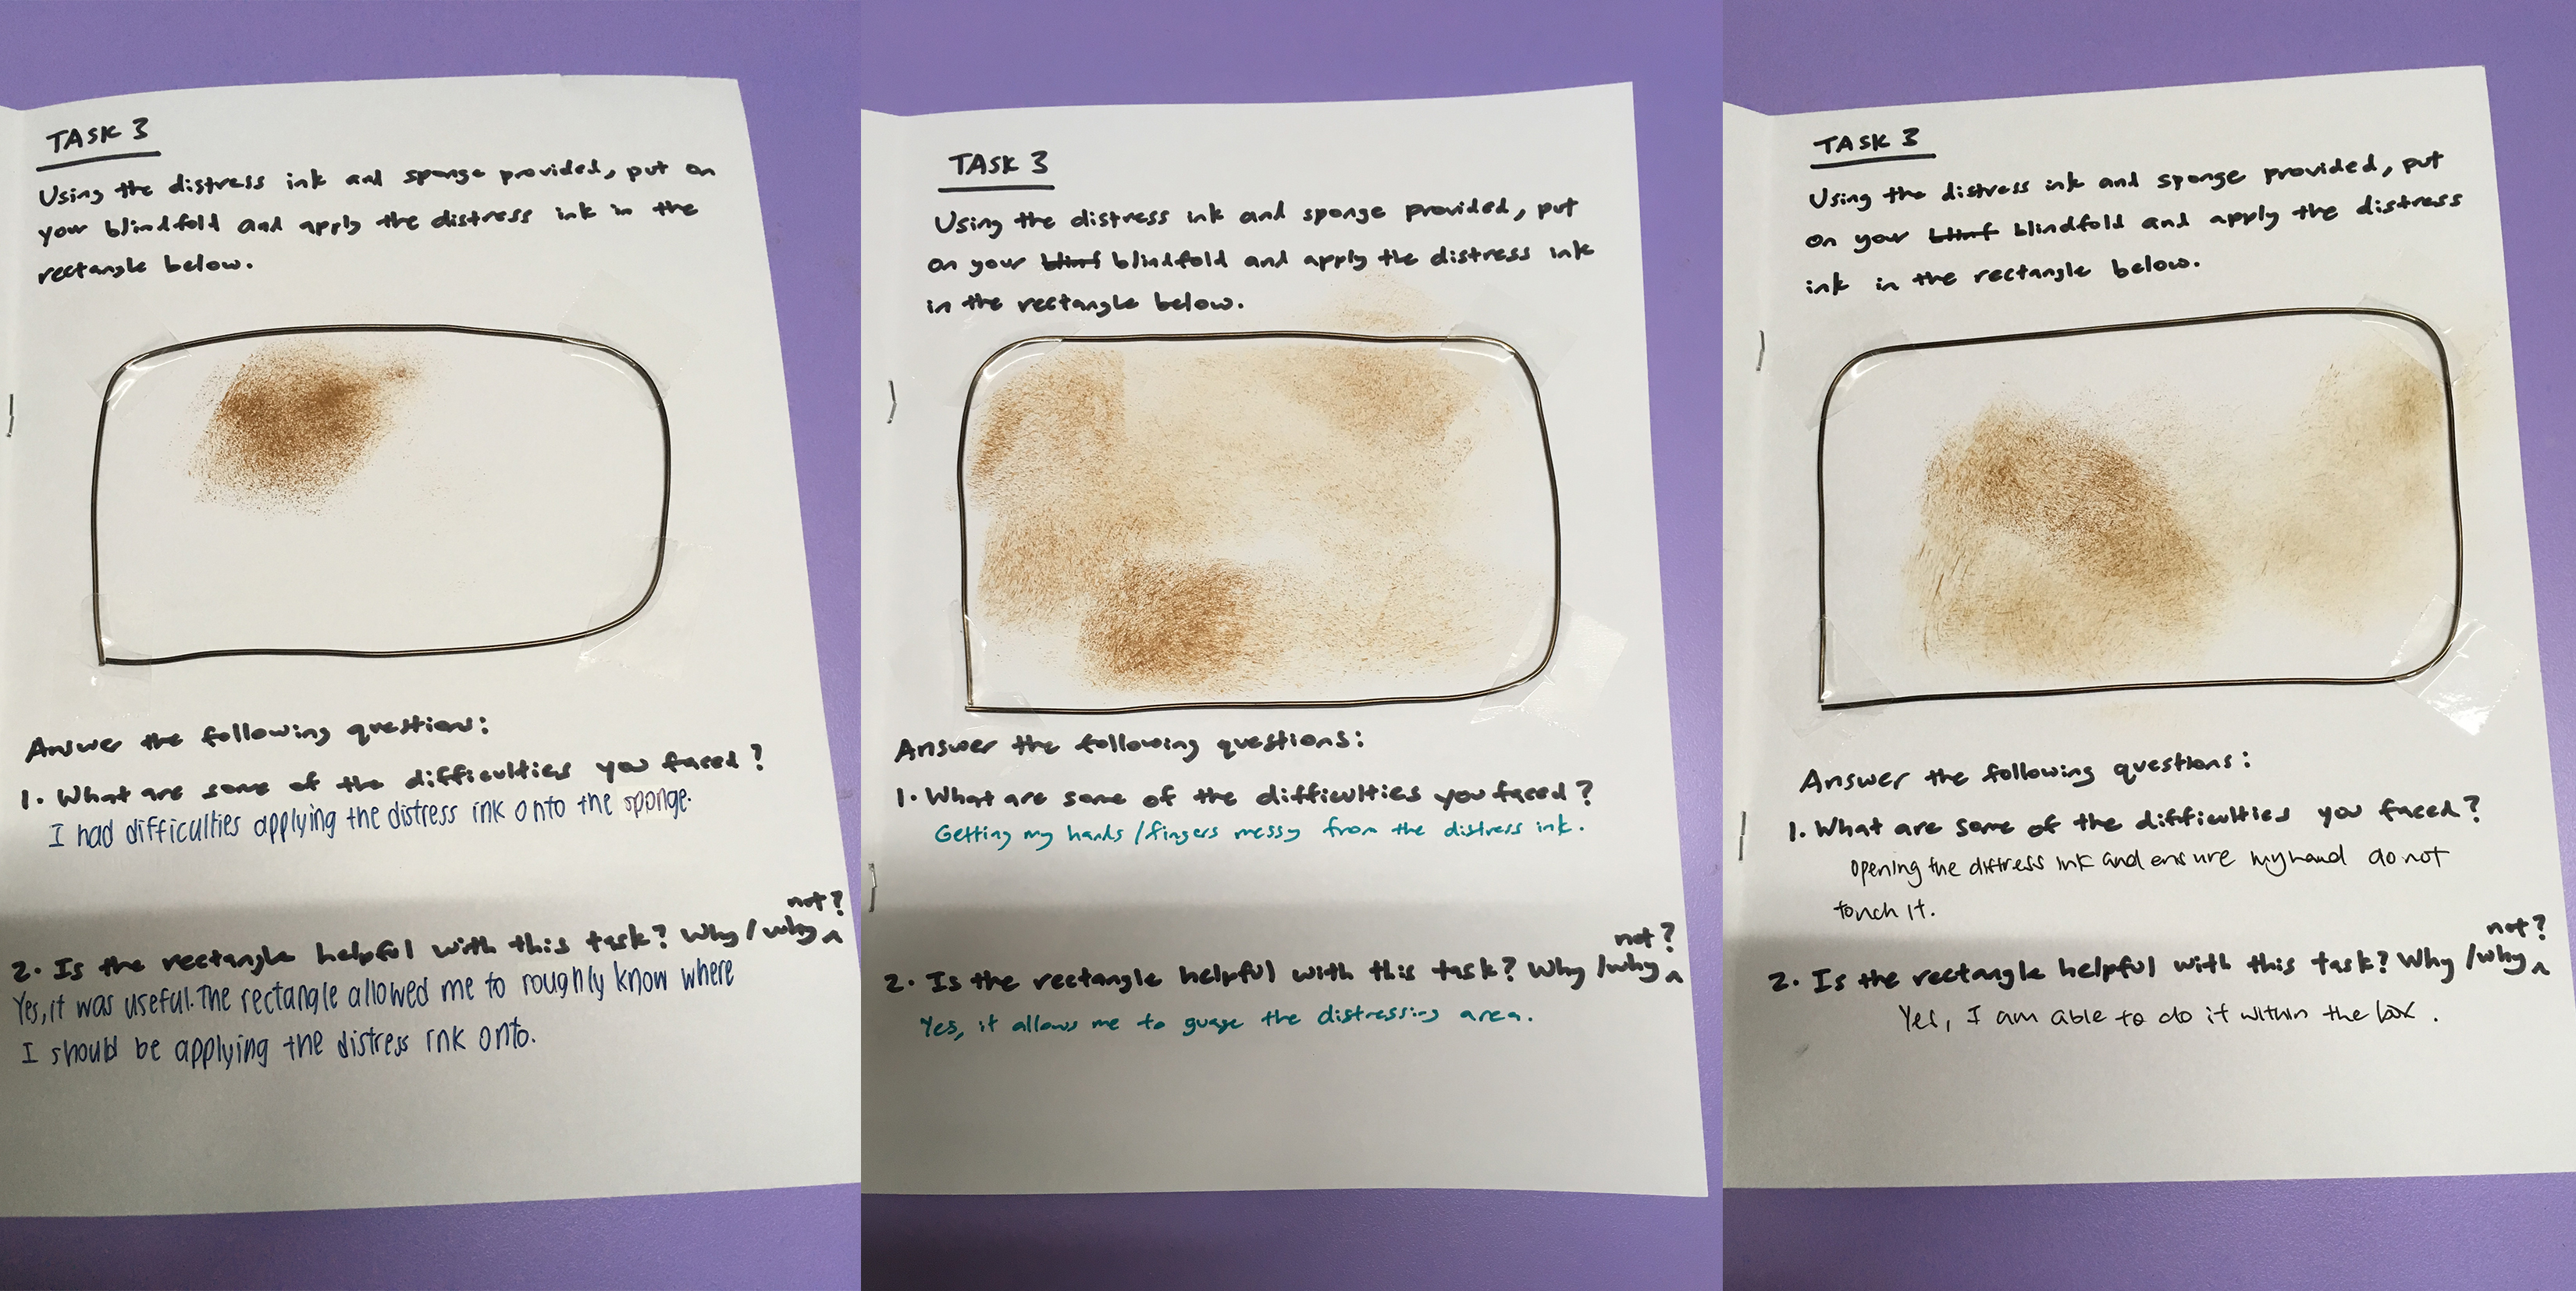
All 3 said that the rectangle was helpful in allowing them to guage the distressing area, but it does not solve the issue of their hands getting messy from the distress ink. This issue is hard to solve, unless the distress ink is sprayed onto the paper instead of using a sponge manually.

Task 4 (findings)

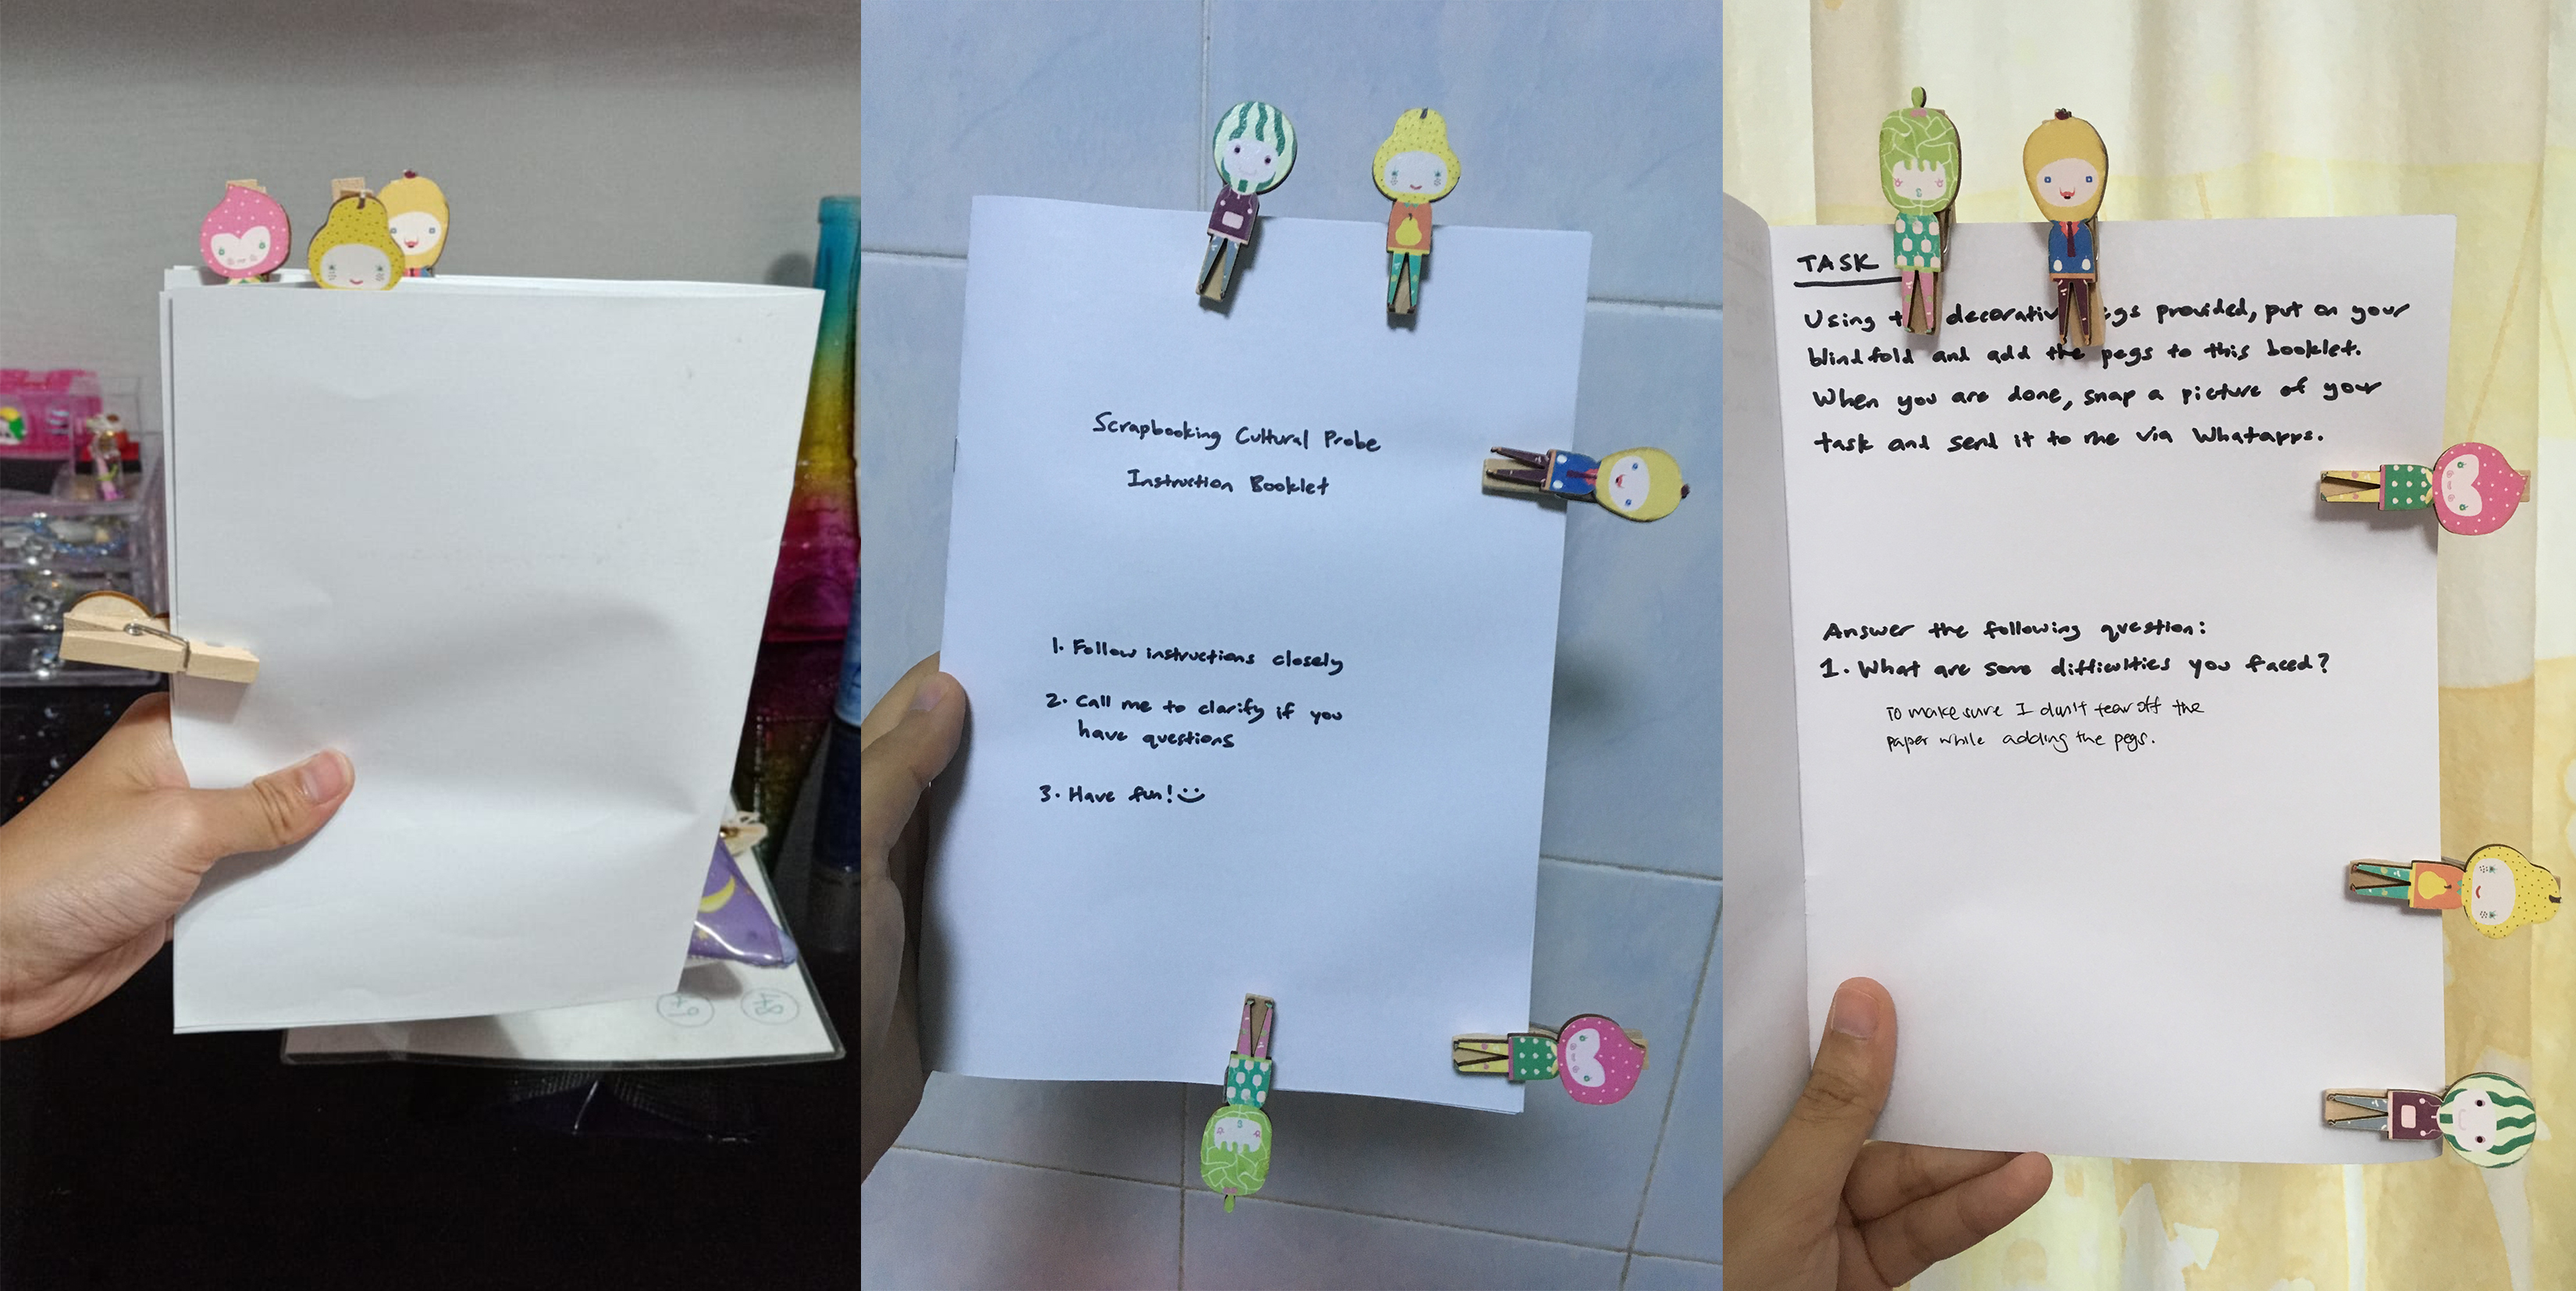
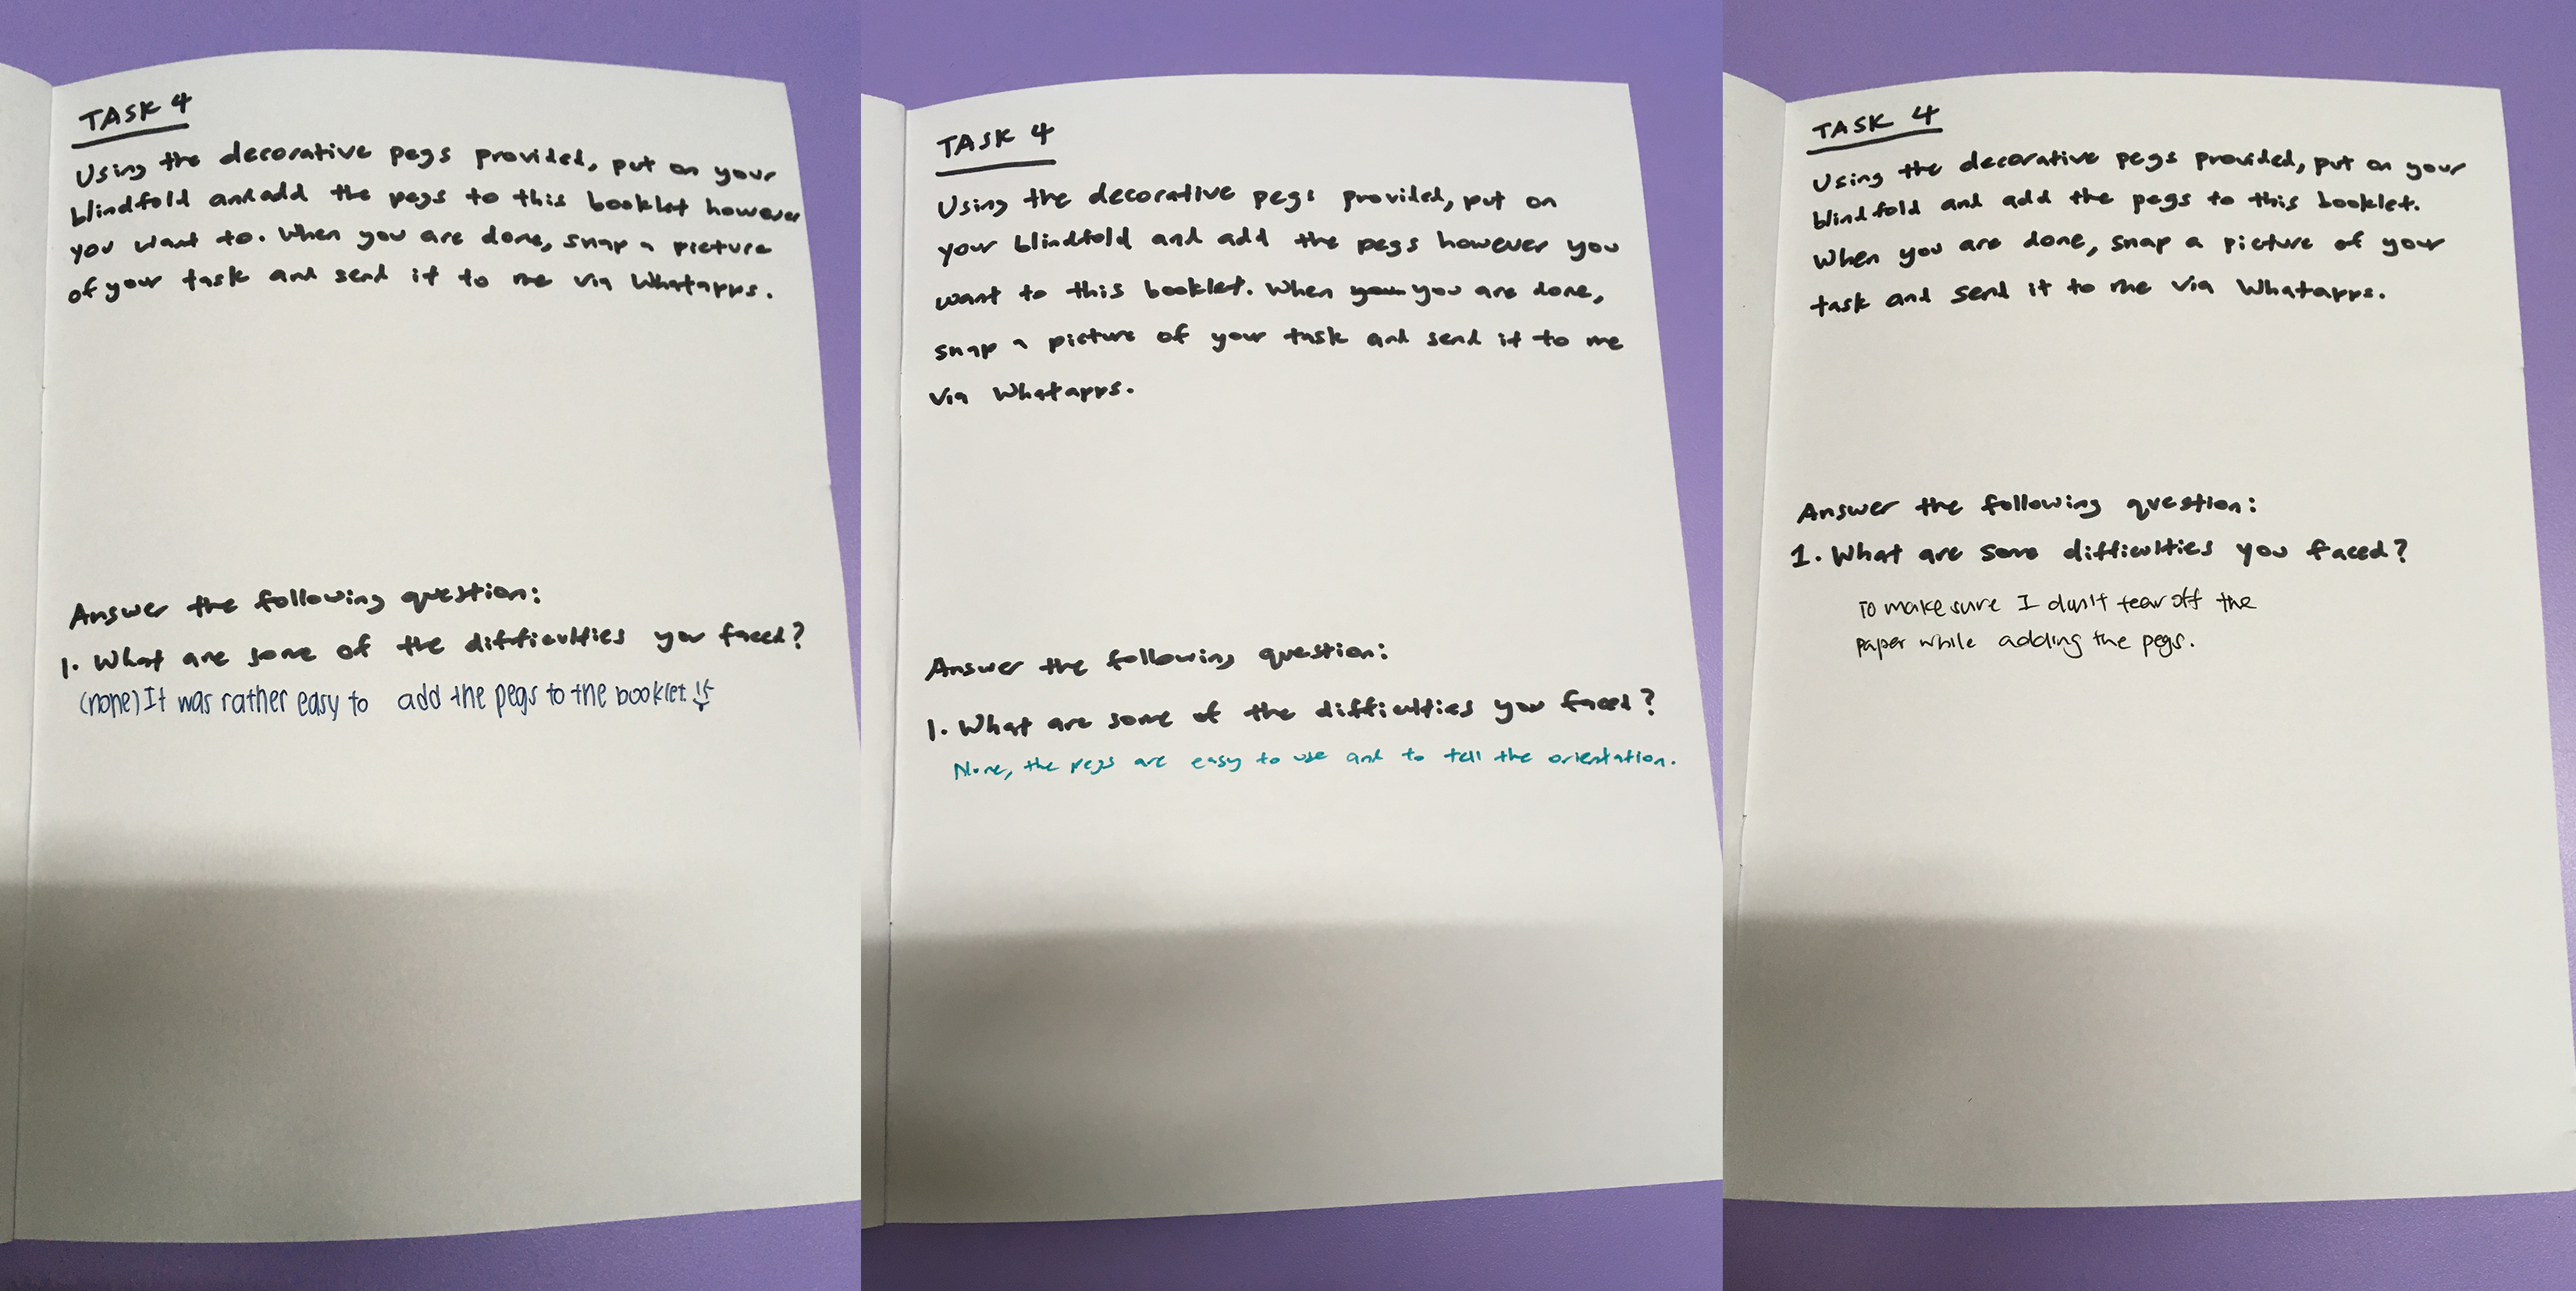
Based on the comments, it is safe to conclude that decorative items such as pegs are very easy to use even when blind. Hence, I should include them in my template.

Conclusion

From the cultural probes conducted, I managed to understand how people do tasks related to scrapbooking while blind, and found out the flaws of my concept designs. Moving on, I know what to improve on and what to keep.

Things to improve:
1. Wire guide for task 1 have to better guide users to write on the next sentence.
2. Wire guide for task 2 should match the shape of the stickers in the right orientation so that it is easier for users to stick them accurately.
3. Figure a way for users to use the distress ink without getting their fingers dirty (maybe spraying instead of sponging). 

Things to keep:
1. Include decorative items such as pegs/stickers.
2. Wire guides are useful in guiding users to a certain extent, although they need improvement in design for some tasks.

Teo Zi Lin – A0160163R

Exploring Practitioners 3: Home-Based Facial Waxing Service – Rachel Teo

Creative Practice

@browsbyrach.sg is a home-based wax beautician. The main service she provides is brow shaping and waxing accompanied by the filling in of the waxed brow. Her other services includes upper and lower lip waxing.

Brow Waxing Process Documentation

First, the area to-be-waxed is cleaned, any makeup and facial oils are removed with a cotton pad and a makeup remover and/or pre-treatment cleanser. Next, an “inked” string is used to carefully map out the shape and areas of the brows to be waxed off. Then a wooden applicator is dipped into the heated soft wax, and a thin layer of the wax is applied to the marked area for hair removal. Following, special waxing strips are used to secure onto the wax areas, and is ripped off swiftly in one motion, removing the unwanted hair in the process. After the general to-be-waxed areas are waxed, a pair of tweezers are used to pluck away any stray hairs that were not able to be waxed off in the process. Any wax residue is then removed by another cotton pad, soaked with post-treatment oil.

Workplace Documentation

The worksite is really small, not much space is needed as the equipment needed is compacted onto a small trolley, and the practice is generally stationary, except of the movement of the practitioner’s hands. The worksite consists of two chairs (one for her client, and another for her), a trolley of her tools, and a light source.

Tools

  • Chair
  • Hair removal wax
  • Wax heater
  • Wax applicator sticks
  • Waxing paper strips
  • Cotton pads
  • Powder
  • Make-up remover
  • Cleanser oil (pre treatment)
  • Wax remover oil (post treatment)
  • Hair clips and a hair band
  • Tweezers
  • Spoolie
  • Mirror
  • Light

Pain Points

The main difficulty was getting there, as her home was far off from the MRT station, and even required a walk from the bus stop. But she is unable to practice her work any where else but her home as she does not have any “shop space”, nor is there another appropriate space for her.

Exploring Practitioners 3: Tattoo Artist – Yukie Miyazaki

I observed my friend, Rickie, who works at Naked Skin Tattoo (@rickiestattoo). She has been a practicing tattoo artist for 2 years now. She first started by doing hand poke tattoos! 

Tools used

  1. Transfer paper (with the design on it)
  2. Tattoo machines (consists of the tip, the grip and the main body)
  3. Needle (disposable & varies in size)
  4. Ink
  5. Scissors
  6. Tissue
  7. Gloves
The tattoo machine body (pink), grip (blue), needle and scissors

Process

The design is first printed out on some sort of transfer paper, which will then be transferred onto the skin, acting as a stencil for the tattoo artist. 

The artist will then check with you if you are pleased with the placement of the design before getting you to lie down while she steralises the needle and prepares the tools that she needs. 

The tatto artist can be seen making some adjustments on the tattoo machine. 

She then cleans the area that the tattoo is supposed to be on and begins tattooing the person, using tissue to wipe off any blood or excess ink that comes off during the process. At the end, she cleans the area once again with some sort of gel. 

Worksite

Her worksite is a small space within the tattoo parlour itself and is cordoned off through the use of curtains, kind of like those in hospital wards. Her total work area is about 2x4m, with enough space for a tattoo bench, a small trolley desk (where she keeps her tools and needles) and about two stools. The whole tattoo parlour was quite dark (maybe to add to the scary vibes of it) so she had a super bright ring lamp in her work area as well. 

Pain points

I think some problems that she might face would be the ink from the image transfer smudging, especially if the area where the person wants to get inked on is under your clothes, so after she transfers the image on, you’ll have to make sure that nothing touches that area for a bit. 

Another pain point could also be that some clients may move around while being tattooed (for example if they are very animated people and move unconsciously) or if they are ticklish, or shiver out of pain. This can make it difficult for the artist as it affects the lines that they draw, and could cause them to make a mistake. 

Additional notes

While researching about tattoo artists, I came across another artist who specialises in fine line tattoos (@eatdiamonddust on Instagram). Besides her work being very nice, she really takes pride in her work and doesn’t tattoo designs that she doesn’t think are nice nor does she do cover up work because she respects other artists work. I think she’s really cool.

Explore Practitioners 3: Candy Crafting – Karin Lew

If you were here in Singapore long enough, you’ll remember how popular the Sticky Sweets were. They had branches with open concept counters showing customers how they made their sweets. I never did stop to look at how their sweets were made and thus it led me to hunt down their last outlet in Clarke Quay to observe the candy making process. 

Process Documentation

These days, the shop usually caters to private orders who ask for customised designs. When I was at the shop, they happen to be making a customised order for PMC.SG which was required to look like this:

To do this, they told me they had to individually craft the alphabets and external layer of colour, before putting it all together and rolling/stretching out until the candy size is achieved. 

The sugar was first melted, then mixed with colouring and placed on the cold counter to harden a little again, before placing on the hot counter to mould out the letters and shape and then stretched and placed on the cold counter again. When it is cooled, the rods are then cut to the small pieces forming the candy.

Steps:

  1. Boil the sugar
  2. Cool it down
  3. Put the colouring and flavouring
  4. Stretch out the candy
  5. Lay on hot counter
  6. Cut out a section from diff colours to form the design and words
  7. Roll all the parts together
  8. Stretch it to candy size
  9. Move to the cold counter for it to harden
  10. Chop into bite-sized pieces
cooling down the candy after adding colour and flavour
Stretching out the candy
Moving to hot counter to cut out sections and shape the desired letters and shape
The letters are starting to appear!
Its a GIANT sticky tube!!!
Stretching out the candy
Cooling down the individual rods!
Final Product! Pretty cool huh

Tools Used

  • Hot counter
  • Cold Counter
  • Metal rod to shape candy
  • Scraper
  • Gloves 
  • Scissors

Worksite Documentation

At least a 2 counter space for the candy making process. Only a few required tools needed. Need counter to be wide as well for stretching out the candy 

Pain Points

One thing that really stood out to me was the tedious and time-consuming process in crafting out the letters and strokes individually. One must have adequate imagination and patience to form out the letters and then put them together

Another was how the candy had to be constantly stretched or pulled or moving or else it would harden up easily. One must be able to do it efficiently and easily. 

Explore Practitioners 2: Jeweller/Beading – Clare Chang

The practice of jewellery is one that involves an artisan that uses a variety of materials to create wearable pieces such as bracelets, earrings, rings, and necklace. However, they might also expand this practice to creating jewellery pieces for bag adornment (like key chains). Jewellers are also skilled craftsmen in repairing and appraising jewellery pieces. 

Process Documentation

For a jeweller, the process of creation starts from ideation. This means that the jeweller has a to brainstorm after drawing inspiration from his/her environment. The jeweller I observed mentions that she feels that in her day-to-day life, she is able to draw inspiration. Such as from the weather, like rain drops or the shapes of clouds. In the following stage, is idea finalisation and then the technical work comes in. 
Steps:

  1. Preparing the materials needed by gathering the related materials (the gem stones, wires etc.) 
  2. Experimentation stage/Assembly: this is where the skeleton of the piece comes together
  3. Modification and refinement: this is where the piece of jewellery is almost in its final stage. The jeweller makes the choice of editing her initial design and testing it physically since it is now in full scale and completely tangible  
  4. Final Touches and Polishing: as the jewellery piece is finished, the jeweller is now ready to end all wires and buff the piece with a polishing cloth to ensure that the piece is free from any unwanted working materials. 

Tools Used

The main family of tools that a jeweller utilises are:

  1. Wires (of different thickness, materials and colours) 
  2. Beads/Gems 
  3. An assortment of cutters (Pictured Below) 

Worksite Documentation 

A jewellers worksite as I observed, is also portable. However, the main important thing that has to be available is.a sturdy, stable working surface.  The jeweller usually keeps all her items in a large tool box that she individually packages her different stones/beads. She uses a premade and store-bought tool box to segregate her items such as wires from ring moulds to beads and also keeps the cutting tools together. 

Pain Points

When asked, the jeweller mentioned that this is a craft that is honed over time. There are many minute details that someone first starting out would find tedious and difficult to pick up, let alone master. These are things like the technical skills to being an ideation to life. Wiring is something that is not easy to the beginner. 


Also, the jeweller mentioned that with age, beading or jewellery work could becomes more difficult. She compared it to the practice of sewing, where having to thread the wire through a small opening in beads might become tough for older people who have shakier hands and declining eyesights.

Explore Practitioner 3: Life Drawing – Darren

Process Documentation/Practice:

I joined a life drawing session by accident (didn’t know what life drawing meant). It was an event organized by the Hive in Lavender, where people gather to draw a nude model. It was definitely a different experience — one that was rather shocking/surprising as it was my first life drawing session. It was indeed enjoyable.

The session started at about 7pm.

All the participants have arrived and collected the materials provided for drawing just outside the main studio.

We were briefed on how the session was going to go — the model will do 4 poses (each for 20 mins) with a 5-minute interval between each pose so that the model can rest.  

After the brief, classical music was played at a low volume and the model walked into the center and stayed in his first pose. I was shocked. You could hear giggles from the other participants. The artists and myself then started drawing the model in whichever angle we are positioned in.

At each 5 minute break, we would go around looking at each other’s pieces.

After 4 poses, the drawing session was over.

Tools Used:

  • Standing Artboard
  • Charcoal
  • Pencil
  • Kneadable Eraser
  • Crocodile Clip
  • Spotlights on model

Worksite:

The worksite was an open space with a table in the middle for model to pose in surrounded by the standing art boards and spotlights. It wasn’t cluttered and there was room for people to walk around the room if they wish to draw the model at a different perspective.

Personal Insights/Pain Points:

I felt that one has to have familiarity with the drawing tools in order to draw nice pieces. For instance, it was my first time using charcoal and I had no idea how much strength I should be applying on the paper for an intended effect. Much practice for human anatomy was also needed as the human anatomy is very complex — coming in different forms and shapes. After the 2nd pose, I felt that my hands were getting a little tired from holding up (there was no support for your hand as you draw). Lastly, I felt hard to manage so many tools and keeping hold of my other completed sheets at a place was hard. I went around asking and chatting with others and noted that it was a matter of practice indeed and they just simply place all the other stuff on the floor or another surface. I felt that the overall experience was rather therapeutic.

Explore Practitioner 2: Sweet-Making – Darren

Process Documentation/Practice:

We paid a visit to Sticky, a business that makes custom rock candy confectionery. The candy is completely hand-made. After asking the practitioners permission to observe and partake in the process, we were able to see the entire process of making a custom order.

Sticky had an order for a custom design — required a website’s URL. So it was pretty interesting to see how they produced the characters one at a time.

They first had to melt the sugar into a working paste for about 20 minutes. Once melted, they can start the process of making the candy. They have 3 different colors – blue, white, and orange paste for the custom order.

They place the slabs on the cooling rack first and then kneaded it. After a few rounds of kneading, the slabs were stretched on a hook to make it more elastic to work with.   

After kneading, they put it on the warm table to work on it.

Once done, they will snip parts of the bigger slab and work on the details from inside-out — starting with the URL. They mold the pieces and then shaped it properly to get the desired effect. The shape is then reinforced with a metal rod.

The process repeats until the entire character is done, wrap it with the white paste and then finally prepare the outer layer.

The outer layer is wrapped around and then they start pulling the giant candy into the smaller signature tubes which is cooled down further with a fan.

Once cooled, the small individual tubes are then cut into the recognizable Sticky candy we know.

Tools:

  • Gloves
  • Scraper
  • Metal Rod
  • Hook for stretching the candy
  • Scissors
  • Fan for cooling down candy

Worksite:

The worksite is open to the public to observe the candy-making proces but only staff could enter the actual site. They have a rack of food coloring and a ‘kitchen’ at the back to prepare the sugar paste for working. In the front, they have large desks – one for keeping the candy paste warm and another that is cool to harden the candy. All their tools are just placed on the desks.

Personal Insights/Pain Points:

I never knew that the candy-making process would be so long and exhausting! You could see the practitioners breaking out a sweat especially with the kneading and forming of the characters. It is pretty labor intensive for pieces with a lot more detail. You need to have an eye to see the characters forming — I didn’t notice it until only halfway through! There was no mold and every detail was formed by the 2 artisans.

Explore Practitioner 1: Leather Crafting – Darren

Process Documentation:

I joined a class to craft a leather cardholder. The practitioner started off with a piece of conditioned leather that has a cutout drawn in pencil. We would cut it out with a penknife guided by a ruler for the straight parts and free-hand for the curved edges. We were also told to use a good amount of force for smooth edges.


Once the shape has been cut out, using a leather hole-puncher, holes of differing sizes are made in the sides of the cutout for the cardholder’s opening and holder. Three edges were folded multiple time and held it together by screwing a metal piece to form the pocket of the cardholder.


Oil is applied to the edges with a balm to smoothen the edges and protect it from external damage. At this stage the wallet is more or less done and the final step is to customize indentations.

To make an indentation, a small indentation kit is provided with different characters that can be left on your leather product. To make an indentation, you dap a little water on the area for indentation with water. It is then hammered lightly to prevent it from punching through the product. You are done whenever you are satisfied with your design!

Processed with VSCO with f2 preset

Me testing out the indentation tool on a smaller strip of leather before on my finished product.

Tools:

  • Penknife, ruler, and cutting board for cutting out shape of wallet
  • Wearable Craftsman Apron for protection
  • Hole-puncher
  • Oil Balm Applicator
  • Hammer and Indentation toolset to leave your desired mark on leather product

Worksite:

The worksite is a small craft workshop with proper benches, chairs, and desk lights for the practitioner to perform their craft with focus. Materials (leather and bits) are stored all around the workshop on hooks/shelves on walls. There was a part of the workshop with a big hydraulic press machine for bigger indents that can’t be done normally.

Personal Insights/Pain Points:

It’s a really cool practice that requires precision and concentration to get the job done. You can express creativity with your work with choice of color and indentation. However, once you mess up, it is almost irreversible — a mistake on a good piece of leather is hard to recover and costly (raw material is expensive). Overall, the craft itself is not as easy as it seems as you require accuracy and precision when cutting and imprinting on leather.  

Exploring Practitioners: Veggie Hunt Cristine – Allison Kapps

Learning about how much food is wasted in Singapore and how to conserve and recycle it so that it is still used. Collecting this food as well.

Worksite Documentation

I participated in a volunteer group led by Cristine and other practitioners that approaches shopkeepers and asks them to give vegetables and fruits that they no longer want. This food hunt was done ta Pasir Panjang at late morning, while food producers were preparing the food they were planning on selling for the day. The centre was filled with people, everyone was constantly moving from place to place and the entire building smelled of fish.

Tools

  • Identification Cards
  • Trolleys
  • Large Boxes and bags
  • Delivery trucks
  • Closed toed shoes
  • Cellphones

Process Documentation

The experience began with an information session, where we all explained the dos and don’ts of interacting with vendors and the businesses. There was language that we had to adhere to in order to be more persuasive, and some overall tips to make the experience go by more smoothly. It was explained that often vendors would not sell food products that looked imperfect, either too small or too large or if they were bruised or did not fit specific standards.

We were each assigned to teams that focused on different food groups — some for vegetables and some for fruits. I met my team leader as part of the vegetable group. There was also a communications coordinator that was responsible for letting the rest of the team know about our progress, meeting places, and keep us on time. The entire collection period couldn’t last more than an hour and a half, so someone had to be keeping us on track.

We brought a large trolley and began approaching owners and vendors by asking if they had any food they wanted to give away that they did not plan on selling. Immediately vendors began giving us massive quantities of vegetables that appeared in perfectly eatable besides not looking standard.

Store owners were friendly, especially because many recognized the organization and understood what was needed. Some even helped stack boxes for us despite being very busy planning for the day’s work.

PAIN POINT: We would quickly fill up the capacity of our trolly and have to return to the truck to unload and then return to collect more.

At the end of the collection process, we returned to the area where the loading truck was and debriefed our session. There were so many products collected, all received for free and many in great condition! Our group could now select the products to bring home for ourselves, and the rest would be used to provide for charities or the poor.

Explore Practitioners 2: Digital Illustrator – Jo-Ann Ng Yixian

I visited a friend, Caroline, who is a freelance digital illustrator – she mainly earns income from working with companies on projects like collateral designs but she also produces prints and merchandise to sell online. She graduated from NAFA 5 years ago and has been doing this ever since.

Sketch of the necessary tools Caroline says she needs to do her job.
(yes snacks are very important)

Tools:
As illustrated in the sketch above:
Seagate 4TB Harddisk, to store all her digital files (She has 5 of these)
Sippycup Waterbottle, to keep hydrated but to prevent any spillage accidents
Pantone Color Booklet, to color check with clients, printers, etc.
– Wrist guard, because of her drawing injuries, tendinitis, so it helps her to work for longer hours without excessively straining it but it is still important for her to take breaks!
WACOM Intuos 4 Tablet + Pen, about 6 years old and still working good

Interestingly, she pastes a piece of thick tracing paper on top of the drawing field of the tablet to protect the surface and prevent it from being too scratched up – which will reduce the sensitivity in the long run.
Many new models of tablets have been released since the Intuos 4 but Caroline has never really bothered to ‘upgrade’ because she feels like she is very comfortable with this and it does the job. 

Worksite: 
She mainly works in the comfort of her own room (which she was not very comfortable with me taking pictures of since it was messy and a private space for her).

Portability: 
On occasion she brings out her iPad (and Apple pencil) for meetings with companies to do quick sketches on the spot, but she works with this Intuos 4 at-home set up 95% of the time and is most comfortable with.
It would be possible to migrate to spaces like cafes or coworking spaces of course, but electricity plugs will be needed due to long working hours and it is important for her to be comfortable in the work environment if not she gets art blocked.

Ng Yixian Jo-Ann (A0142014B) – Practitioner 2/3