Exploring practitioners 1 and 2—Ann Marie and Rose Marie Yang: Shelton Chang

Being in the fashion media industry, I’ve always been on sets of shoots with photographers, hair and makeup artists. But I’ve always been busy assisting shoots, from steaming clothes to dressing models that I’ve never really taken the time to observe what goes into capturing an image.

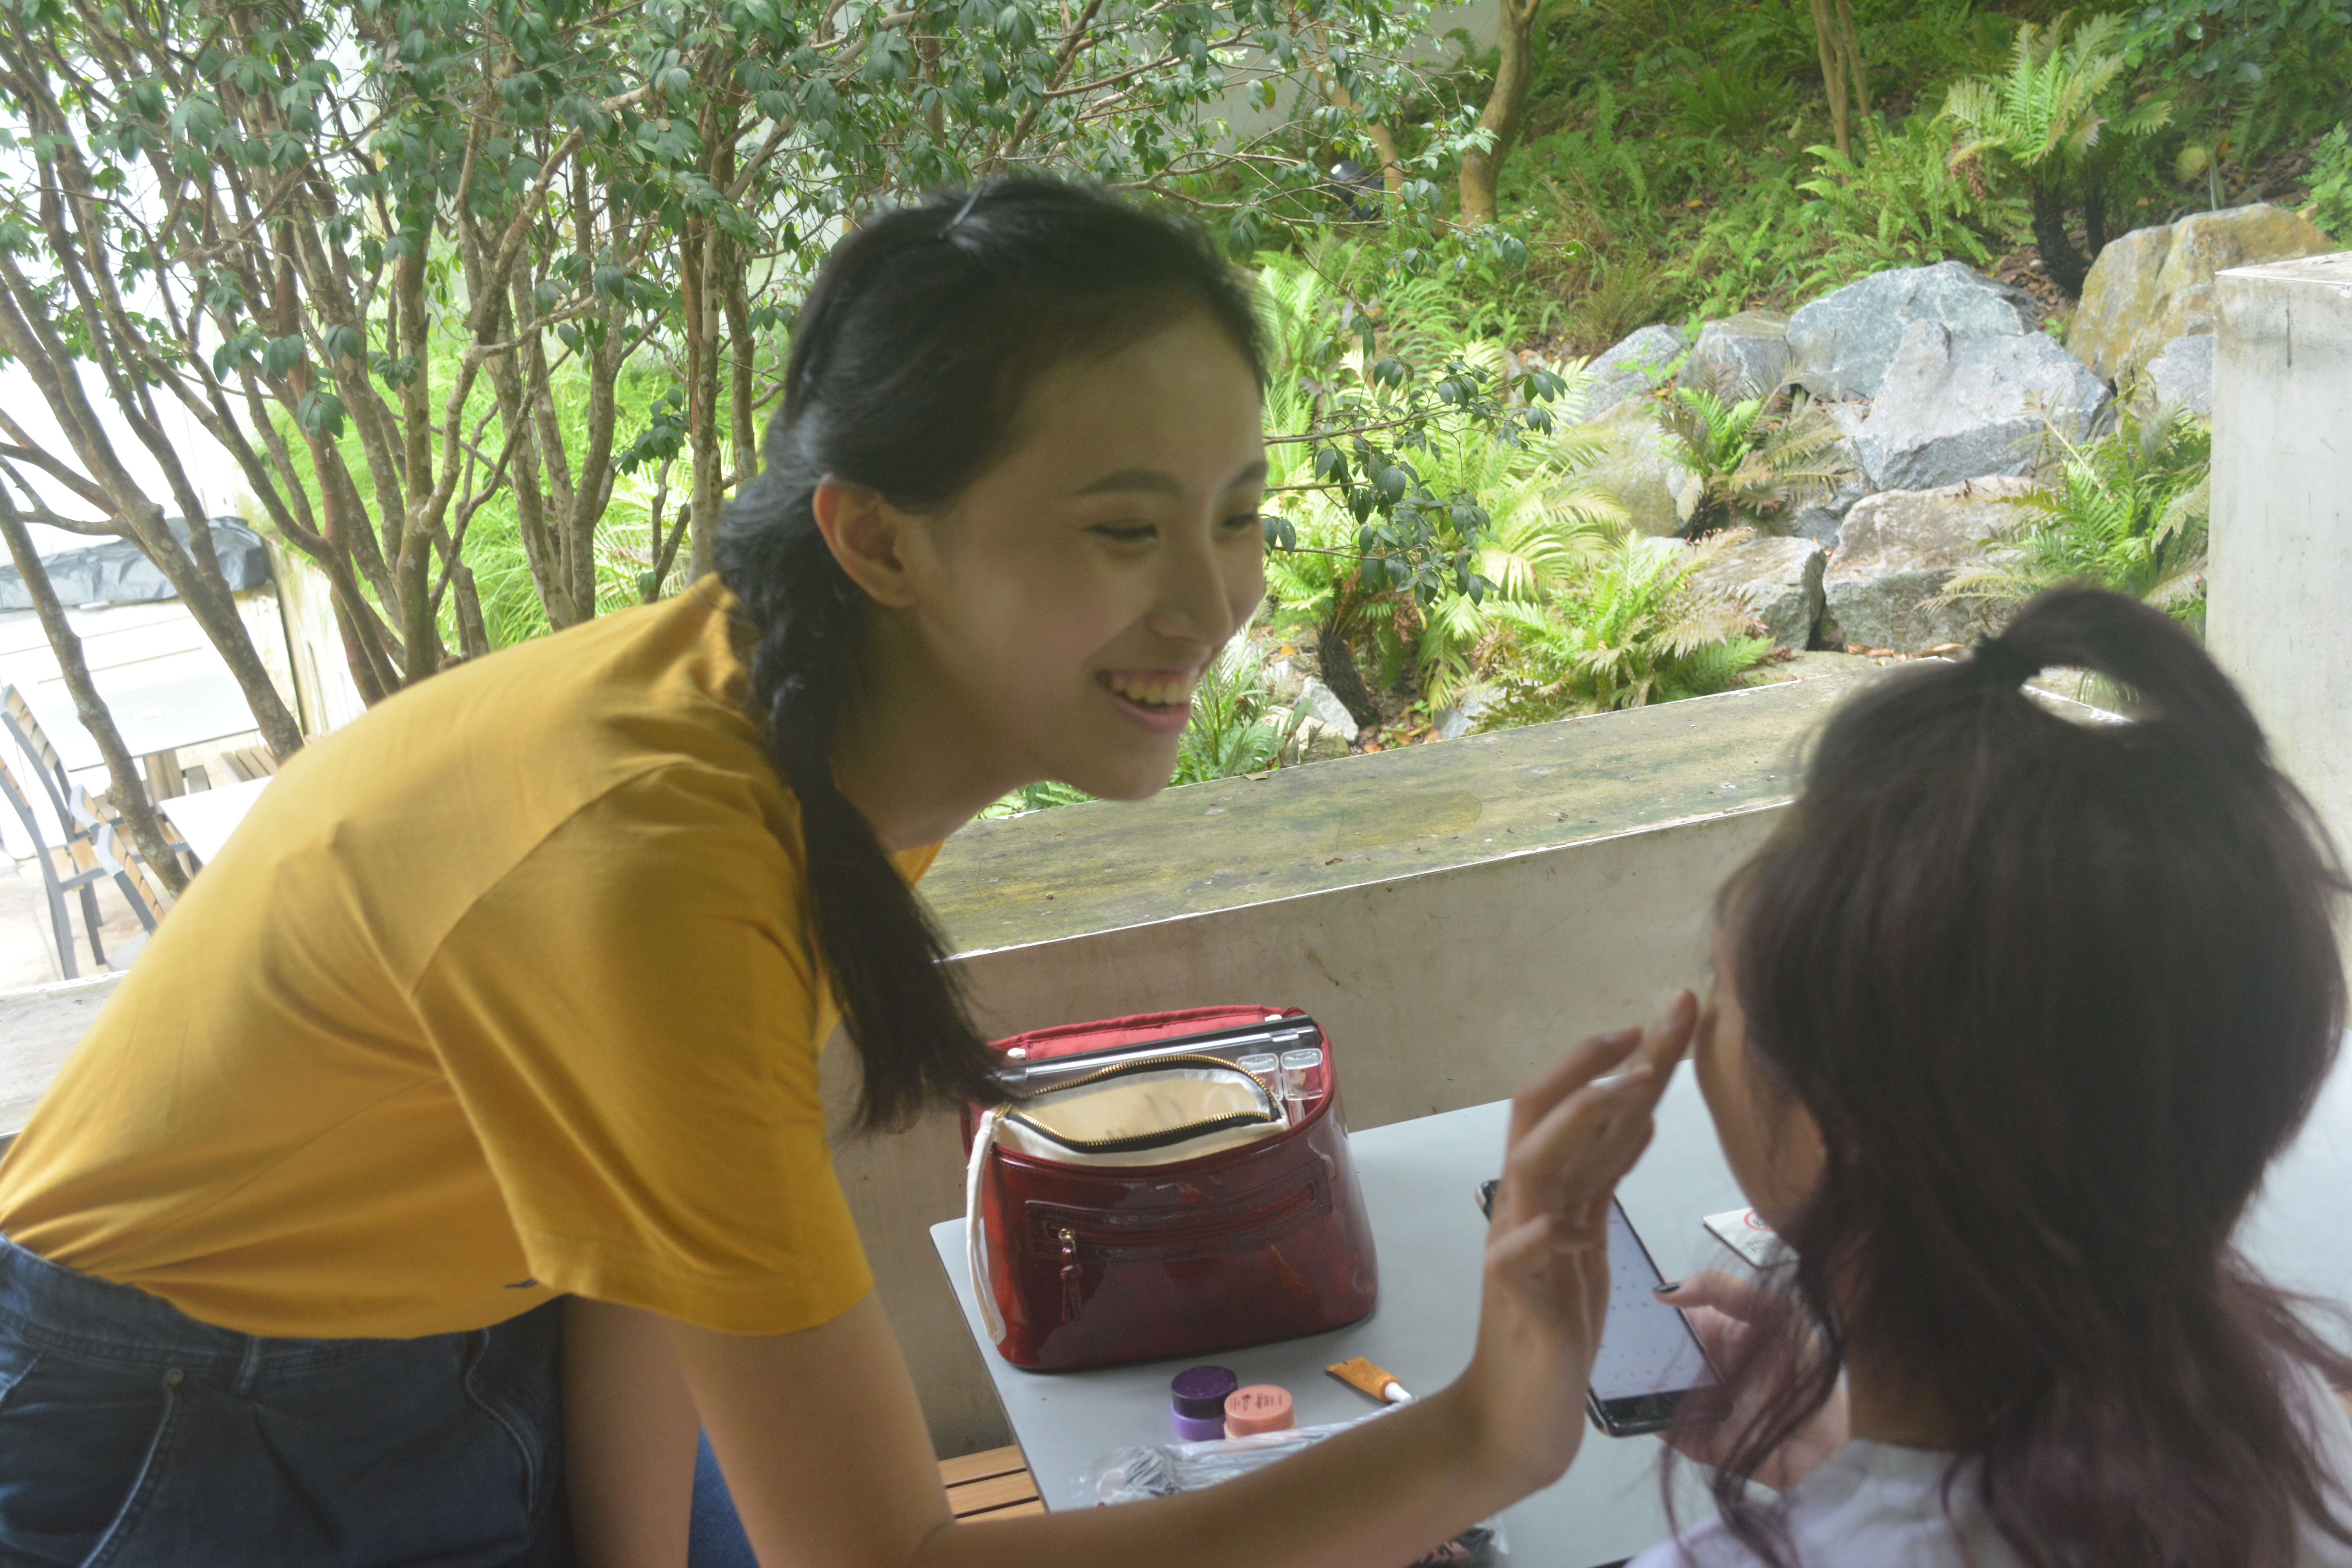
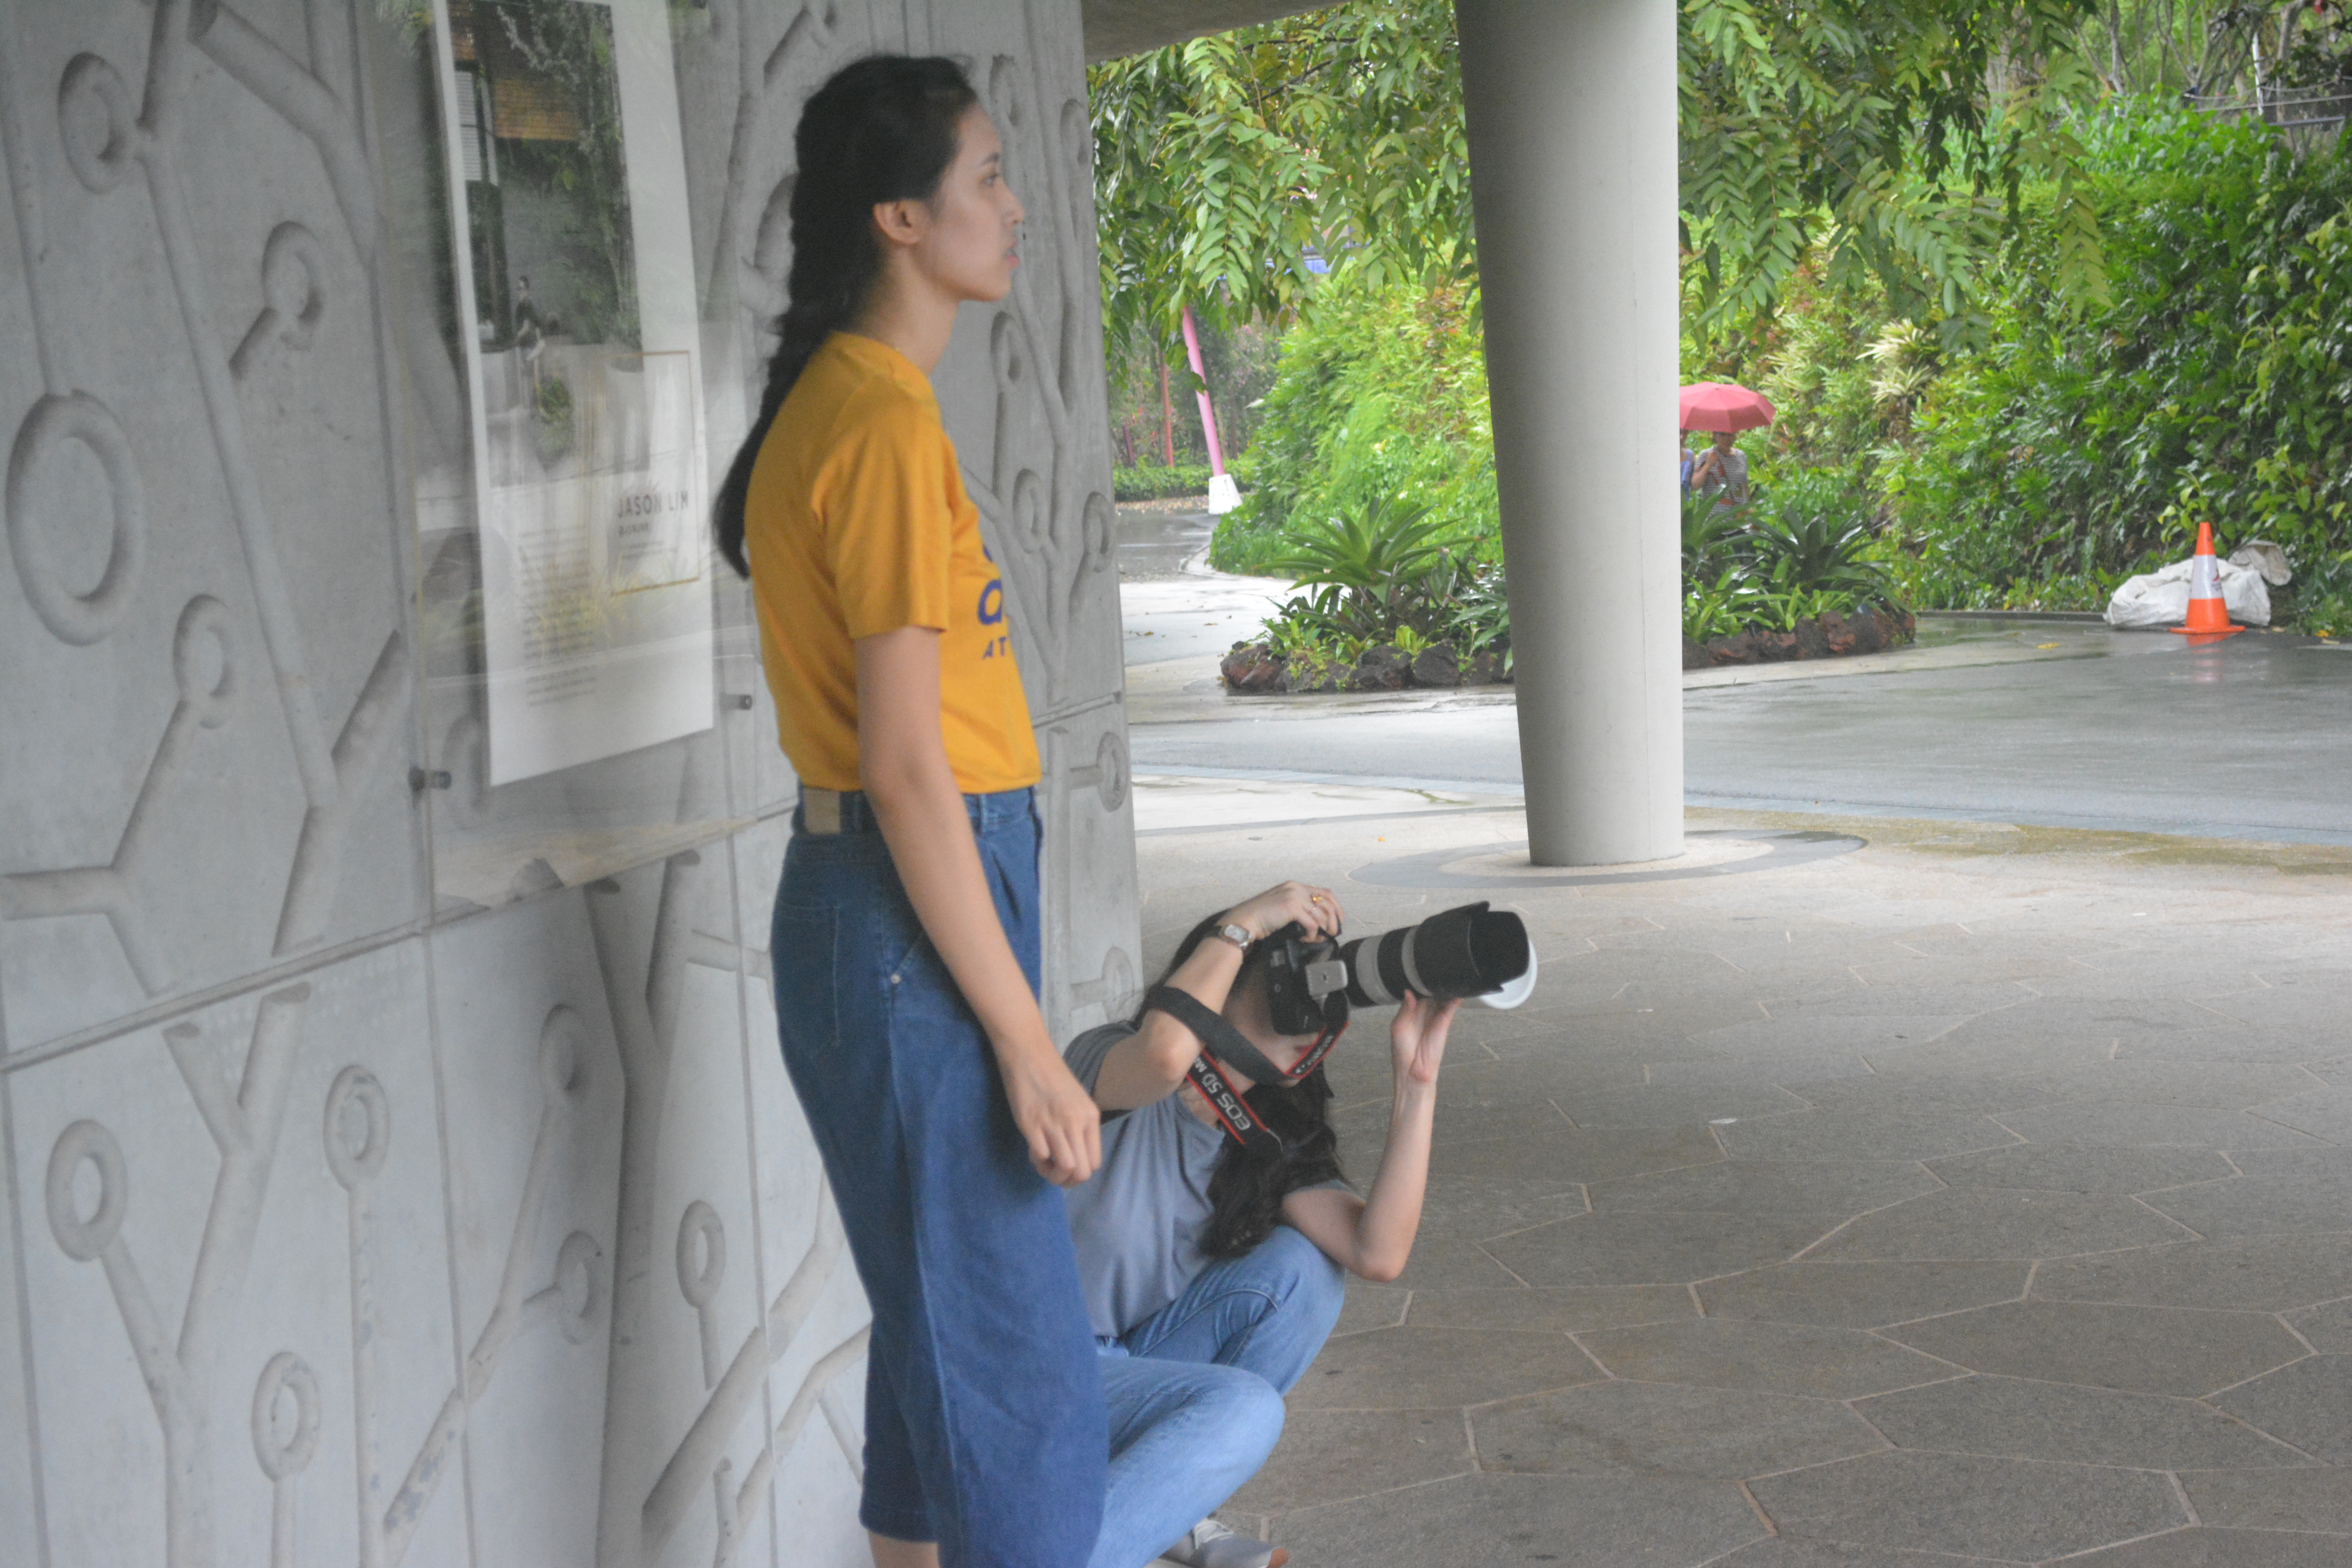
I’ve known the Yang sisters (@challecreatives on Instagram) previously from my gigs and they were so incredibly lovely and talented with their craft that they didn’t hesitate when I asked if I could tag along to observe what they do for a living. Ann Marie does the makeup for the models while Rose Marie photographs, which is probably the dream sister team that anyone would want to have.

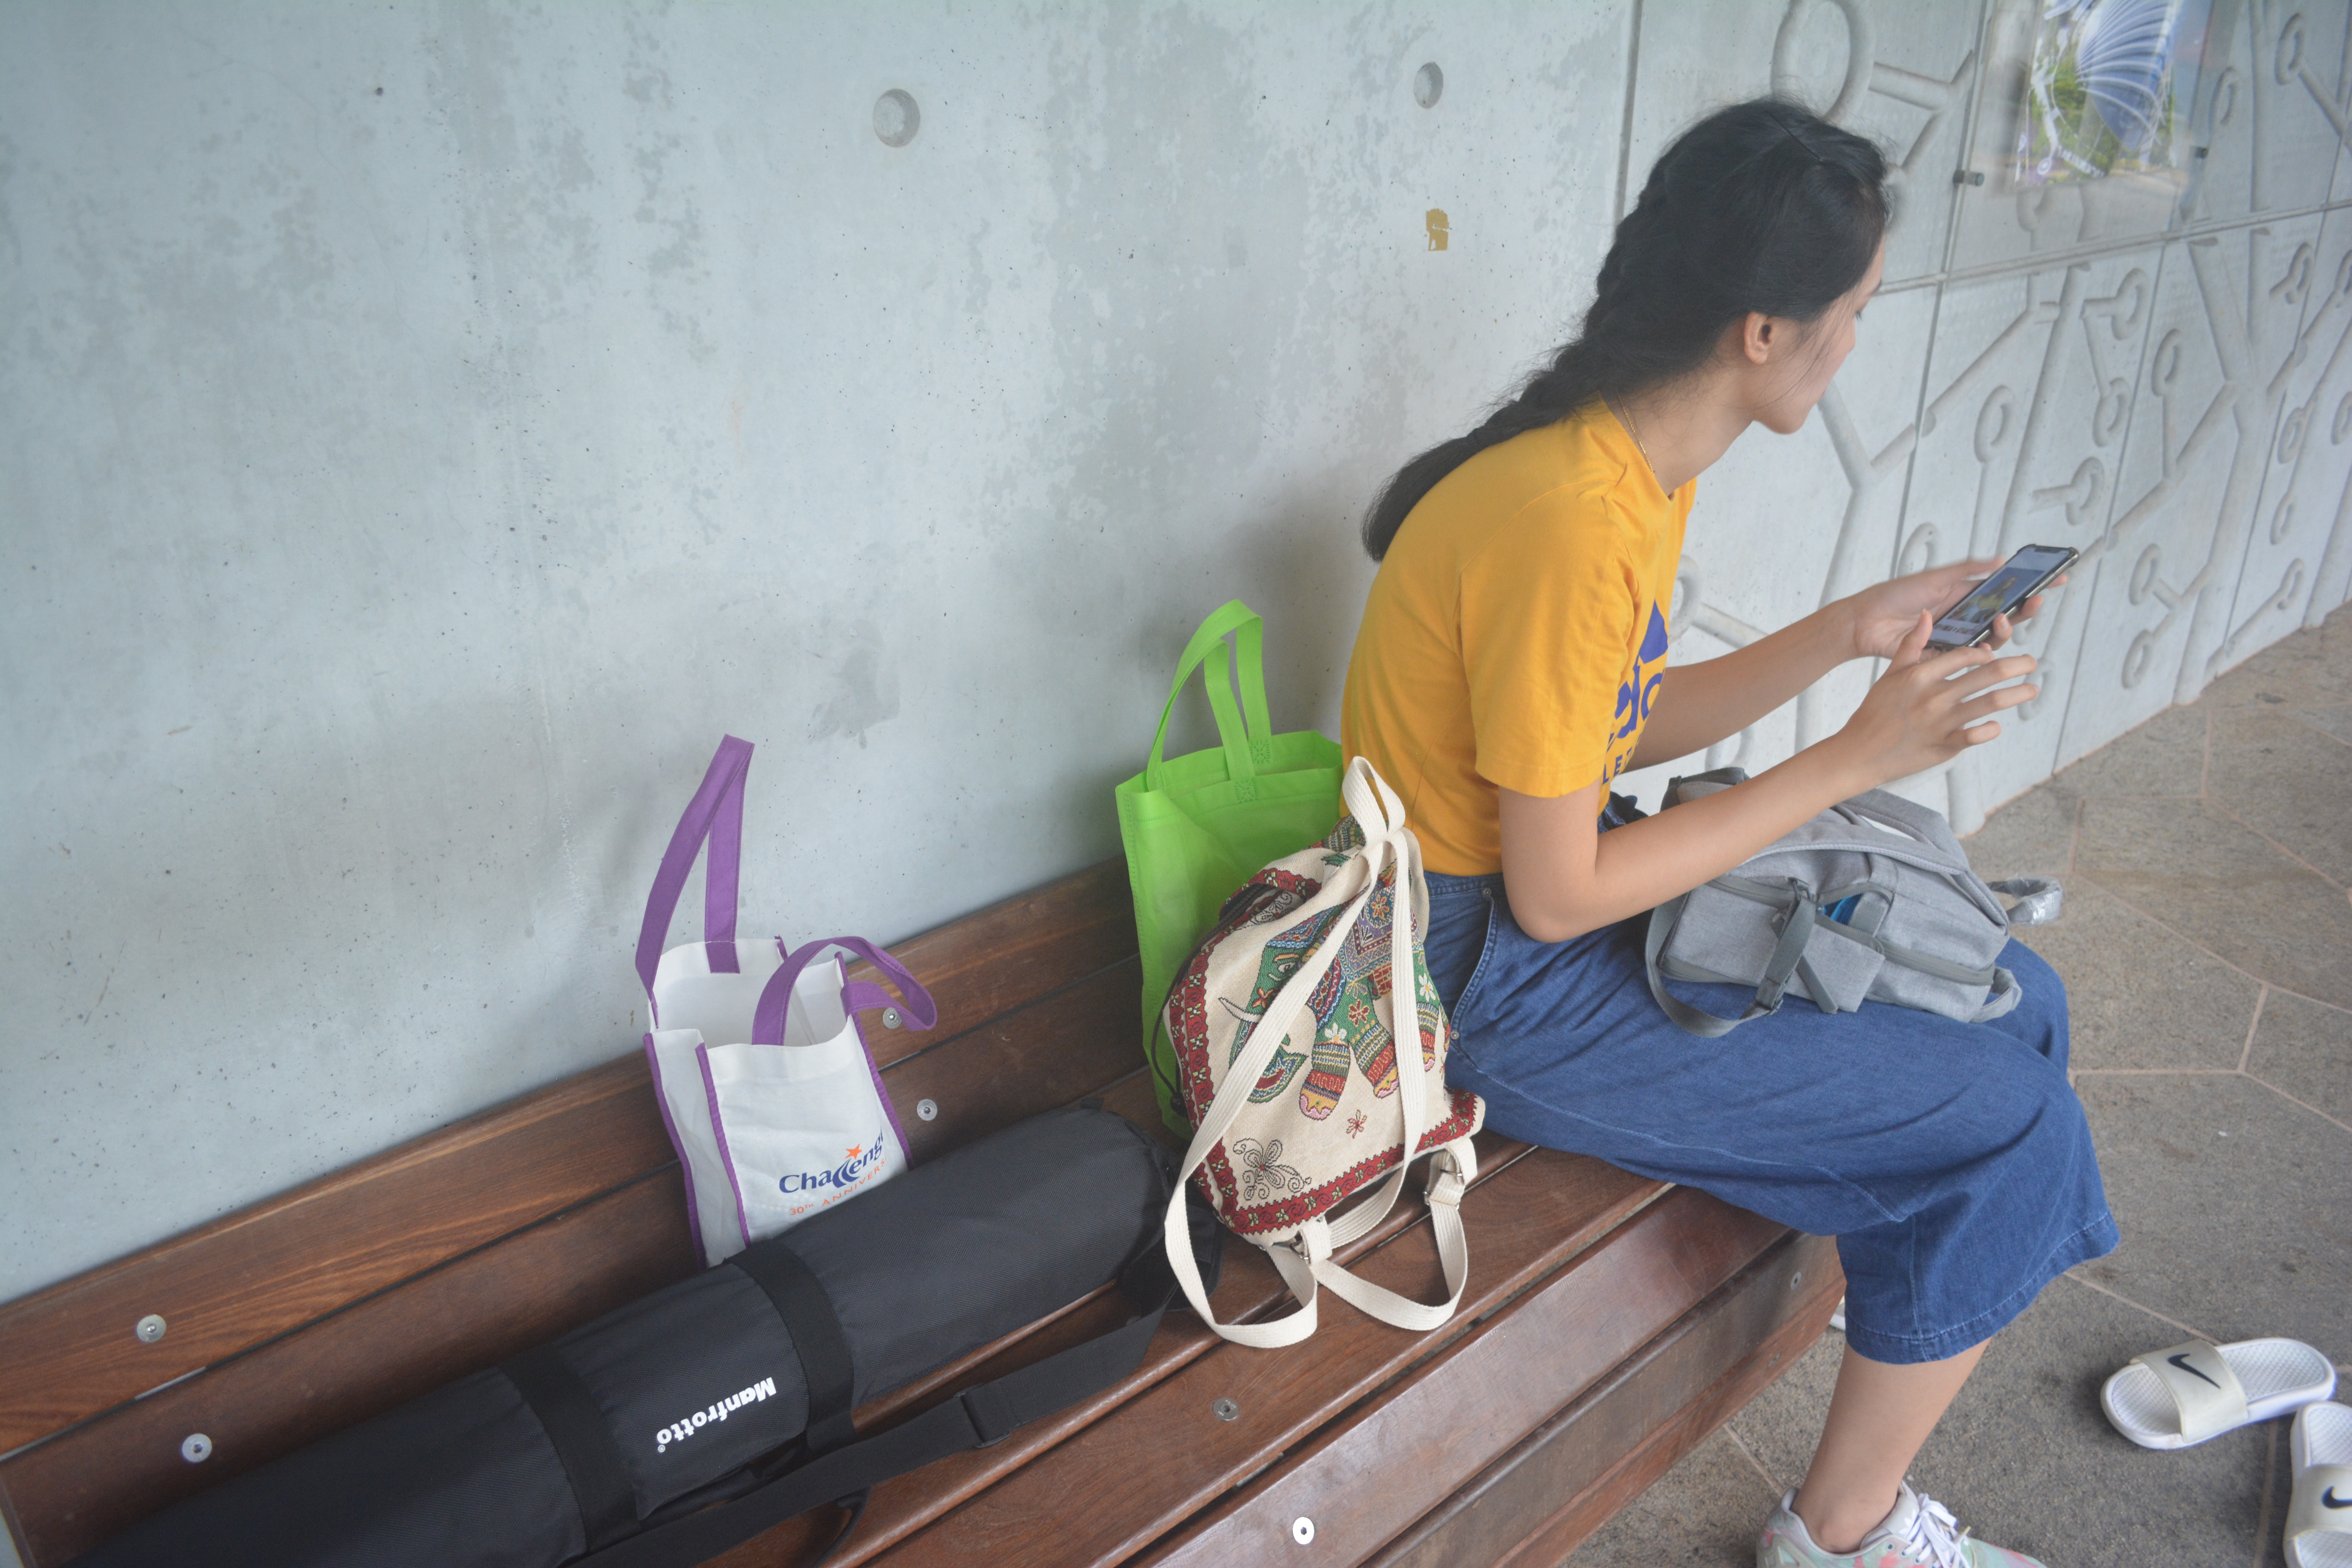
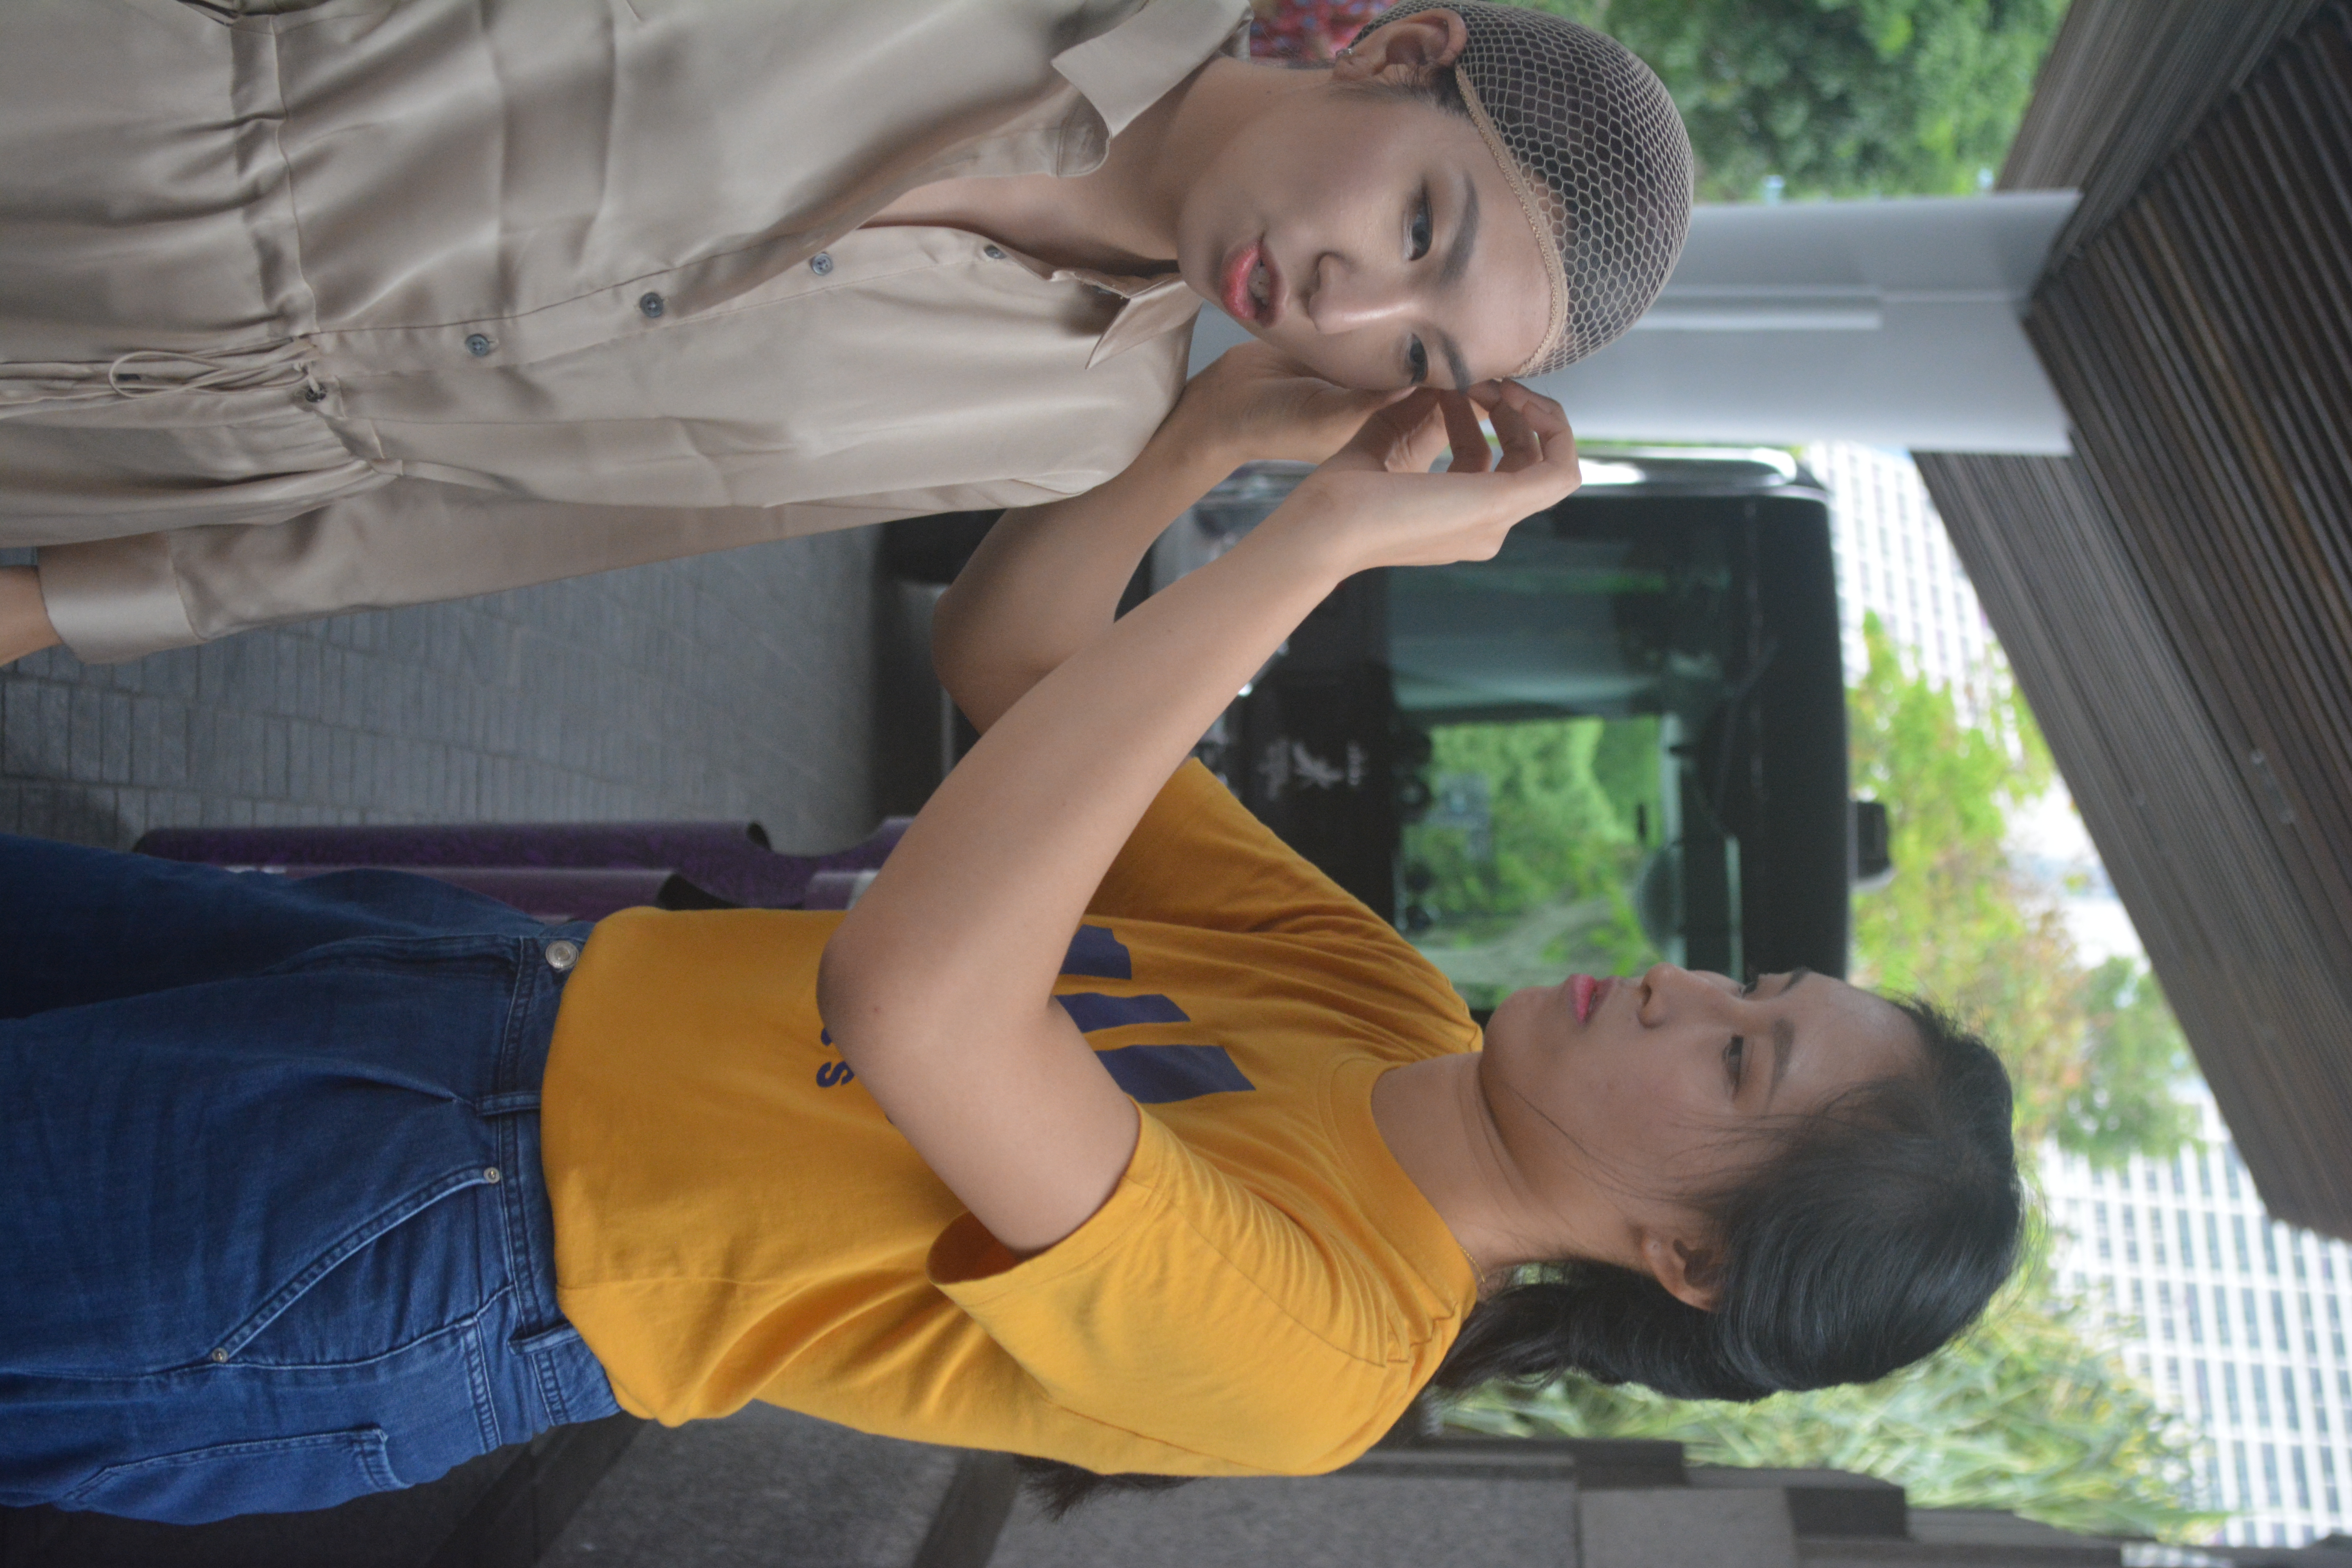
The shoot began at 2 pm, at Gardens by the Bay, which I have never stepped foot on. It was an outdoor shoot and boy the weather was not the most kind to us. Ann started applying makeup for the model for the first hour at the outdoor area of Macs.

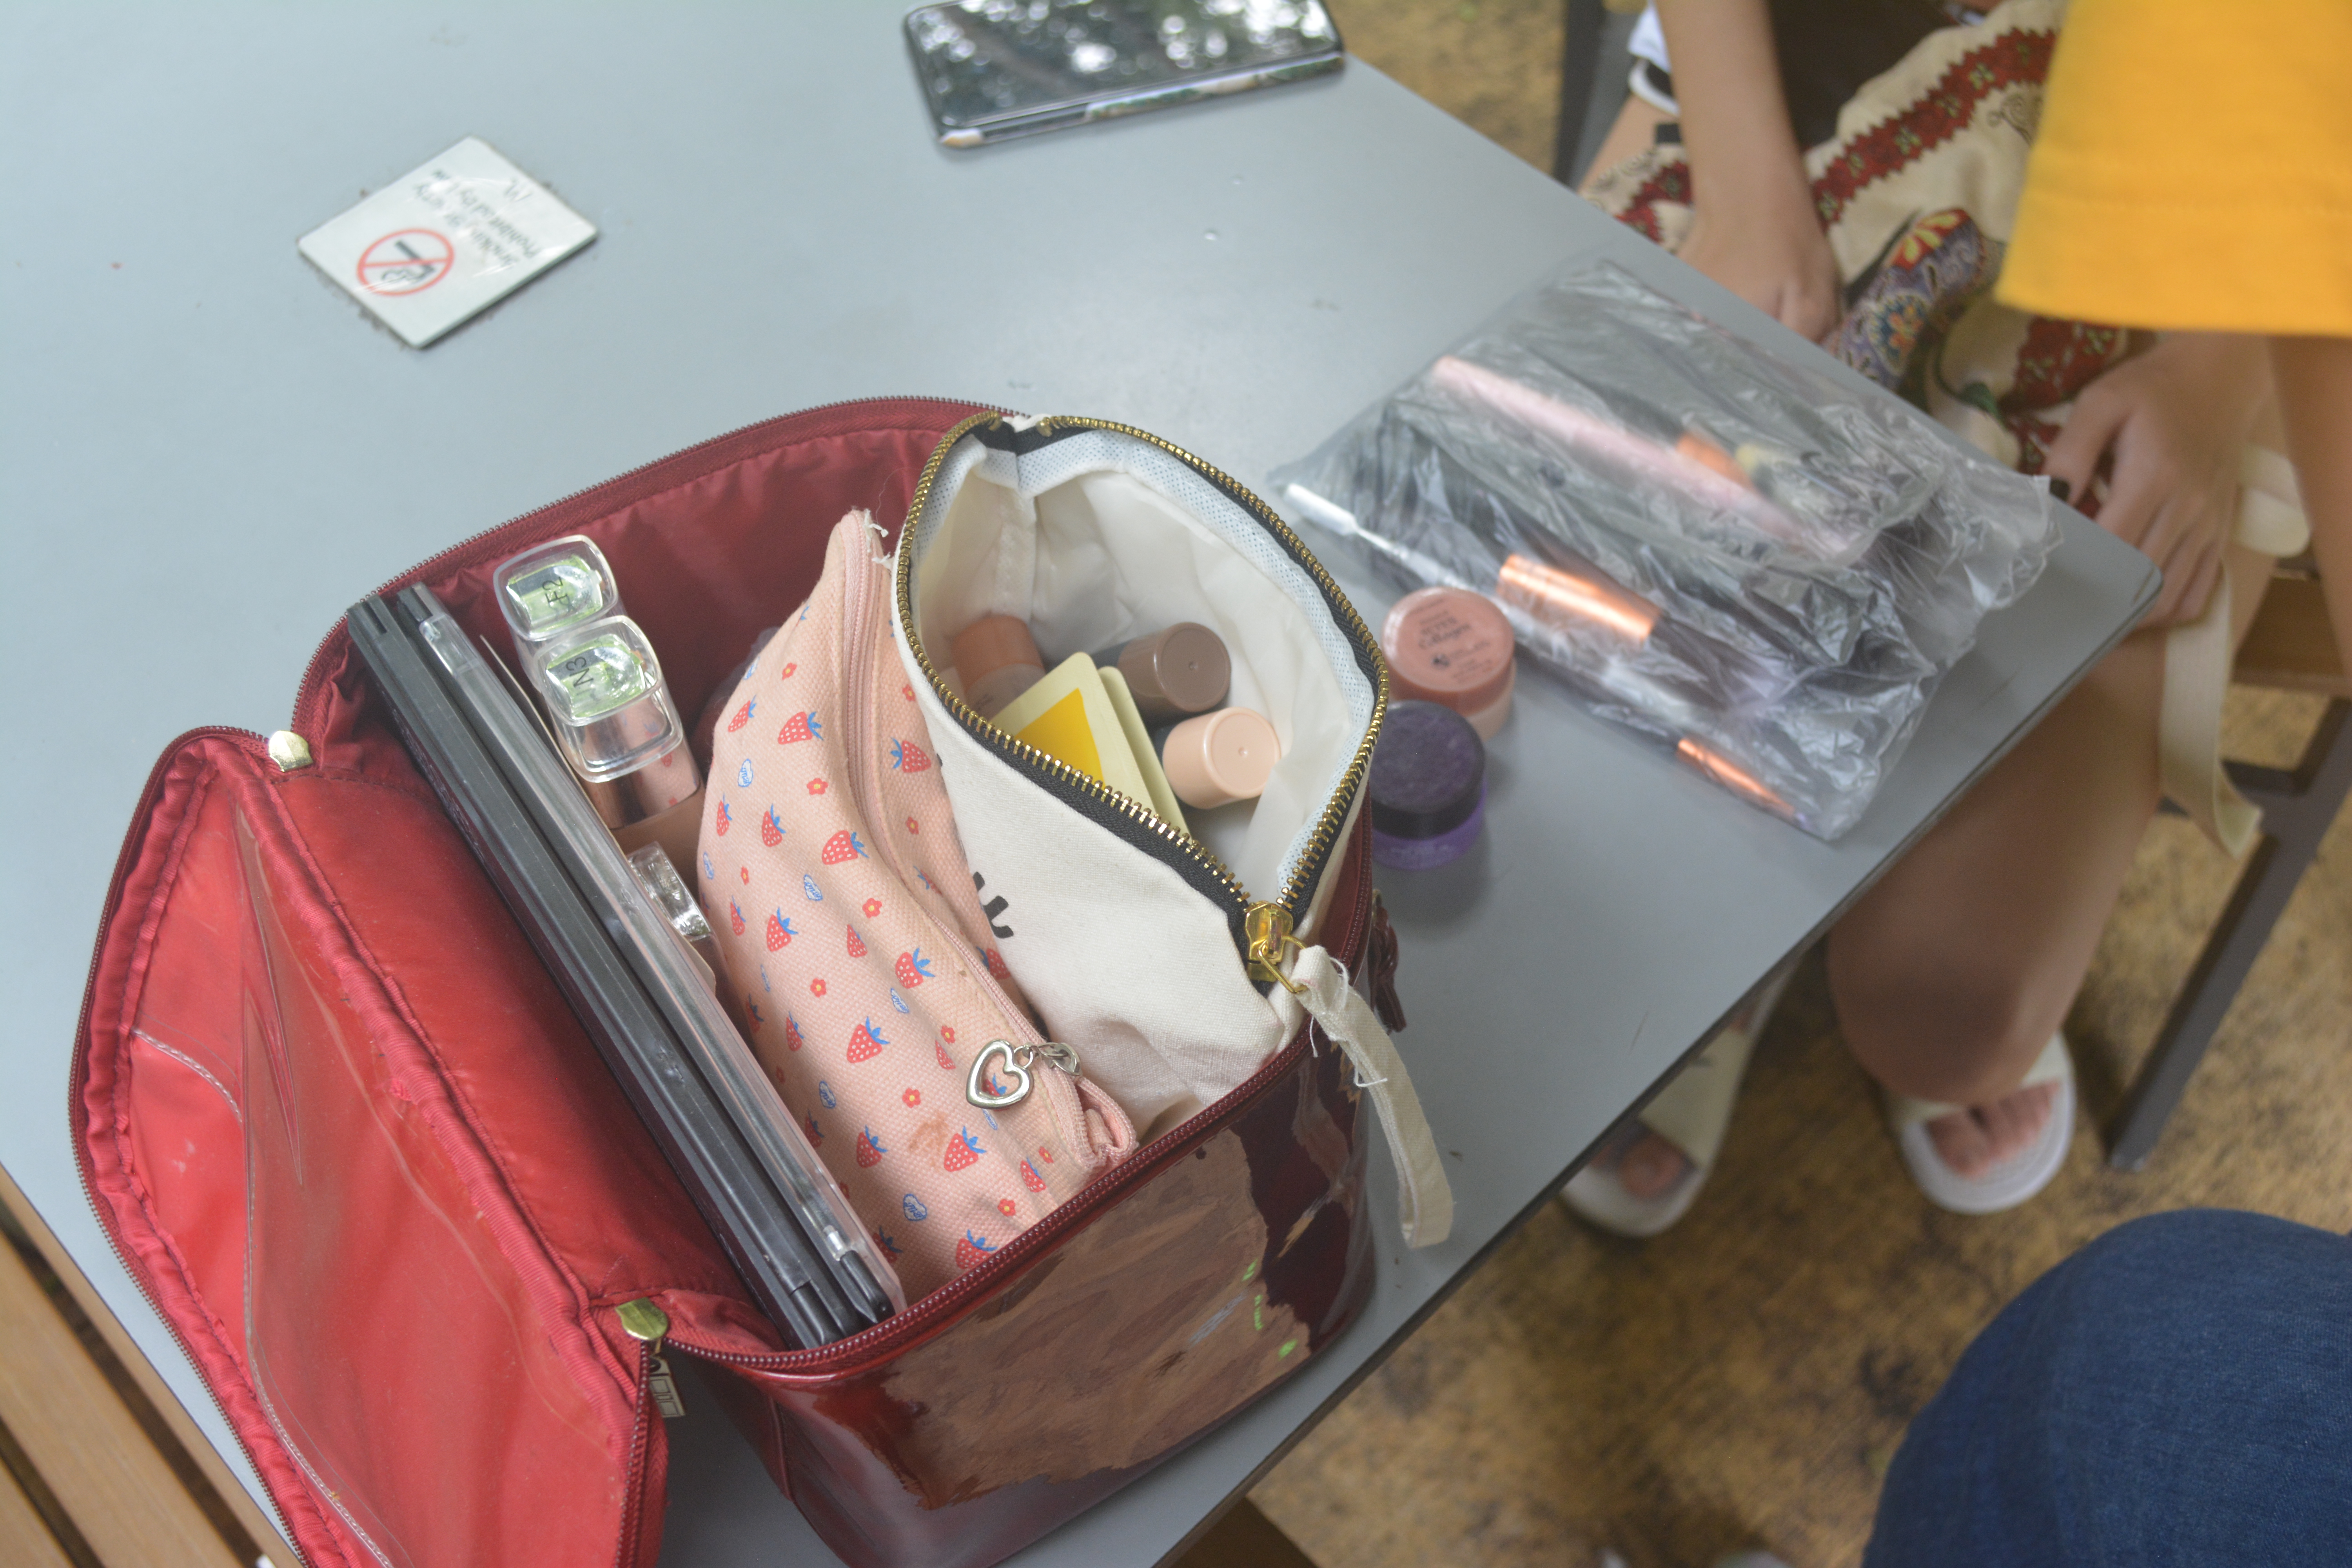
That’s when I realised that it had never occurred to me how do makeup artists do their jobs in a non-studio setting where there is a proper workstation/ dressing table for them to layout their kit. Even if there was a proper station, the tables will soon be overspilling with products and tools as they start pulling out items left and right.

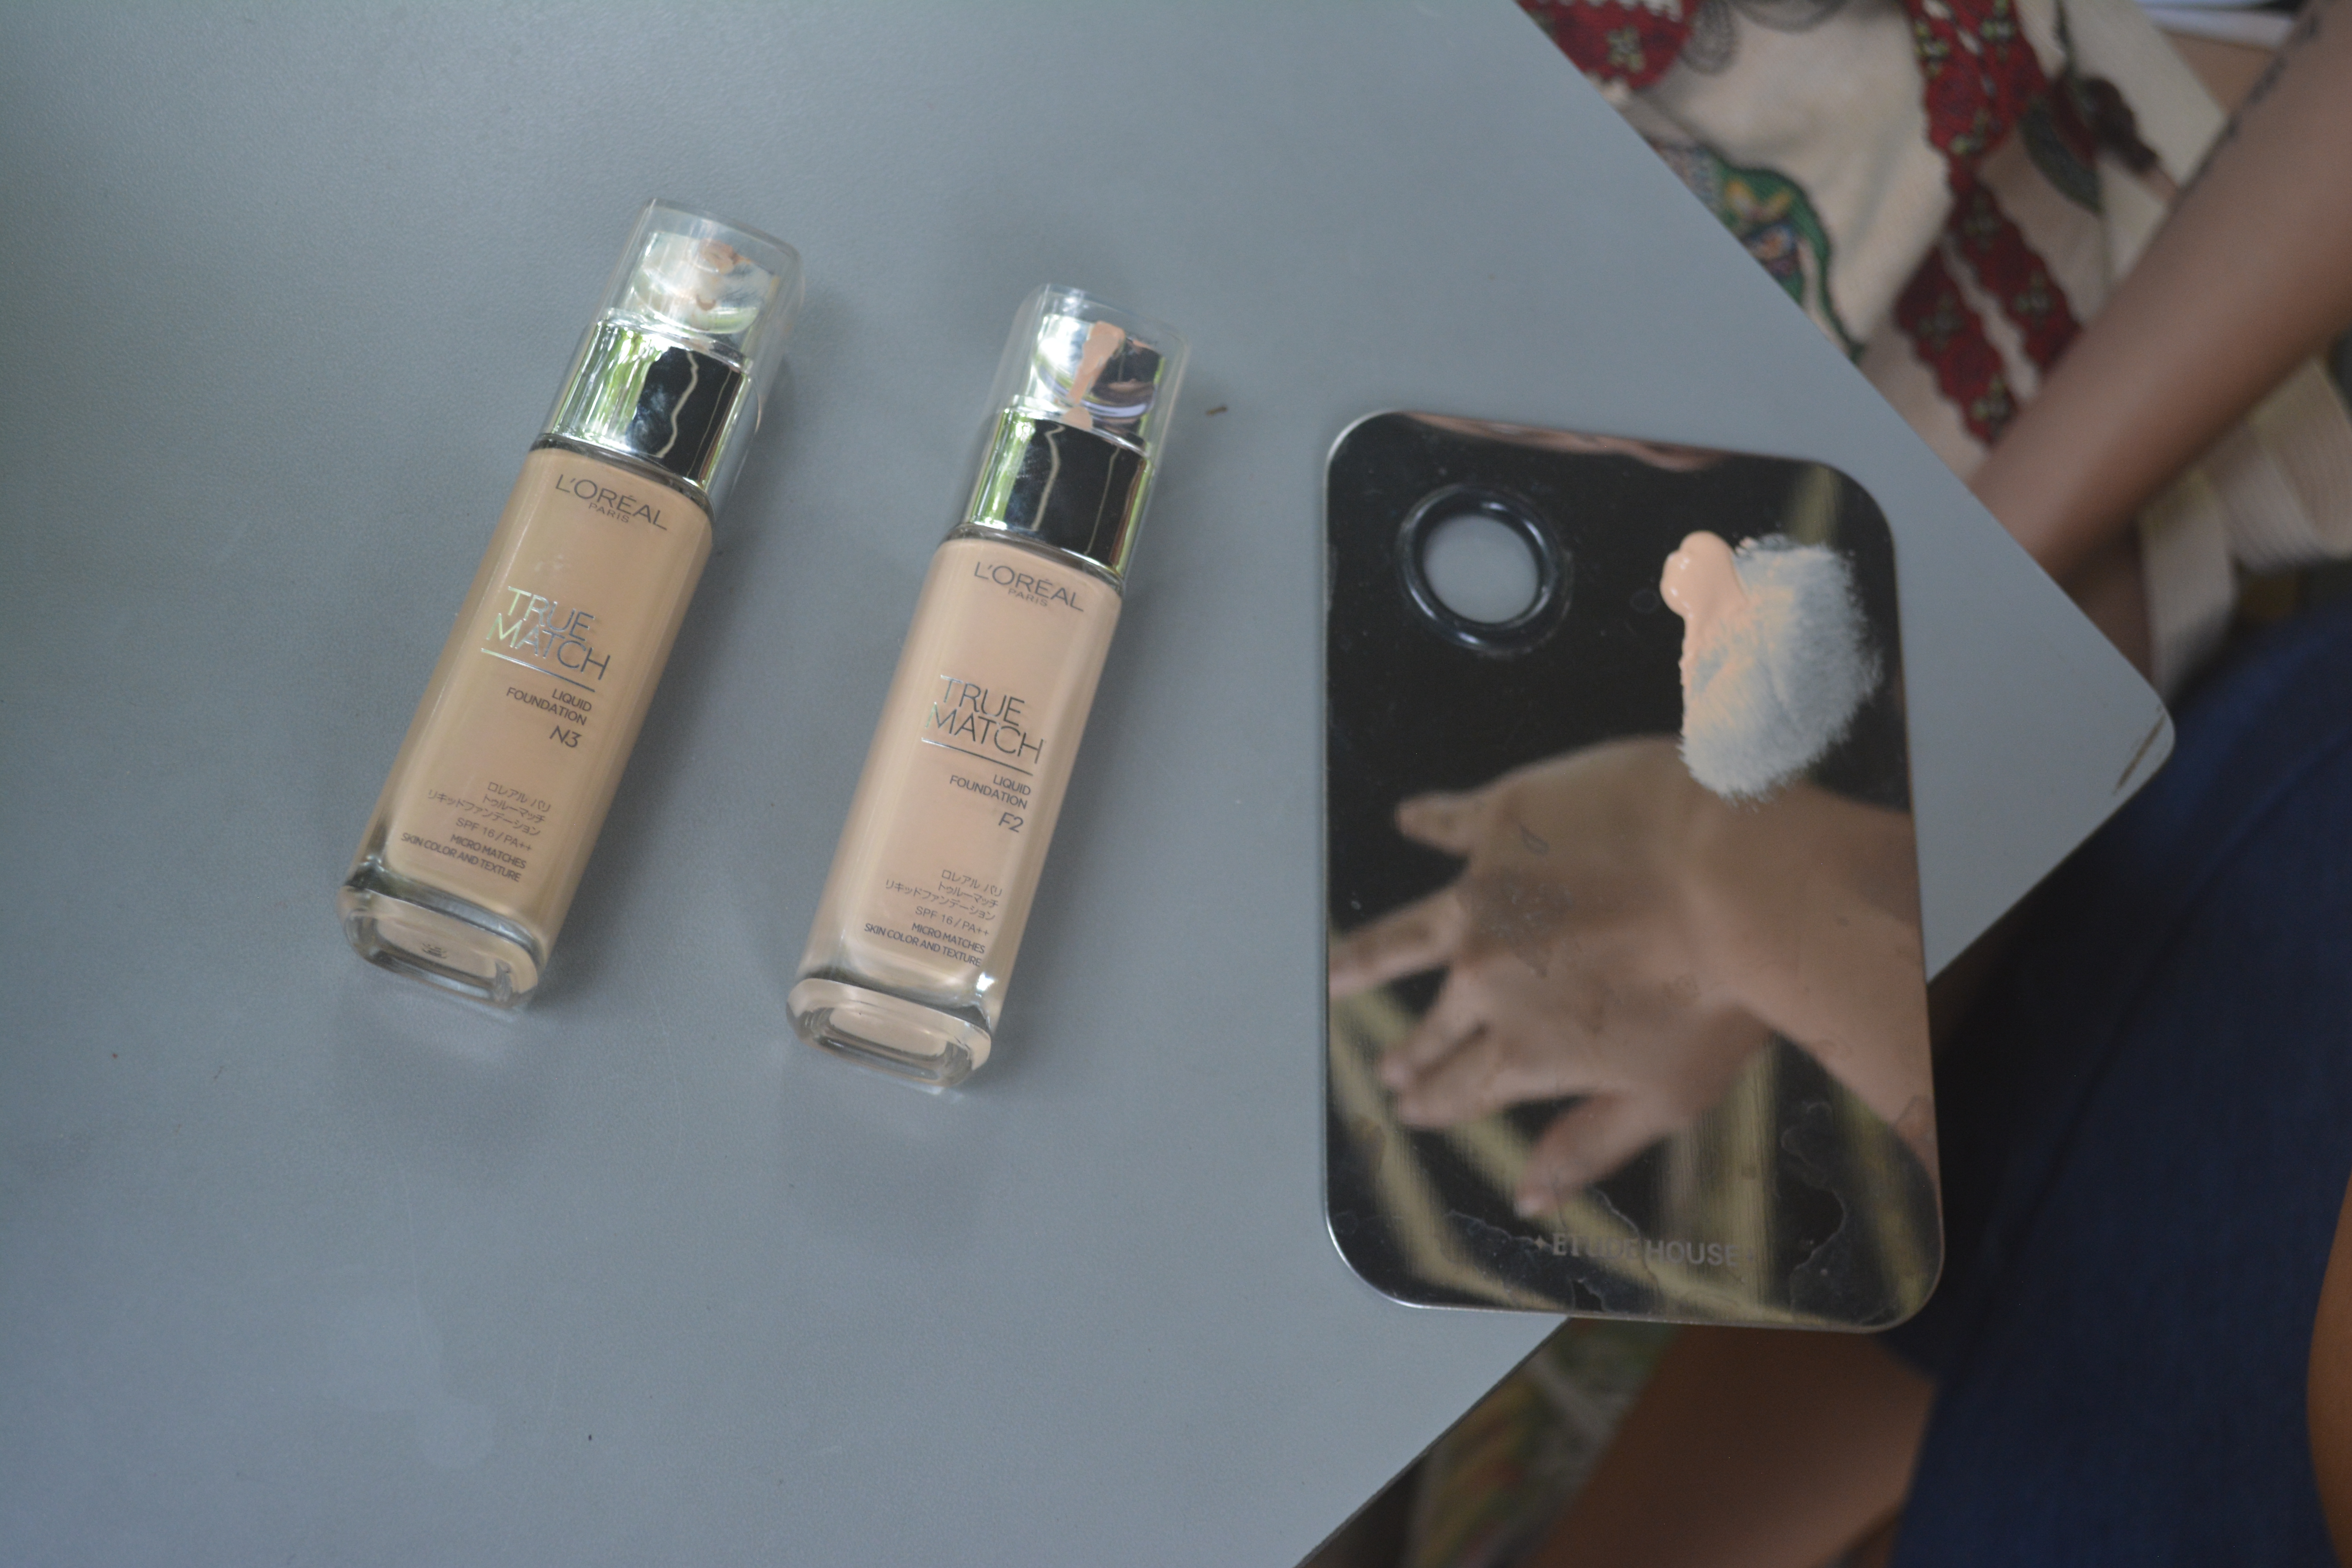
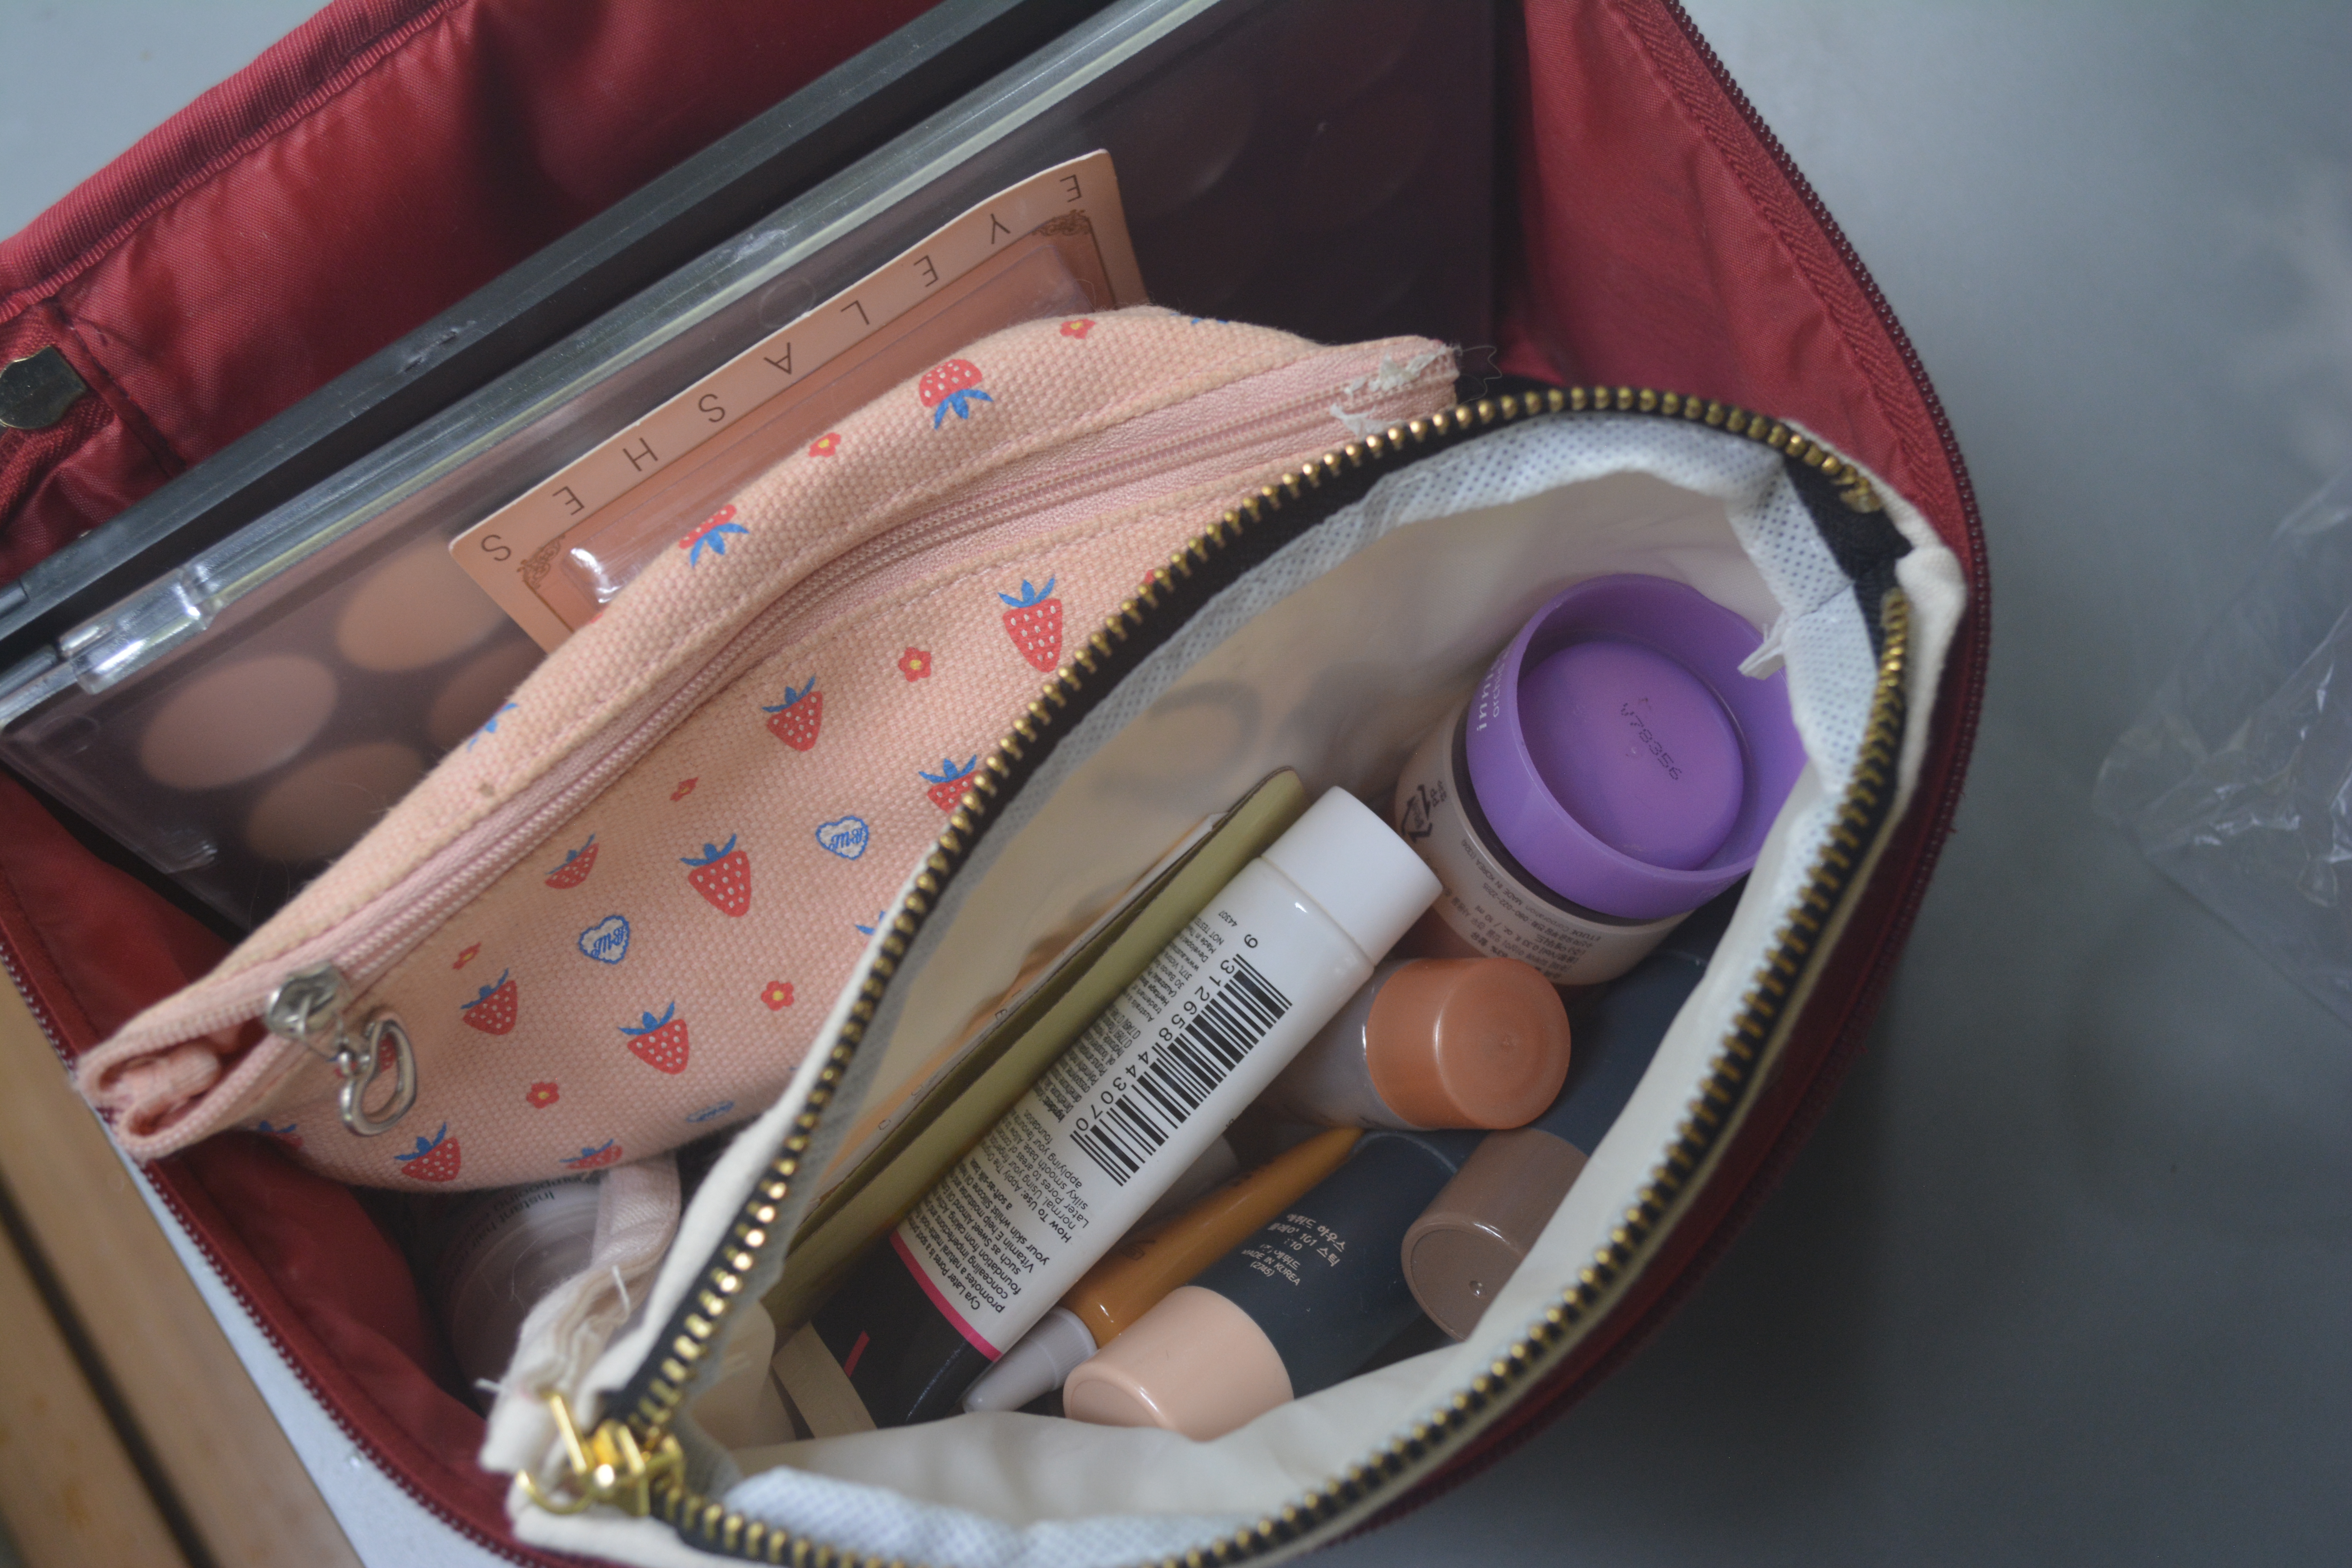
Ann Marie mentioned that one biggest concern was hygiene during shoots. Due to the job nature that requires a lot of skin contact and hands etc, she needs to make sure that her storage, her tools, and her products must be sanitary to prevent cross-contamination with different models. She says that she prefers using samples sizes so that she could dispose of them after she is done with the shoot. 

After that, we finally help the model change into her clothes. We had a total of 5 outfits to shoot, but it started pouring out of the sudden and we had to make do and shoot indoors. Weather also played a big part as the lighting and sky changes with the weather and could be really frustrating for a photographer who is trying to churn out beautiful pictures.

The worksite as mentioned is extremely flexible for the sisters. Anywhere could be their studio unless they are in shooting in an indoor studio. 

Tools of the trade

Rose: Camera, lenses, reflectors, batteries, Manfrotto tripod, flash, memory cards and more.

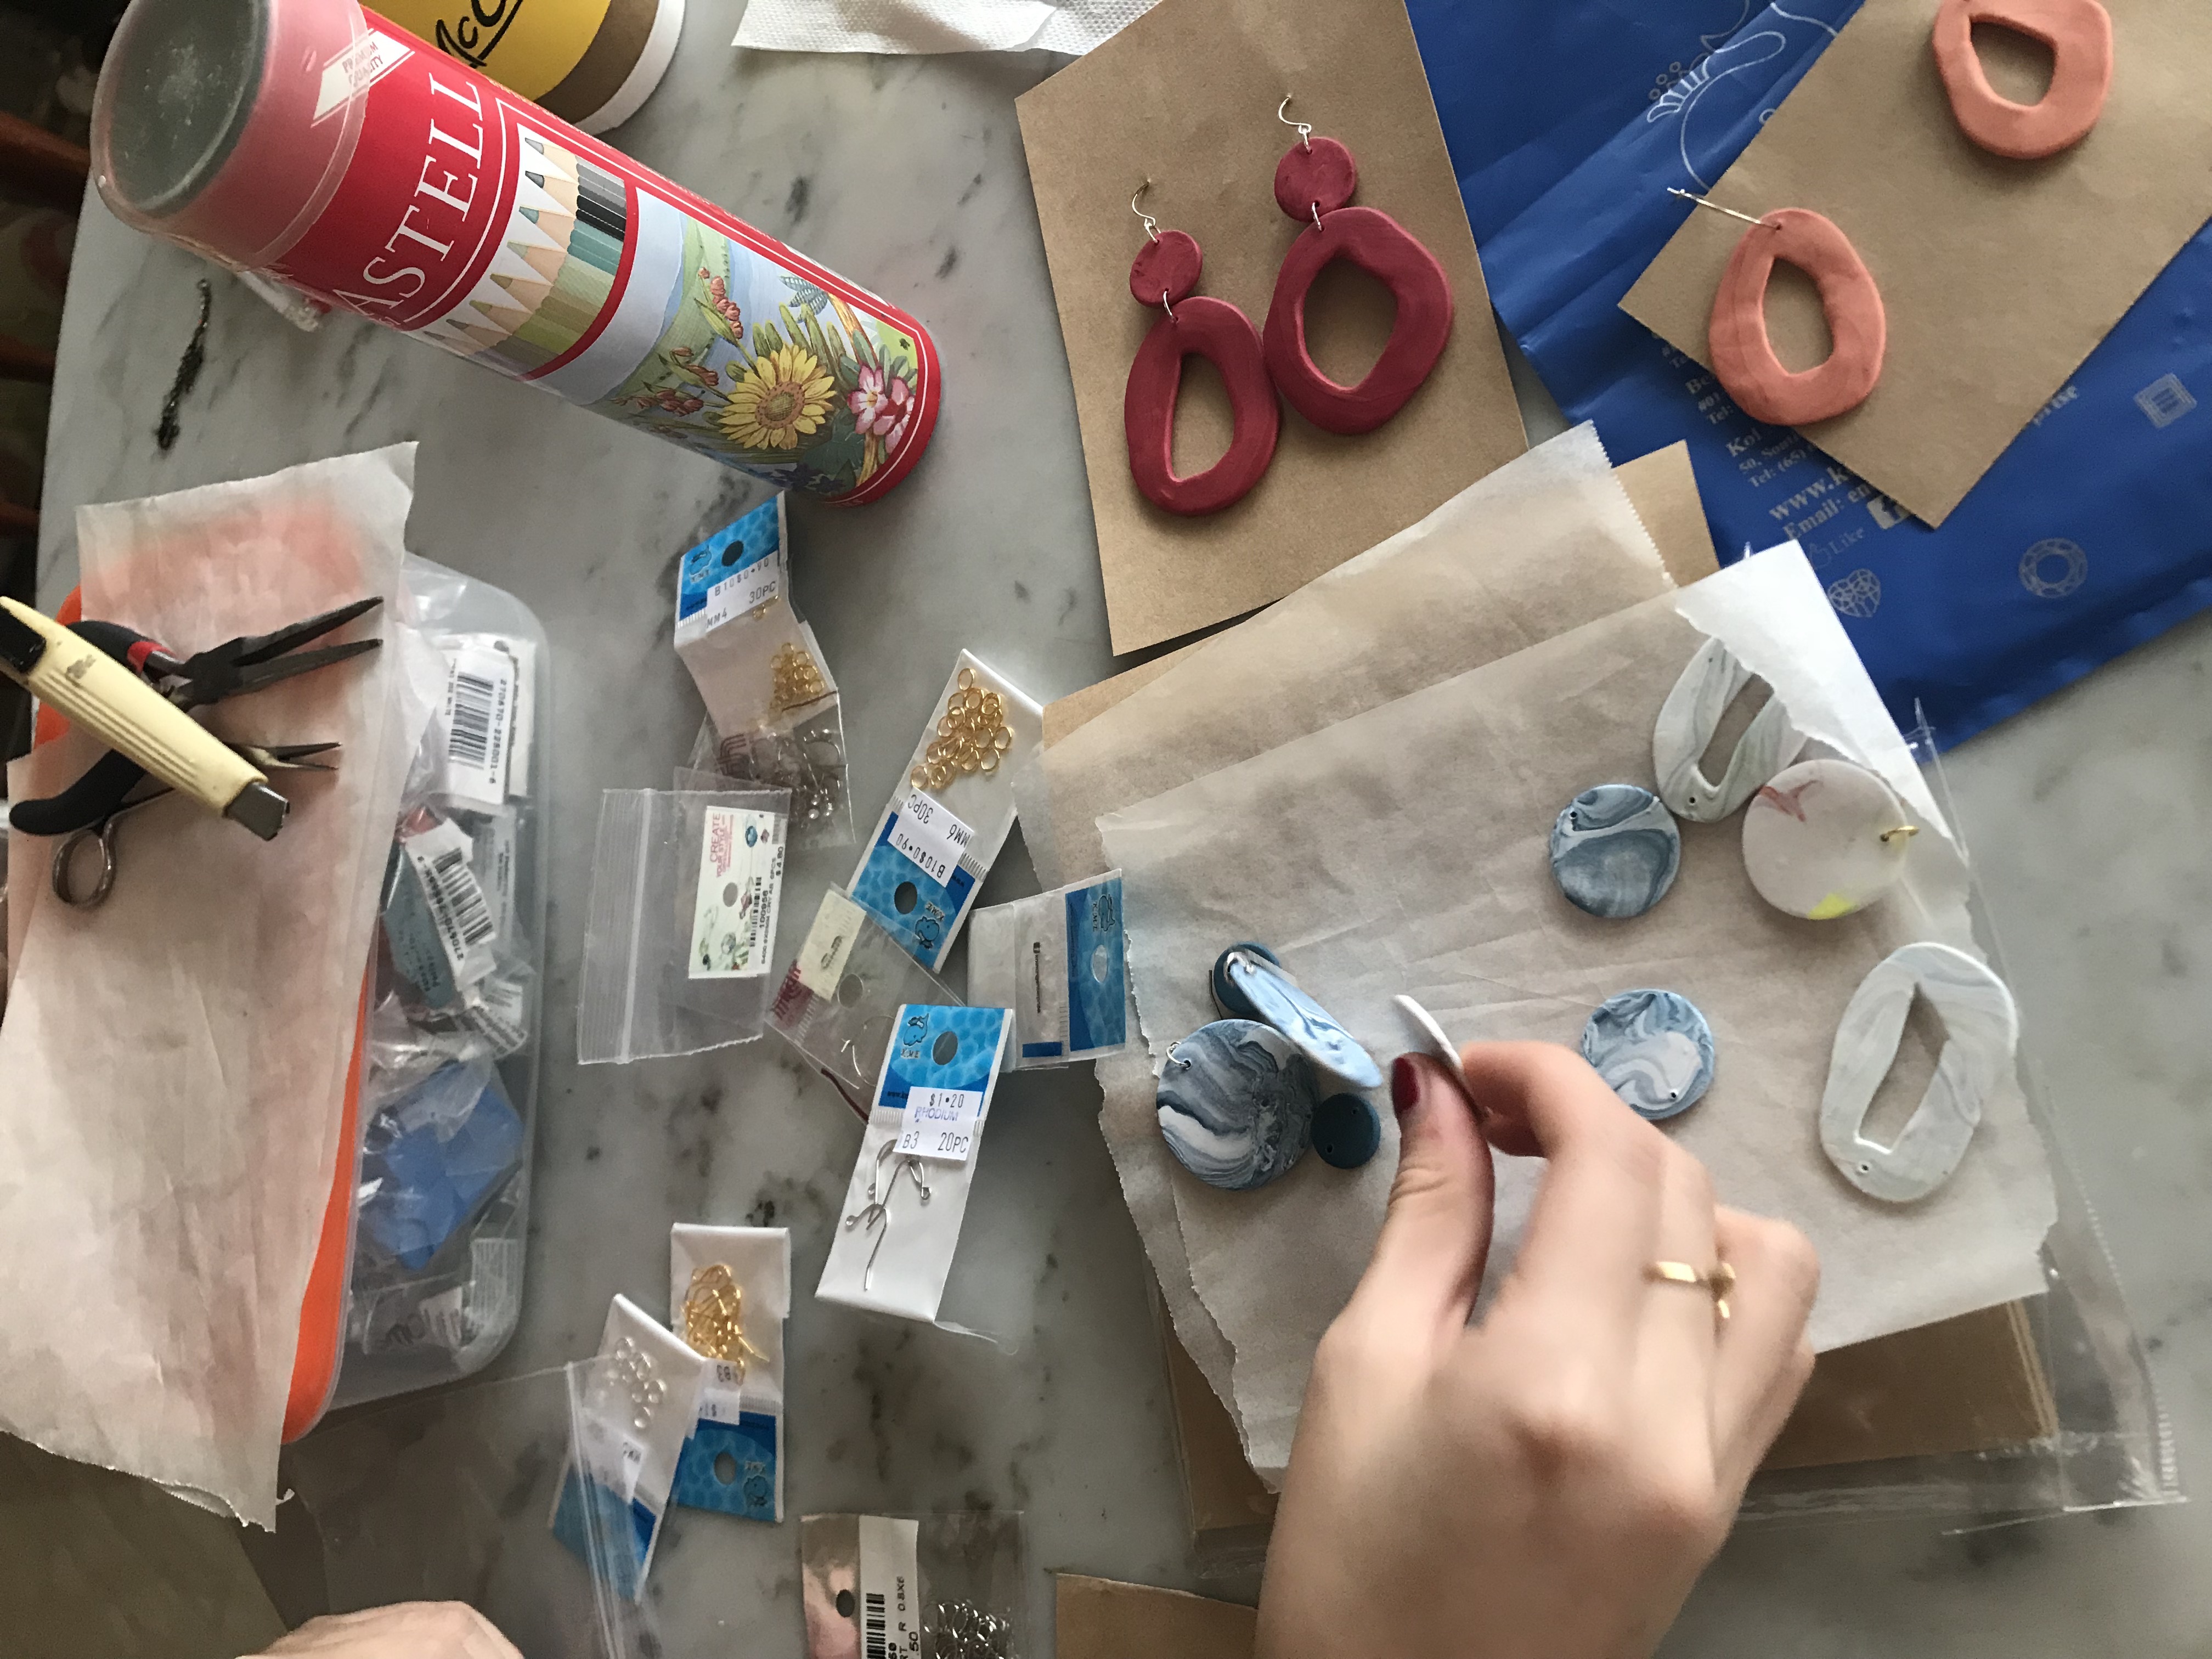
Ann: Makeup storage, brushes, palettes, bottles, q-tips, wet wipes, tissues, makeup, tweezers and more.

Explore Practitioners 2: Clay Jewelry Making – Yukie Miyazaki

My friend has an online business making earrings with oven-bake polymer clay. She explores the medium through different colours that can in turn create different patterns, and through different shapes as well, allowing her to create a myriad of designs. 

Process documentation

My friend usually begins with an idea of what the end product of the earring will look like. With that idea in mind, she selects the colours of the clay that she will be using and sets them aside. She has a piece of baking sheet set up on her table for her to roll and flatten the clay on so that the clay will not stick to the surface of her table. She then rolls the clay into her desired design before poking holes into the pieces of clay (to attach the earring hooks) and baking them. 

The marble designs are made by mixing the clay of different colours together and rolling them into a ball before flattening it. 

Tools Used

The tools that she uses varies from formal tools meant for jewelry making to make-shift ones. 

Tweezers and Pliers to manipulate the jump hooks in order to attach the earring pieces together, and a penknife as well as a painting knife that is used to help flatten the clay pieces and cut out bits that help to shape it. 
She uses this colour pencil box as a pin roller in to flatten her clay pieces. 
Jump hooks and earring hooks.
Oven-bake polymer clay! She also mixes colours in order to get the colour that she wants should they not be available. 

She also makes use of toothpicks and satay sticks in order to poke the holes in the clay, and the oven in her home to bake the clay.

Workspace 

Her workspace exists on her marble dining table. The surface of the marble aids her creative process as well as it is cool and smooth and is suitable to place the clay on without it sticking. However, it is quite messy as she stuffs all her tools and materials into two plastic boxes, which can make it a bit difficult to find the specific tools that she needs at times. 

Pain points

Another particular issue that she faced was that she found it tough to work with pure white clay as dust got caught on it easily and was very visible (which is why she often had to mix it with other colours). 

Sometimes, due to air bubbles, the clay would also crack after being baked. 

Explore Practitioners 1: Korean Rice Wine Making – Karin Lew

Makkoli 막걸리  is a traditional Korean rice wine that has been passed down in the Korean culture for generations (fun fact: it is the oldest alcoholic beverage in Korea). The milky, off-white and lightly sparkling rice wine has a slight viscosity that tastes slightly sweet, tangy, bitter, and astringent. It has many steps involved in making it and is considered a dying tradition that Korea has been trying to revive. I participated in a workshop to make it as part of my Korean class.

Process Documentation

To make makkoli, a lot of preparation has to be done before. Rice has to washed 5 times and cooked the day before. When making the makkoli itself, the bare hands are of essence as it is part of the process to let your hands bacteria and “taste” intermingle with the yeast and water. There also has to be a time period of at least 1-2 weeks of fermentation before the aforementioned mixture is filtered out and becomes drinkable. 

Steps

Step 1
Step 2
Step 3
Step 4
Step 5
Step 6
Step 7

Tools Used

  1. Urn and accompanying lid 
  2. Hands
  3. Empty Bottle 
  4. Filter Bag
  5. Secondary Filter Basin
  6. Large Mixing Bowl
  7. Scoop
  8. Wine Cup
Tools used for making Makkoli.

Worksite Documentation

In general, the worksite for makkoli making requires a good amount of space for laying out the tools as well as a cooling and shaded space for fermenting the makkoli mixture. The good thing is that once you have a set of basic tools to make the makkoli (an urn, sieve, and ladle), you are pretty much set to be able to make makkoli. It must also be understood that makkoli is made in large batches so as much space as the worksite needs is only temporary. 

Pain Points

As mentioned before, the “pain” comes in the tedious process and preparation beforehand. One has to be patient enough to endure through the entire process.

Also, the sourcing of the ingredients has to be done right. Different origin of ingredients can affect the taste of the end product. However, this is also interesting as it is only through experimenting and exploring with different types of rice, water, hands etc that one can cultivate their ideal taste of makkoli. 

Lastly, the knowledge and tools used should also be good enough. if one has only a brief clue on making the makkoli, then their attempt might affect the taste severely. If the tools used are not right, then the essence behind Makkoli is lost as well. 

Exploring Practitioners 1: DJs – Clare Chang

DJ-ing is a practice that has grew in recent years alongside the advancement of technology. I love how music connects people through our auditory while the whole process of DJ-ing extends to our visual and even somatosensation (from the vibration of beats etc). Therefore, my first practitioner of choice is a DJ. I reached out to an acquaintance who is a self-taught DJ. 

Process Documentation

For a DJ, a majority of prep work is done before performing live. This involves creating a playlist that is carefully curated according to the upcoming event and also to showcase teh DJ’s personal style. To put simply, the DJ has to take into consideration the BPM (beats per minute) of every song. From there, they adjust and sequence songs accordingly. As the DJ suggested, transitioning from one song to another smoothly, is quintessential. This can only be done with a prior knowledge of the beats of the song and if they do not match, then it has to be adjusted with the many tools and functions of a DJ set. 

Steps:

  1. Preps through background work of set/playlist
  2. Uploads playlist into a third party application on their laptop – a Record Box software 
  3. Set up the tracks and plug into an audio system
  4. Live manipulation (with different effects) begins! 
Record Box Software

Tools Used

The main tools that a DJ utilises are:

  1. CDJ with vinyls 
  2. DJ Mixer 
  3. Headphones 
  4. Laptop
  5. Audio Cables and Speakers
  6. Microphone (optional) 
  7. Table (to place entire turntable setup on) 
Overview of Whole Setup
Table, Cables, Audio Speakers, Plugs, Microphone 
Electronic Vinyl
DJ Mixer (controls effects/volume etc)

Worksite Documentation 

A DJ’s worksite as I observed, is portable. However, the main important thing that has to be present are electric sockets/plugs.  The DJ set (namely the CDJ and mixer) can be folded and portable as a luggage. This aids in the mobility of equipment and the protection of  these highly expensive tools (one entire set could cost around $10,000!). 

Pain Points

As explained by the DJ, the practice is one that has an extremely steep learning curve. The mastery of using the equipment and ease of it only comes with practice and experience. Also, we went through some of the rookie mistakes that are commonly made when one starts out:

  • Not mixing properly (meaning that it is off beat or off BPM)
  • Failure to sync BPMs during transition from one song to the next 
    • Can be rectified through use of the vinyl (if error is not drastic)
  • Forgetting to shut audio going out to the house while prepping for the next song (meaning, the sound from the headphones intended only for the DJ is played to everyone else)
  • Usage of wrong part of the song to transit
Live Demo 🙂

Exploring Practitioners: Moisturiser Making – Joey

Taking advantage of the field trip, I decided to make the moisturiser making workshop as part of my participation with practitioners exercise.
The workshop was organised by Rachel at the Singapore Visitor Centre.
It was hosted by the company called Theo10 and the founder, Theodore, was the one who was teaching us.

Theodore introducing Theo10 and concepts behind soap making.

Process Documentation
The whole moisturiser making process was actually pretty easy.
1. Get a container
2. Fill it up to 10 drops of essential oils – can be mixed
3. Put warm aloe vera cream in
4. Stir & mix them together with glass rod
And you’re done!

Tools Used

Pain Points
It is a fairly simple activity that can be done within 15 minutes.
One possible challenge is perhaps the number of essential oils that are available. There was at least 15 bottles and they vary in size and shape.
It was also hard to get the oils from the smaller bottle as they do not have a dripper.
Another challenge could be having a big pot filled with warm water to warm and keep the aloe vera cream warm as it very bulky.
Other than these, once everything is set up, it is quite easy to get to the tools and use them.

BONUS
We also participated in making our own mosquito repellent.
Apparently their mosquito repellent has been featured on CNN etc. during the dengue outbreak. (pretty cool!)
The challenge was to mask the weird scent of their own trade-secret-formulated repellent. (it smelt like fish oil to me – wouldn’t want that scent to stay on your skin for 4-6 hours…)

Process Documentation

So we had to mix in lots and lost of essential oil.
But before we did that, we had to concoct the repellent first.
With the measuring cylinder, we had to pour in 10ml of water and 2ml of their repellent using a pipette.
Once that was done, we could begin to mix in our essential oils to create a better scent for the repellent.

Pain Points
It was quite tough to mask the smell of the mosquito repellent – it took at least 100 drops of essential oils according to Theo.
An obstruction was the volume of the spray bottle. With the repellent solution taking about half of the bottle, there was only so much room for the essential oils. For me, I filled the bottle close to the brim and luckily mine worked. (Smells ok.)
The solution also had to be very precise as Theo instructed that the proportions has to be accurate in order for the repellent to work well.

I think one cool way to bring all the essential oils around is to make a coat with many many pockets storing each oil in each pocket. (looking like doctor gadget) Also a hot pocket (pun intended) to keep the aloe vera cream warm.
As the activity is fairly simple, just involving pouring liquid, once the workspace is set up, everything should go well.

Explore Practitioners 1: Illustrator – Yukie Miyazaki

I visited the Illustration Arts Market (held at Lasalle) over the weekend with my sister, and we had our portrait live drawn by an Tran Tran Thi Huyen, a Vietnamese illustrator based in Singapore. It was quite interesting because there wasn’t an official worksite allocated for the illustrators. There were only two long benches parallel to one another. My sister and I were seated on one side with Tran opposite us. Her tools were sprawled on the remaining space on the bench beside her as well. 

Tools Used 

She had a wrap pencil case that contained most of her drawing tools (pens, pencils, markers, brushes). It’s pretty snazzy, considering it can hold quite a number of pens and stuff and allow you to look at everything clearly when you open it up. Also, it protects your brushes because they are all held down securely and wouldn’t be pressed against the other stuff in the case. 
(picture can’t flip) Tran’s art work consisted of more than using pens and pencils, but had a mix of colour pencils and watercolour pencils as well. She kept her colour pencils in an upcycled cookie tin box.
She also had a physical watercolour palette and a water paintbrush as well (a paintbrush that had water stored inside it, so that you wouldn’t need to have a cup of water in order to use the watercolour).

Workspace

As mentioned, her workspace consisted of a bench and she made use of her knee to hold up her drawing pad in order to support it. The artist beside her brought her own board to hold up the paper. 

I personally think it’s really amazing how she can just draw on the spot without being afraid of messing up or making mistakes, because she is really forced to work under pressure as we (and her other customers) just sit there and watch her illustrate us/them. Each of the illustrators there have their own styles and they really do deliver consistently! 

Explore Practitioners 2: Preschool Teacher – Brenda Tan

I have always thought that being an early childhood educator is the most rewarding and heartwarming job because you get to see young kids grow and achieve their little milestones. This morning, I sat in for an English class at a neighbourhood preschool center as I wanted to gain more insights on what it’s really like to be a preschool teacher.

*Note: I didn’t get to take a lot of photos of videos without an official permit.

K2 Classroom

Practice Documentation

There is no fixed process or steps when it comes to teaching a group of 6-year-olds. While the teachers have a lesson plan that they have to follow everyday, they usually have to be on the ball and ready to respond to the unpredictable needs of the kids. During the English lesson, the kids became a bit rowdy and they started to ask a lot of questions at the same time. Since the teachers need to face similar situations like this everyday, they need to be able to multi-task and learn to give her attention to more than 15 children at once.

Tools Used

  • Portable whiteboard
  • Magnetic whiteboard – for writing or attaching pictures/ news articles to facilitate the lesson
  • Stationery basket – contains whiteboard markers of different colours and magnets
  • Chair 
  • Tissue box – to clean up after the children

Evaluation of tools used
In my opinion, the stationery basket is a little inconvenient because it has no handles for the teacher to grab on to. In addition, the basket has no lid, thus increasing the risk of all the stationery falling out of the basket if the teacher does not hold it properly. Furthermore, although other tools like whiteboard markers, duster and tissue box are placed near to the teacher, she still has to look around for them whenever she needs them, while paying attention to the kids at the same time.

Portable whiteboard
Magnetic whiteboard
Stationery basket
Chair and tissue box
Sketches of tools used

Worksite Documentation

The classroom is generally organised as everything is packed neatly in the shelves. The kids’ bags and water bottles are also placed nicely in the cubby holes provided. However, since everything is placed in different shelves, whenever the teacher needs something other than the tools stated above, she would need to walk to the shelves to take it.

Personal Insights

Apart from sitting in for the class, I was also given the wonderful opportunity to conduct a short lesson. Since I’m not a professionally-trained preschool teacher, I could only conduct a drawing lesson. Also, since I was not familiar with where everything was kept, I had to ask the teachers and this made the process slightly more time consuming.

In my opinion, since the kids can be rather unpredictable, it is better for the teachers to have a portable toolbox, or a wearable kit, with all the tools that they need. This way, the teachers can spend less time searching for the things they need and they can pay more attention to the kids around them.

Explore Practitioners 2: Pottery (Cups) – Chia Li Hui

Pottery is one of my many interests that I have always wanted to learn but have no time to do it. As I wish to create my own plates and cups in the future, I decided to choose my second creative practice to be pottery. As my cousin opens pottery workshop for children, I decided to approach him to learn the basic skills of pottery.

Process Documentation

Steps:

  1. Take a fair amount of clay and put some water on it.
  2. Make sure that the clay is not too watery. If it is, leave it to dry on Plaster of Paris. The clay should be partially sticky and not too hard.
  3. Put it on the middle of the pottery wheel and set the pottery wheel to be turning at a pace you are comfortable with.
  4. Shape the clay into a cone-shape and use your thumb to push the middle of the cone down to create the opening for the cup.
  5. Move on to shape the body of the cup.
  6. Use the wooden carving tool to shape the bottom of the cup.
  7. Use the sponge to remove air bubbles in the clay and the tip of the cup so that there will be consistency.
  8. Use hairdryer to dry the clay.
  9. Use the wire clay cutting tool to remove the cup from the pottery wheel.

Tools used

  1. Plaster of Paris (Calcium Sulphate Monohydrate)
  2. Pottery wheel
  3. Wooden Carving tool
  4. Sponge
  5. Hairdryer
  6. Wire Clay Cutting Tool

Worksite Documentation

My cousin conducts the workshops in his house. Although I find that the worksite is a little cramped, there was still enough space to learn. As his stuffs were surrounding the pottery wheel, I had to be extremely careful so that I would not dirty his stuffs while learning.

Pain points

As it was my first time trying out, I find it hard to gauge how much clay to use and how to determine whether the clay was ready to put on the pottery wheel. It is also important to have firm hands so that the sides of the cup were even. In addition, the cleaning up was quite tedious as for an amateur, the clay will splatter outside of the pottery wheel. However, despite all these difficulties, I still enjoy the process of learning pottery!

Explore Practitioners 1: Mooncake Making – Chia Li Hui

As mid-autumn festival is around the corner, I have decided to learn how to make handmade snow skin mooncakes to give out to my family and friends. Therefore, I chose to approach my friend who sells snow skin mooncakes.

Process Documentation

Making handmade snow skin mooncakes may seem easy but it is a very tedious process. It takes up one whole day to create just a few pieces!

Steps:

  1. Mix the flour with water and butter. Knead until the dough is form.
  2. Add food flavouring and colouring to the dough. Knead the dough until the colour is evenly spread out.
  3. Scoop about 20g of dough and roll it into a ball.
  4. Leave the dough one side and scoop about 40g of paste. Roll the paste into a ball.
  5. Flatten the dough balls using a wooden rolling pin.
  6. Wrap each flatten dough around each paste ball.
  7. Dust some premix flour around the wrapped ball to prevent it from sticking to the mooncake mould.
  8. Put the wrapped ball into the mooncake mould to create your final mooncake!
  9. Refrigerate the mooncake.

Tools used

  1. Bowls
  2. Wooden rolling pin
  3. Mooncake mould
  4. Electronic weighing scale
  5. Spoon

Worksite Documentation

As I made the snow skin mooncakes at my friend’s house, it is very convenient to get extra bowls. Additionally, it was easy to clean up and we prepared a plastic cover on the table so even with all the flour, we did not make a big mess. As there were several types of paste and dough, we are also required to wash our hands every single time we change a paste or dough. Hence, it was very convenient for us to wash our hands as the workspace was just beside the kitchen. Therefore, I find that I was at a very comfortable state to learn this new skill.

Pain points

Kneading of the dough takes the most effort. It takes skill to knead it properly and we are not supposed to knead the dough for too long as it would become too soft. When it becomes too soft, it would be hard to flatten it and wrap it around the paste balls. At the same time, the colours may not be spread evenly if the dough was not kneaded properly as well. From this, I learnt that making handmade snow skin mooncakes are not as easy as I thought it will be. It is a very tiring process and it takes up a lot of time to produce a small amount.

Exploring Practitioners: Starbucks Barista – Joey

I went to participate in my friend’s work who is a Starbucks Barista at One-North. He has been working at Starbucks for close to 4 and a half years. 
I wanted to see how the usual Starbucks barista works around the many professional tools behind the counter, facing crowds and rushes.

Starbucks at One-North

Process Documentation
The space is quite spacious with about 3-4 staff working behind the counter each time. There is the oven section for heating food, the frappuccino area with the machine for frozen blend goodness, the sink area for washing, the cold brew area for their latest nitro coffee and of course the coffee machines area for brewing coffee. 

To make coffee, he would pick up the cup for the right size then make the coffee by using the fancy coffee machine. The machine will then dispense the coffee into small glasses – shots.
While this is happening, my friend would pump syrup (if needed) from the syrup bottles into the cup.
After this, coffee would be poured into the cup and topped off with more syrup/milk/milk foam/whipped cream. 

Tools Used
These are some of tools he usually use.

One really interesting “machine” or appliance the dispenser for the cold nitro brew coffee – it looks like a beer tap.
Also got to try it with the courtesy of my friend!
It tasted pretty sour and acidic to me – not a fan (hahah)
But the foam is pretty cool!

Pain Points
I think one main challenge was that tools and appliances were spread out over the counter.
If the space was contrainted or if there were too many people, it would be hard to get to the tools needed and may even cause an accident as the staff walk from the fridge/oven/food area to the cashier counter to the coffee area etc.

Another problem I observed is that there are extras of tools, such as extra chocolate/vanilla/caramel syrup in bottle and pump form and they can be all over the place at crowded times like the lunch or morning rush.
There is also 2 coffee machines although they only use one. Perhaps it is in the case where one might broken/spoilt/malfunctioning.

Coconut White Mocha Macchiato 

I think a Starbucks barista has to learn how to use a lot of tools and get comfortable and used to his/her space in order to work efficiently.
From the fridge, to the cashier machine, the oven, the coffee machine, the frappuccino machine, syrup bottles and pumps and cups, lids etc, it would be a challenge to come up with a wearable tool that can do the job of a Starbucks barista. 
Perhaps it would be more worthwhile to think of a specific function that can benefit with a wearable tool and make him/her more efficient.
I was thinking a portable/movable coffee machine or even a cafe would be really cool too! (Imagine carrying chairs and open them up for your customers and you make coffee on your body)
A portable coffee grinder might work although the quality might not be machine grade and the person would have to stand near a drain/grass to get rid of excess hot water and coffee grinds.