I have always been very supportive of Singapore’s hawker culture as I always visit hawker centers when I am craving some comfort food or a taste of nostalgia. Hence, for my first practitioner, I decided to approach a family friend who owns a coffeeshop, to teach me how to make one of my favourite dishes – lor mee, which literally translates to “braised noodles”.
Process Documentation
Usually, the chef wakes up at 1am to prepare the gravy beforehand! After the gravy is done, she will move on to prepare the toppings for the noodles. Below is a short video of how a typical bowl of lor mee is prepared and served to customers.
Preparing a bowl of lor mee involves a systematic and arduous process. Here are the steps according to the video above:
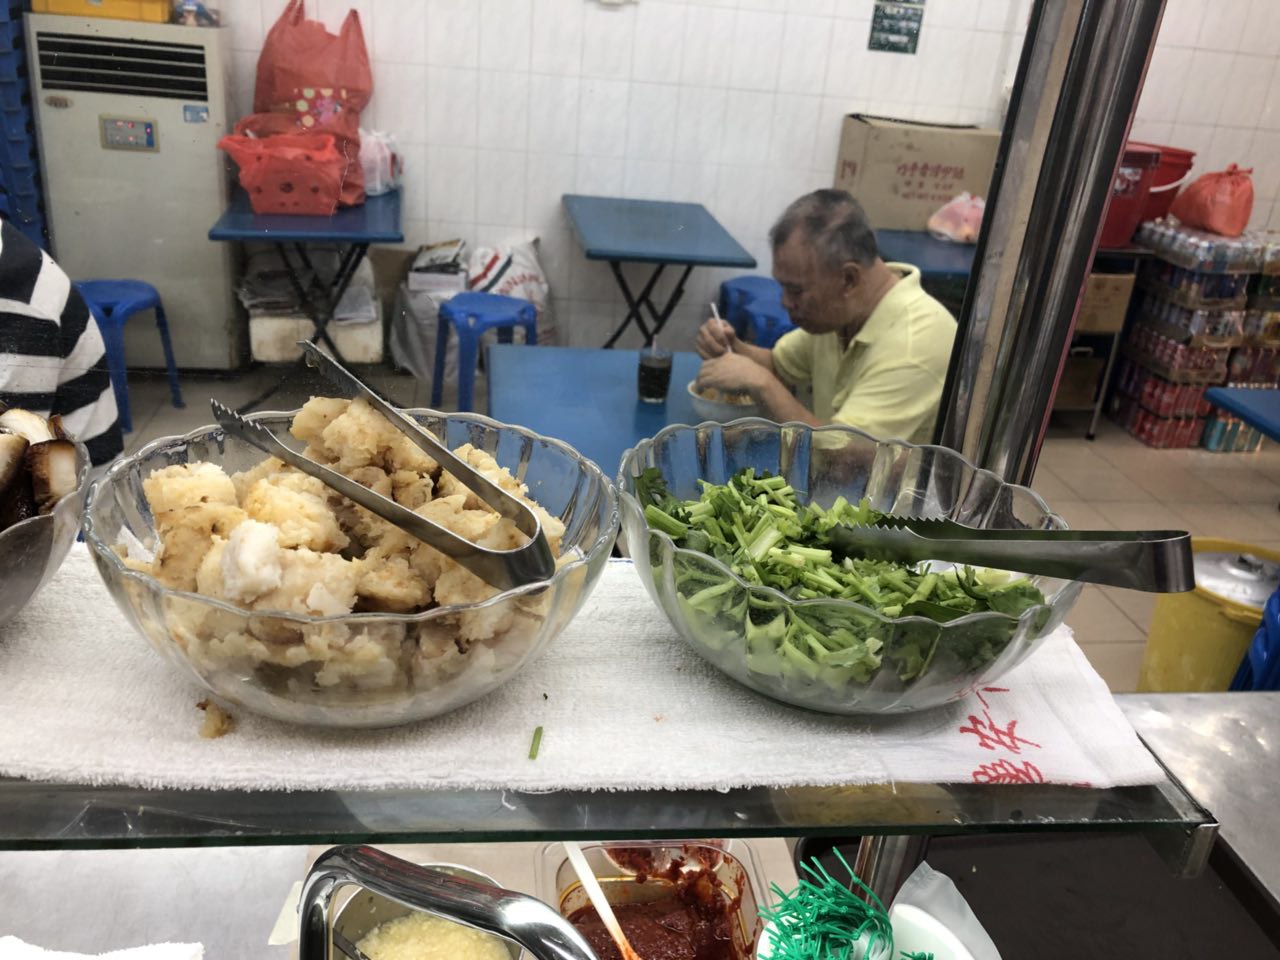
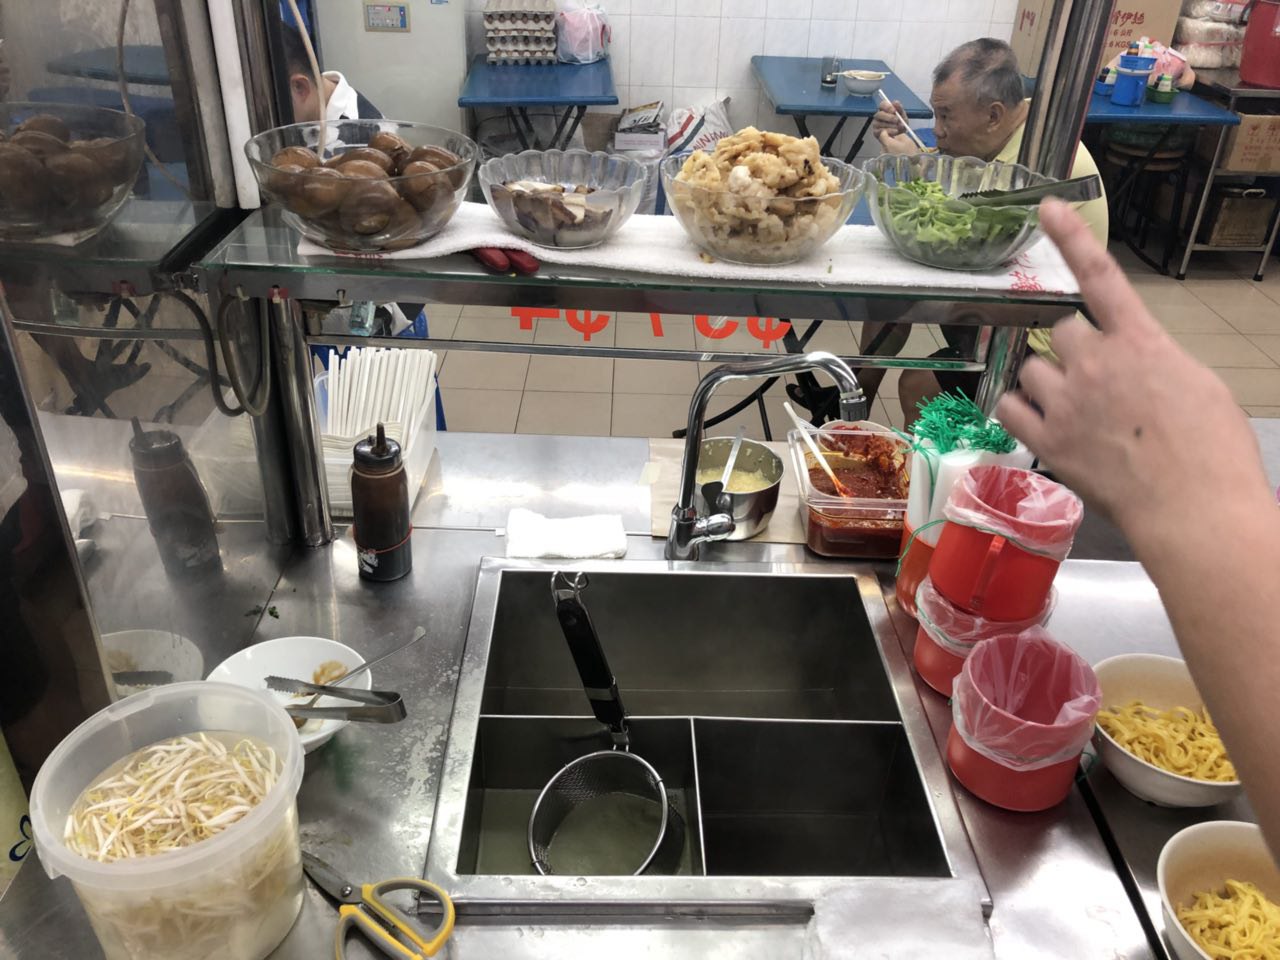
Firstly, the amount of noodles and beansprouts are estimated by hand and placed into a noodle strainer, before being blanched in piping hot water.
After the noodles are cooked, 1 1/2 ladles worth of thick, sticky gravy is poured on top of the noodles, just enough to cover the noodles.
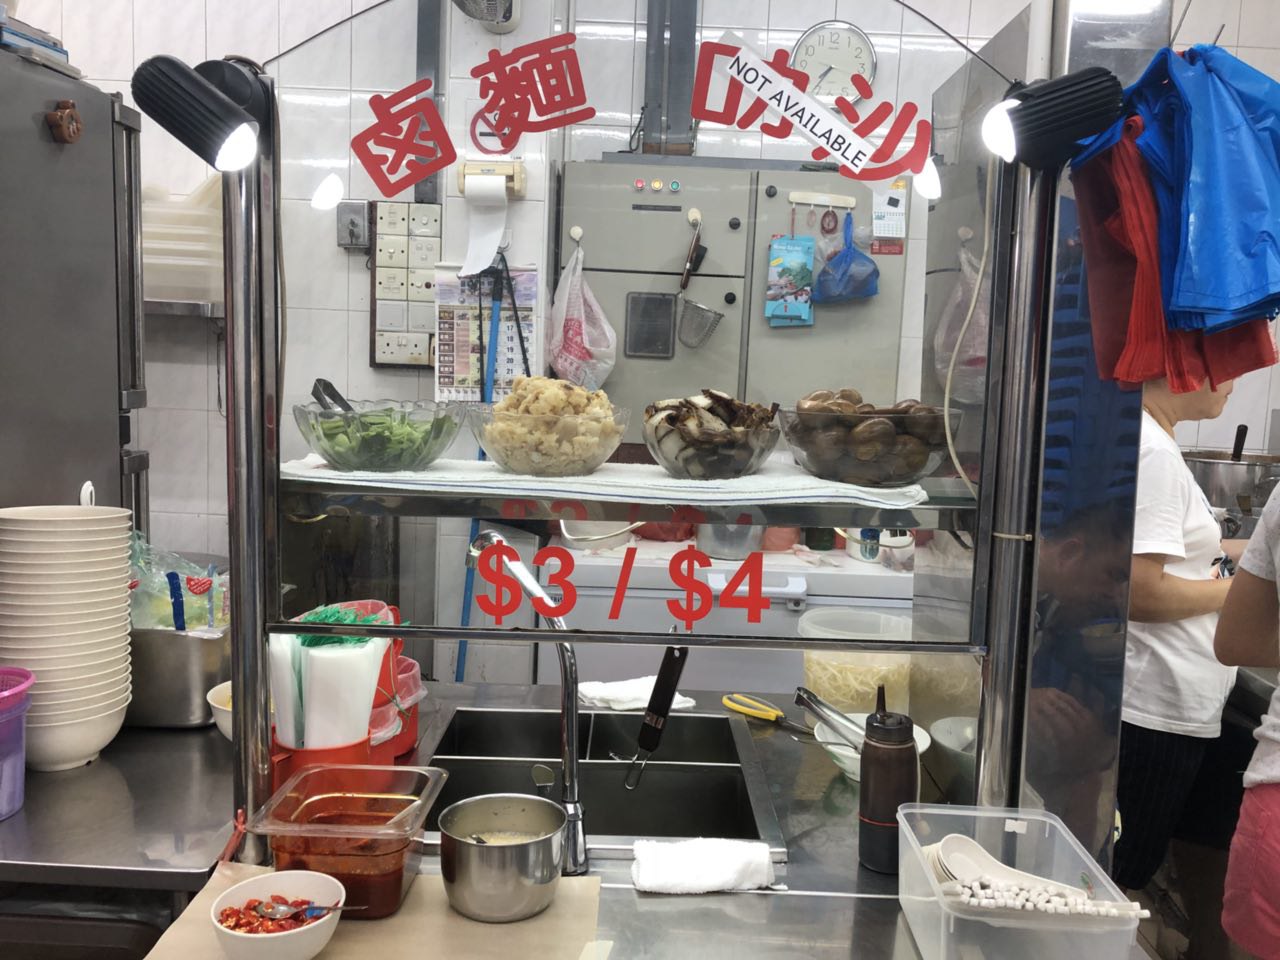
Next, toppings such as braised egg, fried fish, braised pork and parsley are added to the bowl.
Last but not least, condiments like black vinegar, chilli paste and minced garlic are added before serving the bowl of noodles to the customer.
Tools used
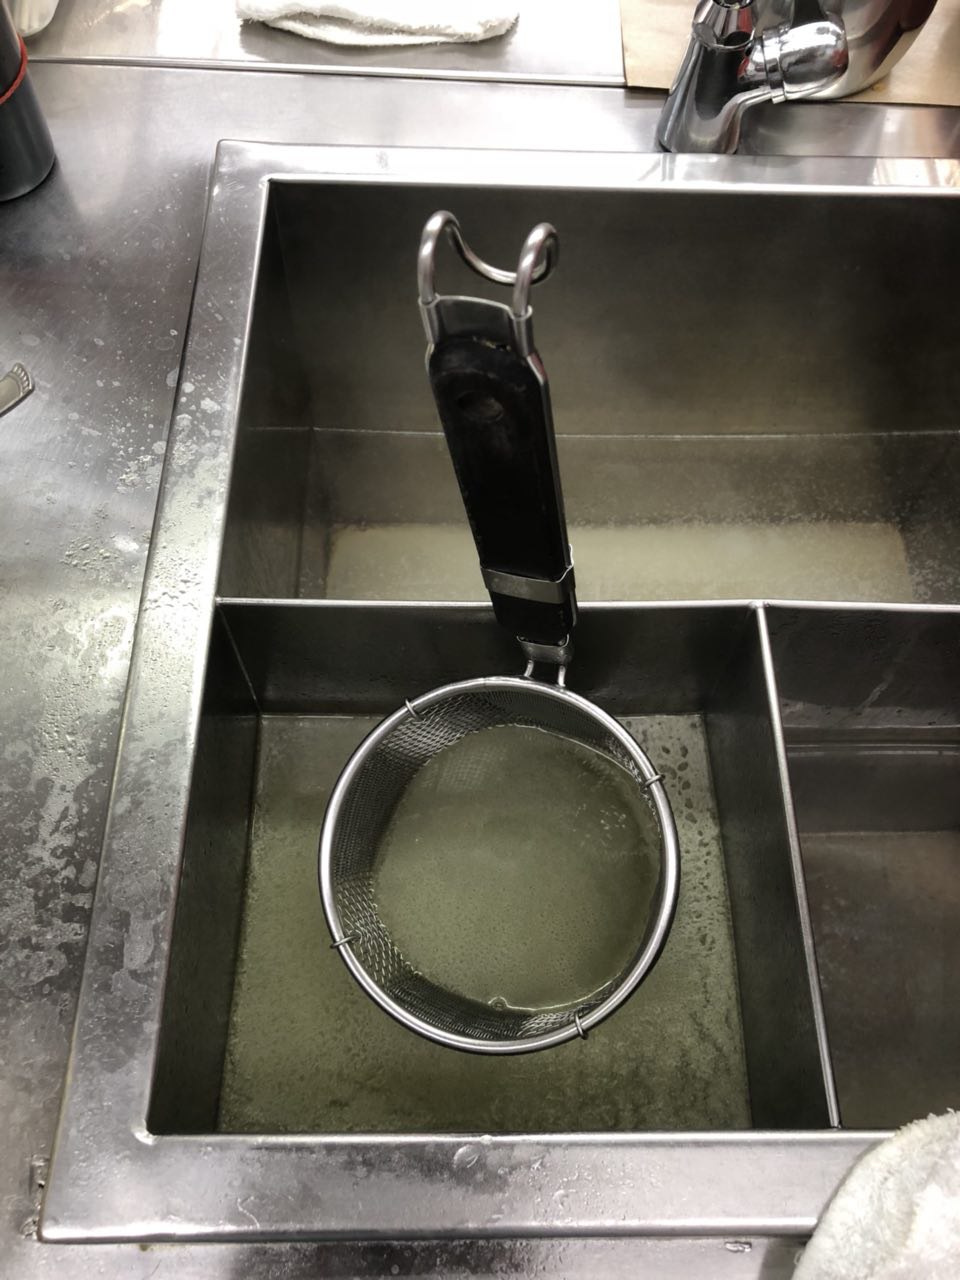
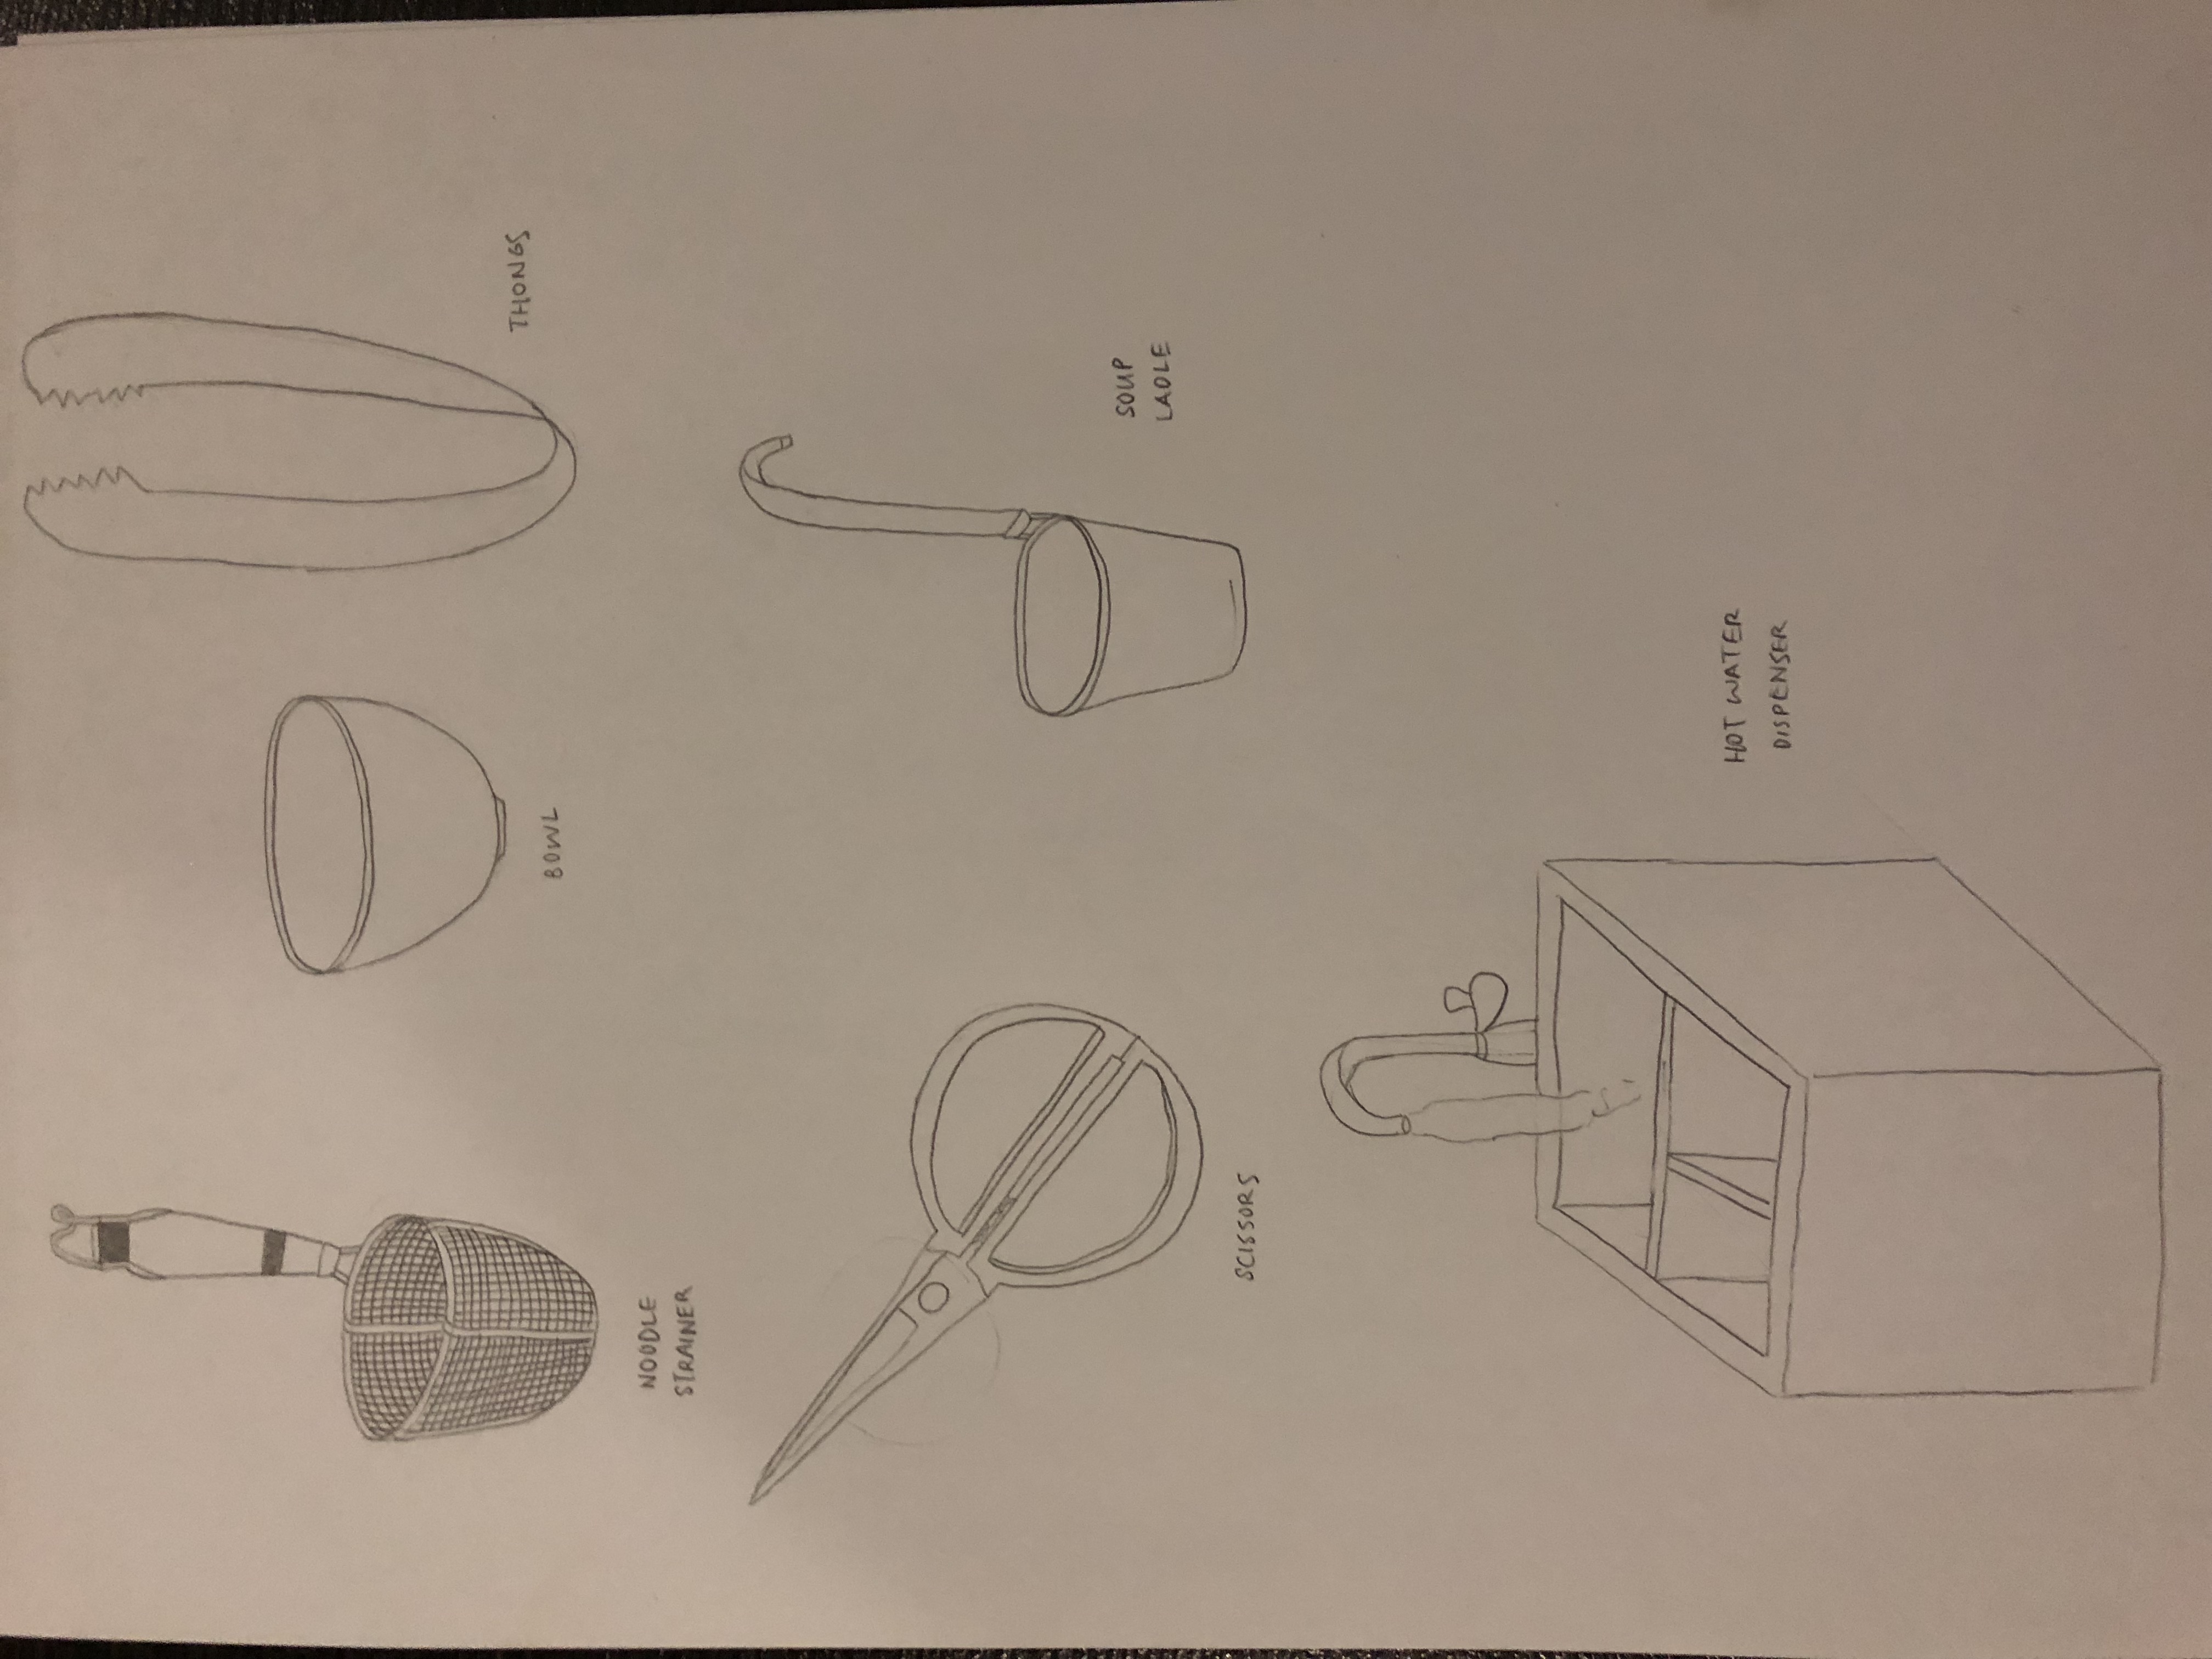
Stainless steel noodle strainer
Thongs
Ladle
Bowl
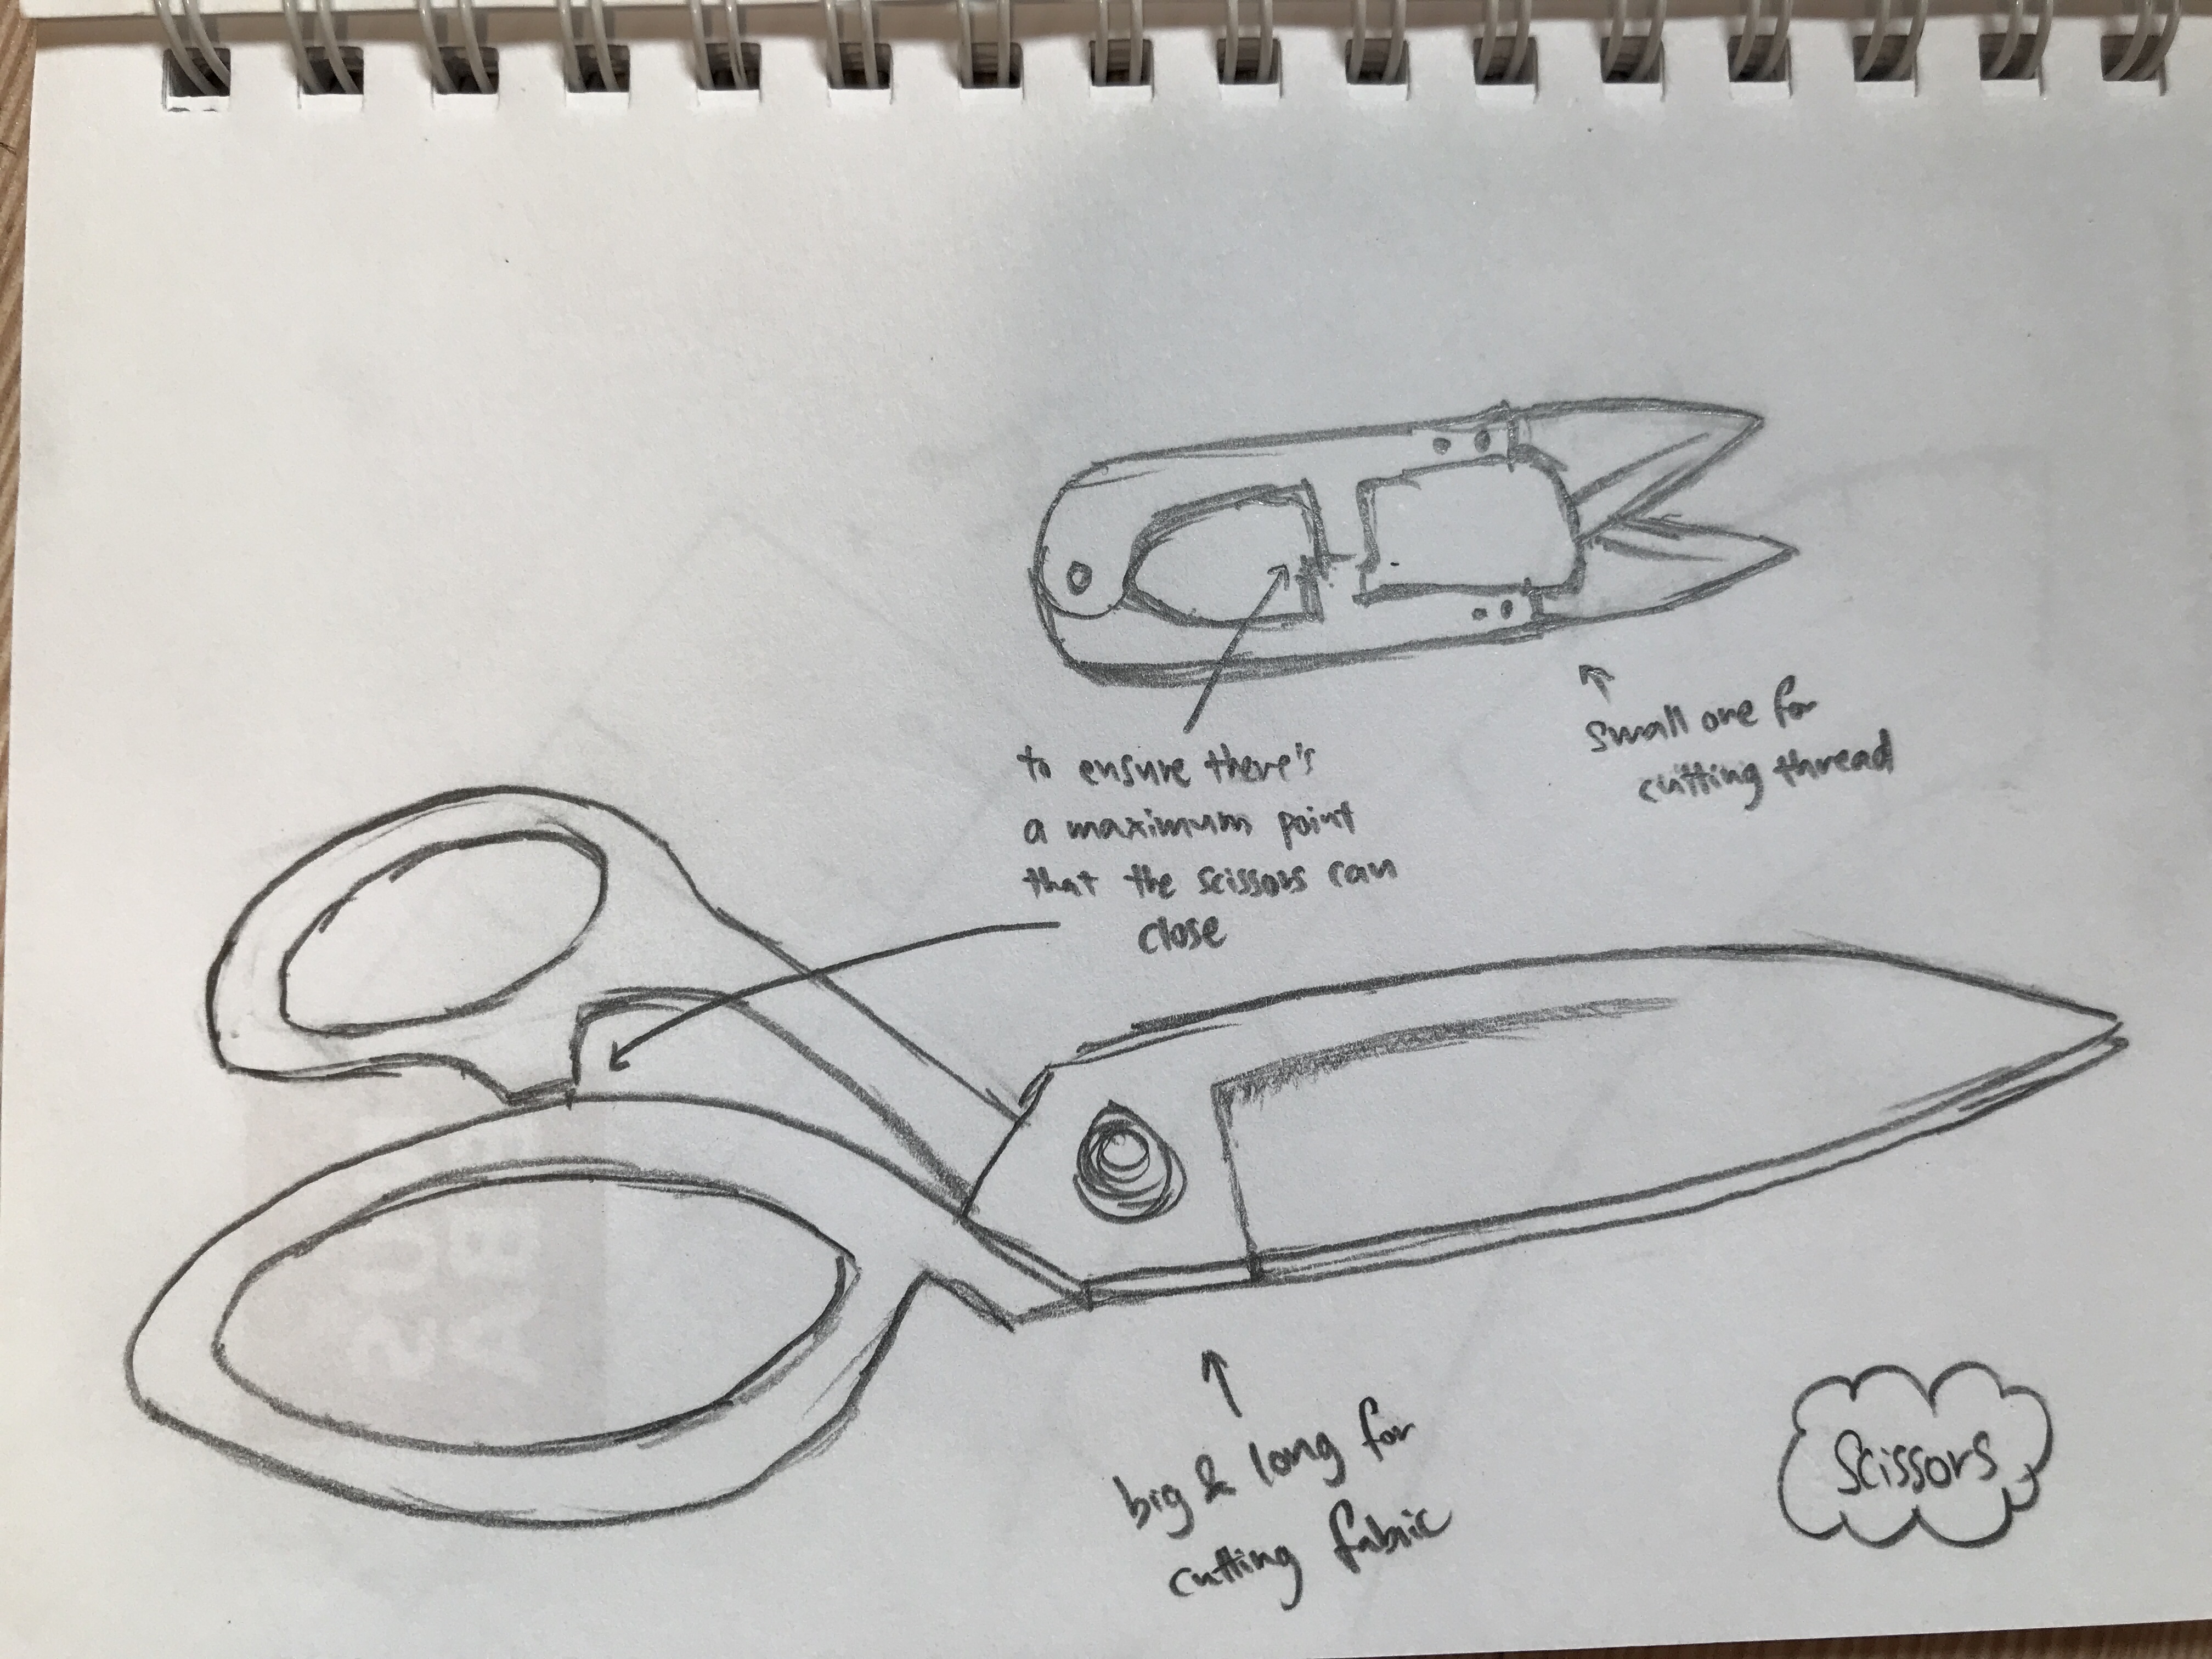
Scissors
Hot water dispenser
Thongs usedNoodle strainer usedSketches of tools used
Worksite Documentation
The worksite is a small and humble space, and it also very clean and organised. Below are a few photos I took of the worksite.
Personal Insights
After attempting to prepare a bowl of lor mee by myself, I took down some notes regarding my experience. The most challenging part would be straining the water out of the noodles, because I need to leave the right amount of water in the noodles, and if there is too much water retained in the noodles, it will become too soggy. In my opinion, it takes a lot of time and experience for one to master this step. On the other hand, I learnt that preparing a humble bowl of noodles is actually a very laborious and meticulous process, and almost no machines or pre-made food are used. Everything from the braised egg to the braised pork are made with love by the chef and kitchen staff.
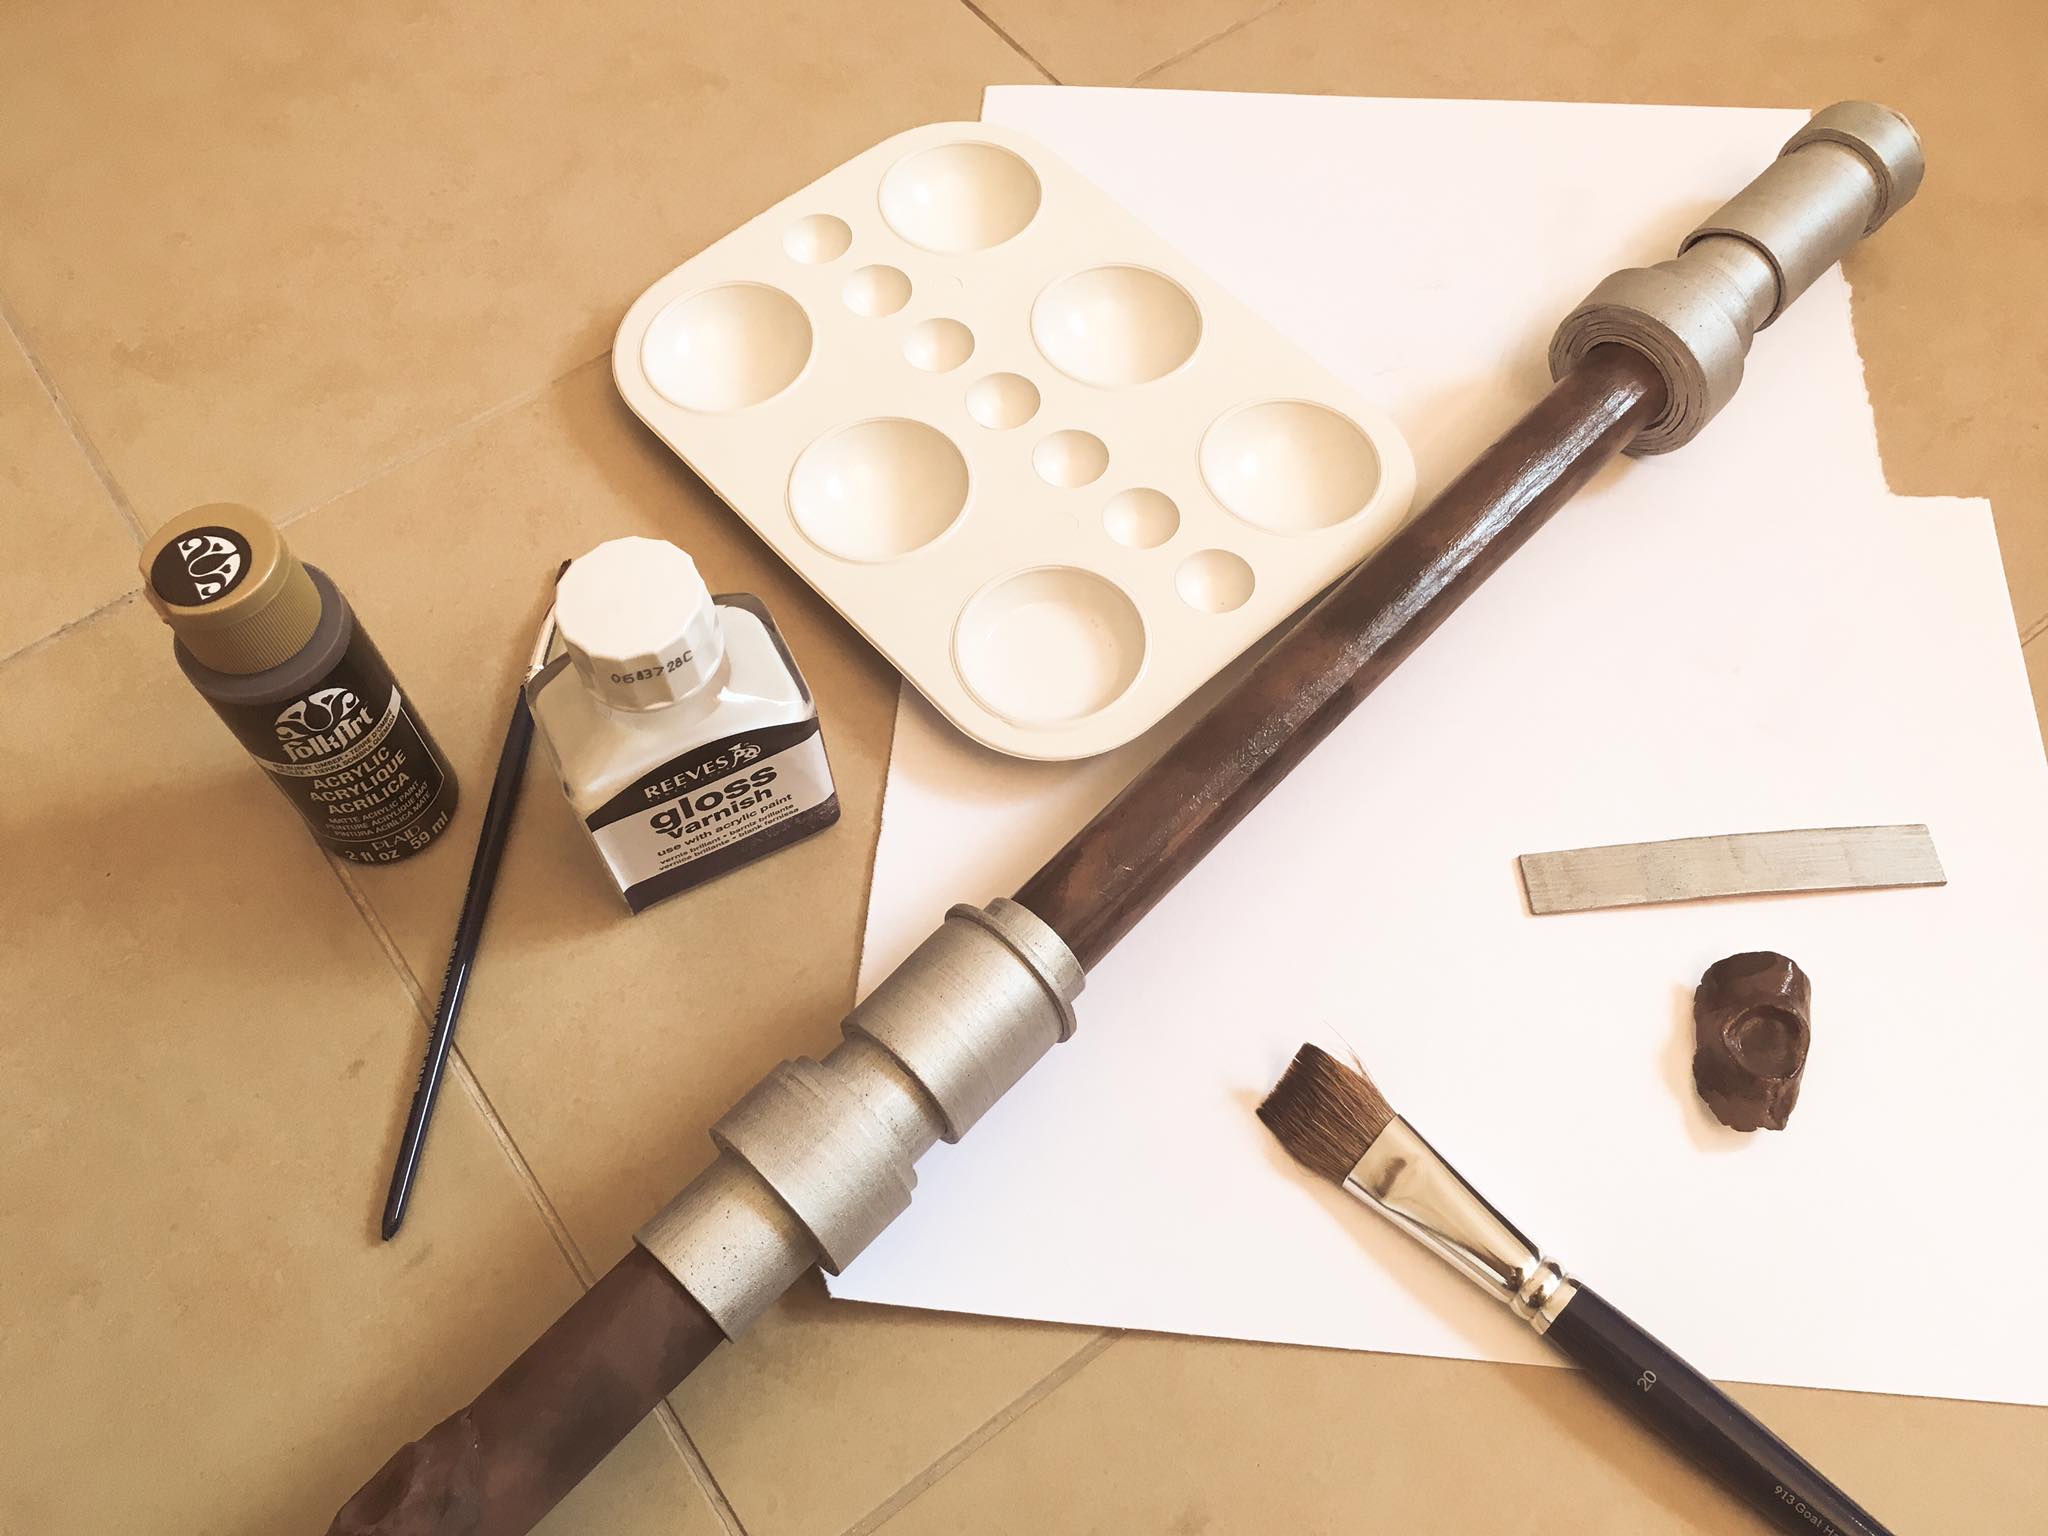
I am an otaku (anime lover) and cosplayer. I have been cosplaying for about 2 years, but I have never crafted my own weapons for cosplay (thanks Taobao). For this year’s Singapore Toy, Game & Comic Convention, I decided to cosplay Chirrut Îmwe from Rogue One: A Star Wars Story. I asked my cosplay friend, who is also a crafter, for help on making Chirrut’s weapon/walking stick because the weapon costs $200+ if I buy it online. Below is the documentation on the tools used and the crafting process.
Tools used
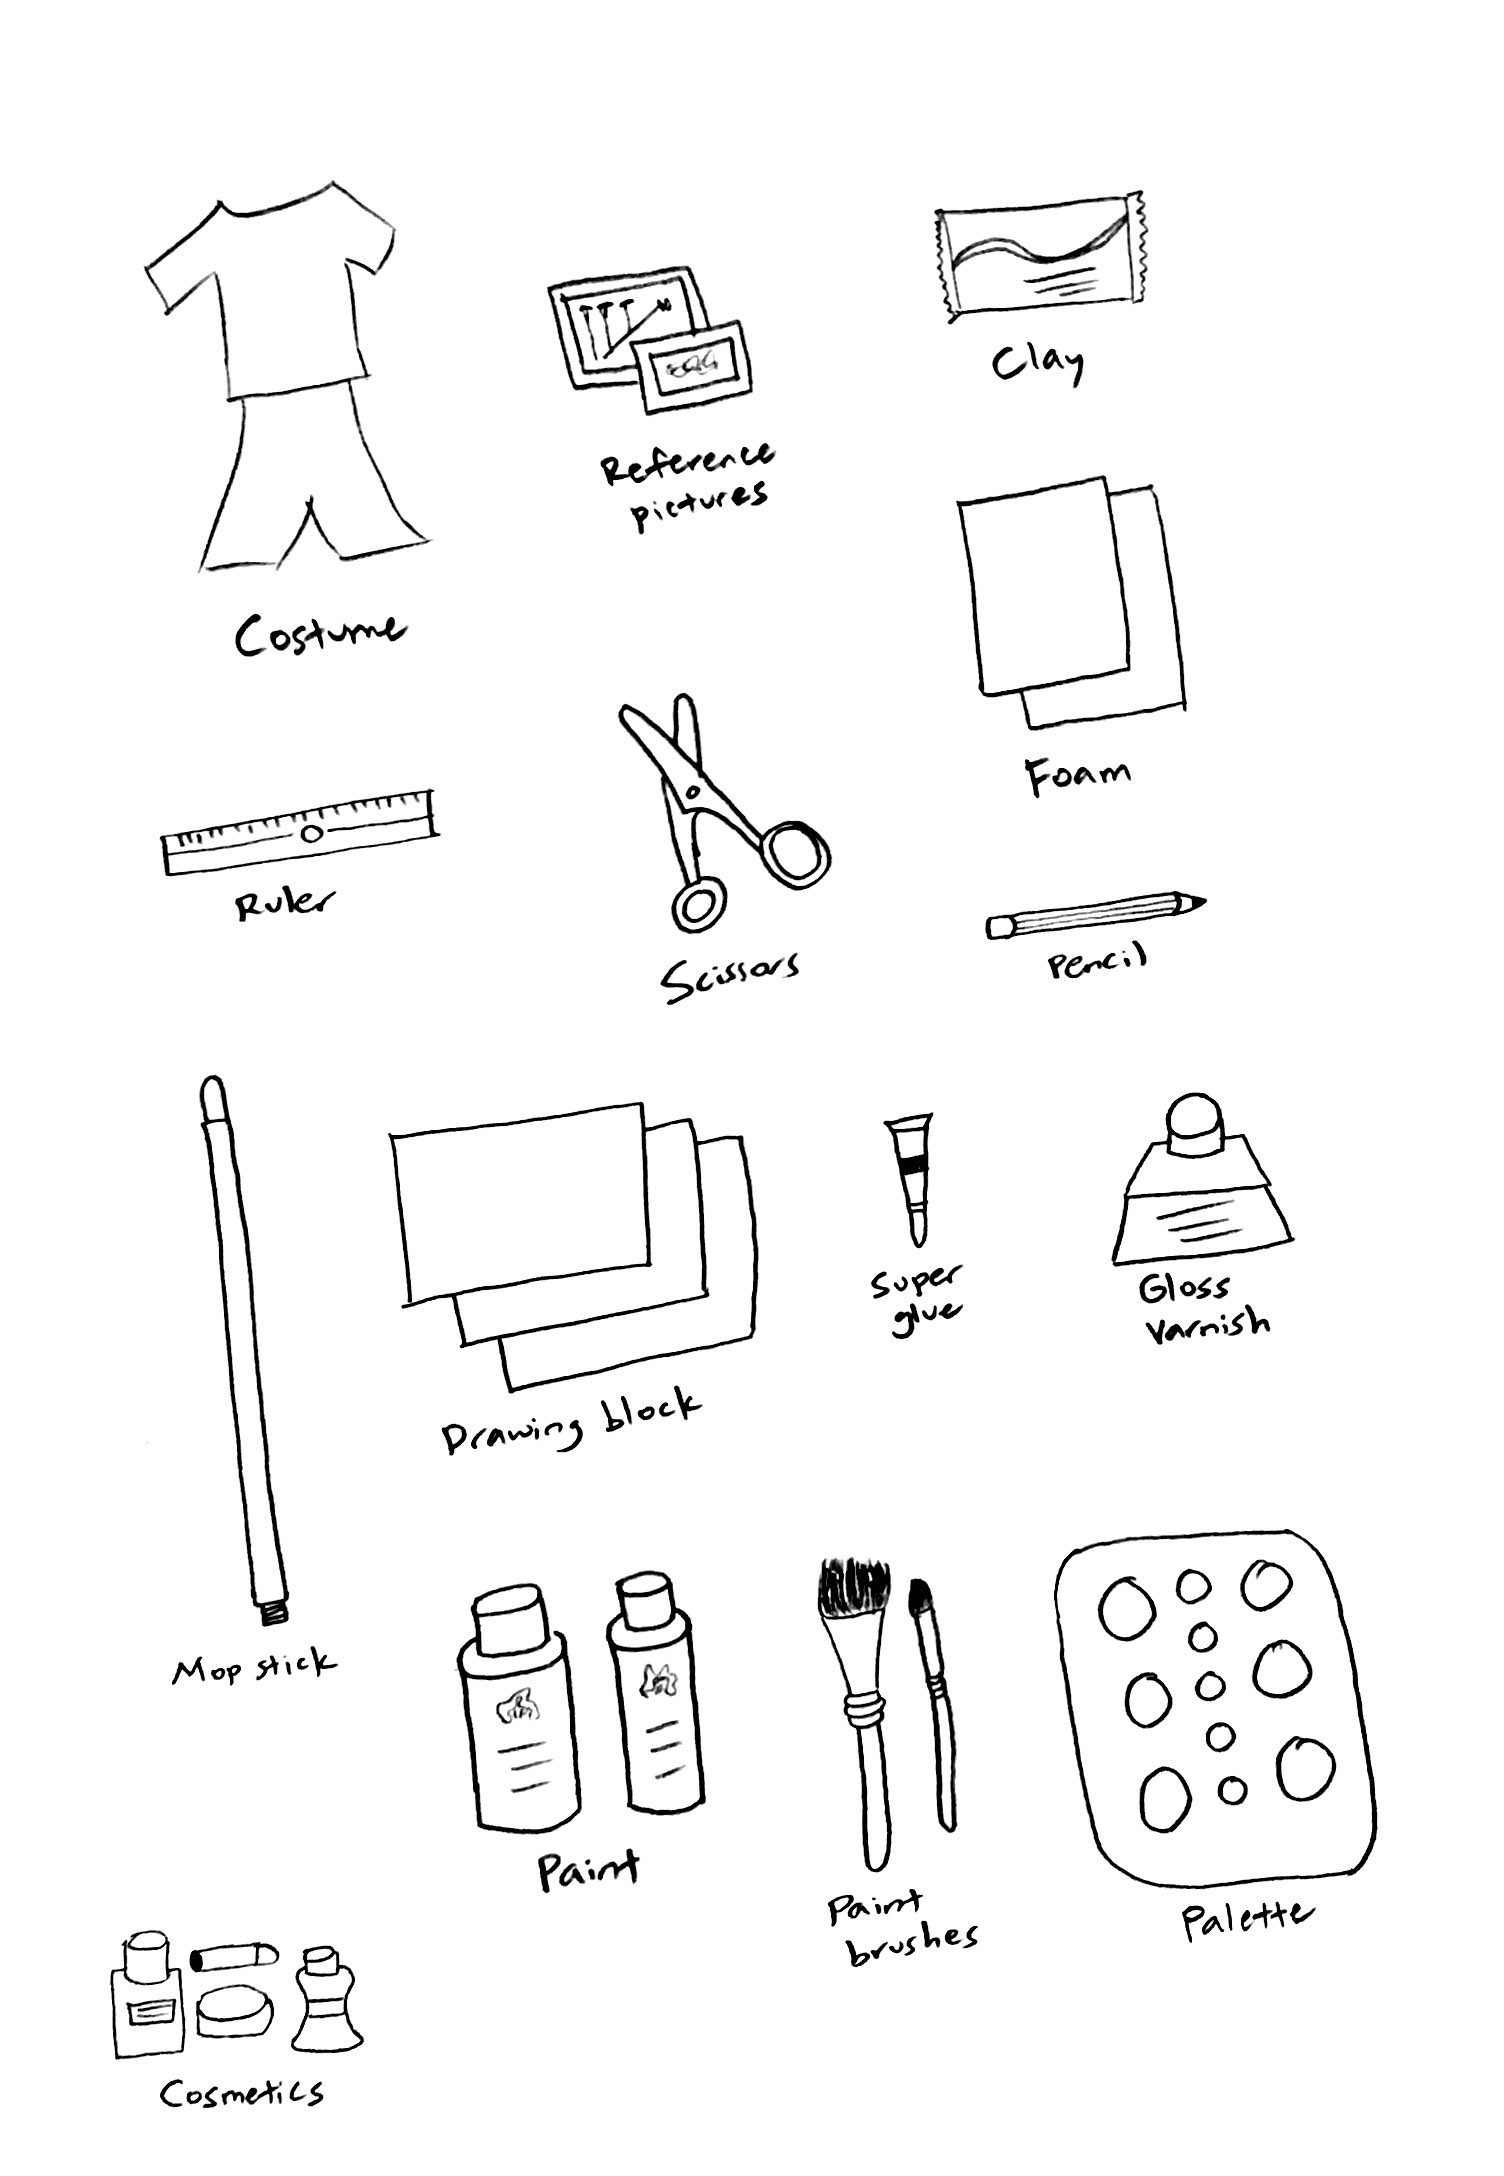
Sketch of tools used in the entire process of crafting and cosplaying. I did not take a collage of these tools, but they’ll appear in the process documentation.Reference picture for Chirrut (character) used in the entire process.Reference picture for Chirrut’s weapon used in the crafting process.Chirrut’s costume that I bought from Taobao (rip wallet).
Worksite documentation
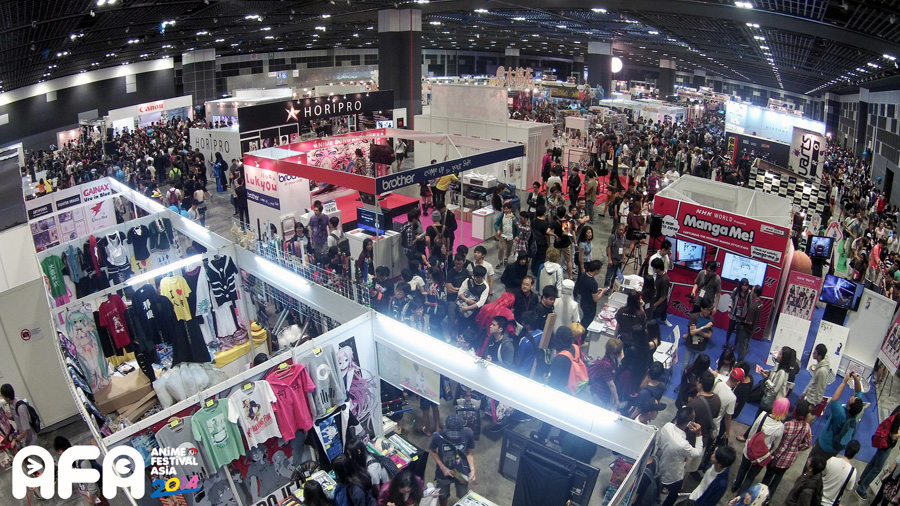
The best part about crafting is that it can be done anywhere. Yes, that includes the comfort of your own home/room. I crafted Chirrut’s weapon in my room as my room has all the tools necessary. For cosplay, it’s usually done at conventions, such as Anime Festival Asia Singapore or Singapore Toy, Game & Comic Convention. The worksite for cosplay is usually really crowded with a mix of normies (casual visitors), cosplayers, exhibitors, and photographers.
The worksite for cosplay (convention). Picture belongs to AFASG.
Process documentation
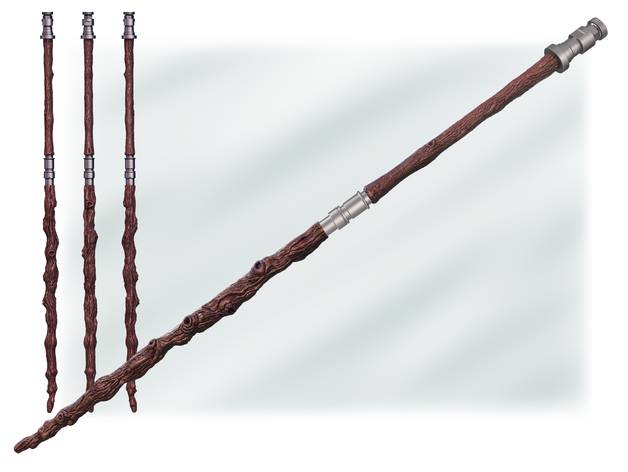
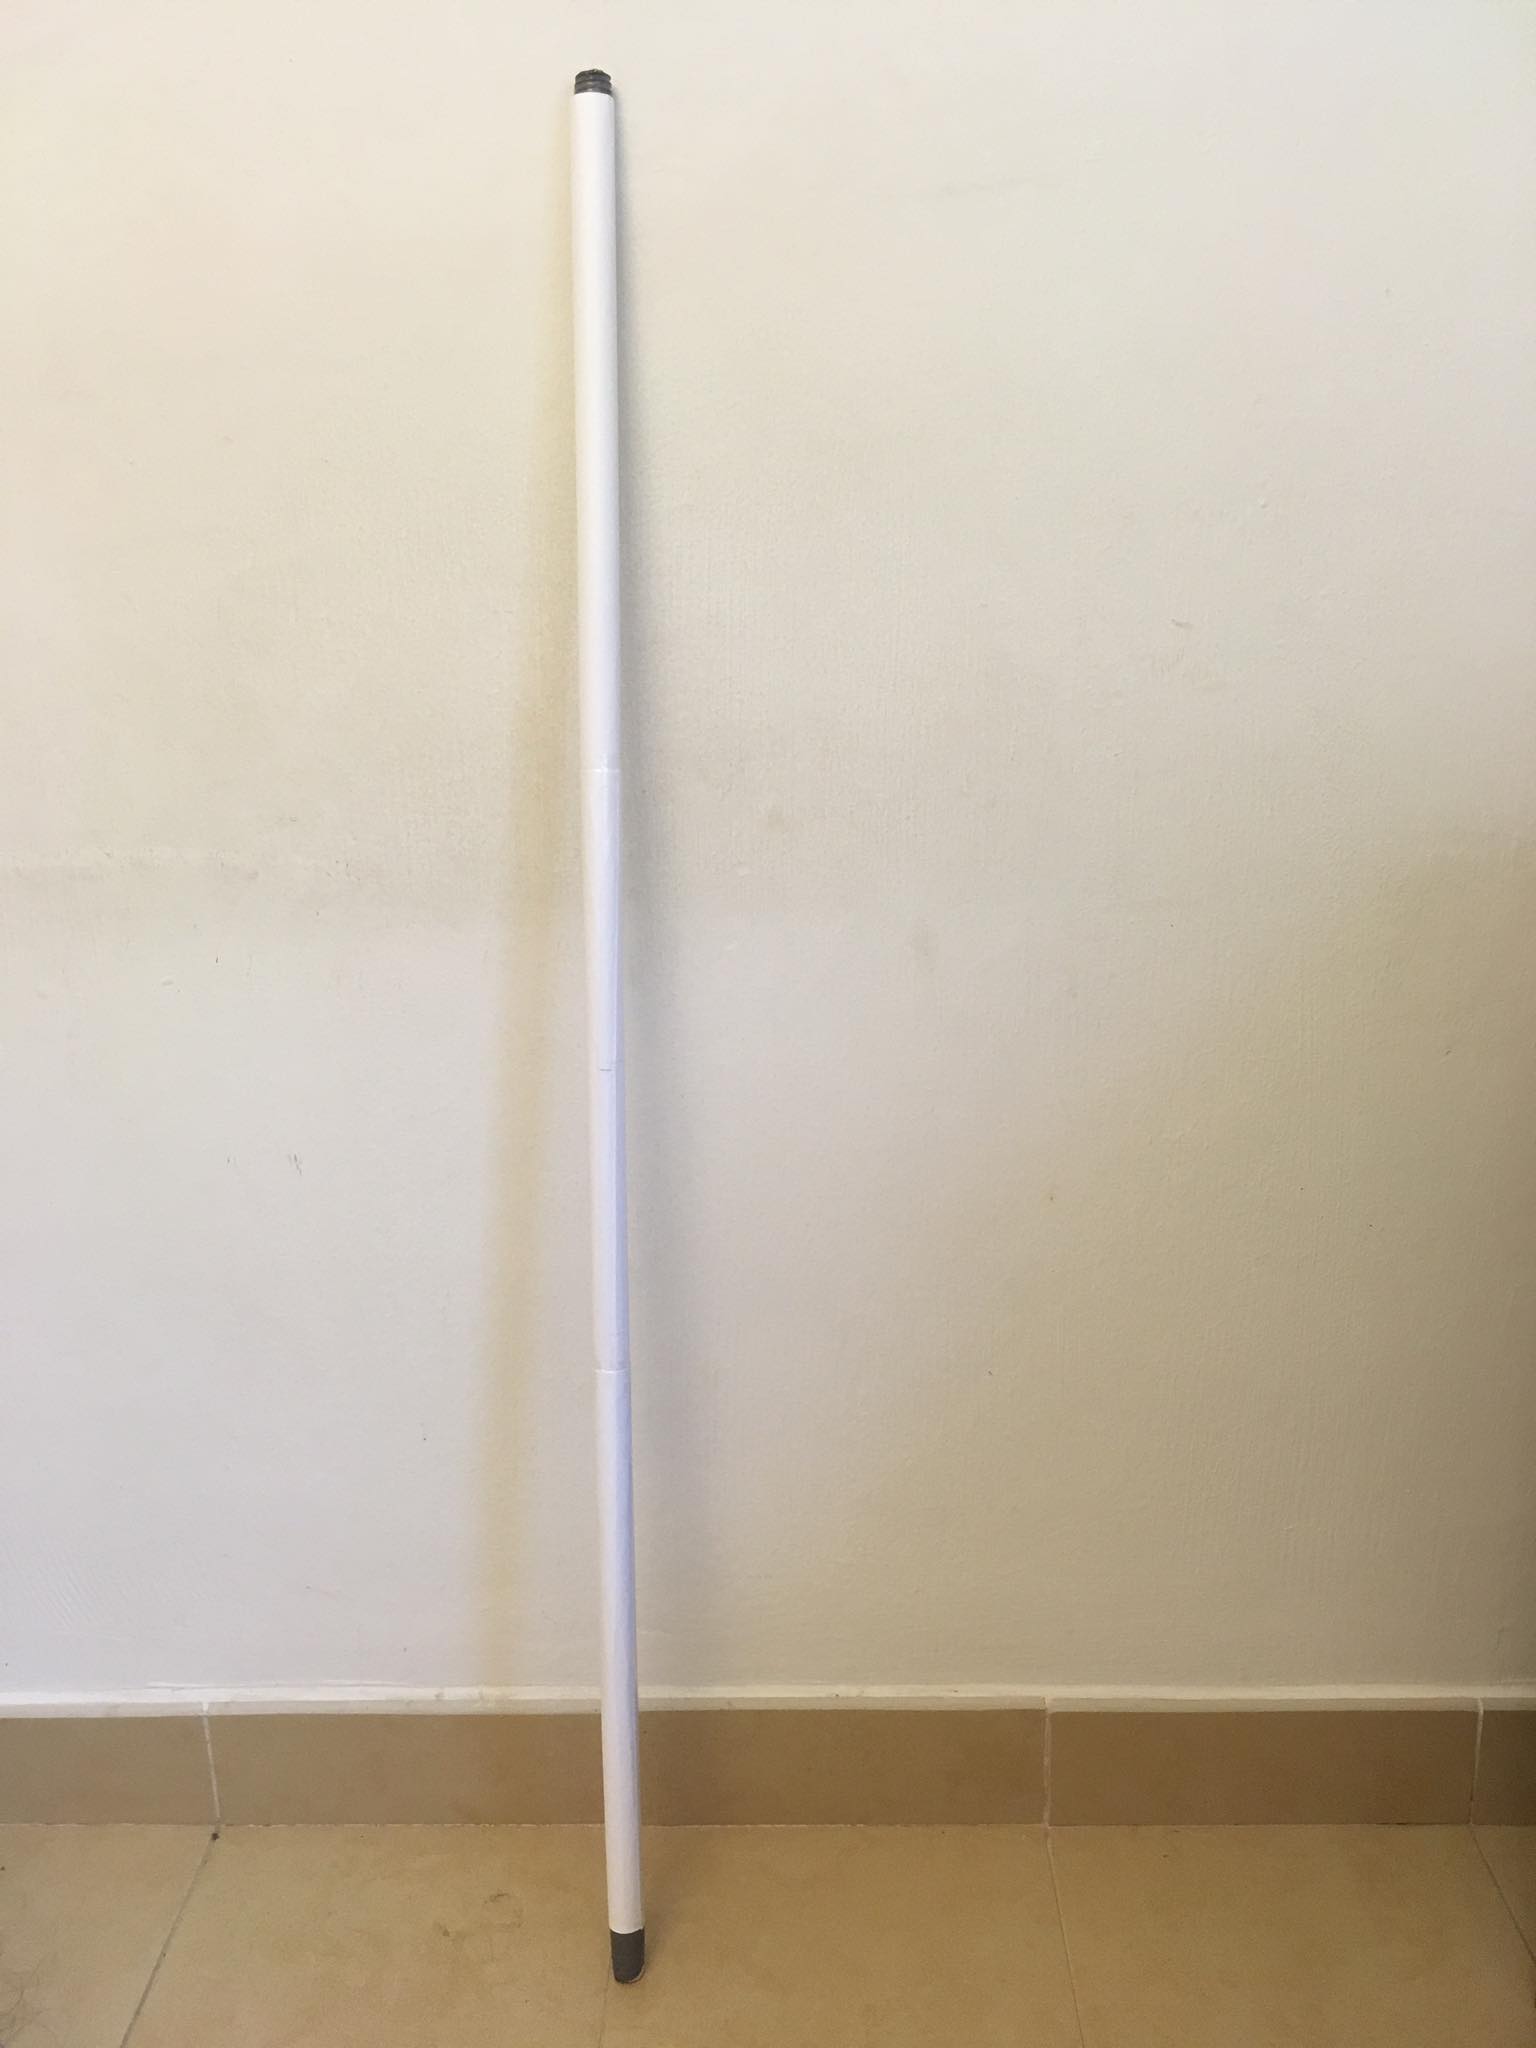
My friend shared with me that as a crafter, I need to have the mantra of “lowest cost possible” deeply rooted in my mind. Crafters often think out of the box and figure out how to make a weapon using the cheapest items, including household items. They dissect the weapon into layers and build the layers one by one. To begin, we decided to use a stick meant for attaching a mop as the base for the weapon. The stick only costed $1 from a household items store. We wrapped the stick with pieces of drawing blocks so that the paint can stay on it easily.
Base for Chirrut’s weapon.
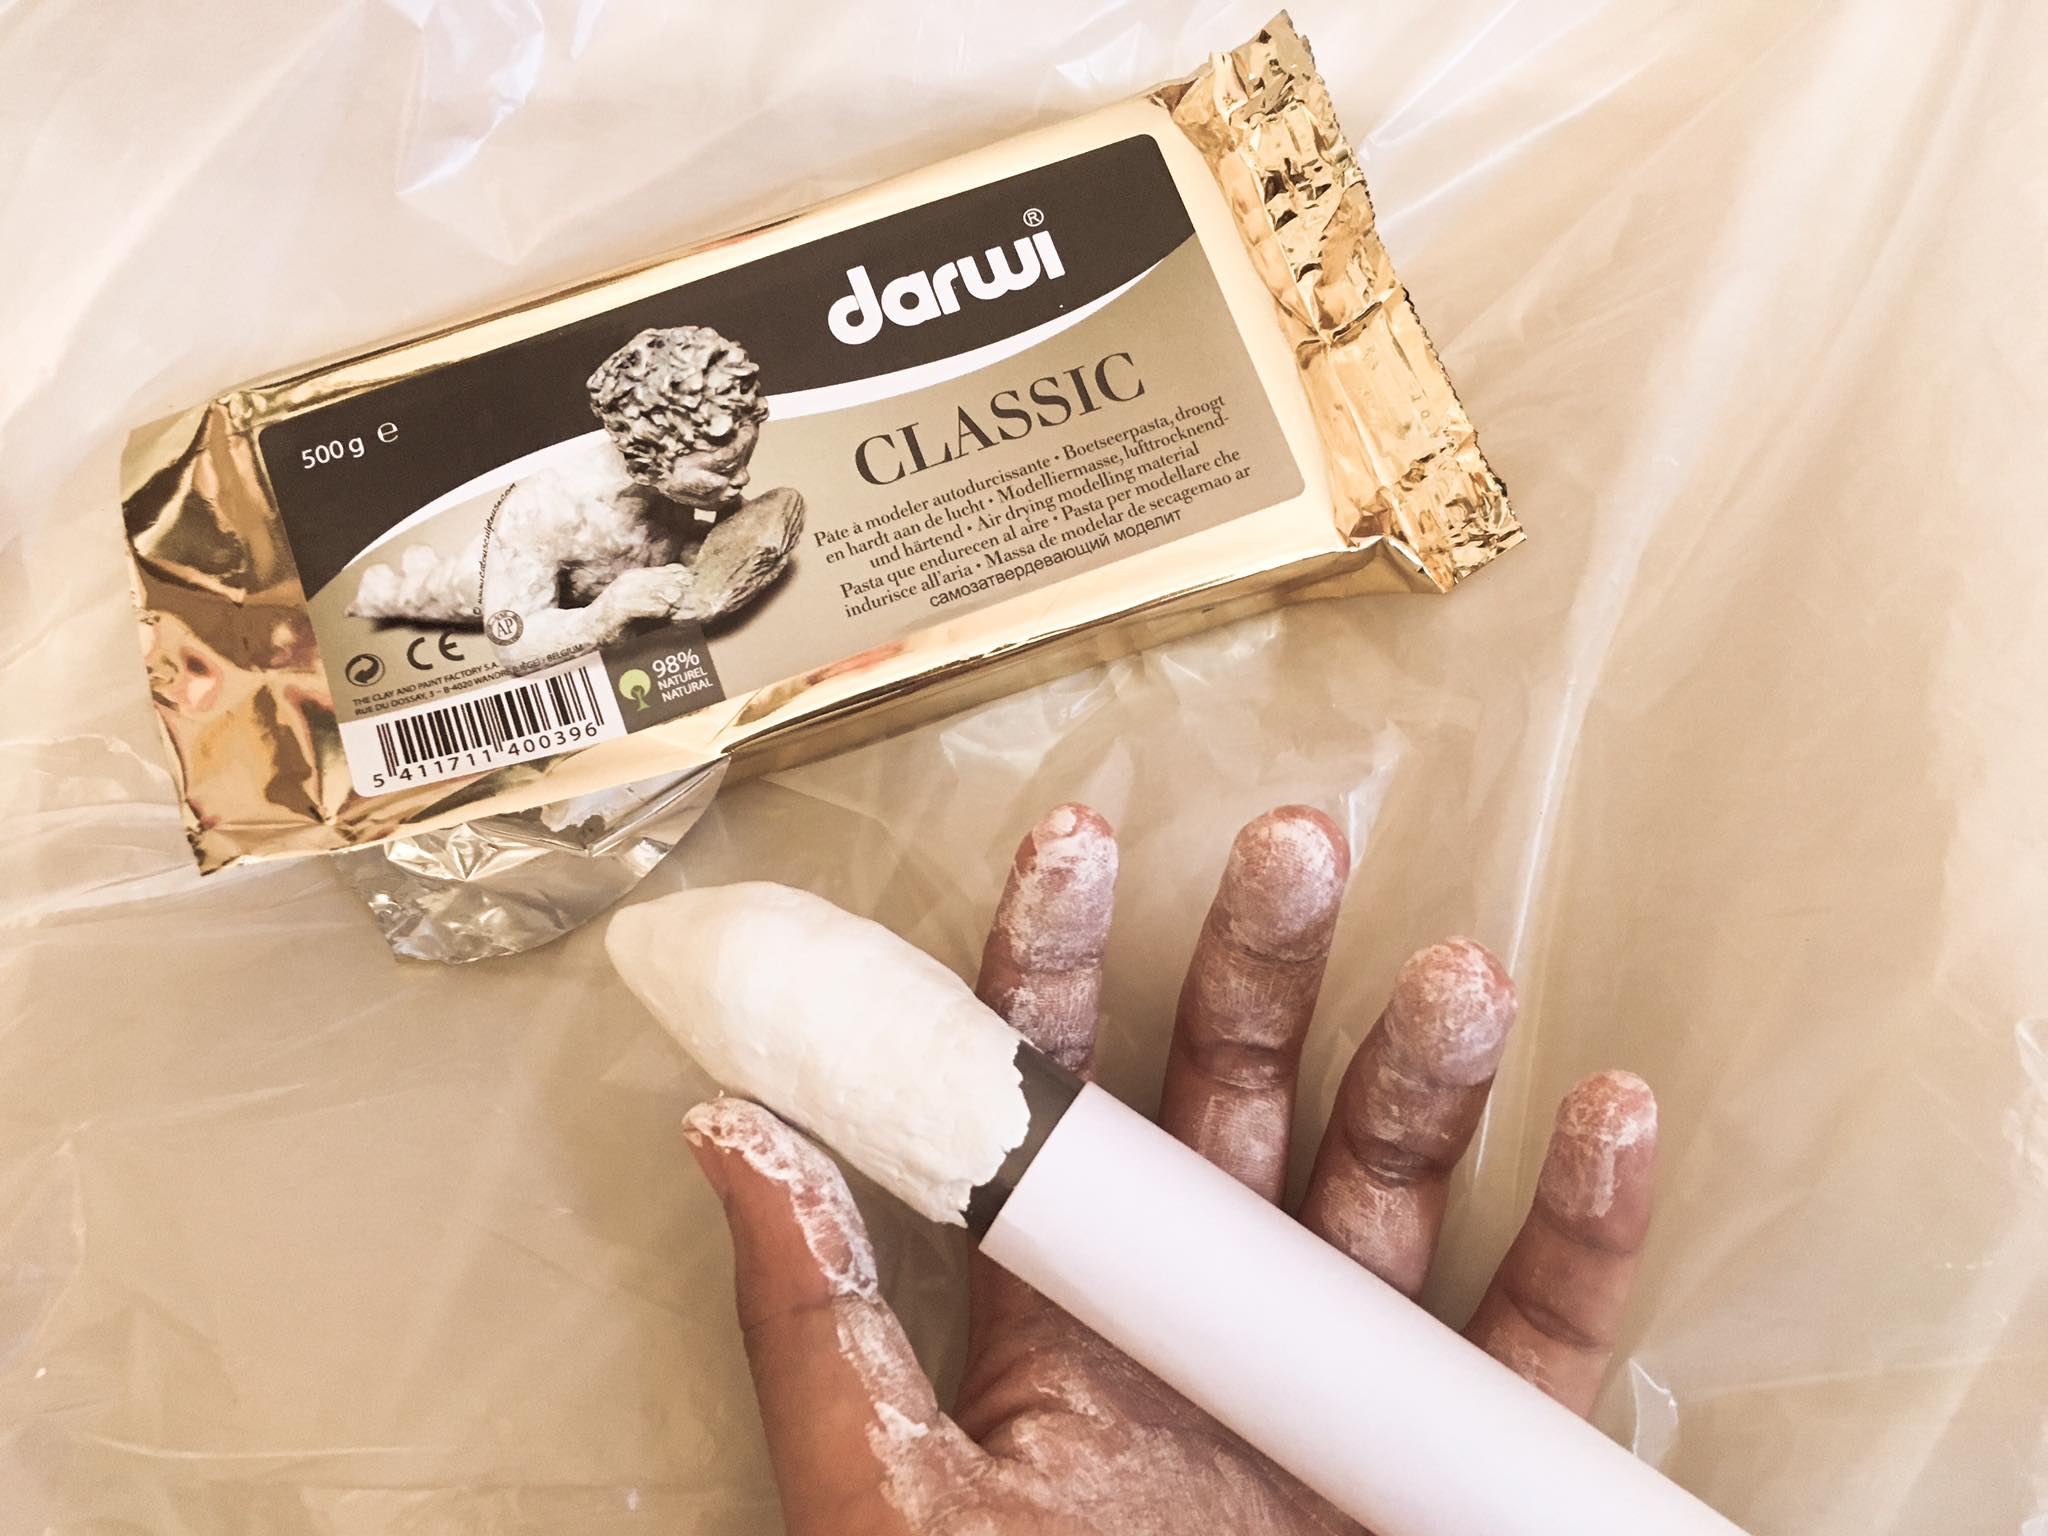
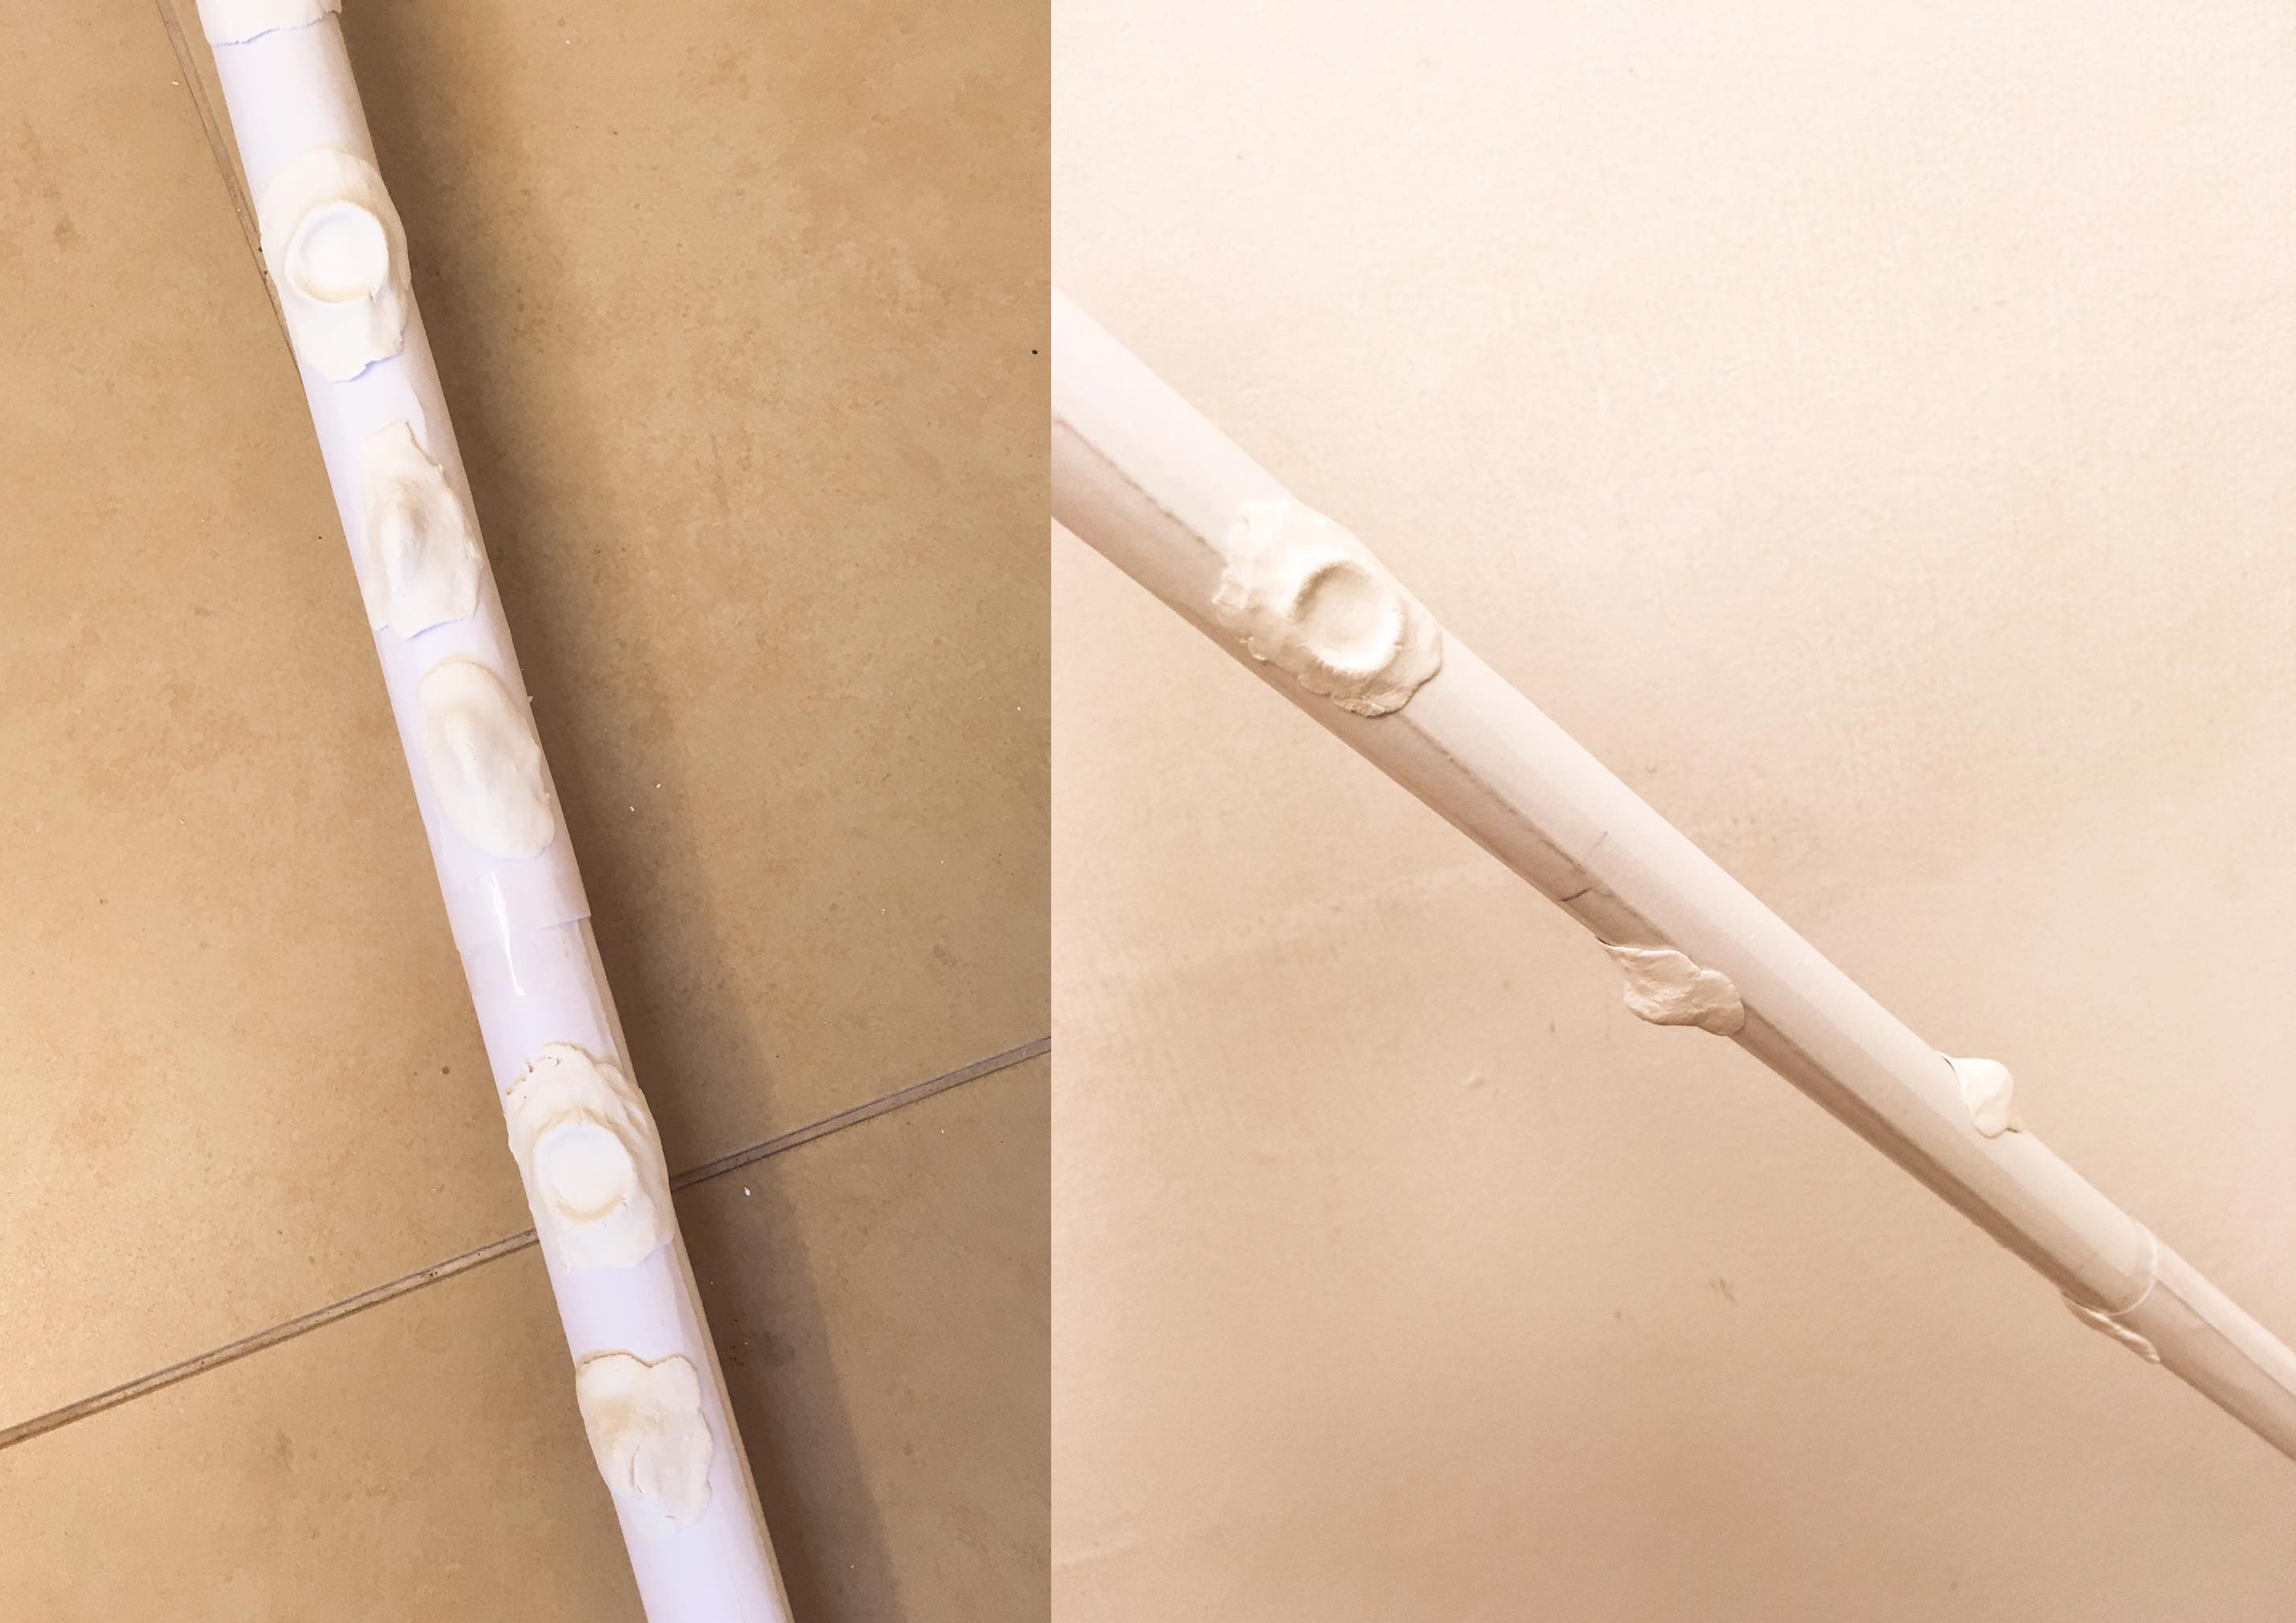
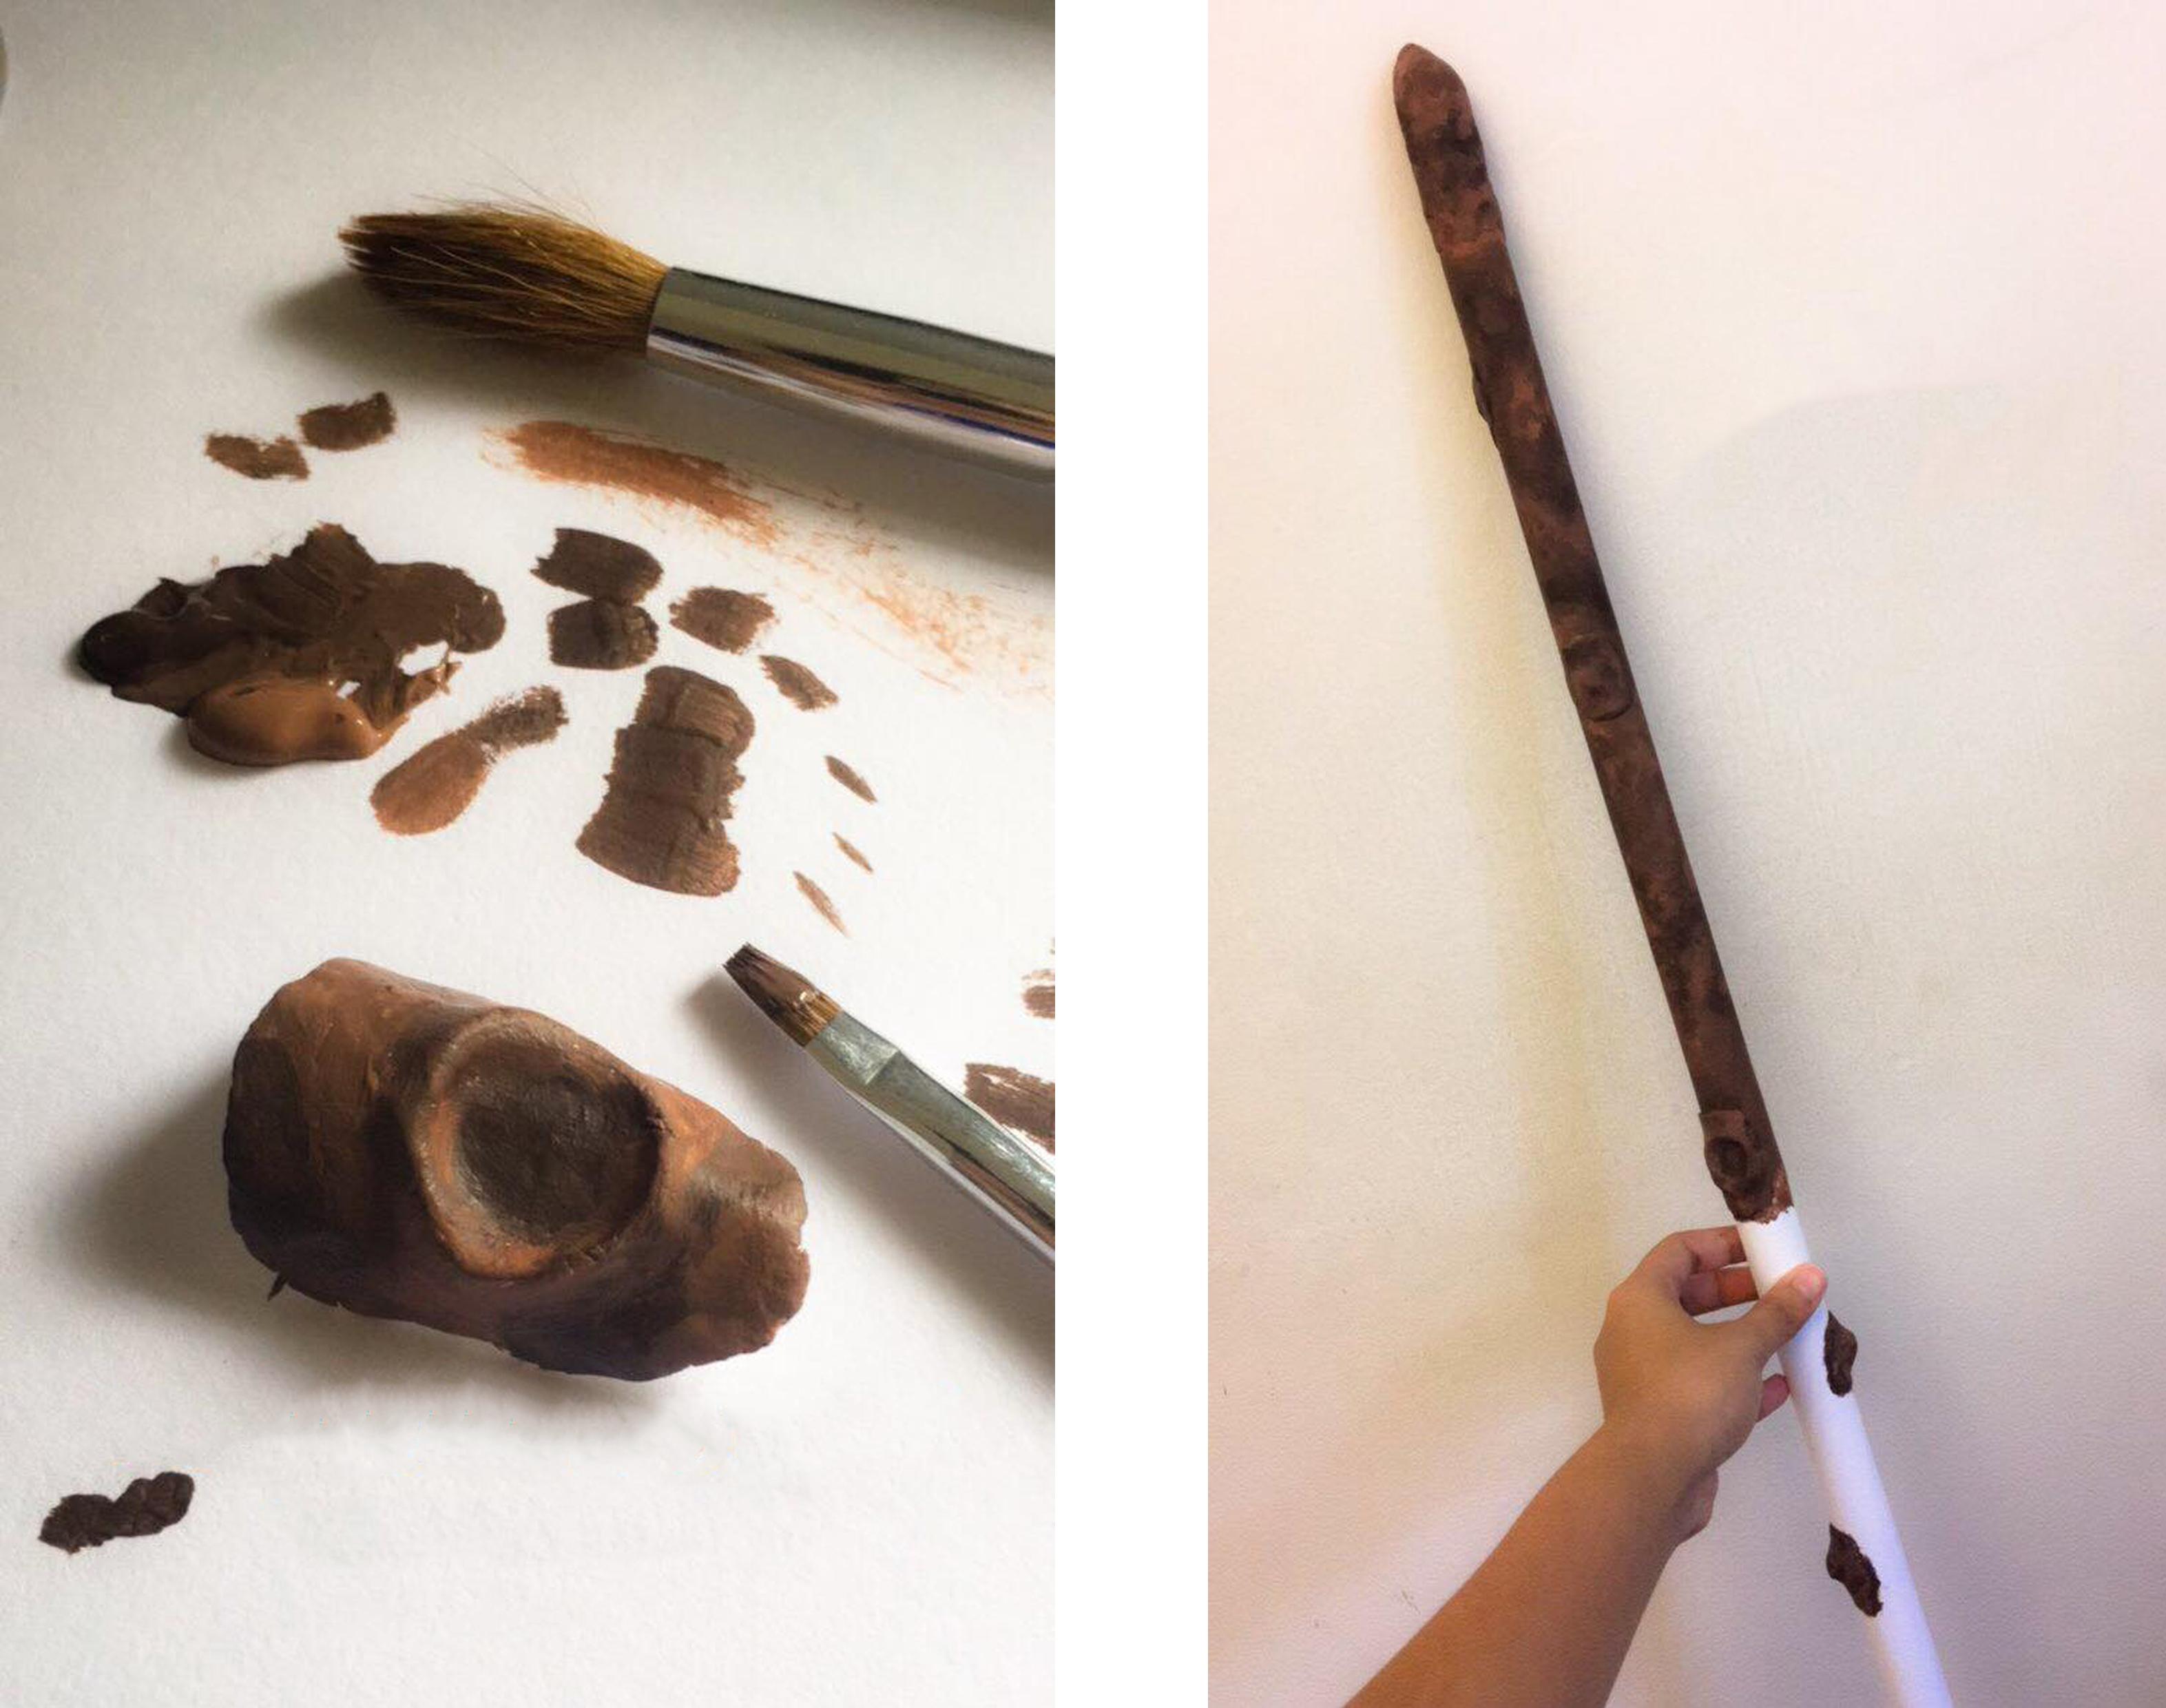
Then, we used moulding clay to make the tip and the uneven bark-like structure of the weapon. After allowing the clay to harden over 24 hours, we used 3-seconds super glue to attach the clay to the stick.
Moulding the shape of the weapon’s tip with clay.Creating the uneven bark-like structure of the weapon.
The next step is to paint the weapon. We used 2 different shades of brown paint to coat the weapon. By mixing the 2 different shades, we are able to get a couple of other shades of brown (saving costs). The varying shades of brown give my weapon the illusion of a more realistic texture similar to tree bark or wood.
Painting the weapon.
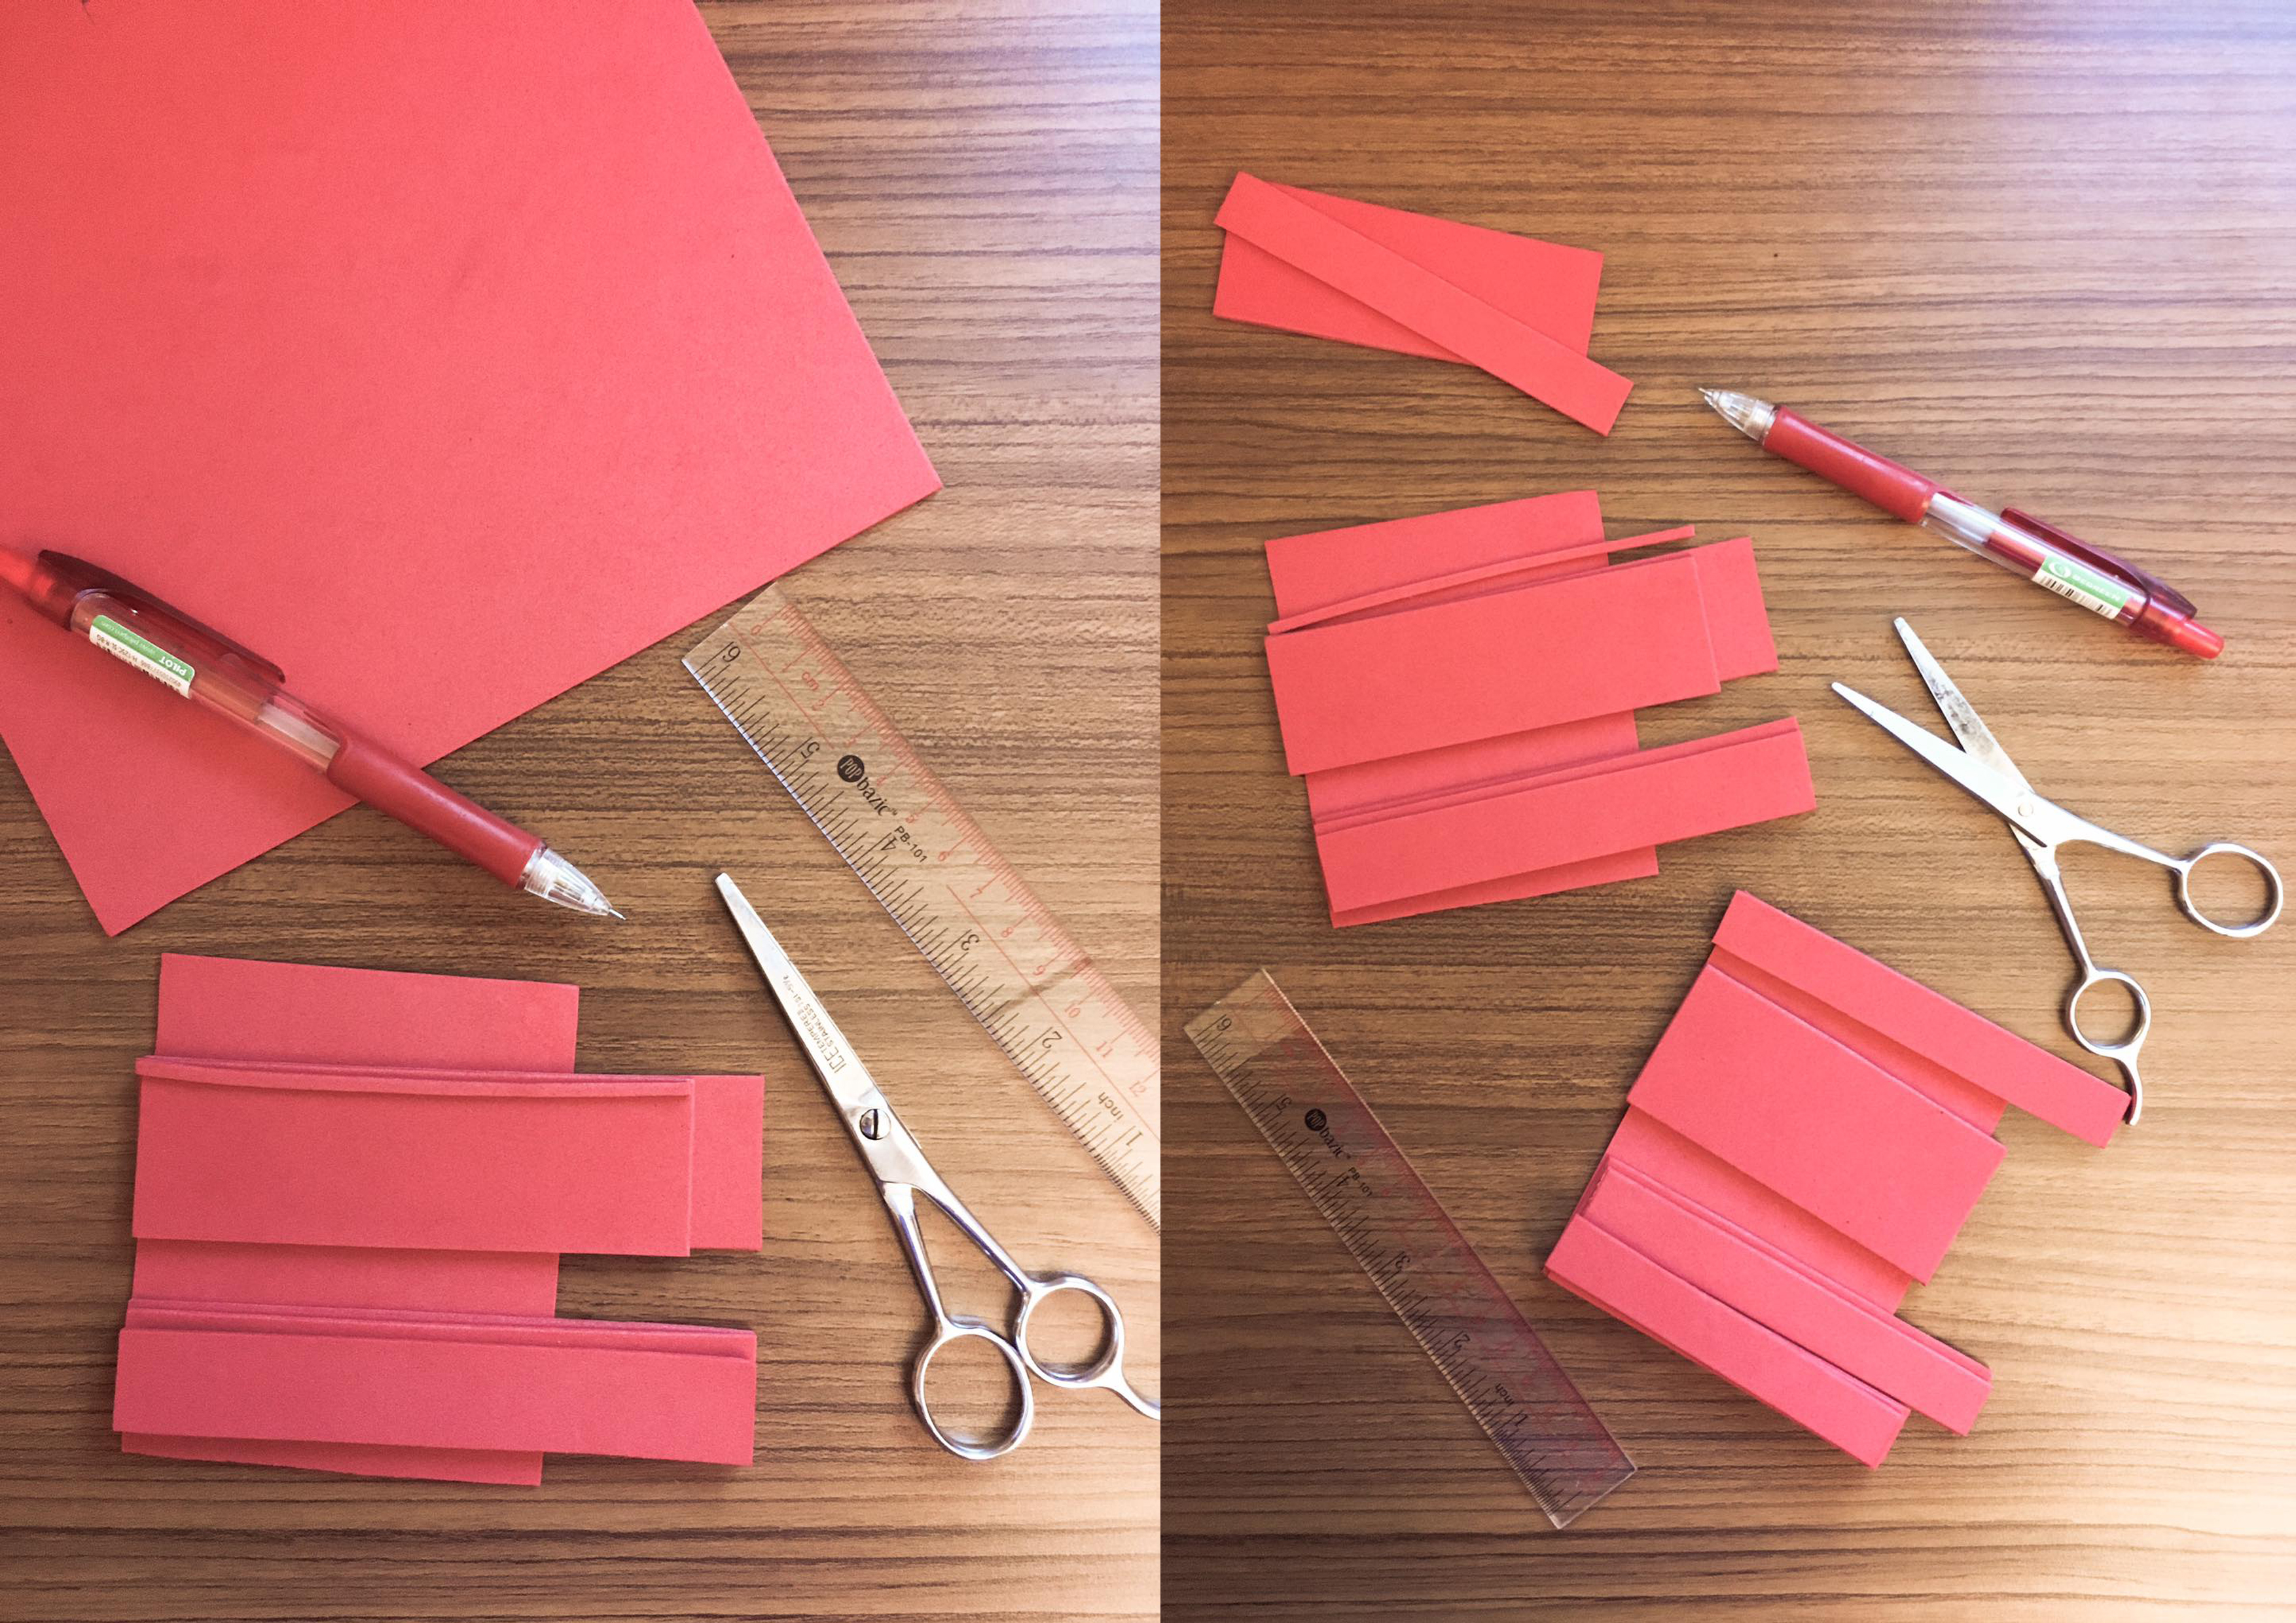
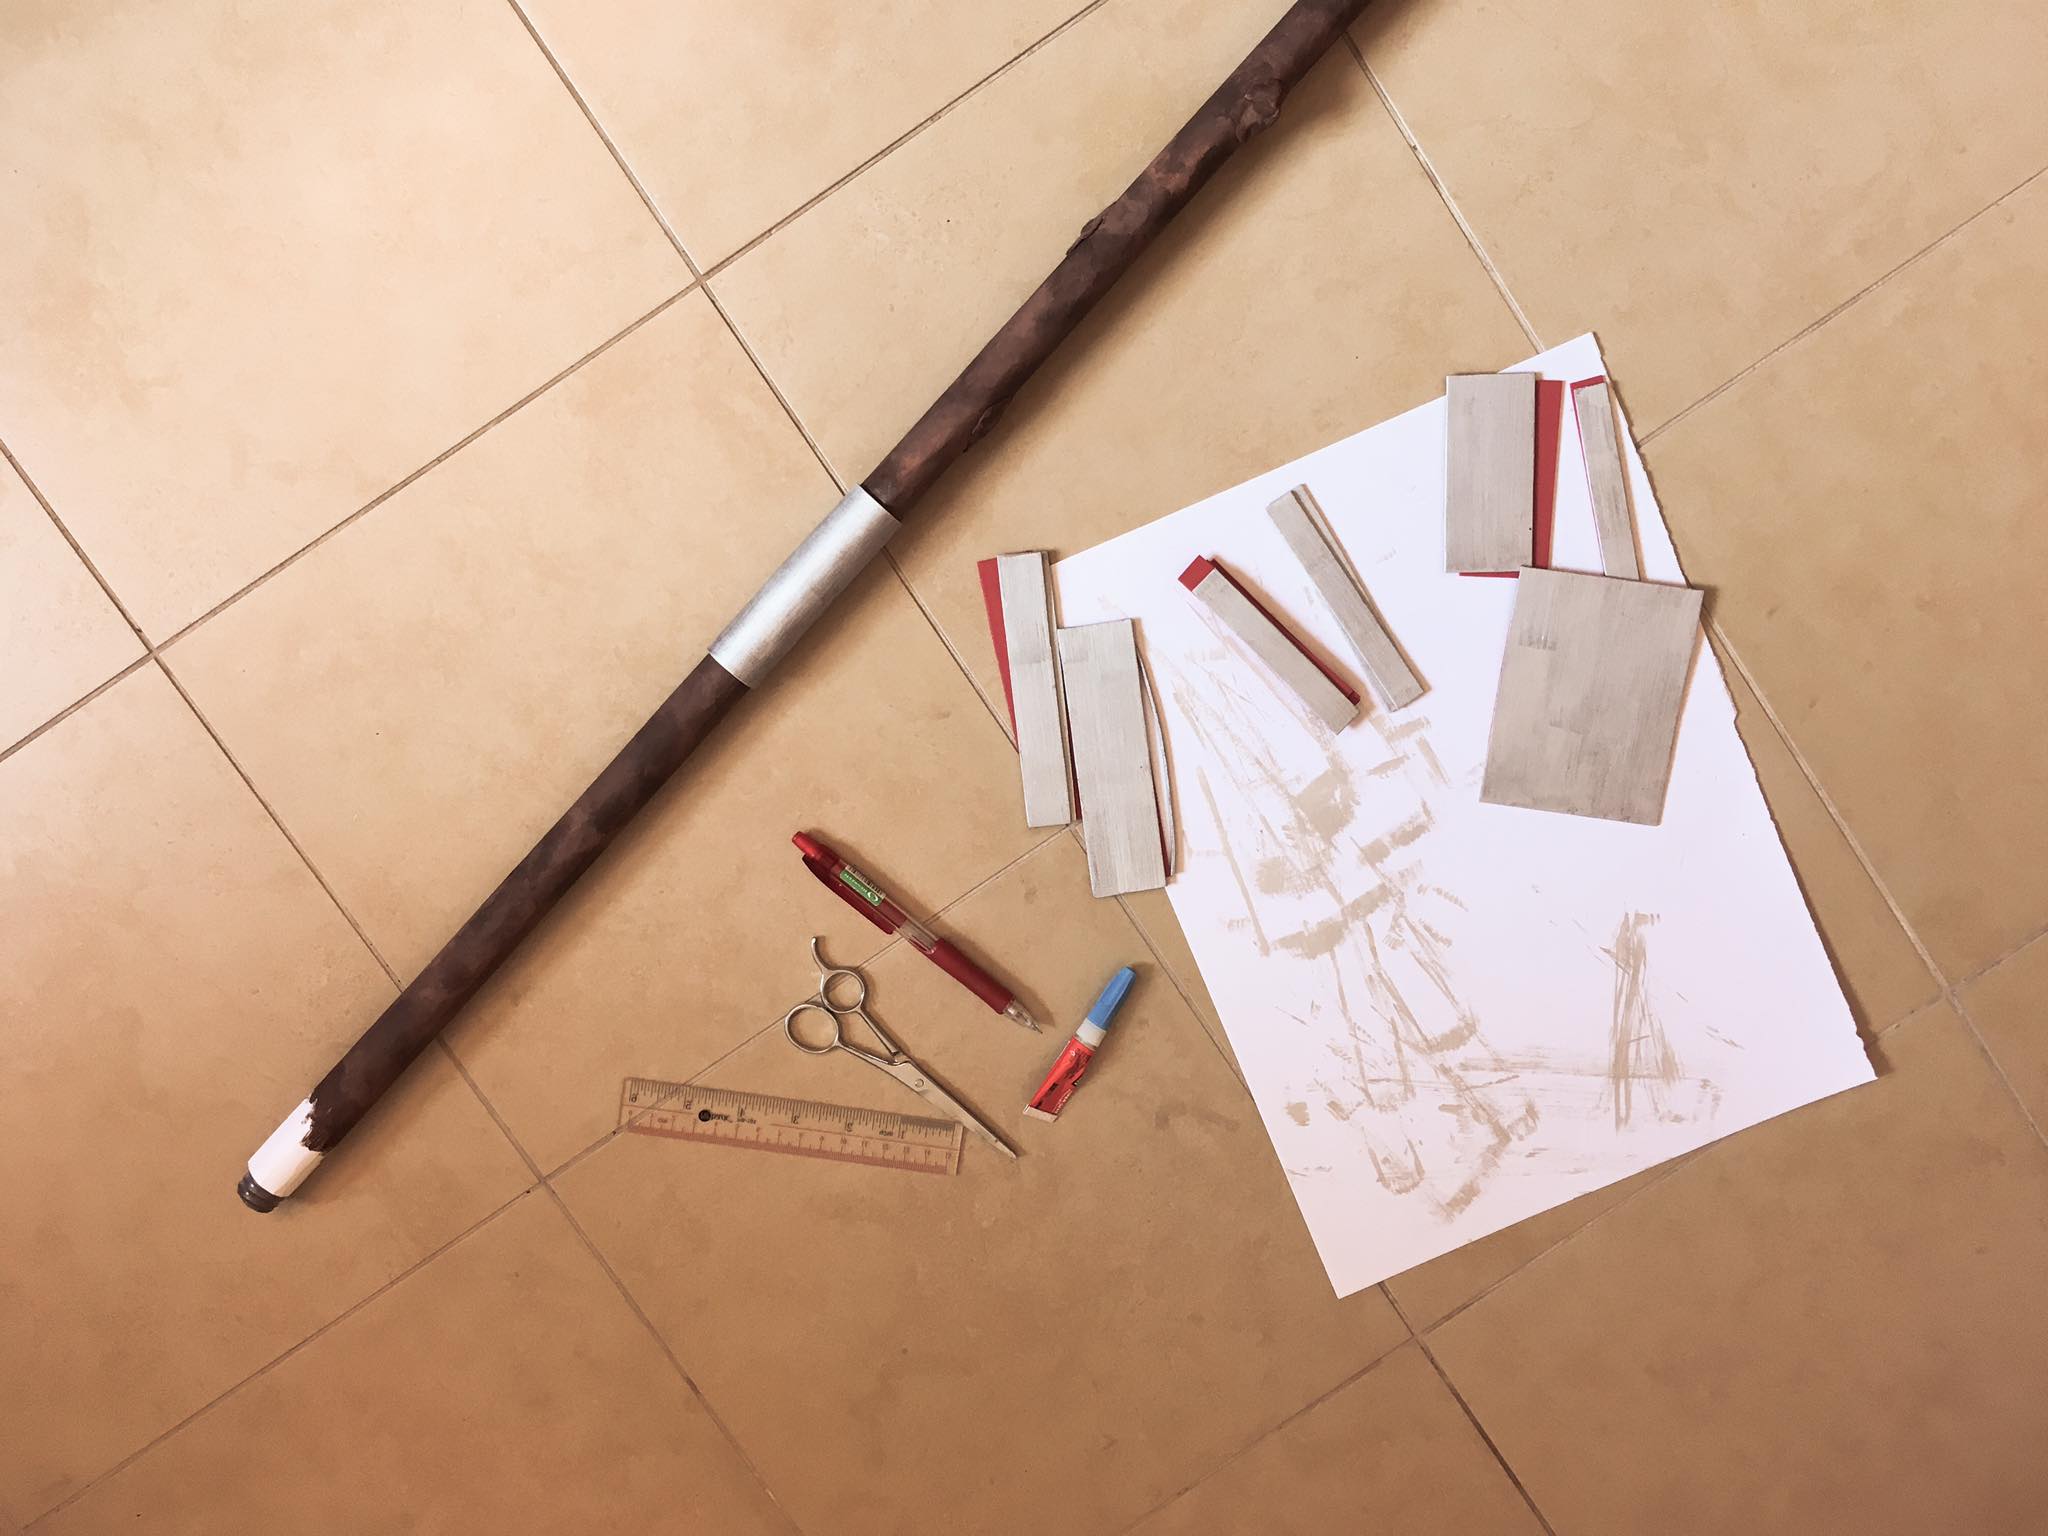
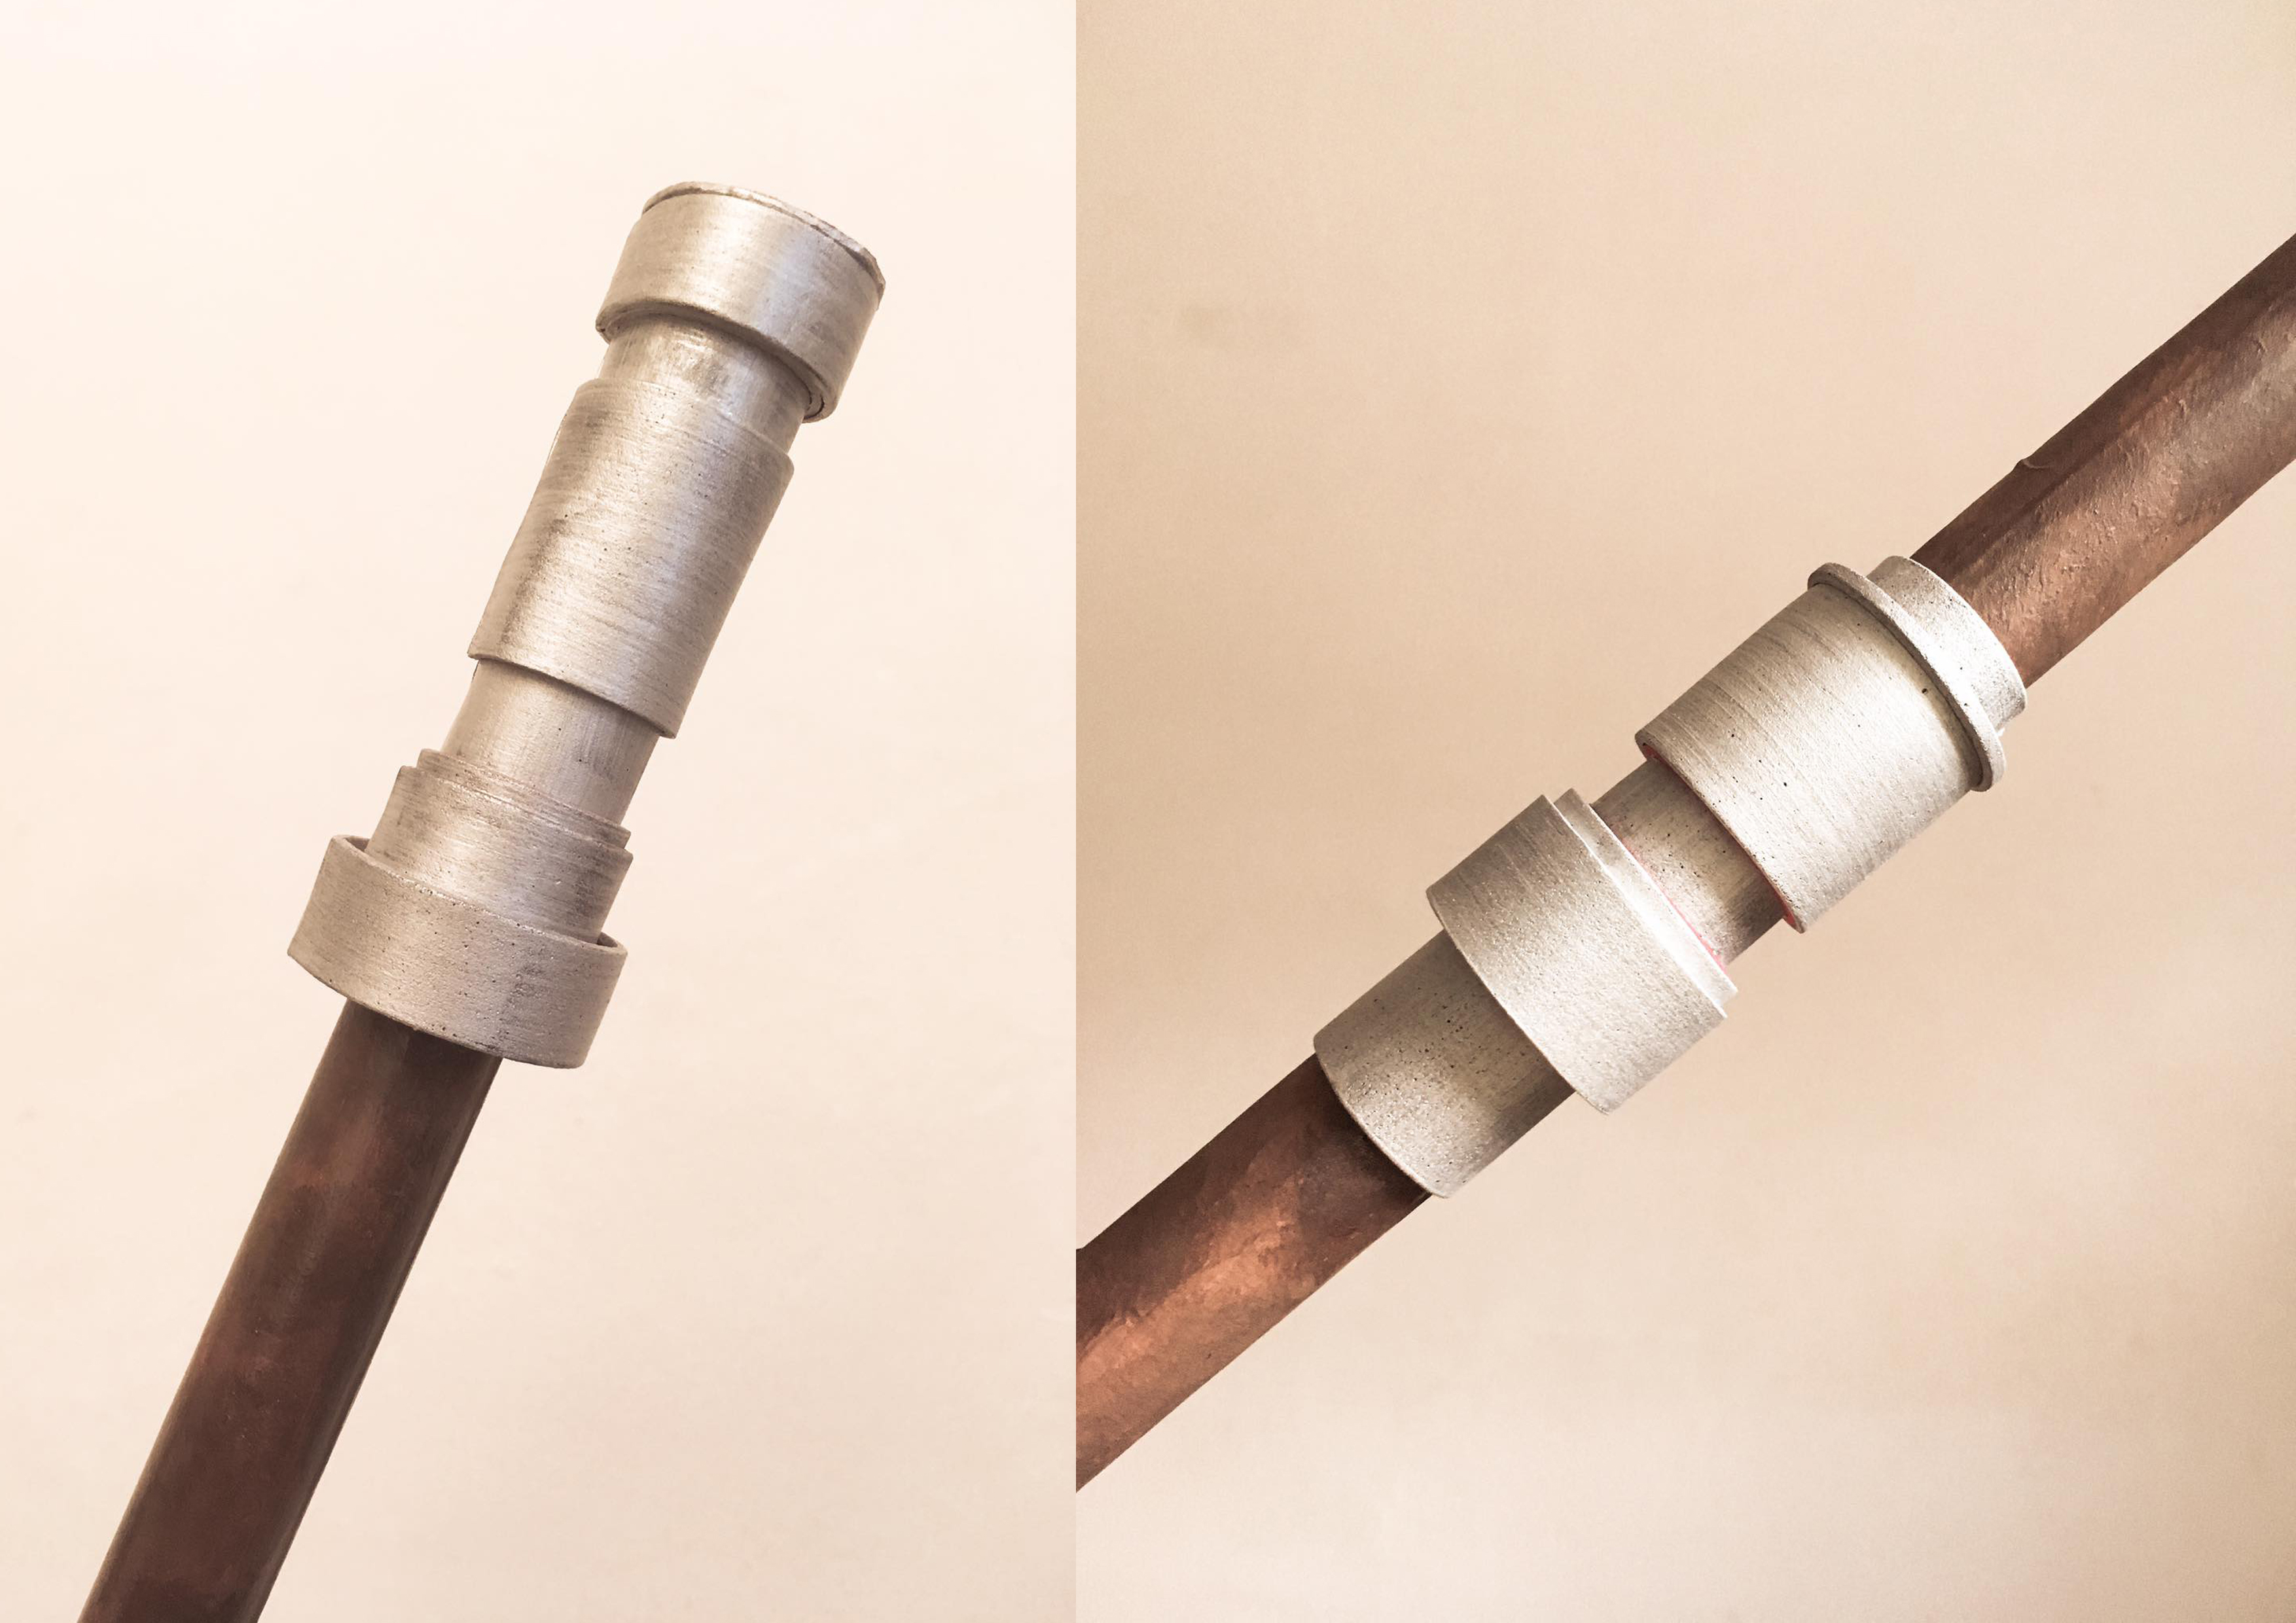
We then proceeded to make the metallic parts of the weapon. To do so, we used pieces of red foam that I had at home (save $$). We used the weapon reference picture as a guide to layer the foam pieces in order to create similar mockups. We added more layers of foam for the parts that are “higher” and less layers for the parts that are sunken. After the mockups were done, we painted the foam silver in order to create the metallic effect, and used super glue to attach them together and to the weapon.
Layering the metallic parts of the weapon using foam.Attaching the painted foam pieces to the weapon. Finished metallic parts of the weapon (yay).
In order for the paint to stay on longer, it was paramount to add a layer of protective coating to the weapon. This is even more important if you are going to a crowded convention where people may brush against your weapon. We applied a layer of gloss varnish to add gloss and shine to my weapon (which appears better in pictures, according to my friend). After which, lo and behold, the weapon is finally completed! The weapon costed me about $20 to make (including leftover paint, garnish and glue), as compared to $200+ if I were to buy it online. I can proudly say we have fulfilled the mantra “lowest cost possible” for this weapon.
Applying varnish to the completed weapon. Completed Chirrut weapon.
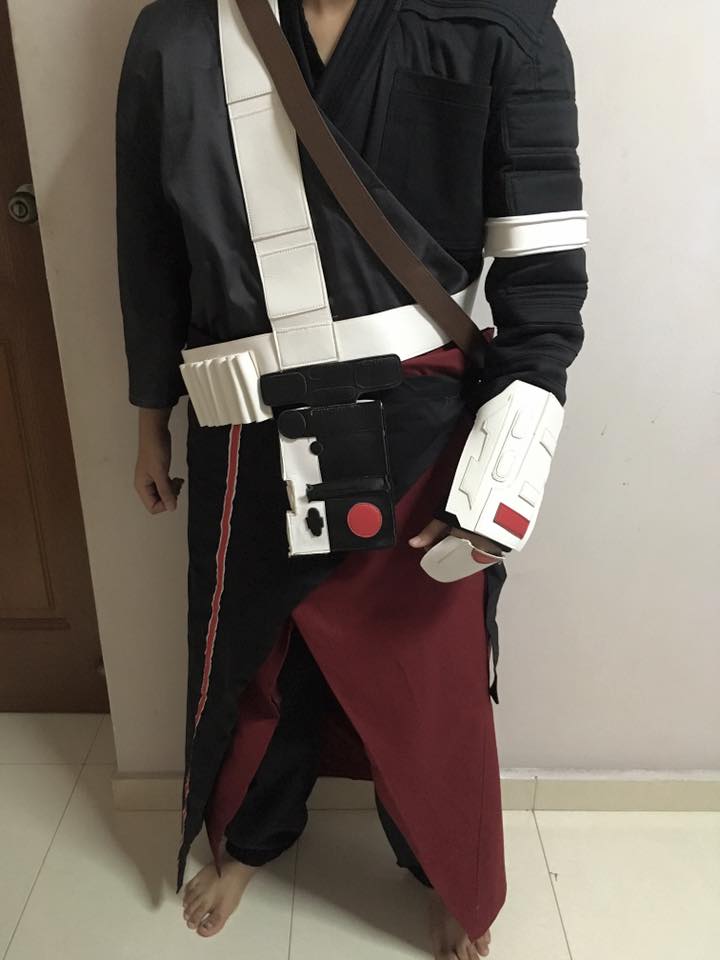
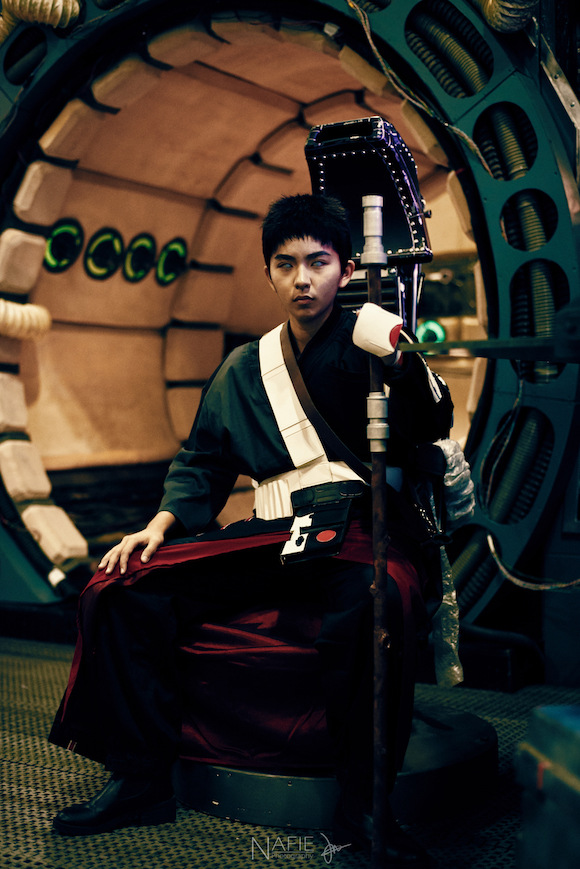
Below is a picture of me cosplaying as Chirrut and proudly posing with the weapon I crafted together with my friend.
Pain points
Some of the pain points I experienced during the convention was trying to move around in my costume as it was really crowded. Also, it was difficult for me to see in those contact lens. I had issues trying to touch up on my makeup during the con, and had to leave my baggage unattended at some corner of the venue. For the crafting process, painting took a really long time. It would be nice if there were some sort of paint gun that allows me to spray the paint on according to how I wanted quickly.
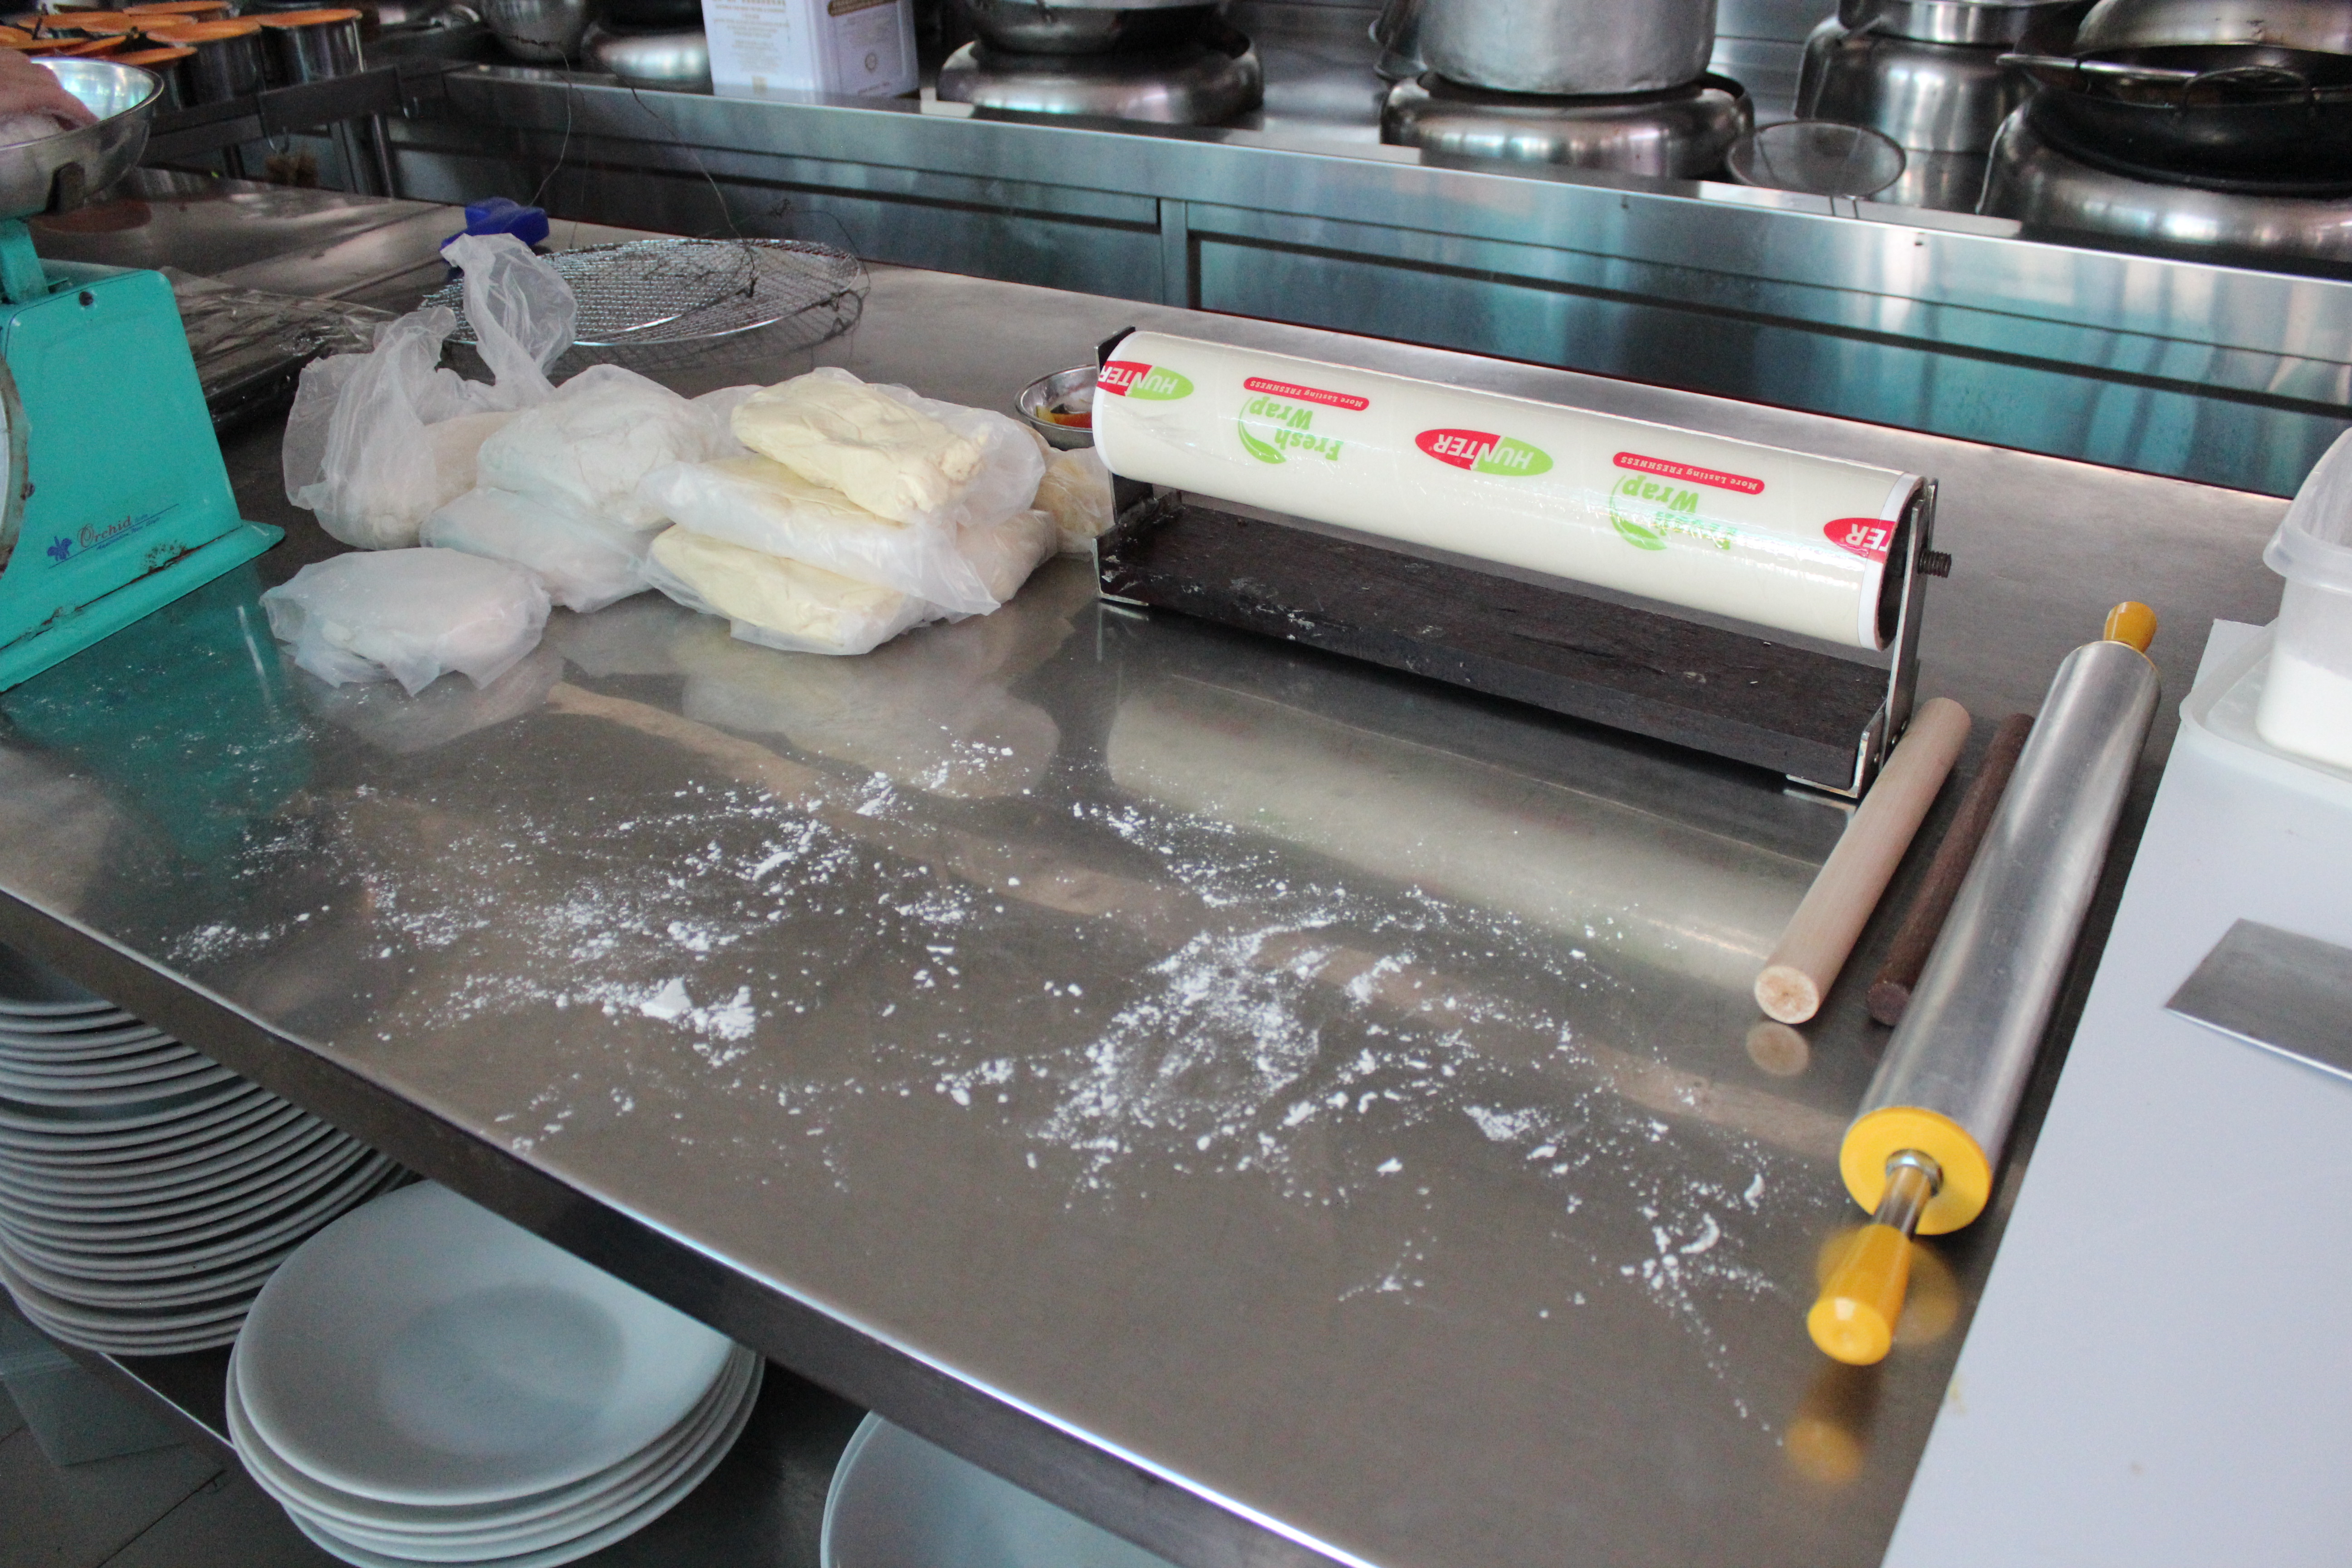
Since mid-autumn festival is round the corner, I got to join my Dad at his workplace kitchen (Hua Yu Wee seafood restaurant) to make some traditional Teochew yam mooncake. Below is the documentation on the tools used and the baking process.
Tools used
(Left) Industrial-grade mixer for mixing the mooncake base. (Right) Tools used in the deep frying process.The weighing scale is a very important tool in baking as baking is all about precision.Tools used for preparing and shaping the mooncake base.Sketch of tools used in the entire process.
Worksite documentation
The worksite is a kitchen containing the necessary tools for mooncake making. In any F&B industry, hygiene is of utmost importance, so the worksite has to be kept clean at all times. Chefs also need to wear apron and hat for hygiene purposes.
The worksite
Process documentation
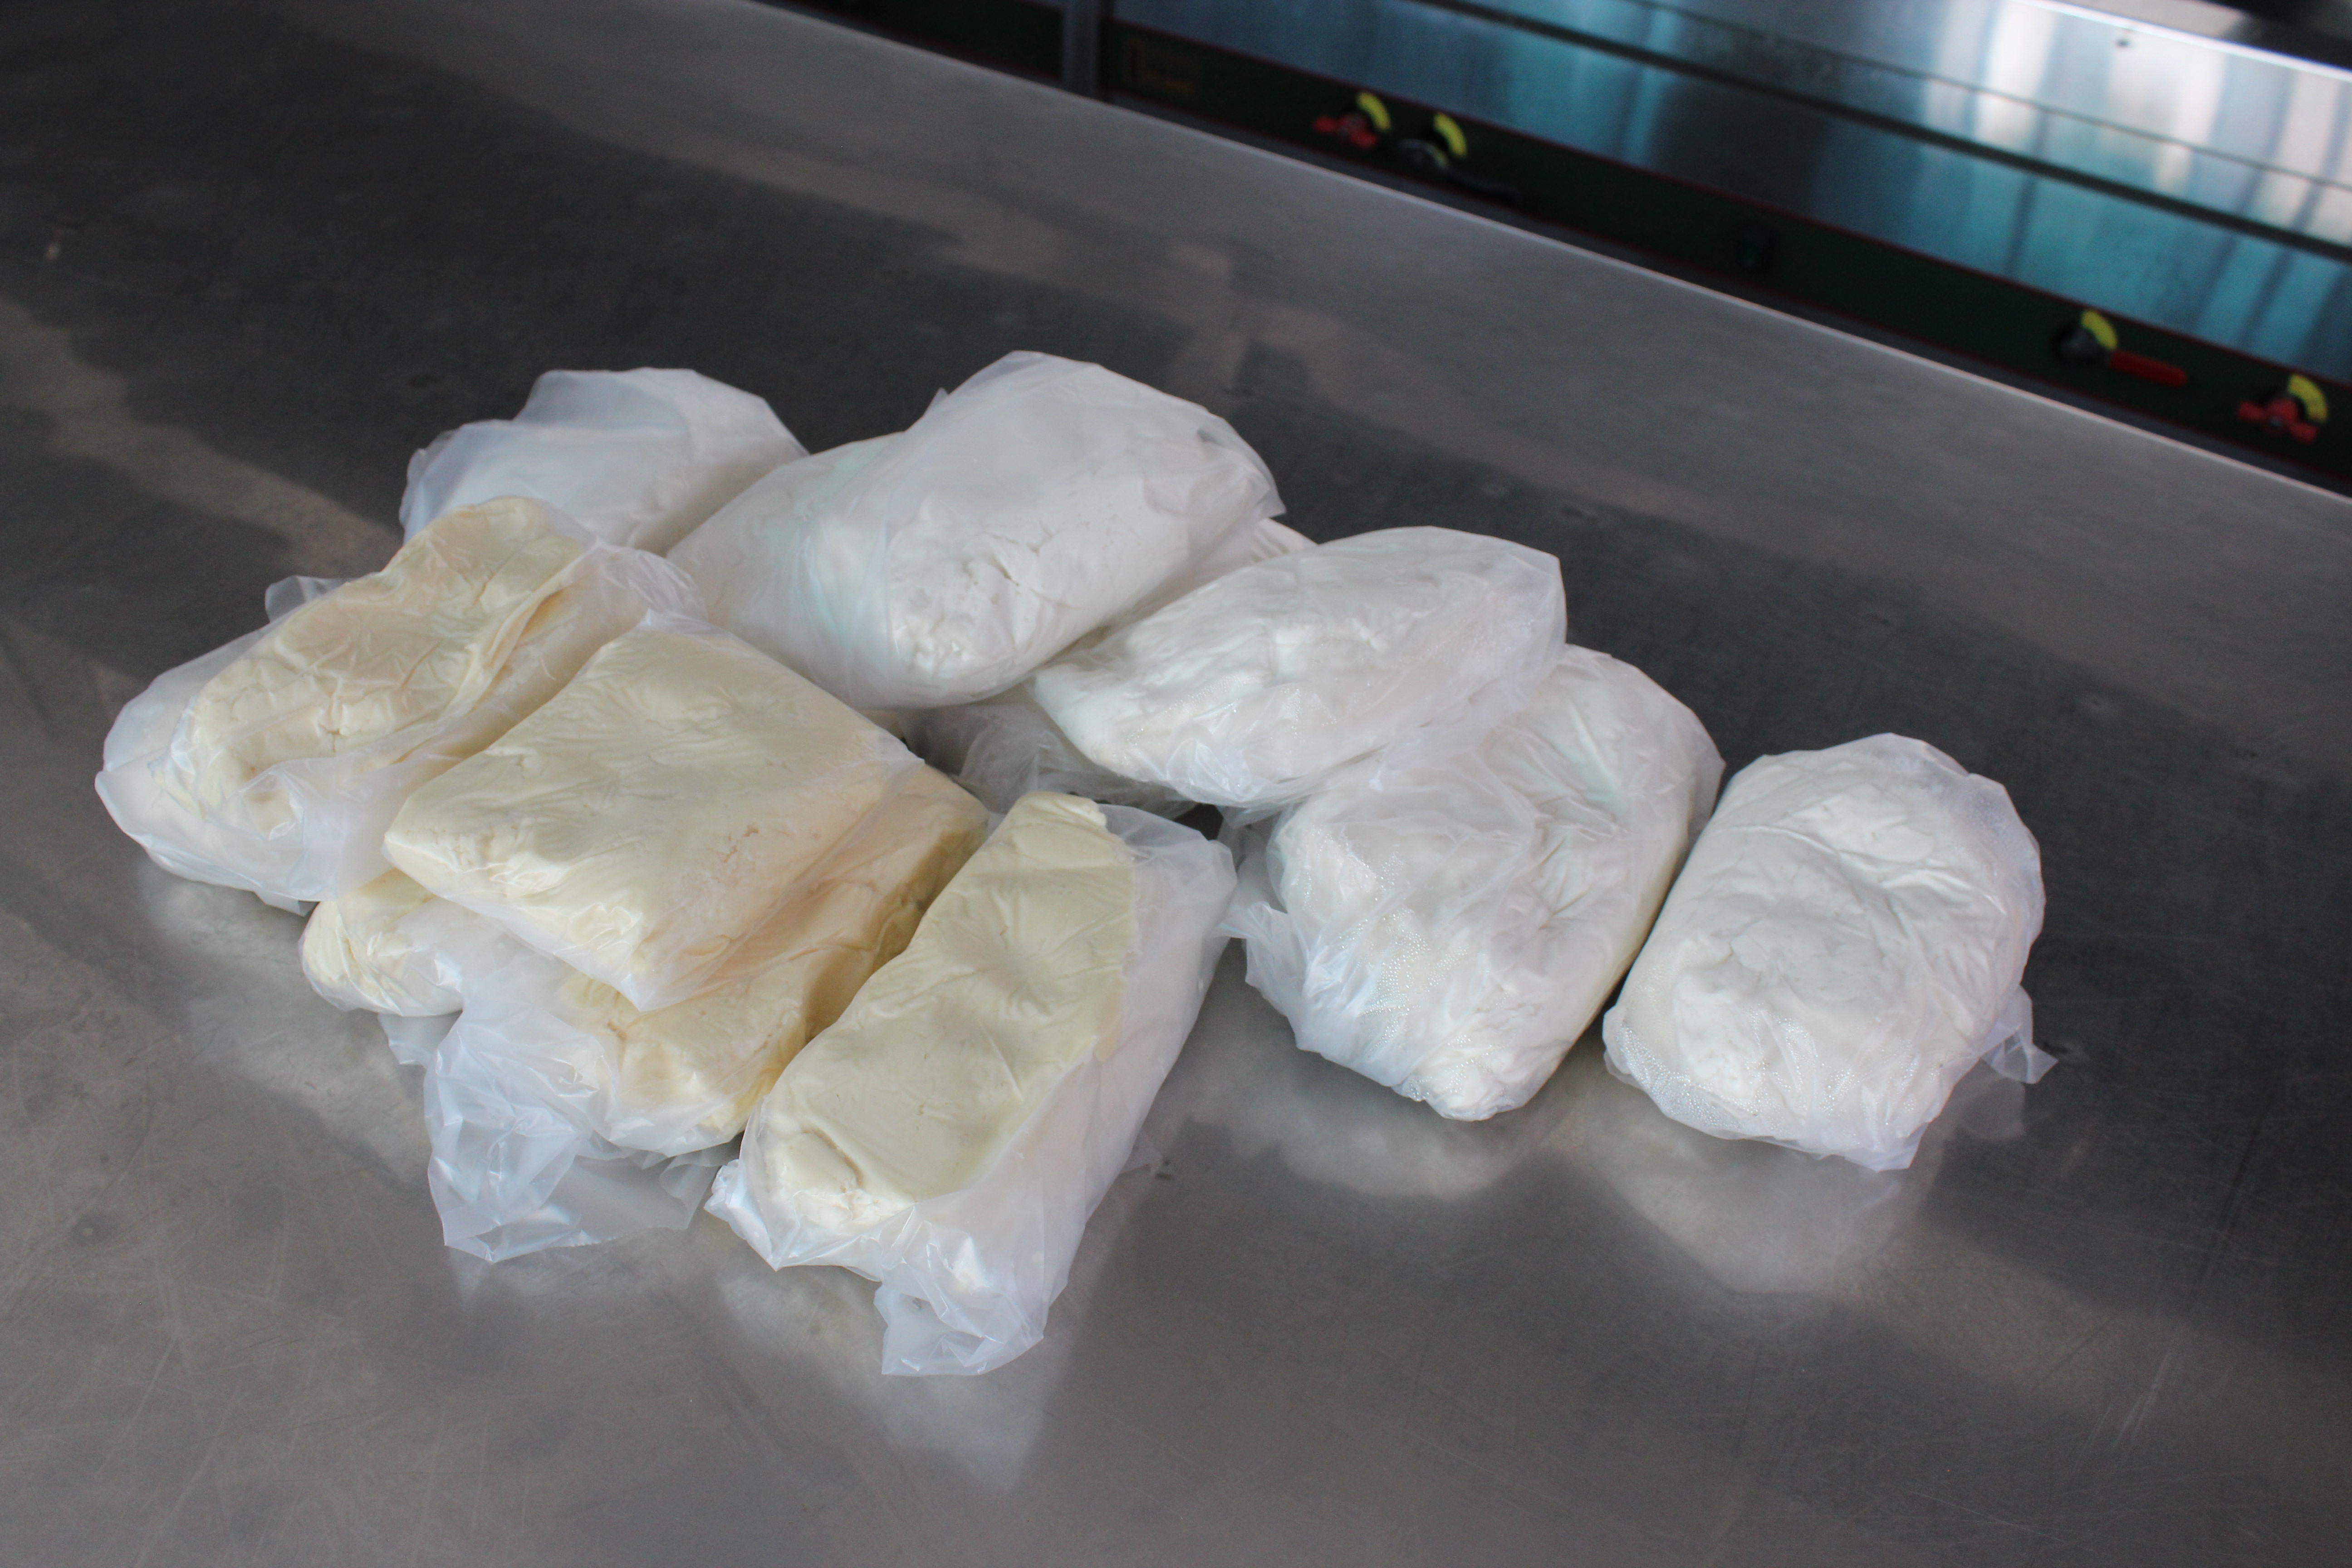
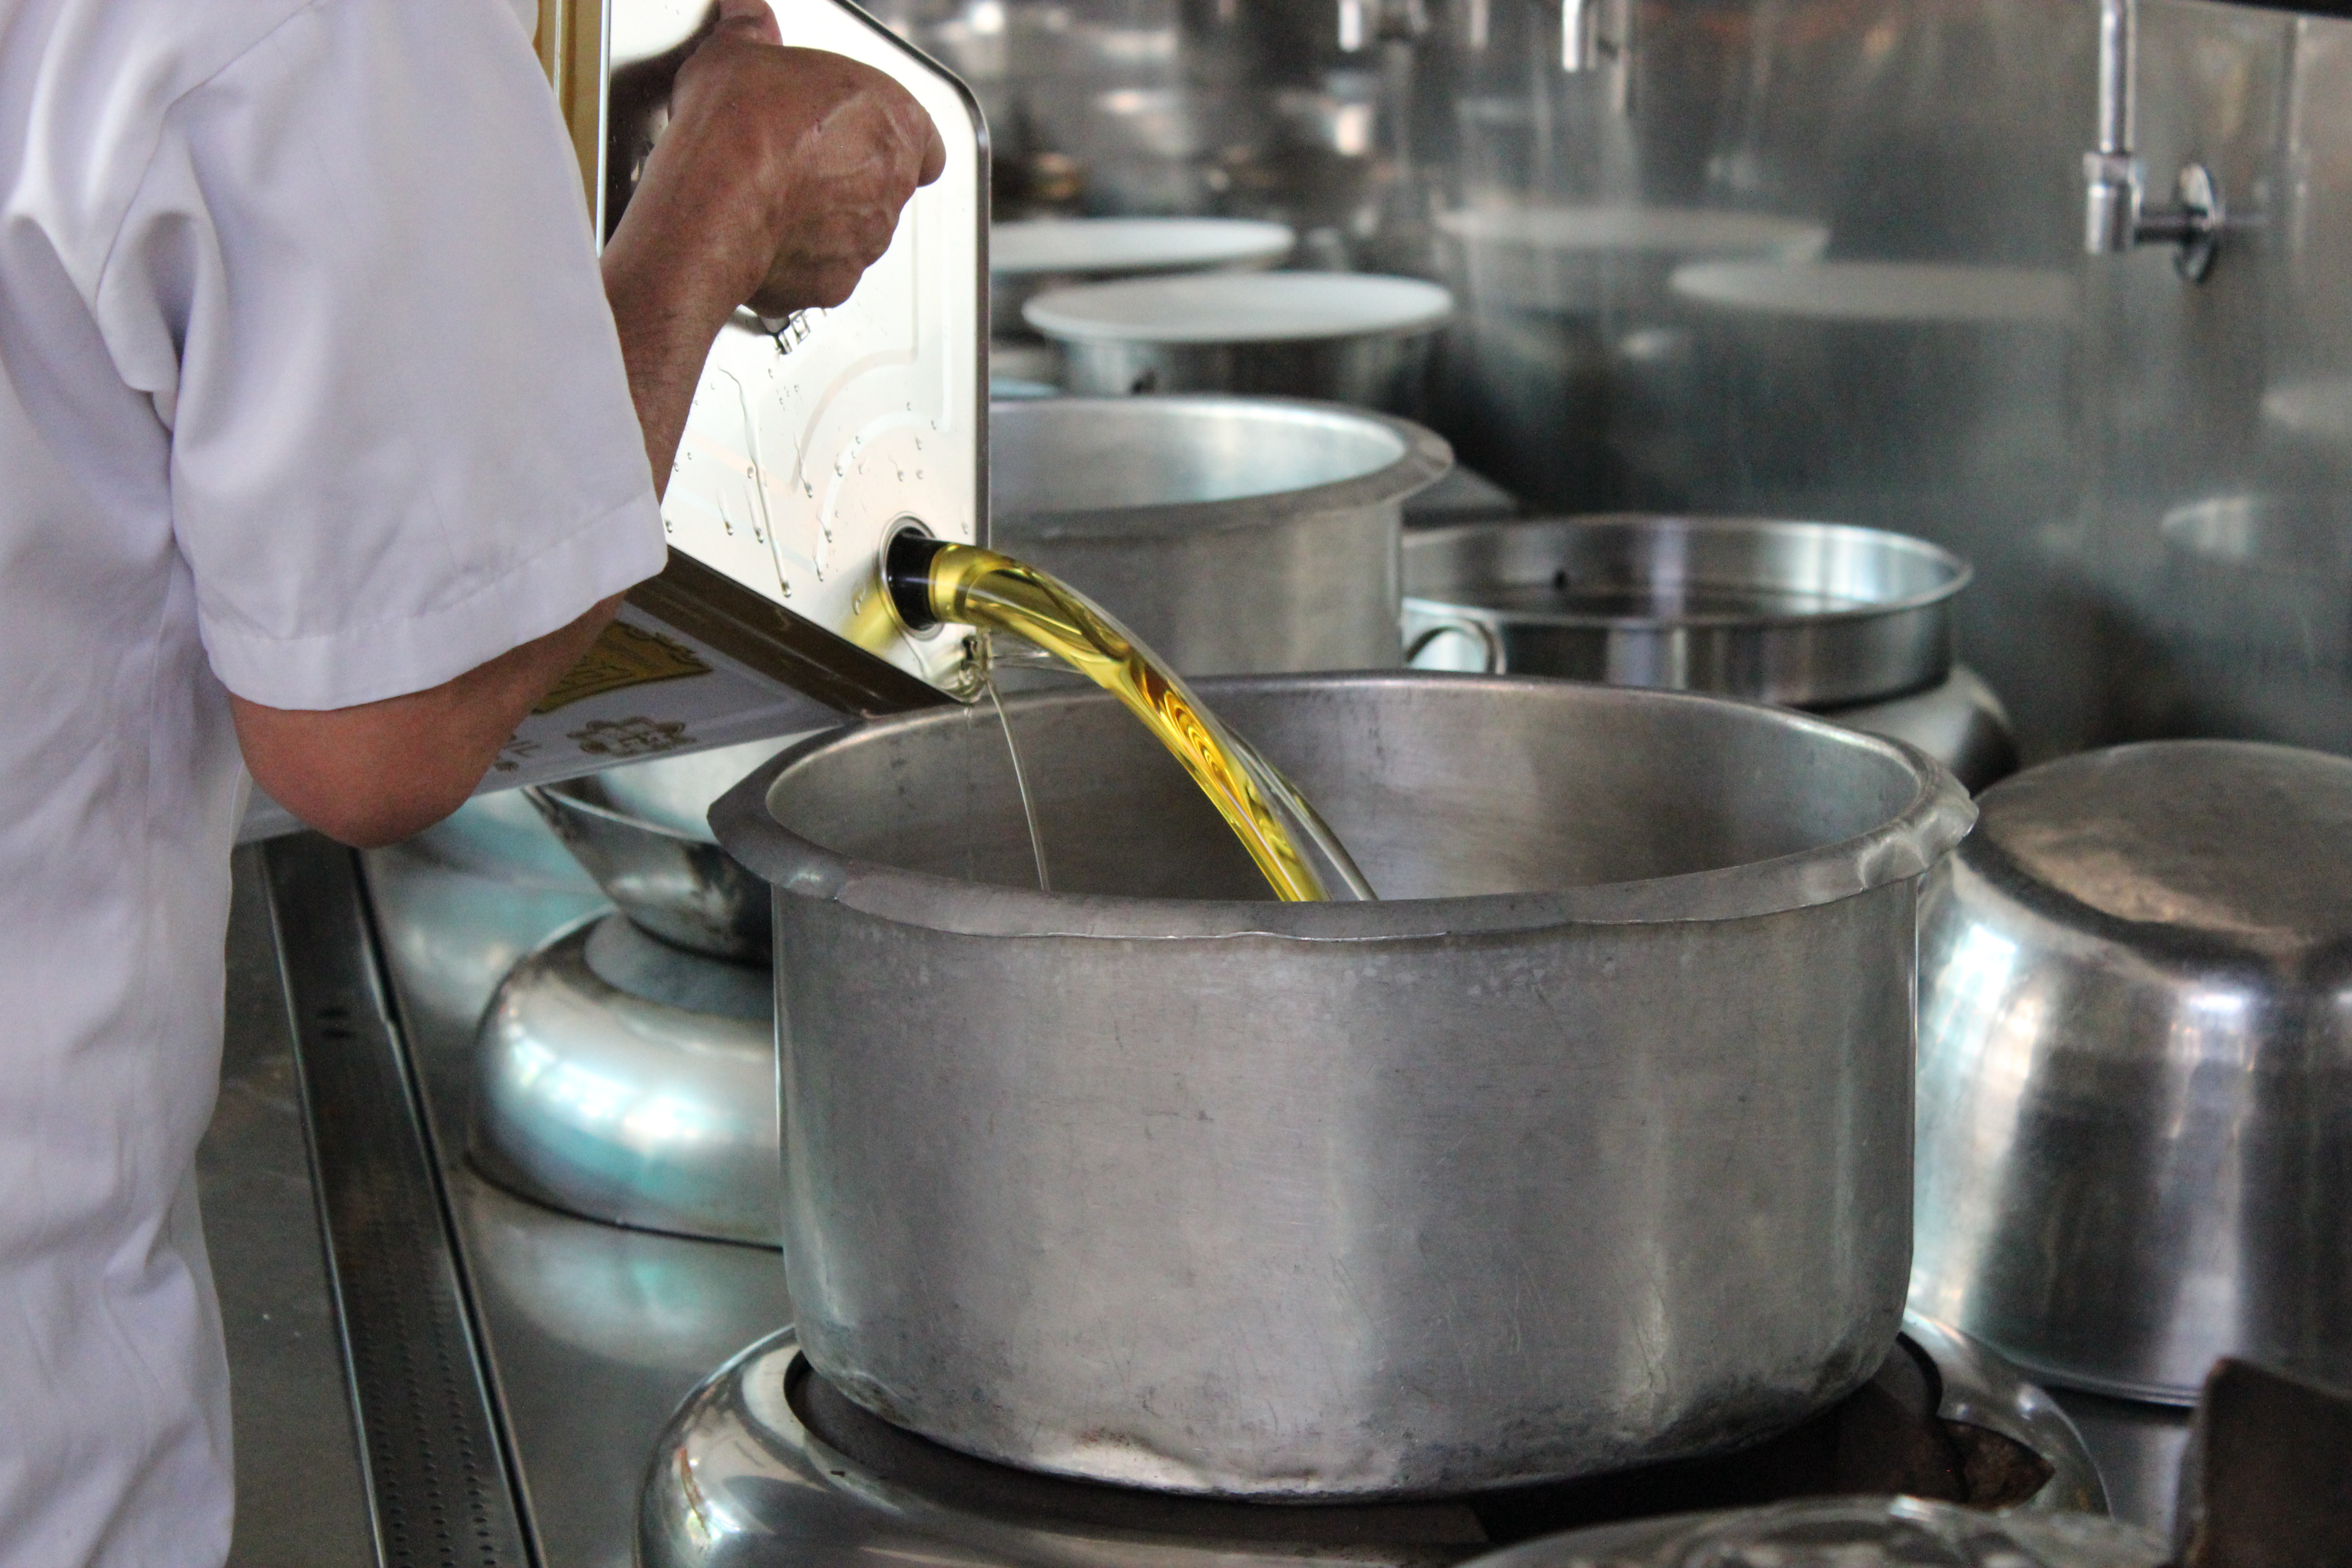
Flour (white) and batter (yellow) mix that my Dad has already prepared beforehand.Shaping the base (part 1)Shaping the base (part 2)Shaping the mooncake (part 1)Shaping the mooncake (part 2)Preparing the food colouring to mark the mooncakes. Those with an orange dot marking means that it contains yam and egg yolk. Those without simply contains yam.Transporting and getting the mooncakes ready for dry frying.Preparing the oil for deep frying the mooncake. The temperature of the oil is paramount.Deep frying mooncakes process
It was interesting to make some traditional Teochew mooncakes with my Dad. Being involved in the process made me realise that because eating is so easy, we tend not to think about the efforts that go into preparing and making them. Making traditional pastries is incredibly challenging and there must be intricate precision in all steps. I got to shape 2 mooncakes and boy, they did not turn out well during the deep frying process.
The 2 mooncakes I shaped “exploded” during the deep frying process because I did not smash the dough hard enough with the chopper to force the air out of the dough. Meanwhile, most of the ones my Dad shaped turned out gorgeous with nice layered flakes.
Pain points
Some of the pain points we experienced during the baking process include the dough turning hard despite it being covered with a wet cloth. This was a huge headache as my Dad made the mooncakes in batches of 10 (a total of 60 mooncakes). When shaping the first few mooncakes of each batch, the dough for the last few mooncakes tend to harden. When the dough hardened, it was difficult to shape the mooncake as cracks formed easily. This will result in the mooncake “exploding” during the deep frying process and compromising on aesthetics. In addition, when kneading the dough with hand or flattening the dough with a rolling pin, parts of the dough will be smeared and stuck onto the table despite a layer of flour coating. It would be nice if there can be solutions to these pain points.
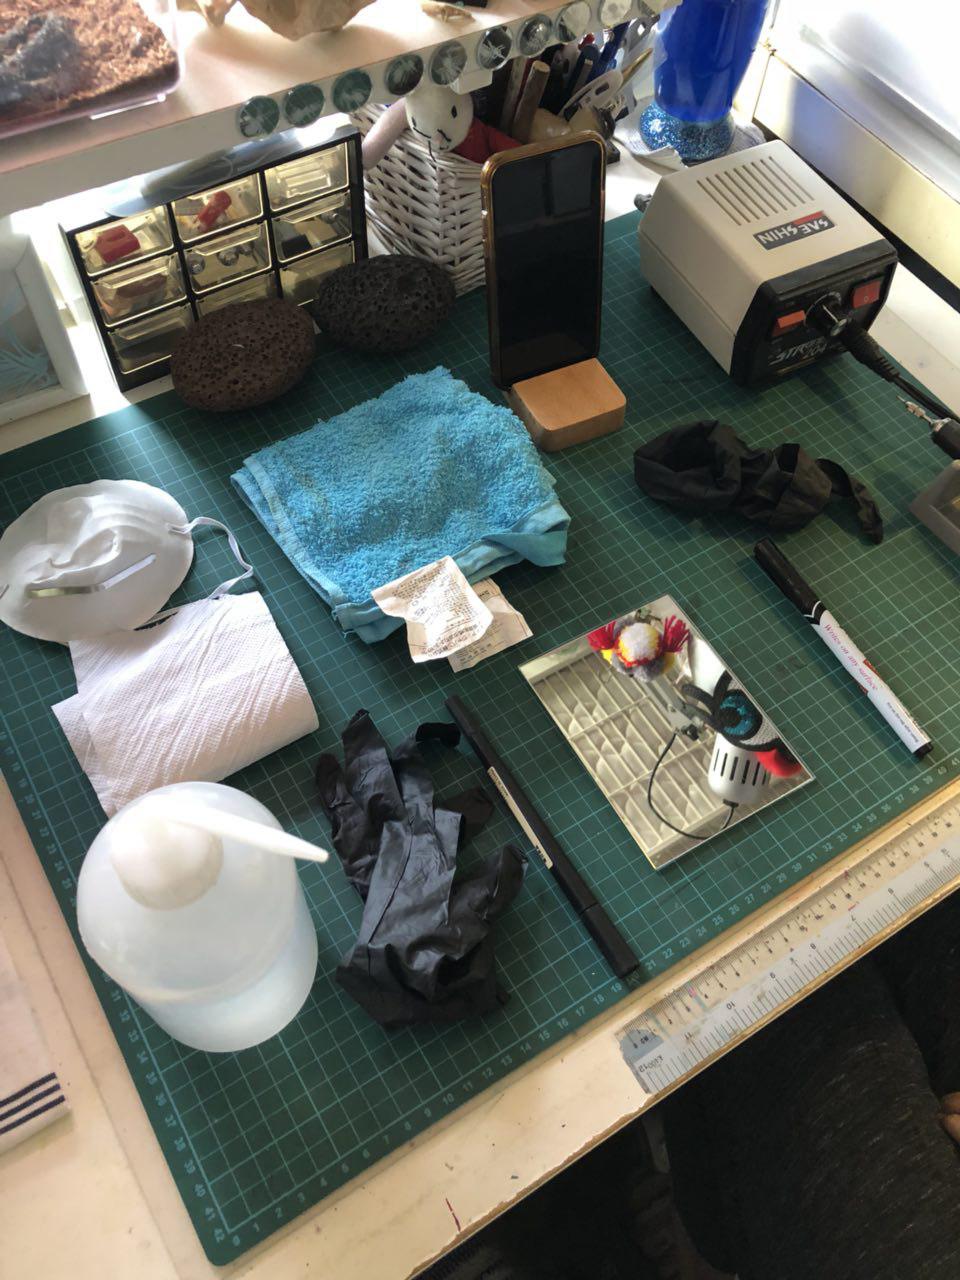
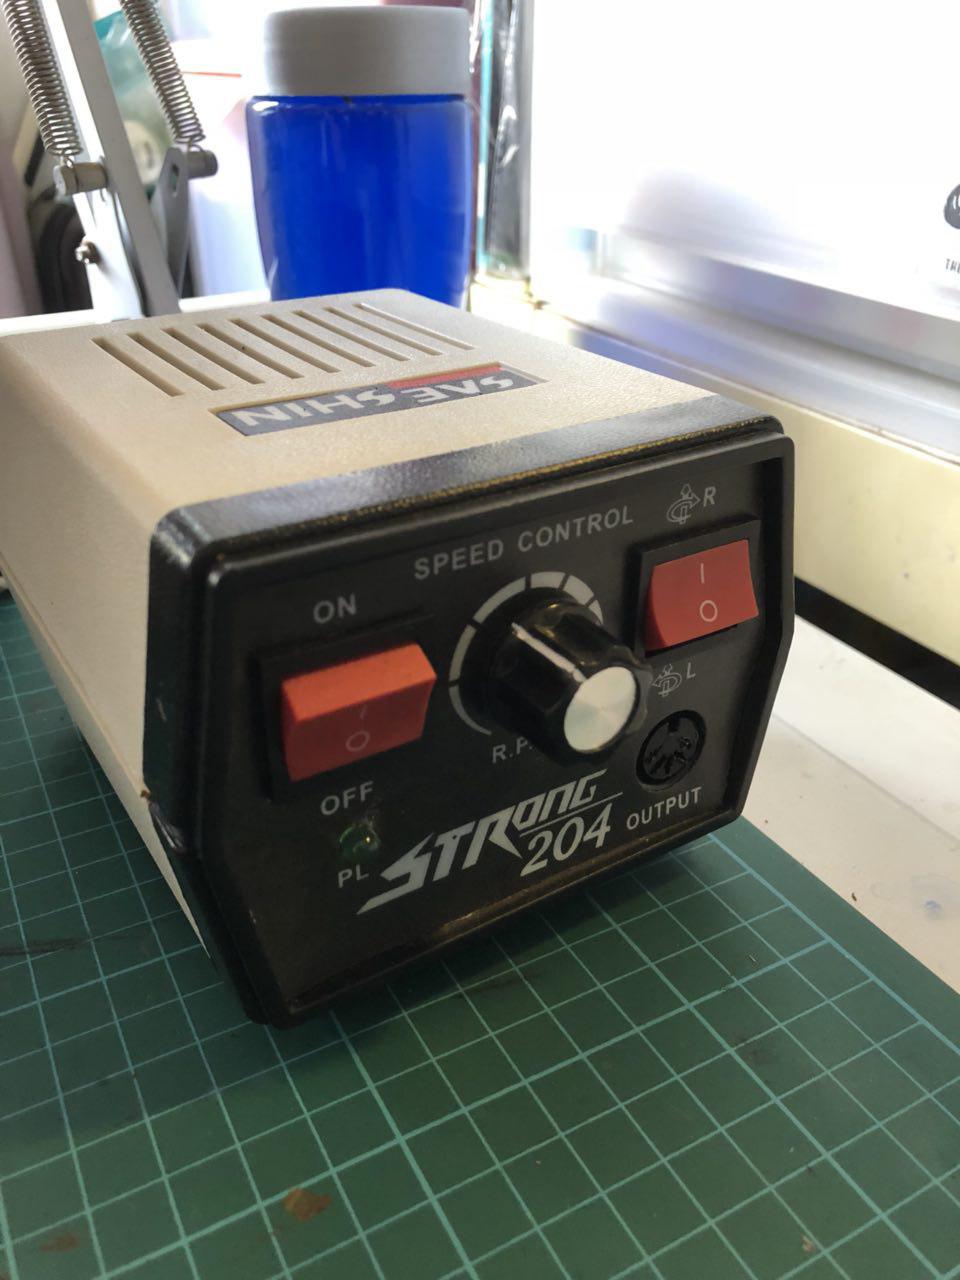
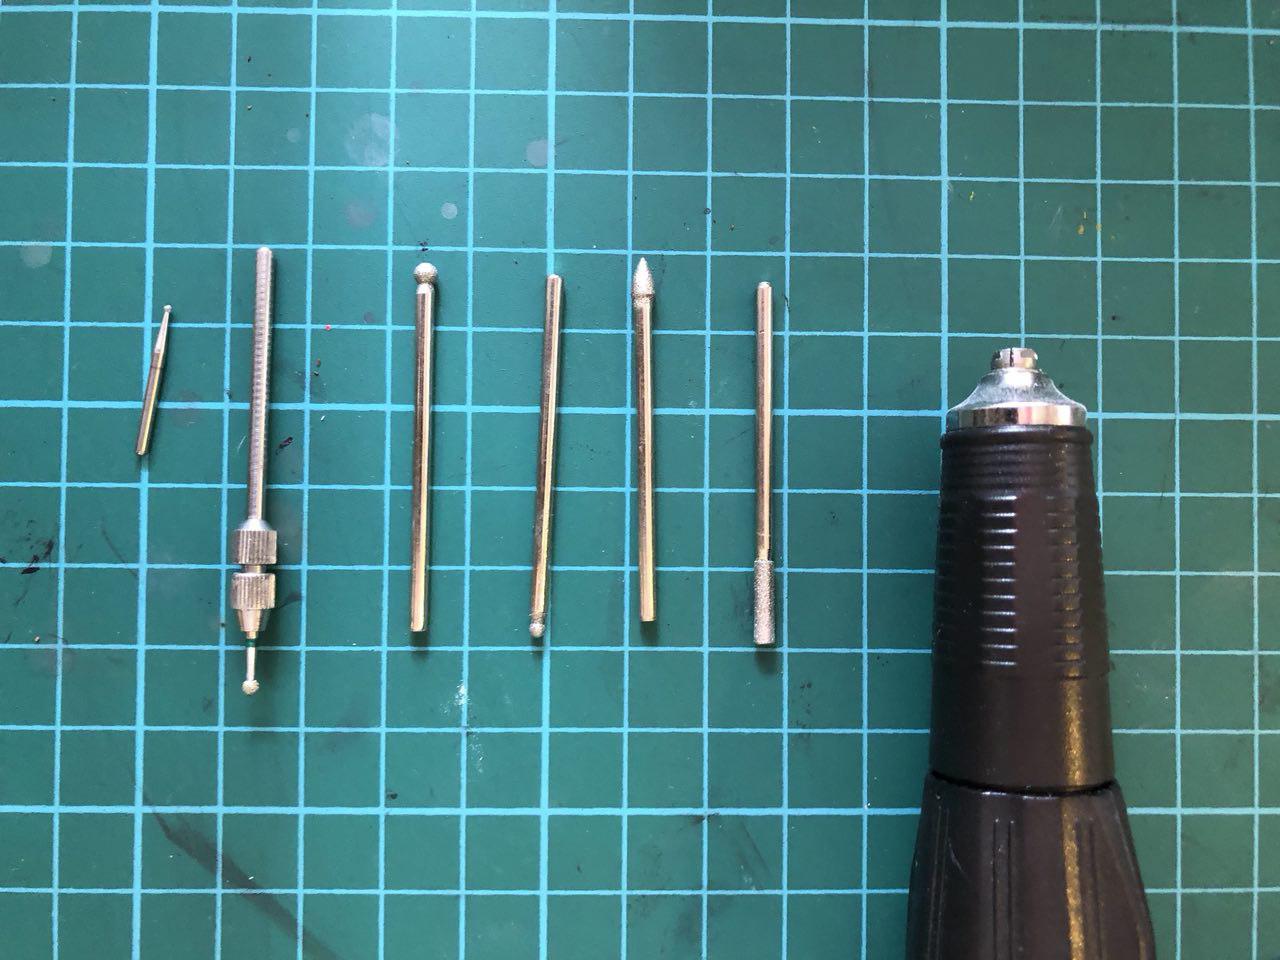
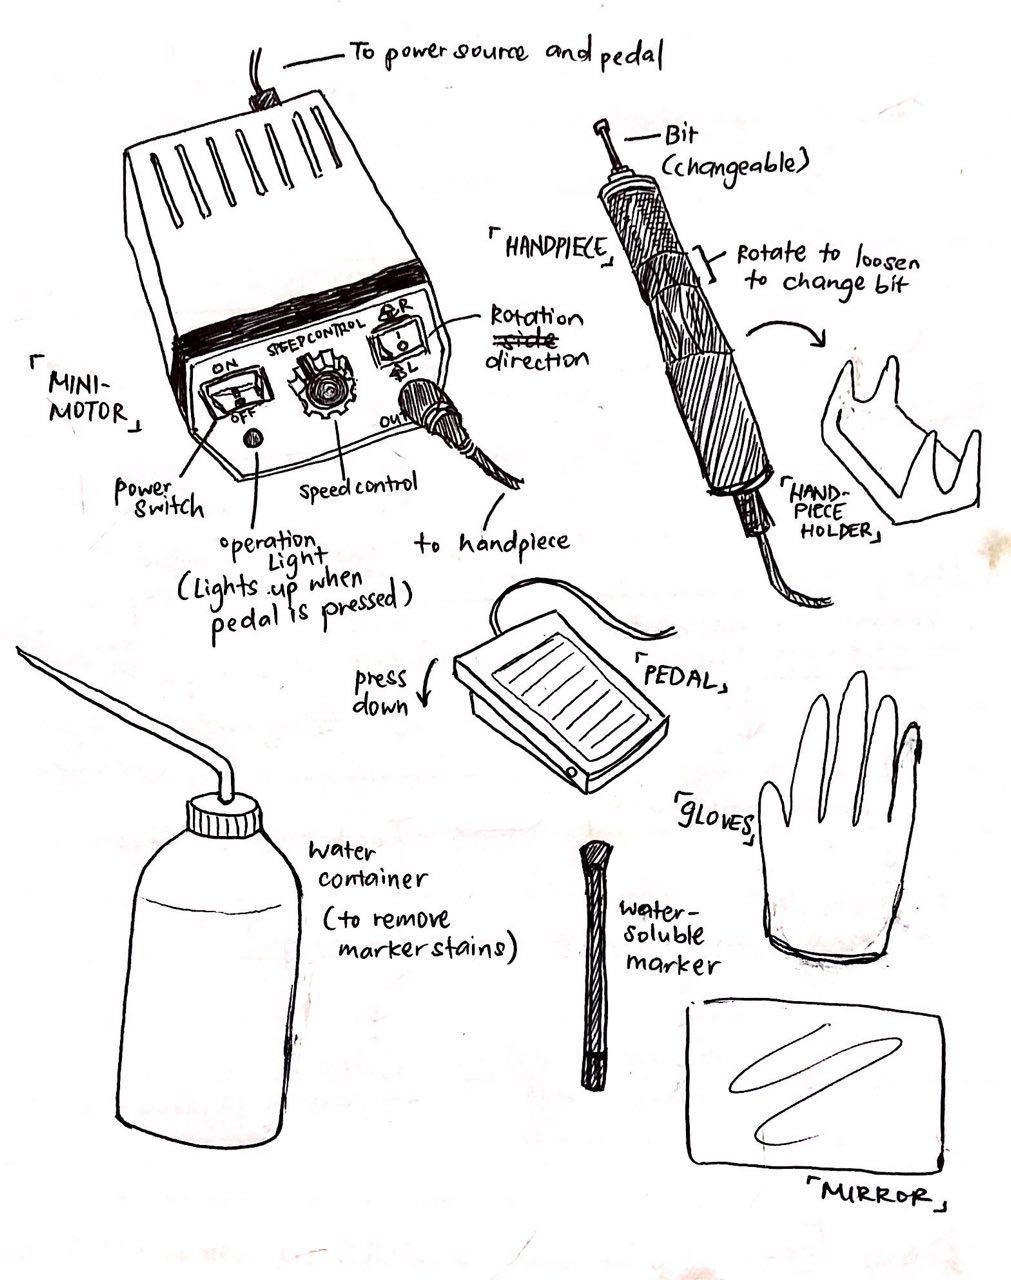
(Left) Various tools that are required for mirror engraving. (Middle) Main body of the micromotor machine. (Right) A few examples of the different bits that can be put into the handpiece – each achieves a different type of thickness and roughness (for lines to be drawn and to suit a range of different materials)
Sketch of the materials needed as well as a brief description of what they did
Alicia, the mirror engraver, allowed me to engrave my own mirror, while teaching me the basics of how to do so.
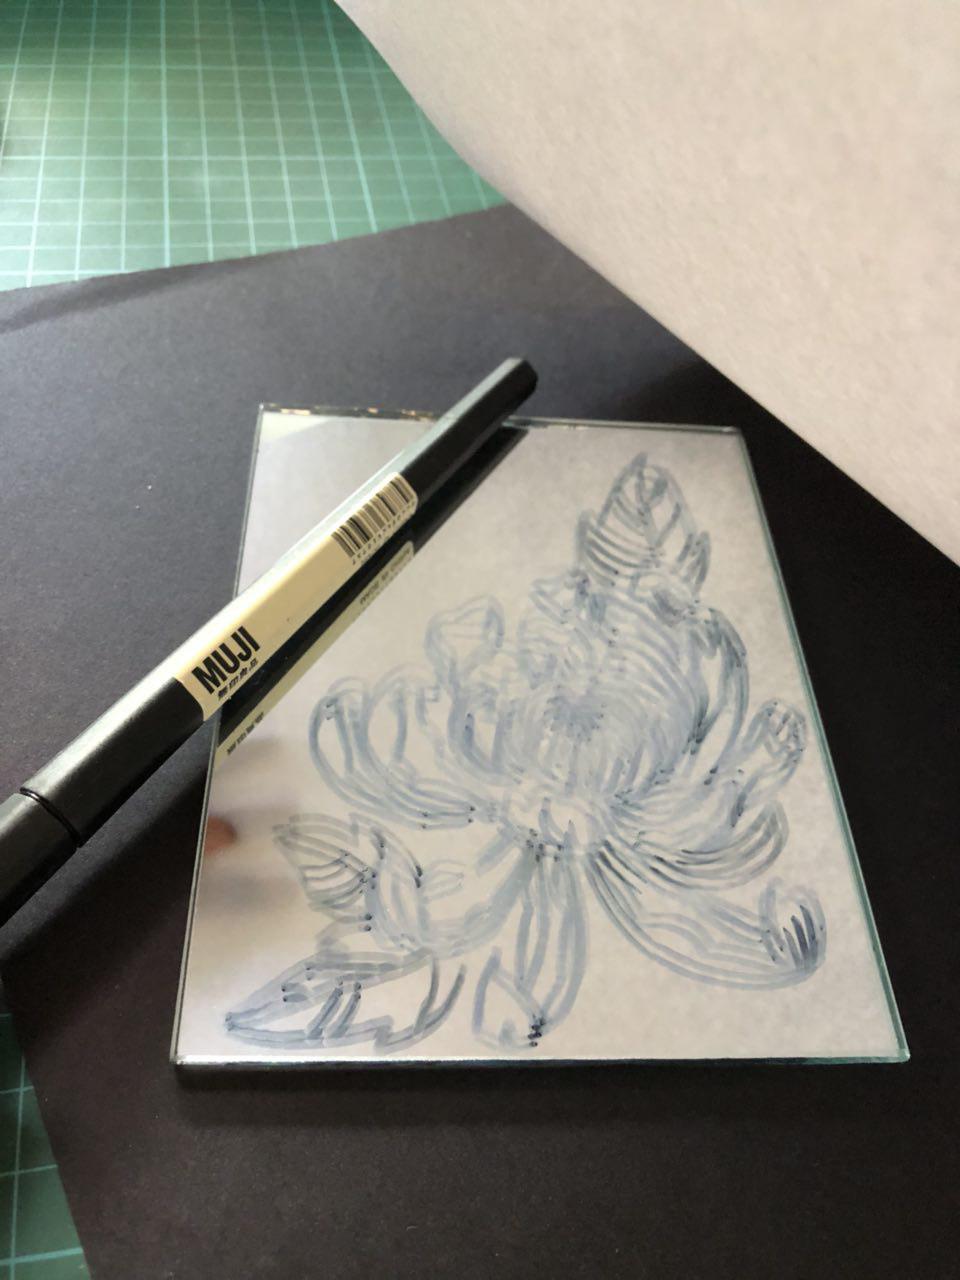
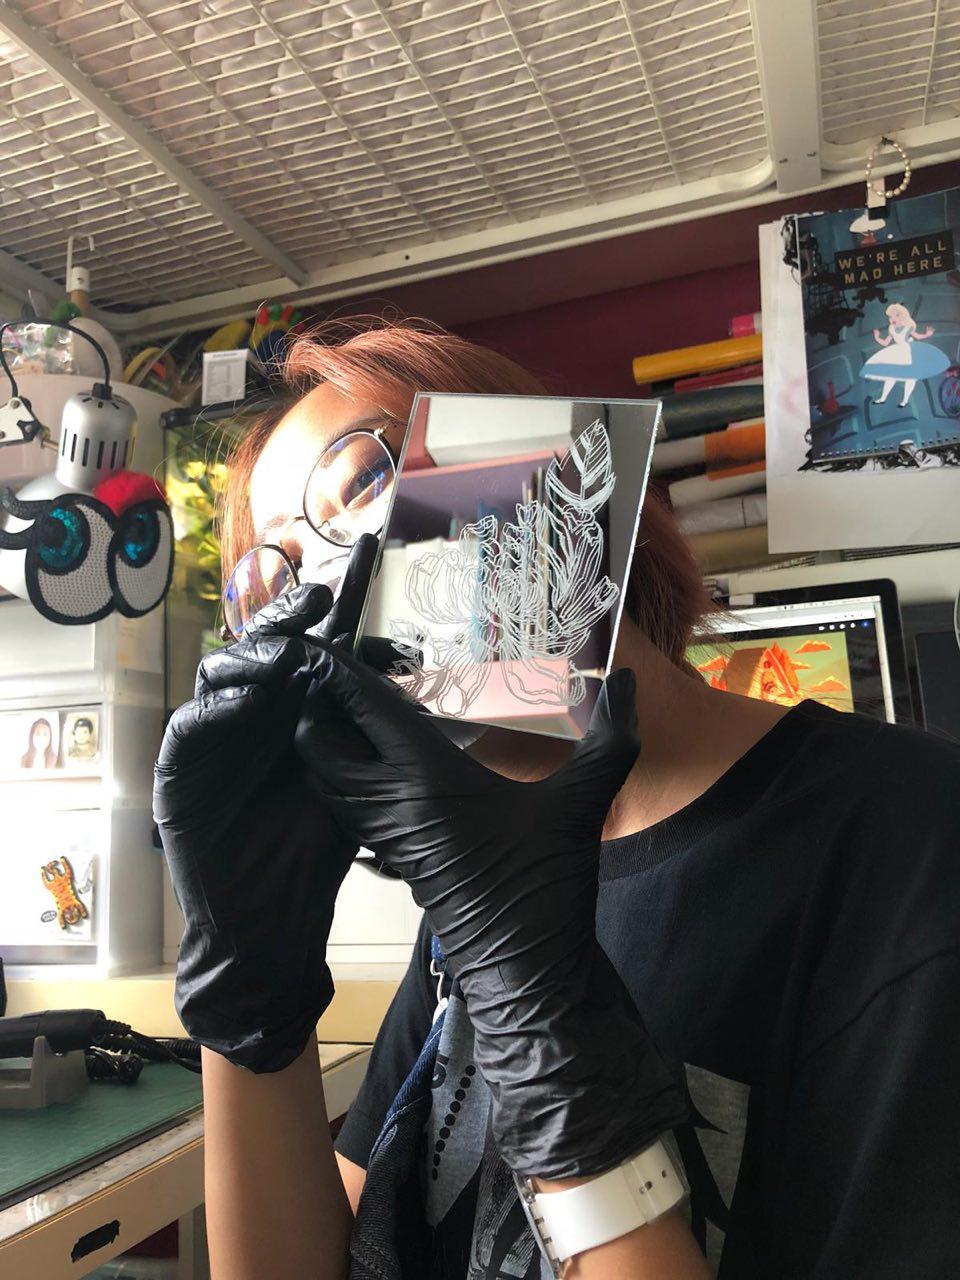
Starting with drawing a sketch on the mirror with a water-soluble marker. I decided to draw a chrysanthemum.Video of me engraving the mirror for the first time.After completing the engraving, wipe off the marker lines and the bits of glass that were ‘shaved’ off during the engraving process. In case it gets too cloudy while engraving, wiping off the bits can also be done during the process.Completed! A mask is optional but good to prevent breathing in the small glass shards/powder.
The mirror turned out a lot better than I expected for a first-time engraving. As I was allowed to fully experience the entire process, I had a much better idea of what is needed and various considerations that are needed to make the engraving process run smoothly.
Alicia’s work space (her studio of sorts) was in her own room. She mentioned that she has brought her equipment to other locations (such as art events) as well on several occasions.
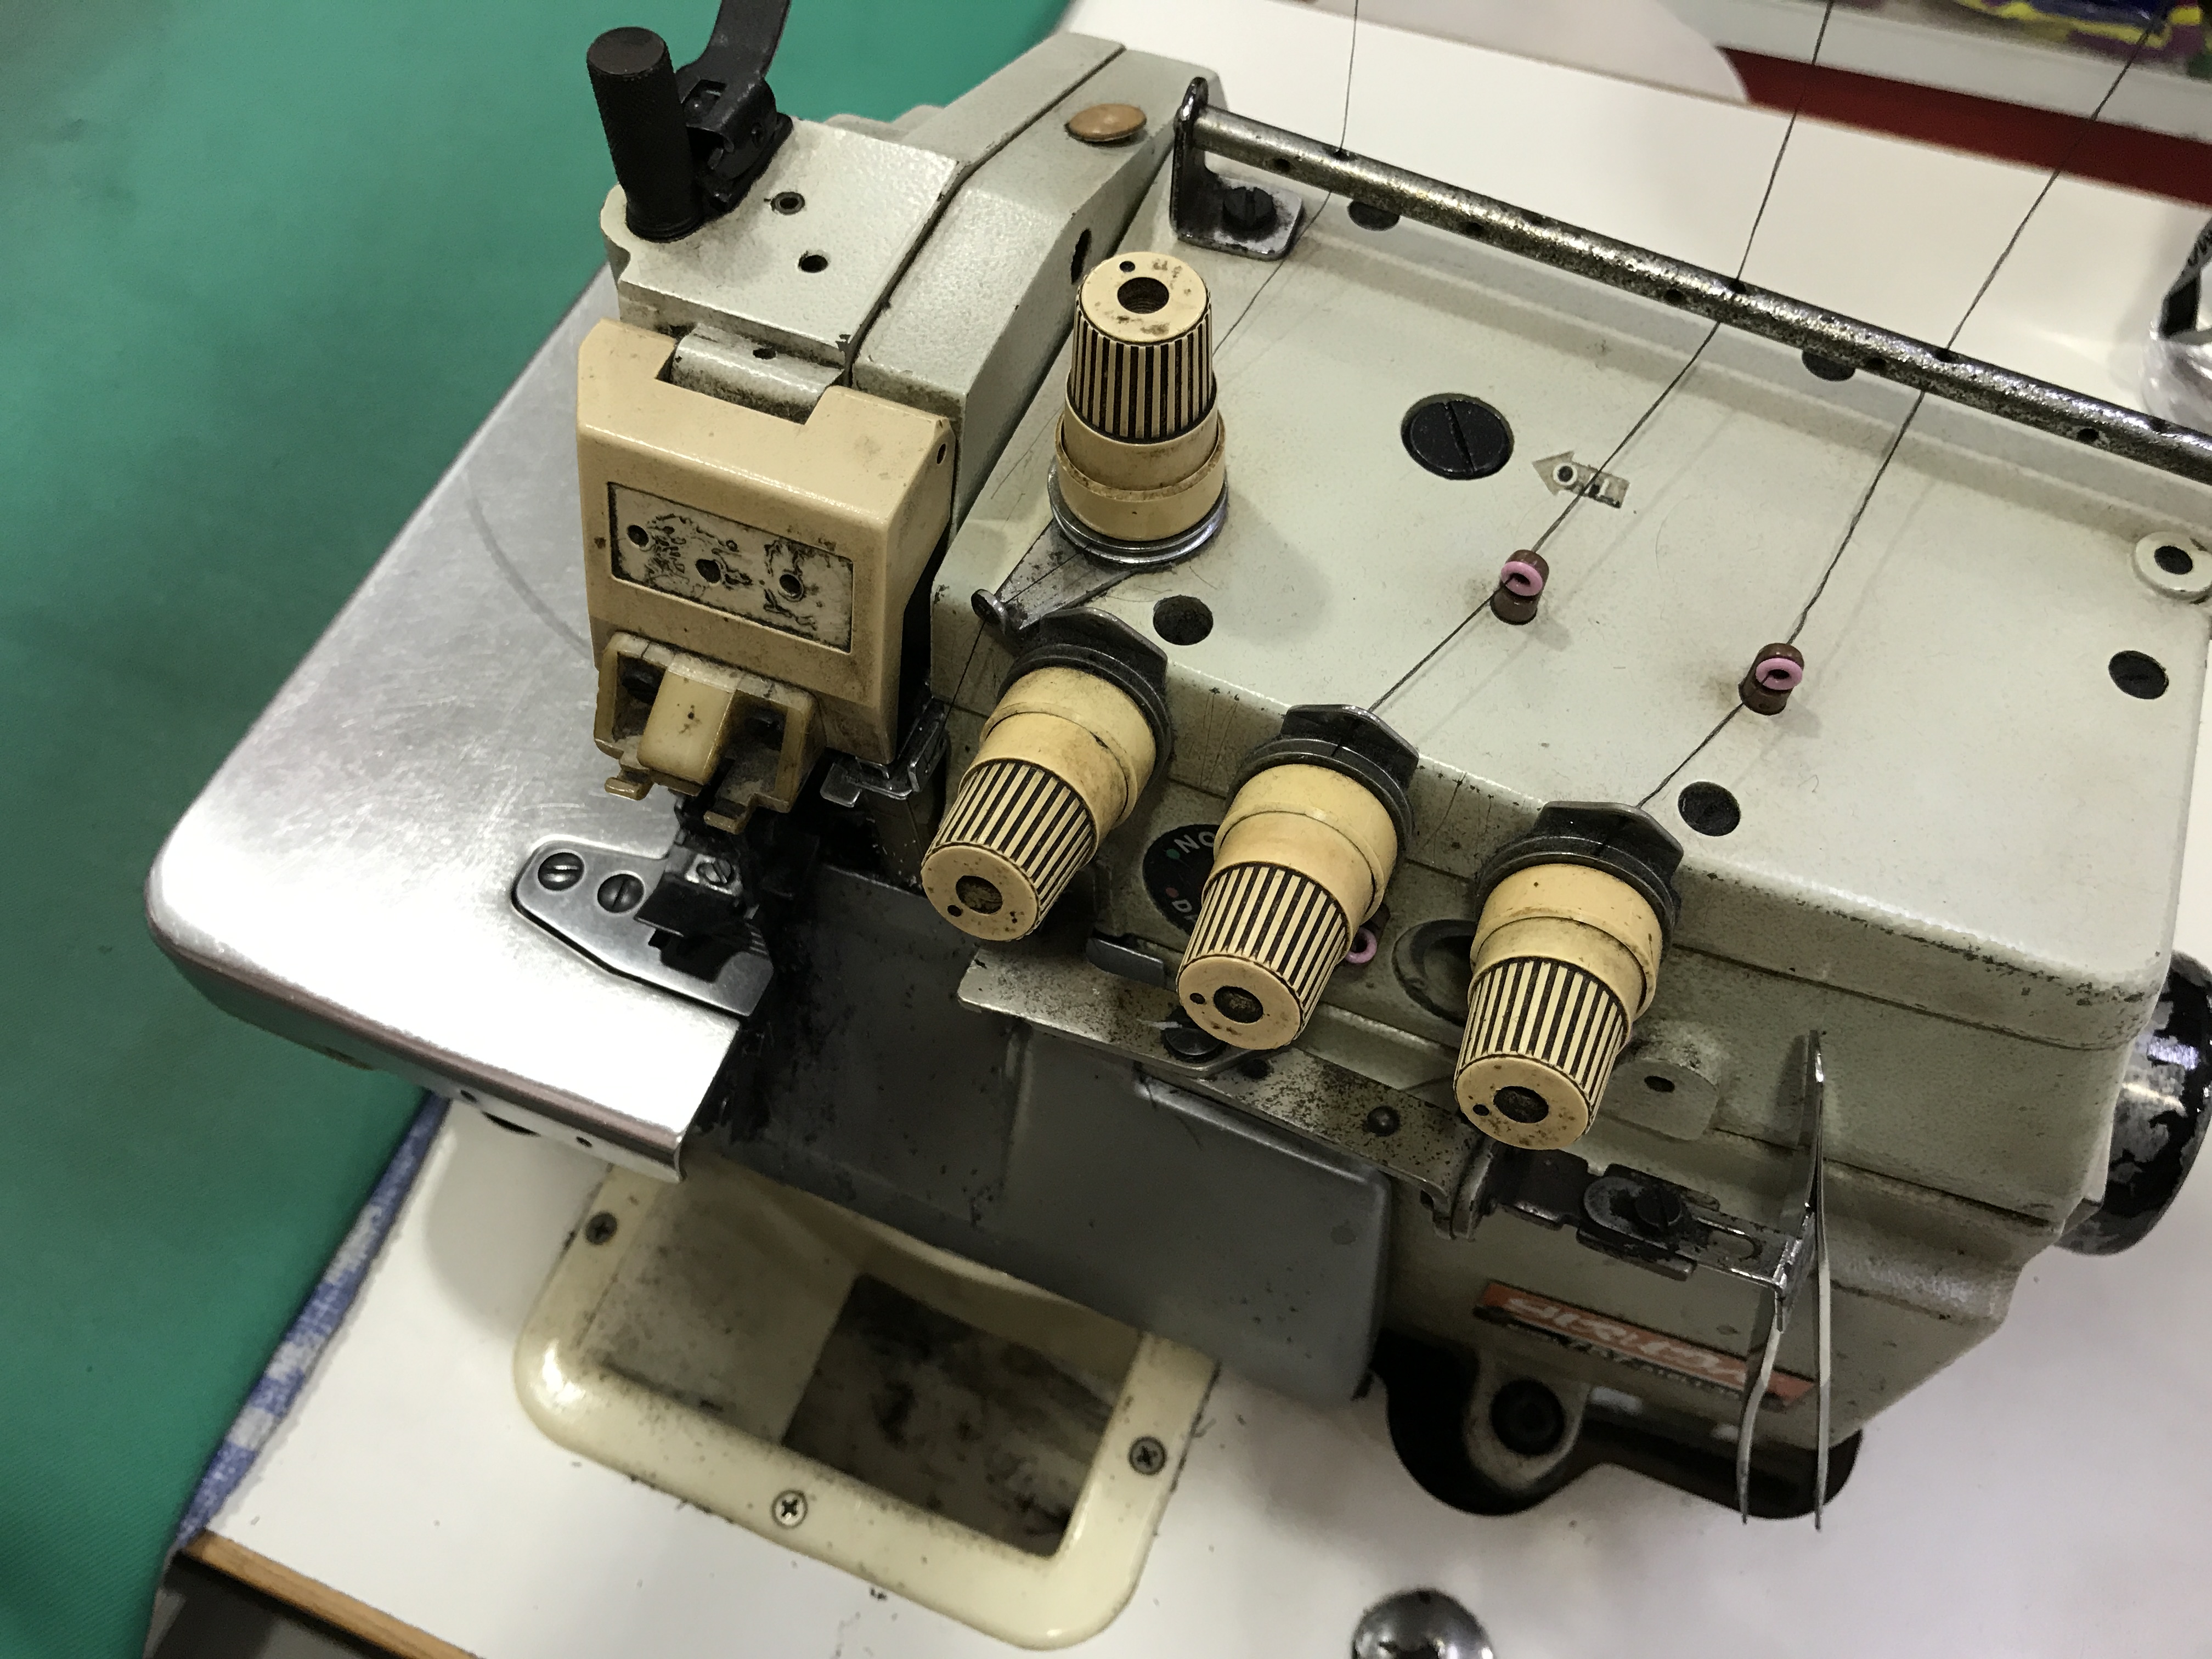
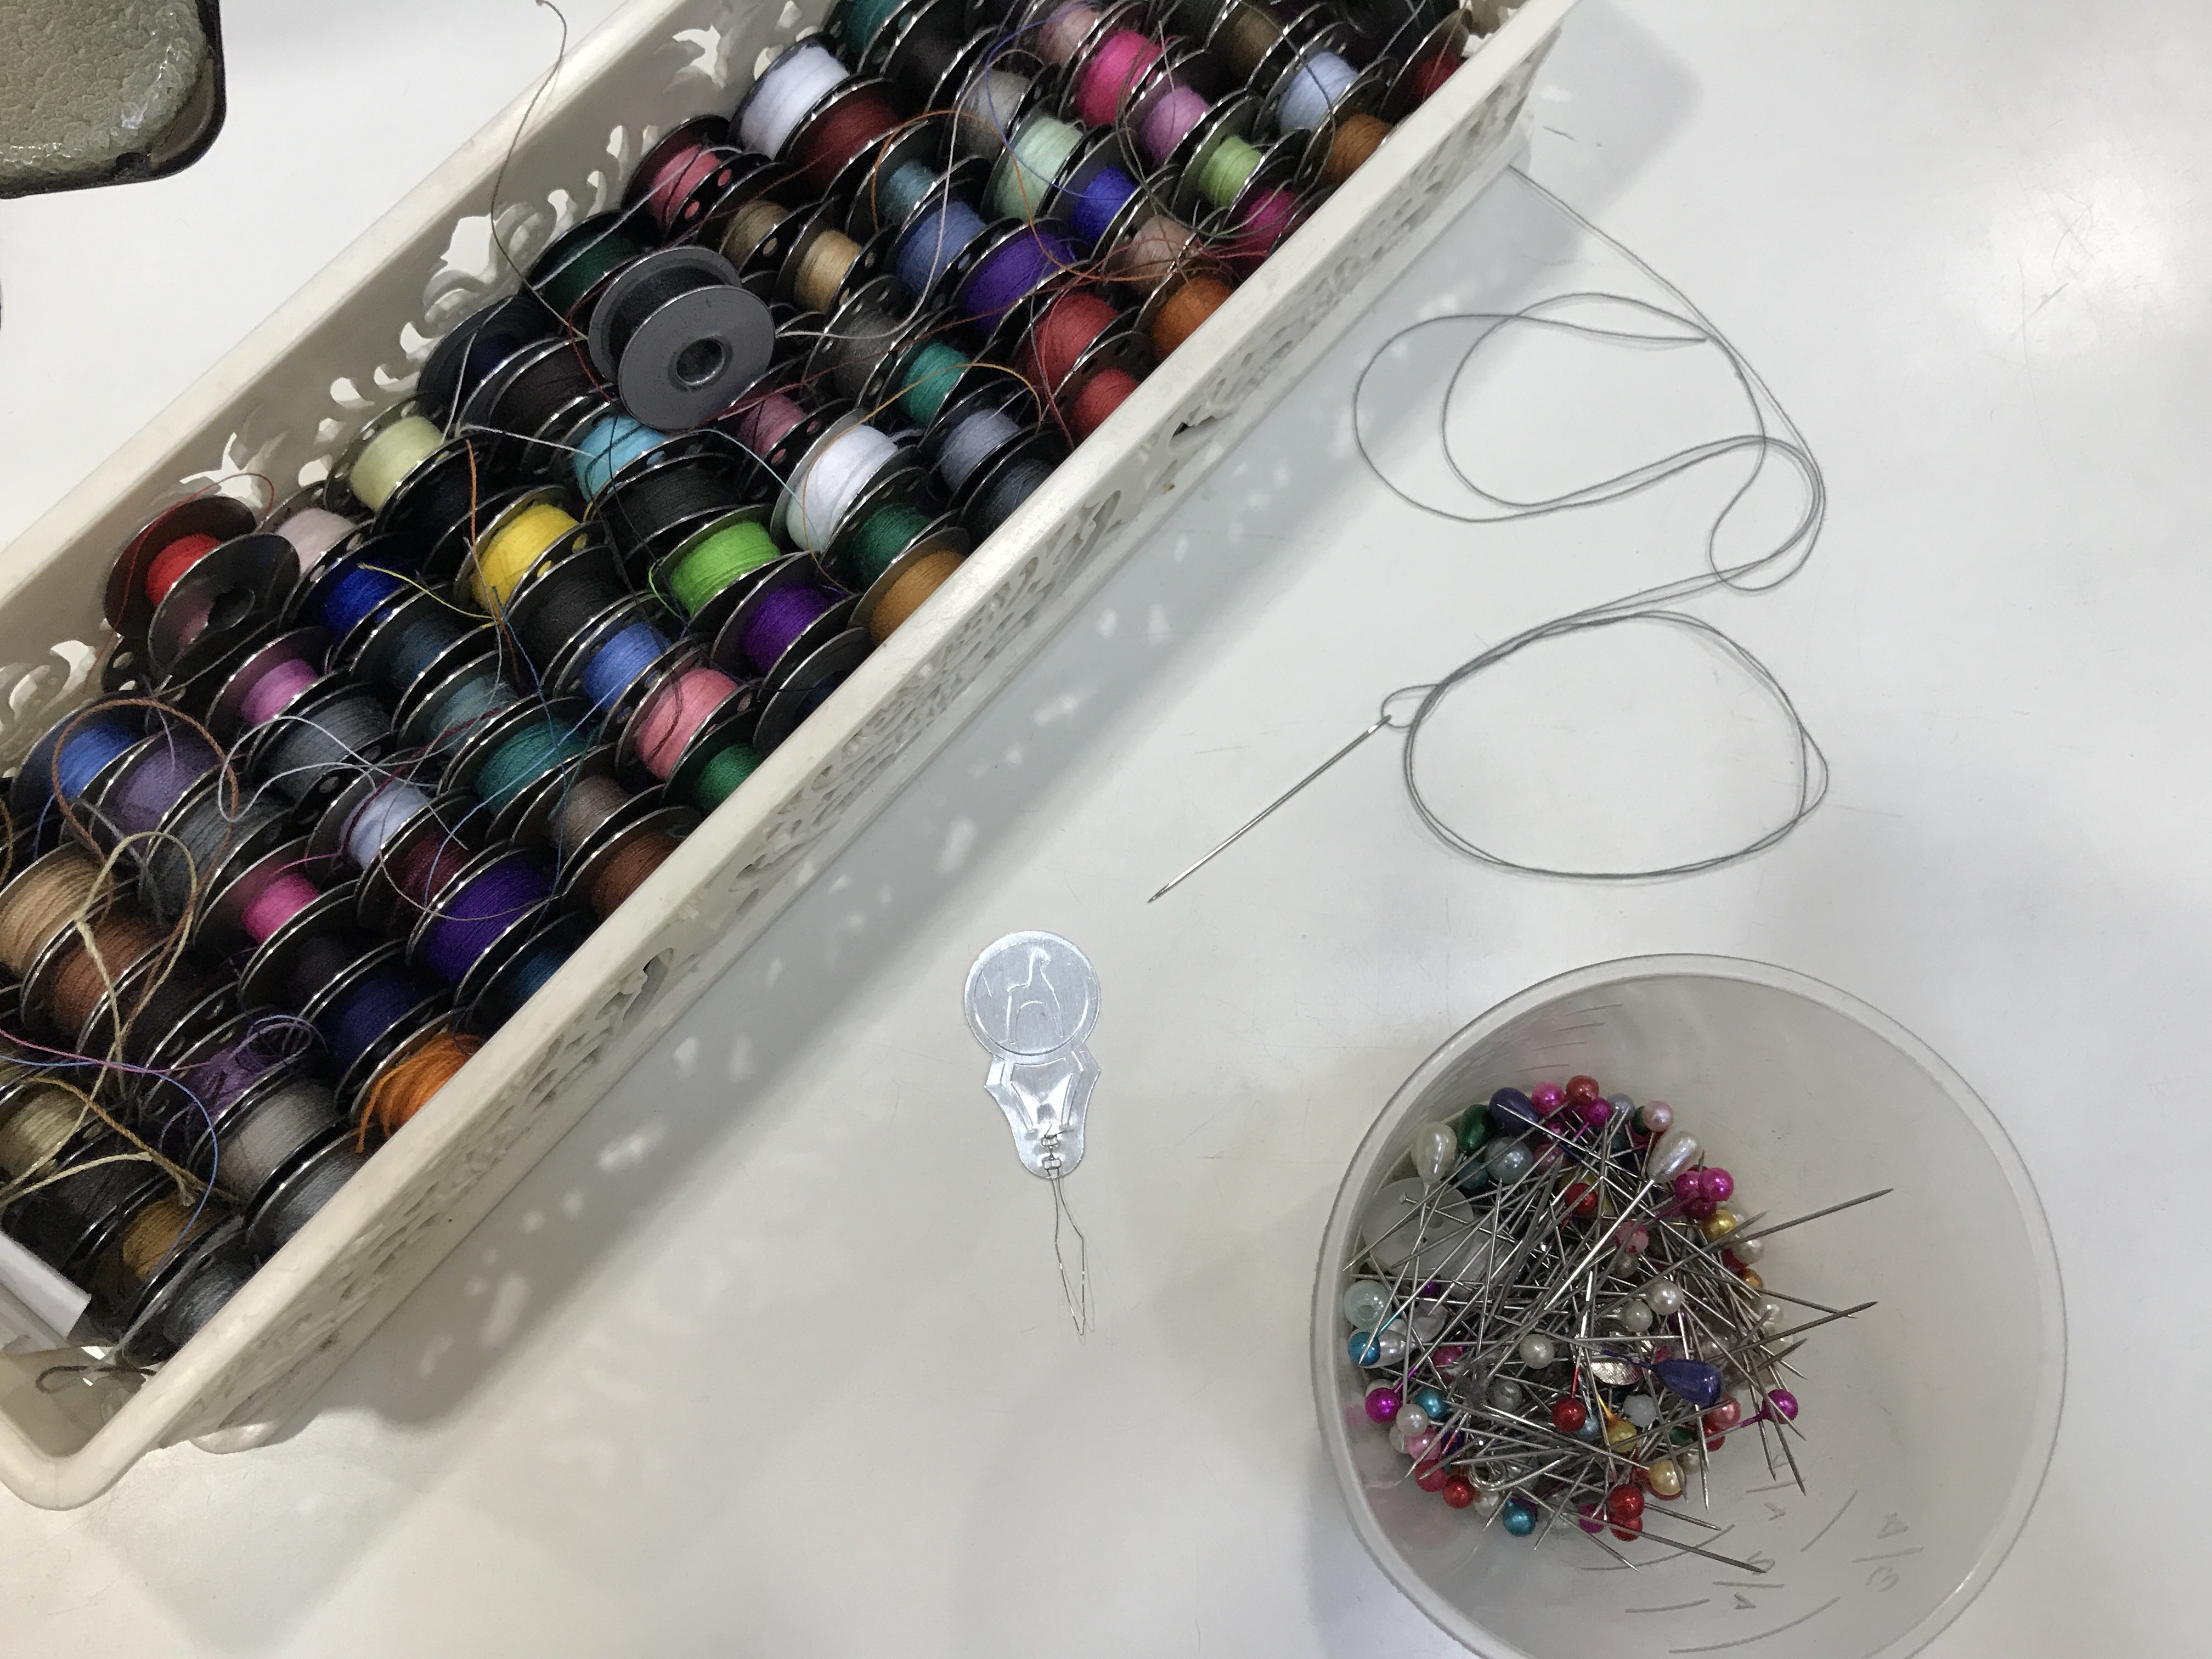
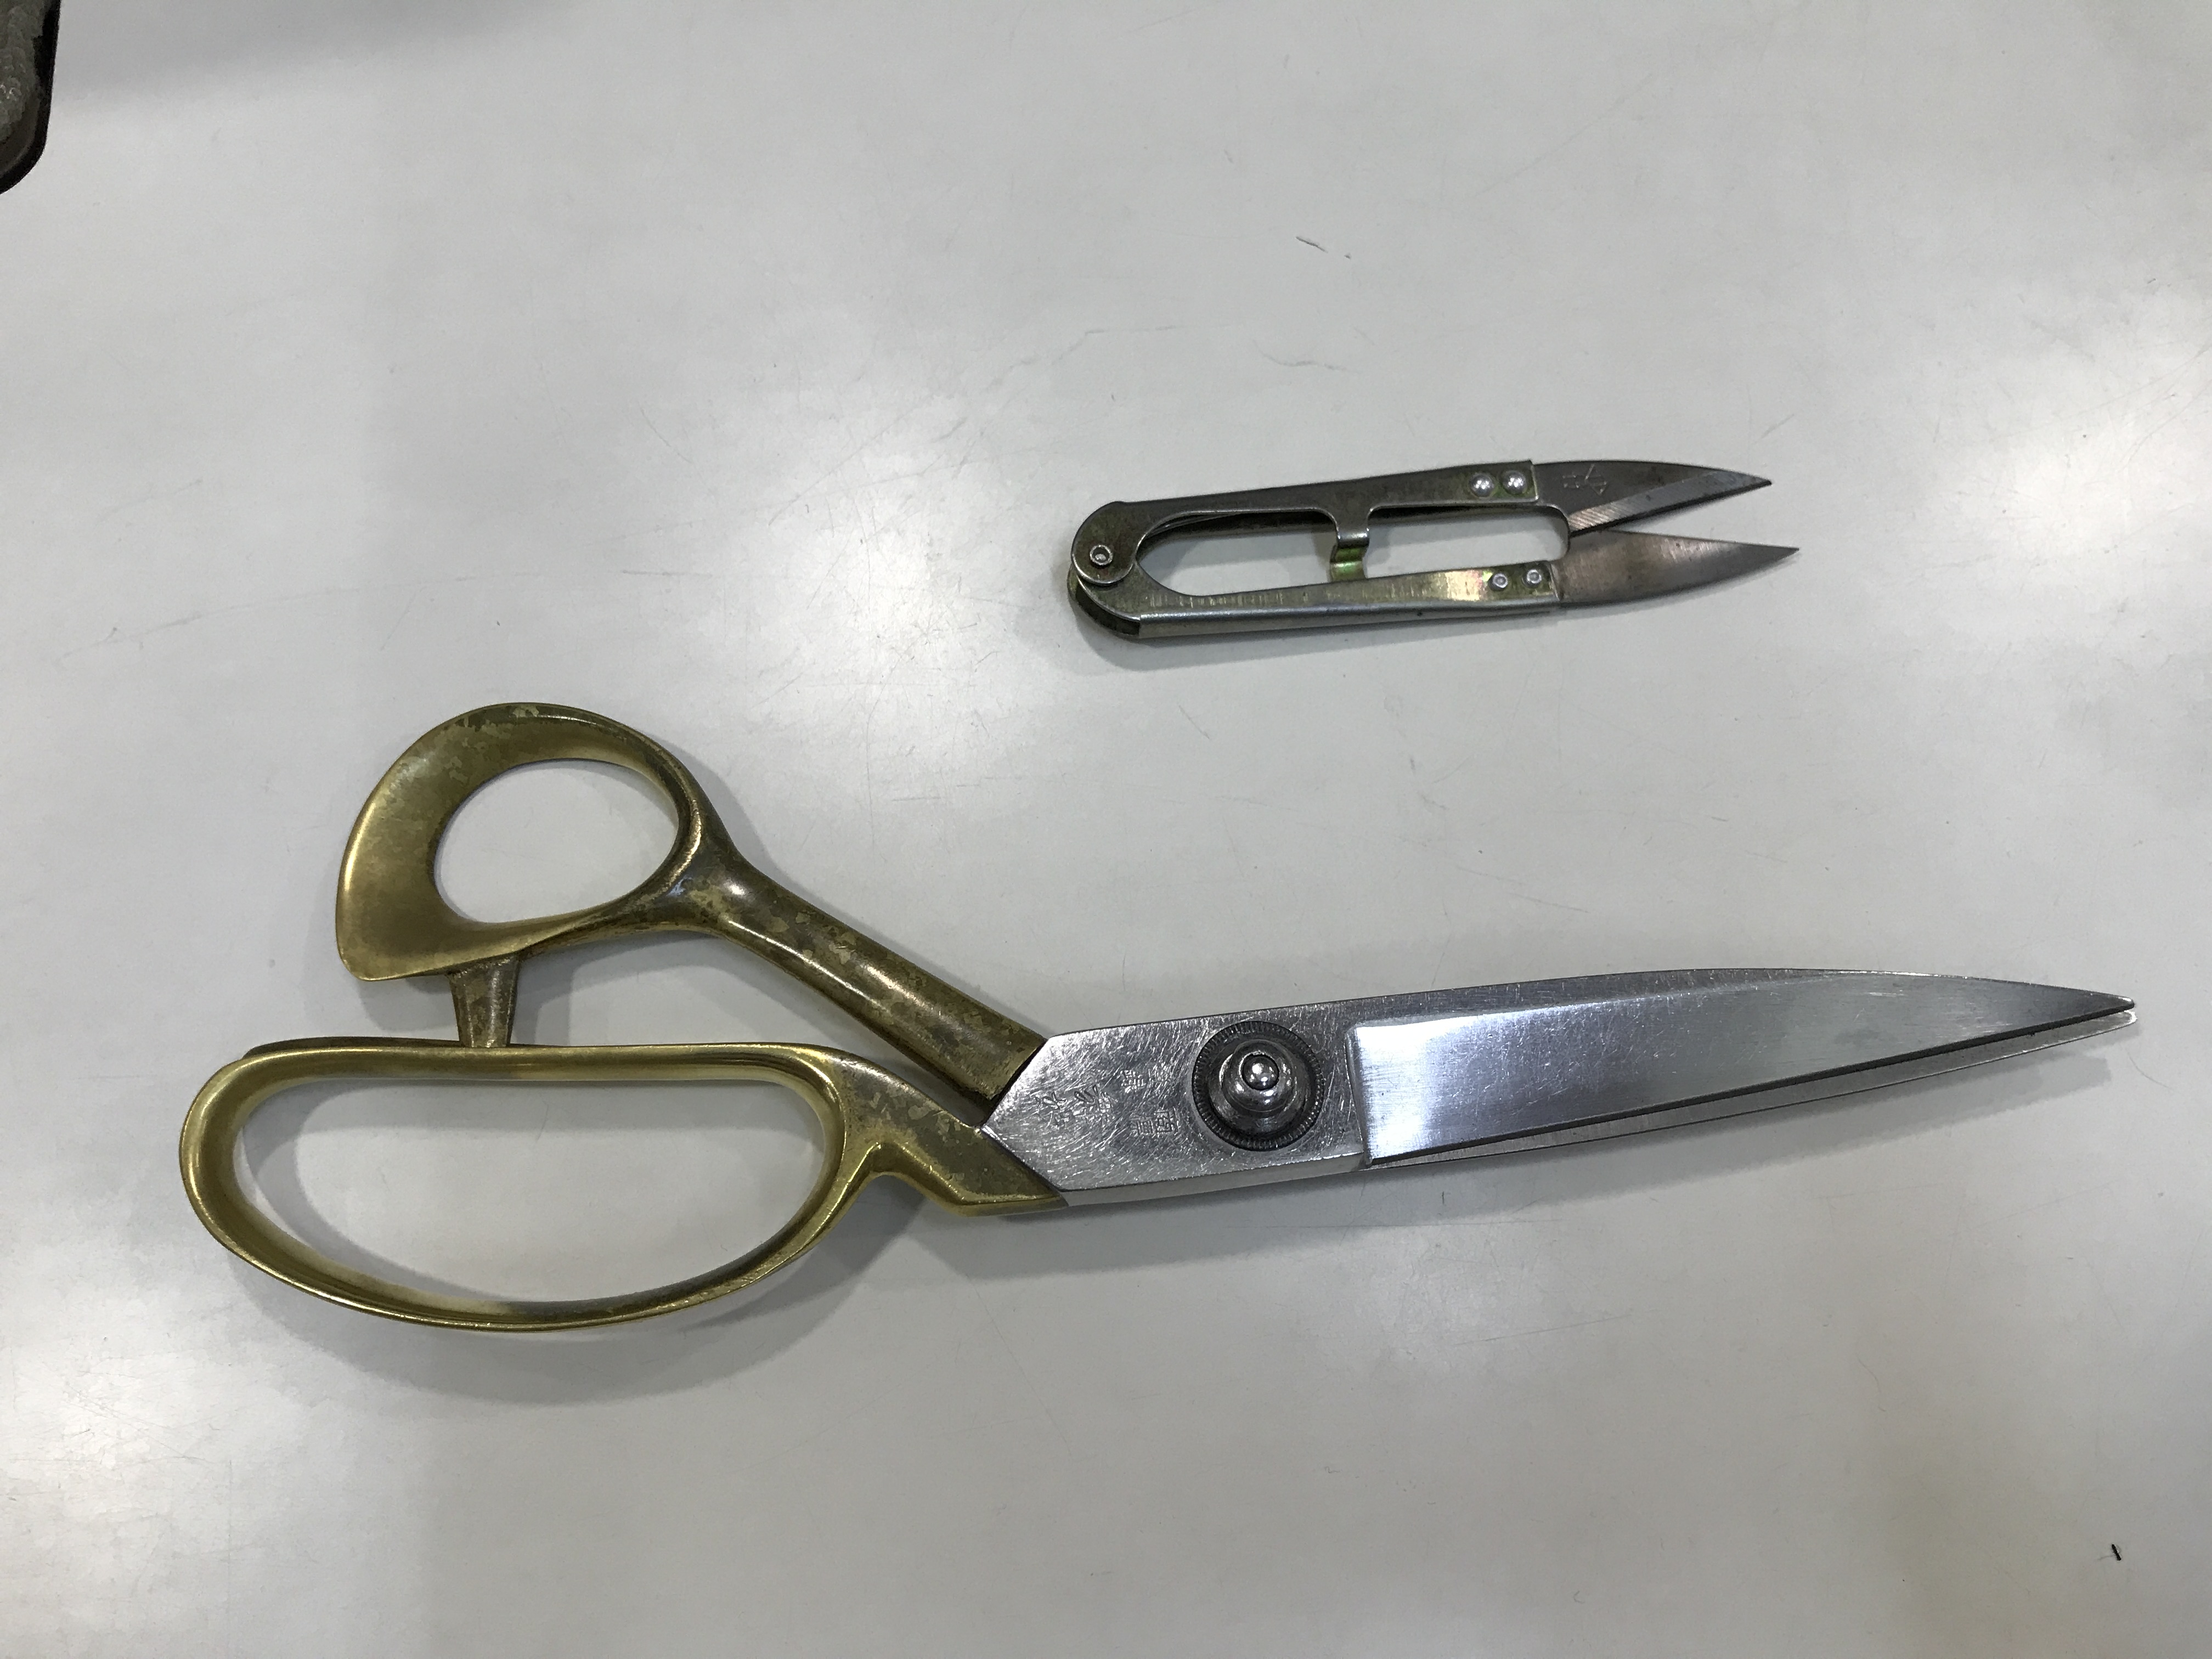
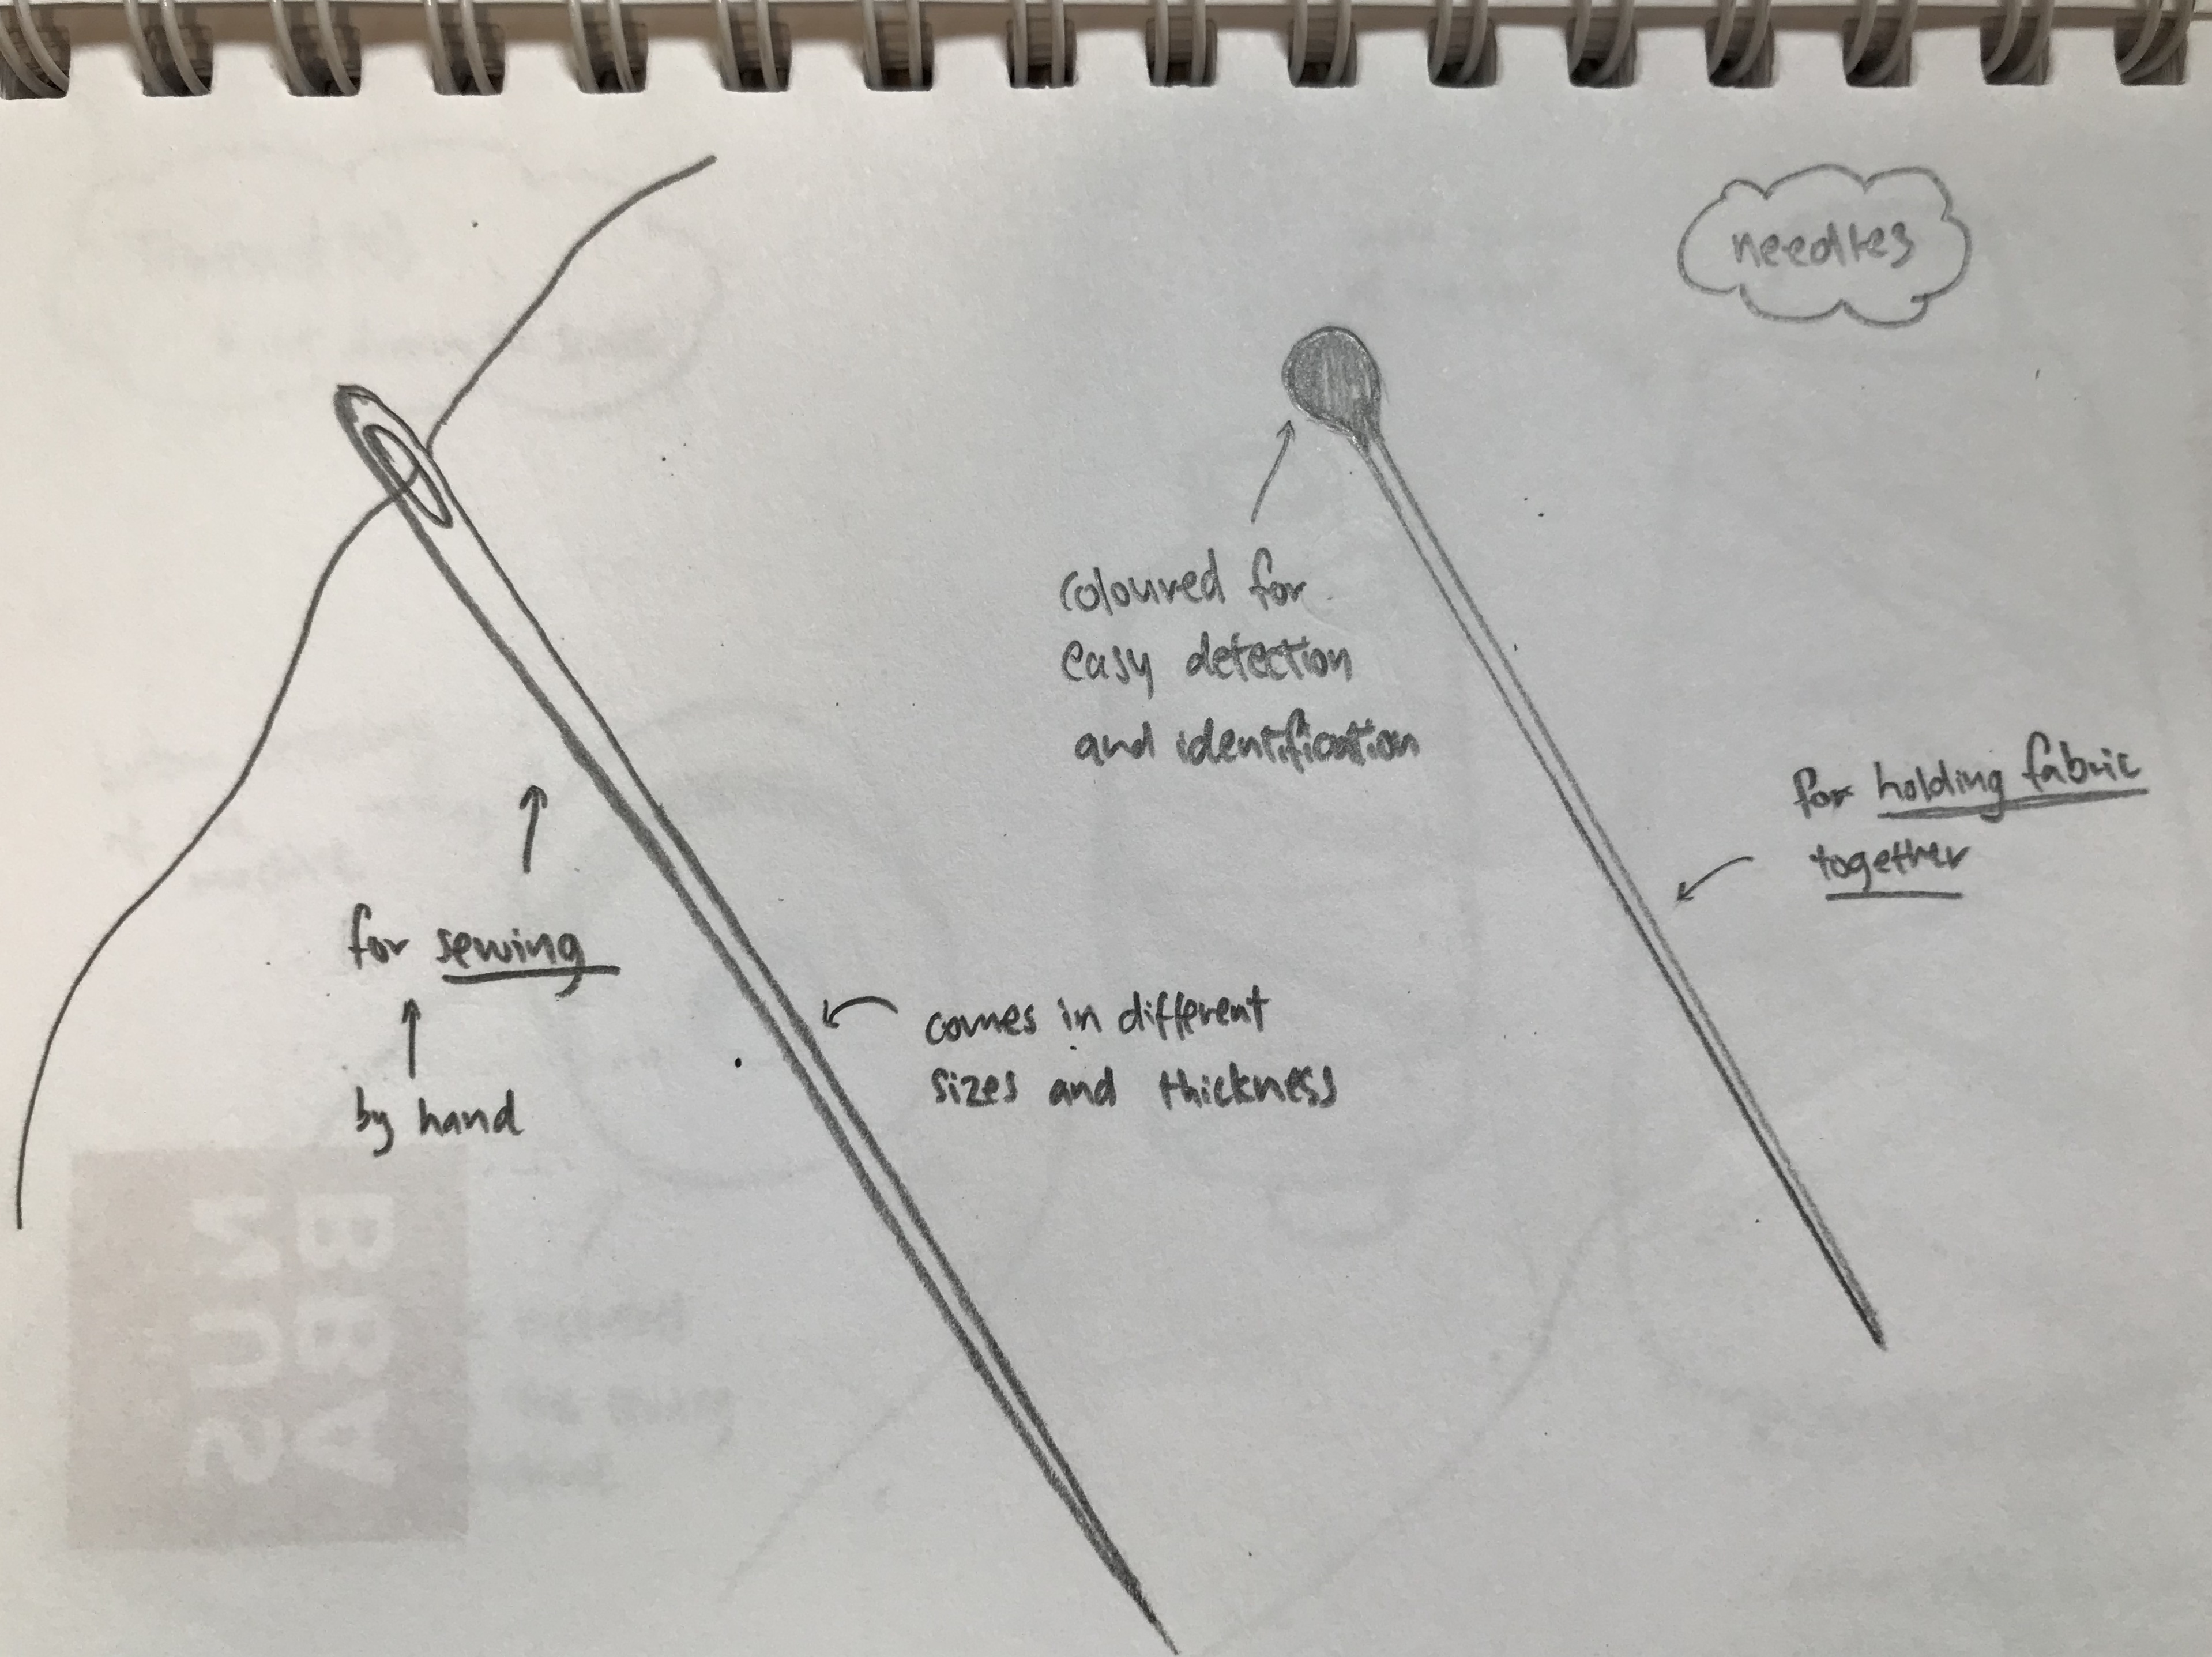
I visited a seamstress to observe her at work, as well as the various tools that she needed for her creative profession. She has her own workspace that is the size of two sewing machine-tables. Two different types of sewing machines are needed because there is two main type of sewing stitches needed to create an article of clothing. At her workspace, we also has an entire wall-shelf decorated with threads of different colours and sizes. This is to ensure that she can colour match the thread to the various coloured clothing that customers bring in.
Pain Points:
She requires many different types of tools, which are kept all over her workplace. In the profession of sewing, there are also many tools that are small in size. So she has to be very careful where she keeps her tools, so that she does not misplace and cannot find anything.
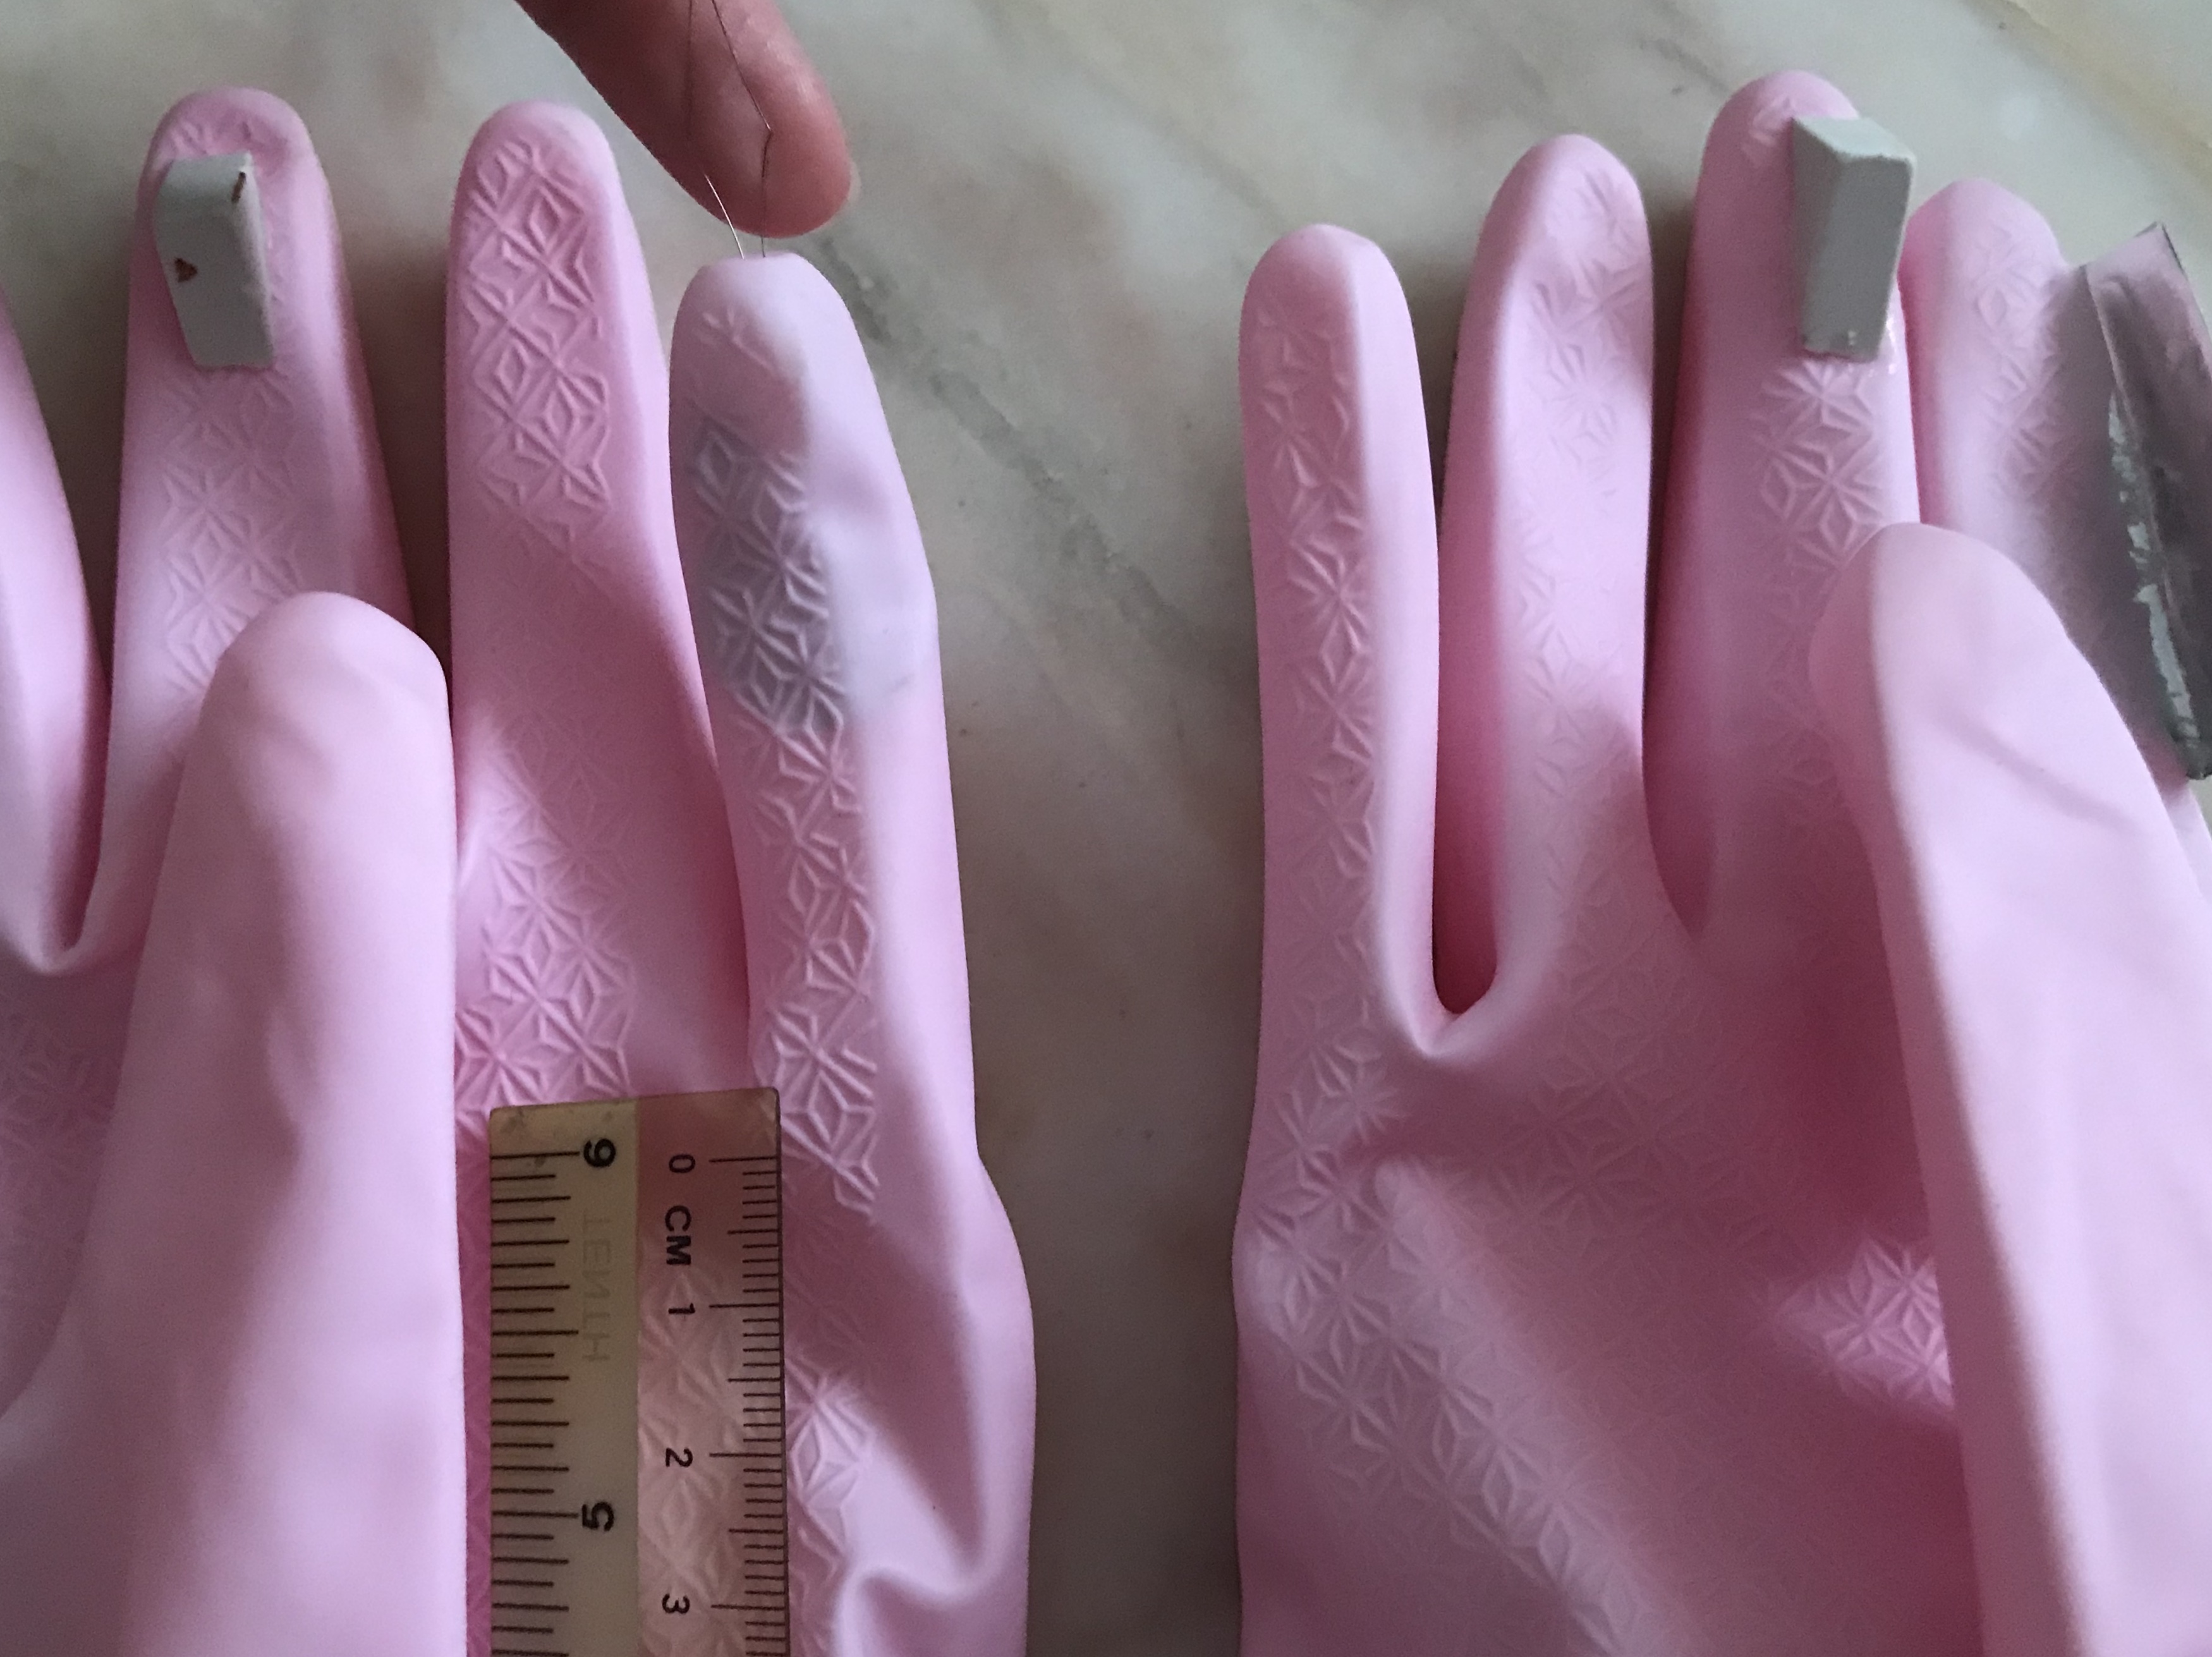
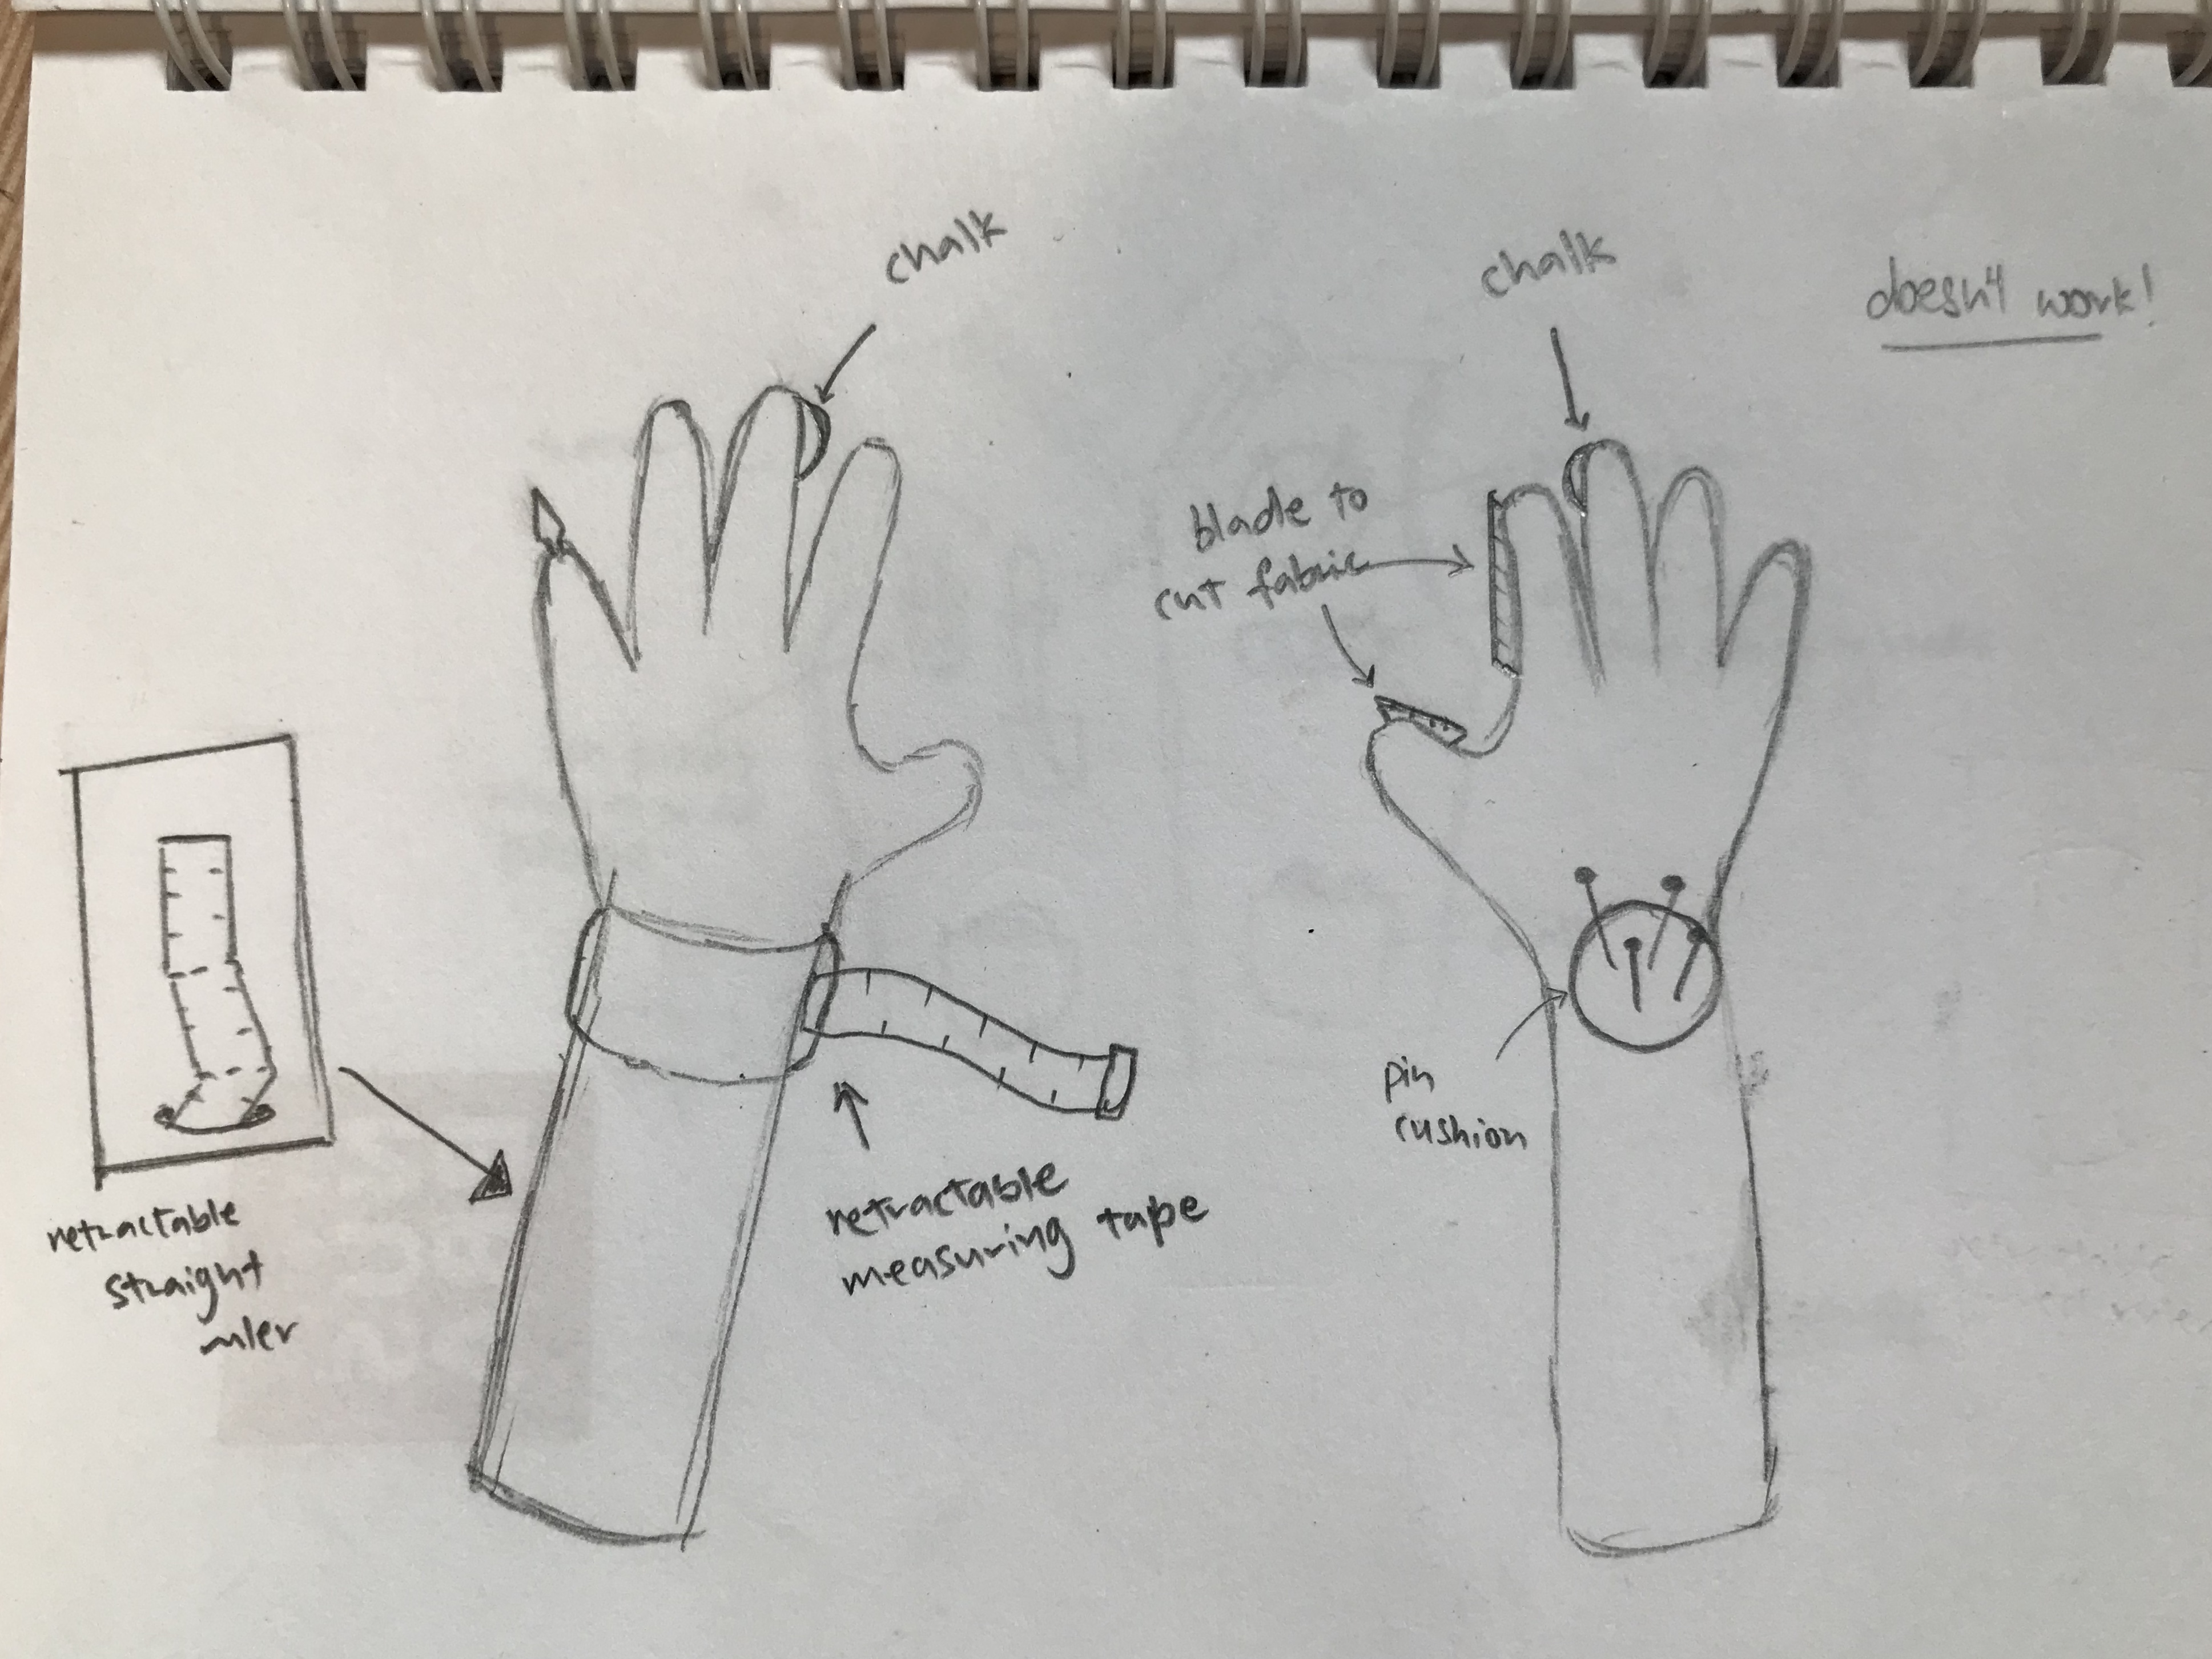
From the various tools that she shared me, I wanted to create a device that incorporated as many of them as possible, and I came up with the assistant glove.
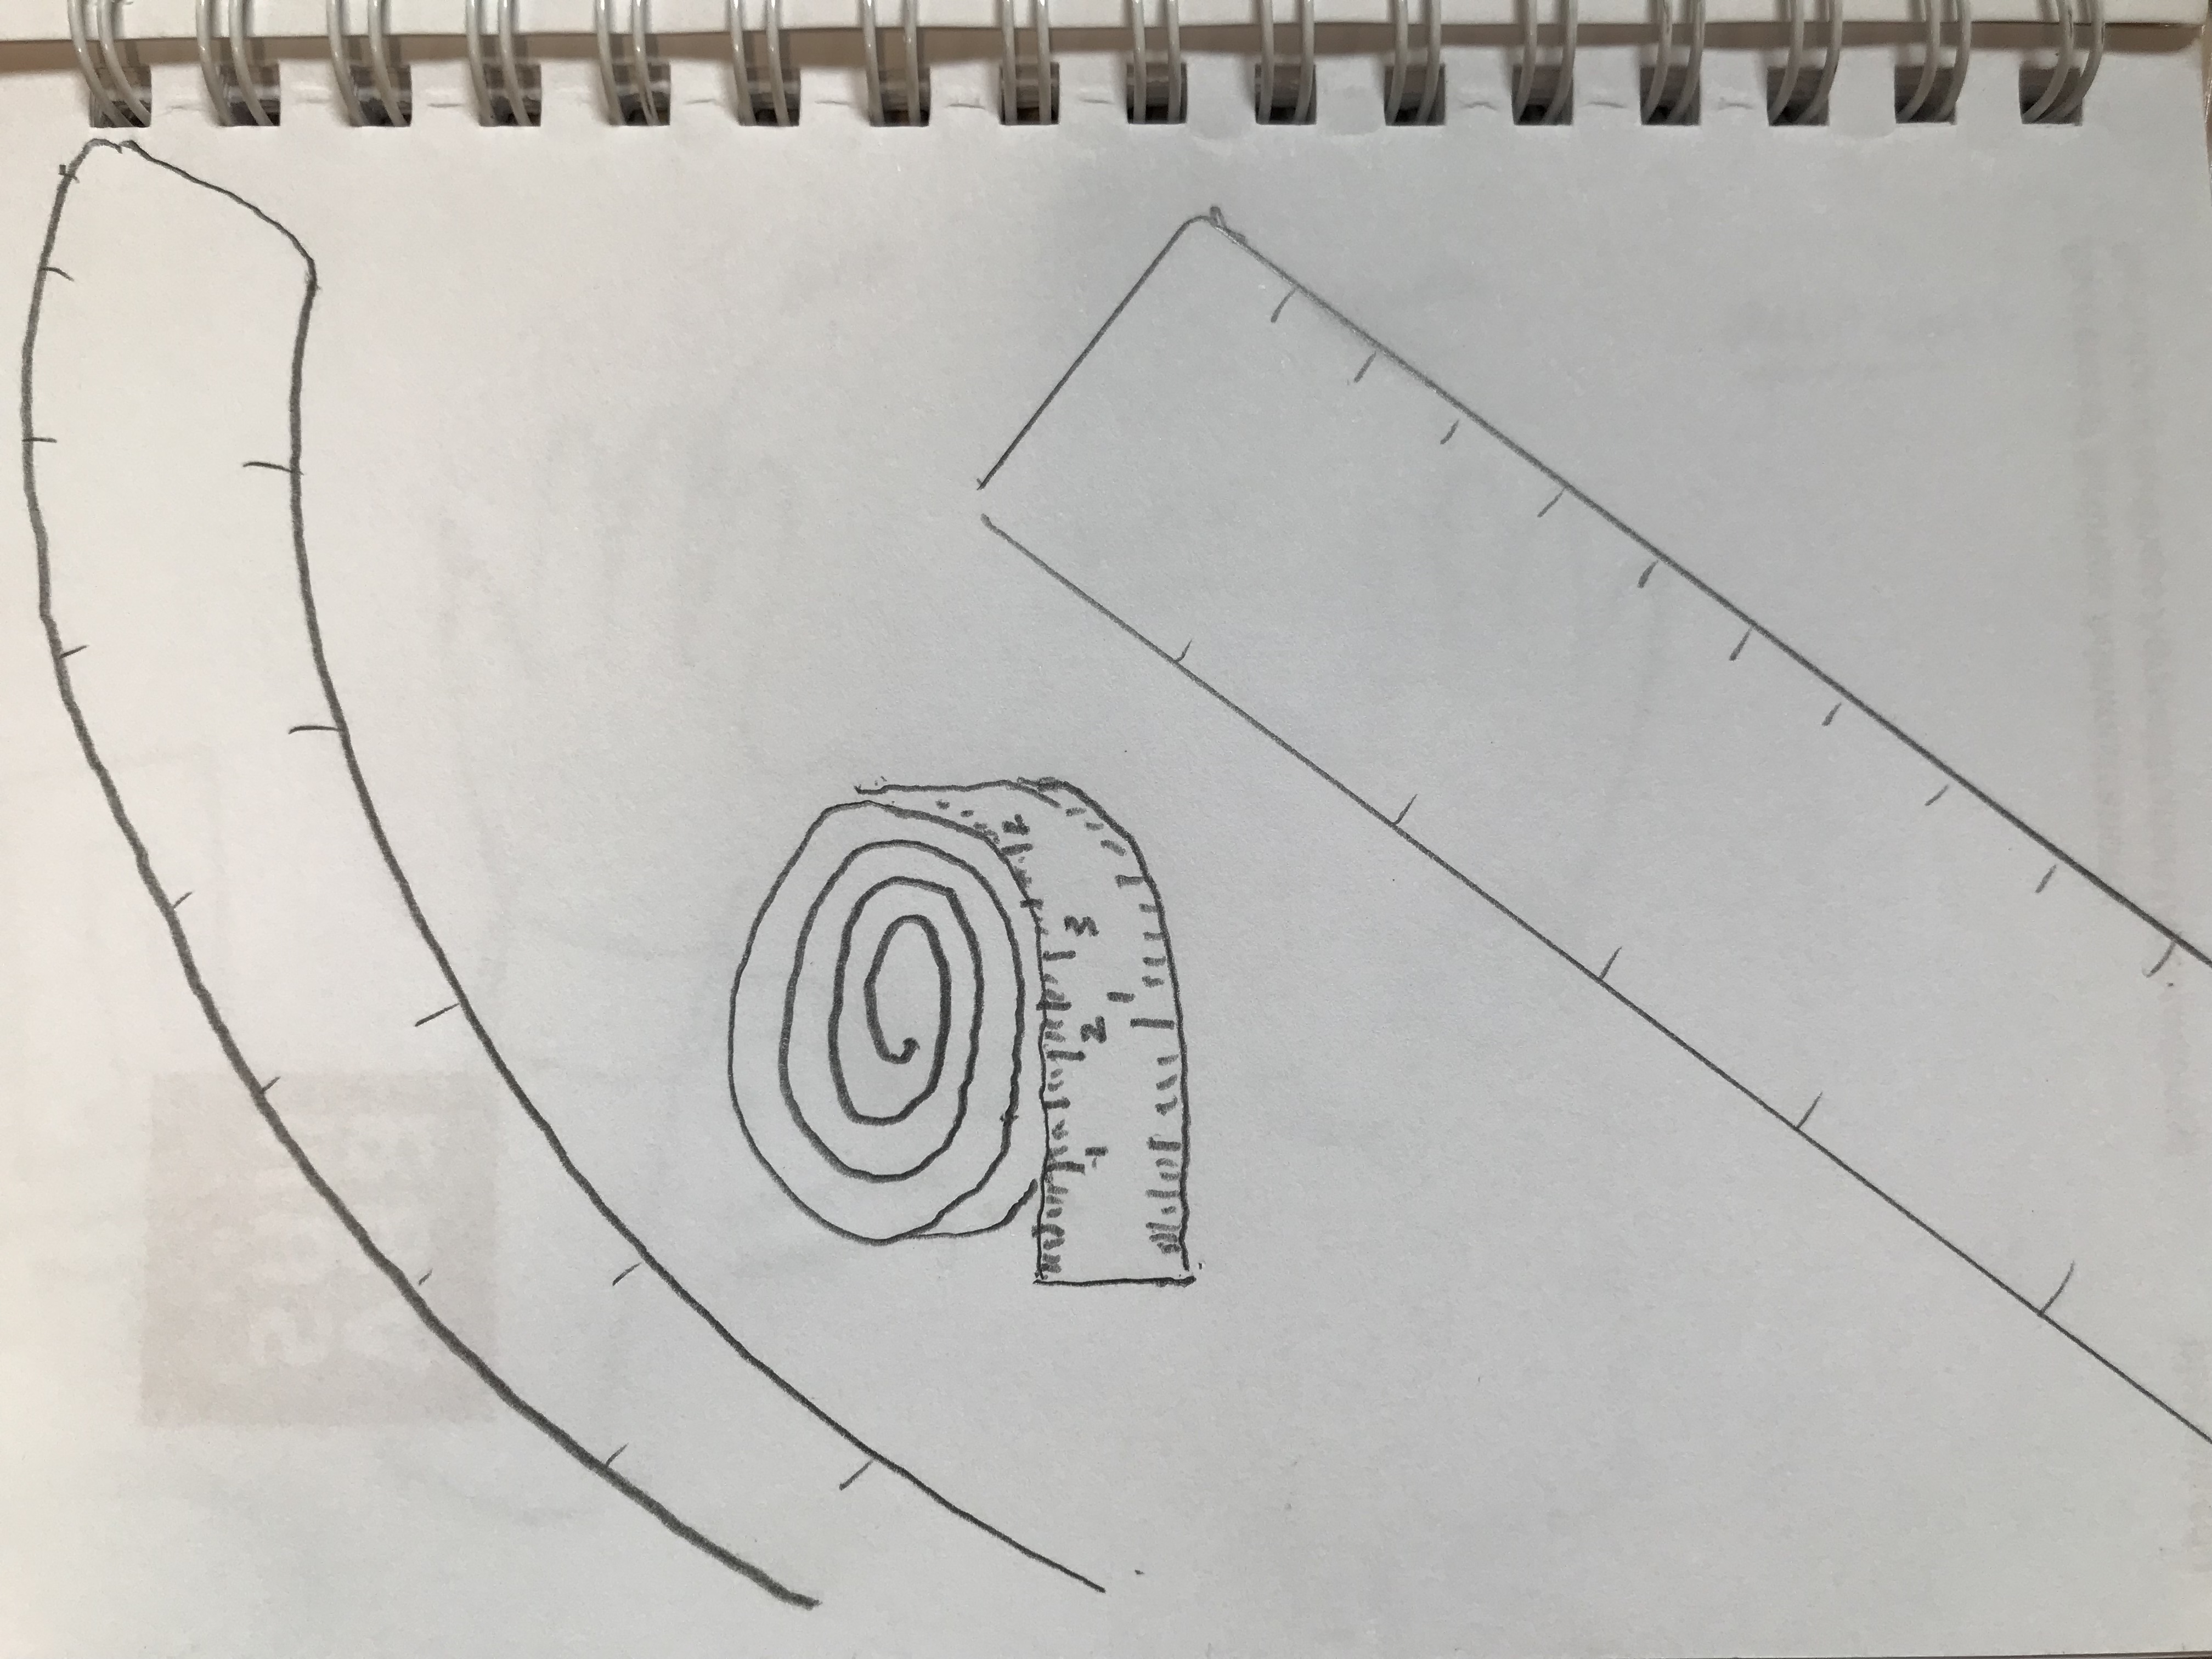
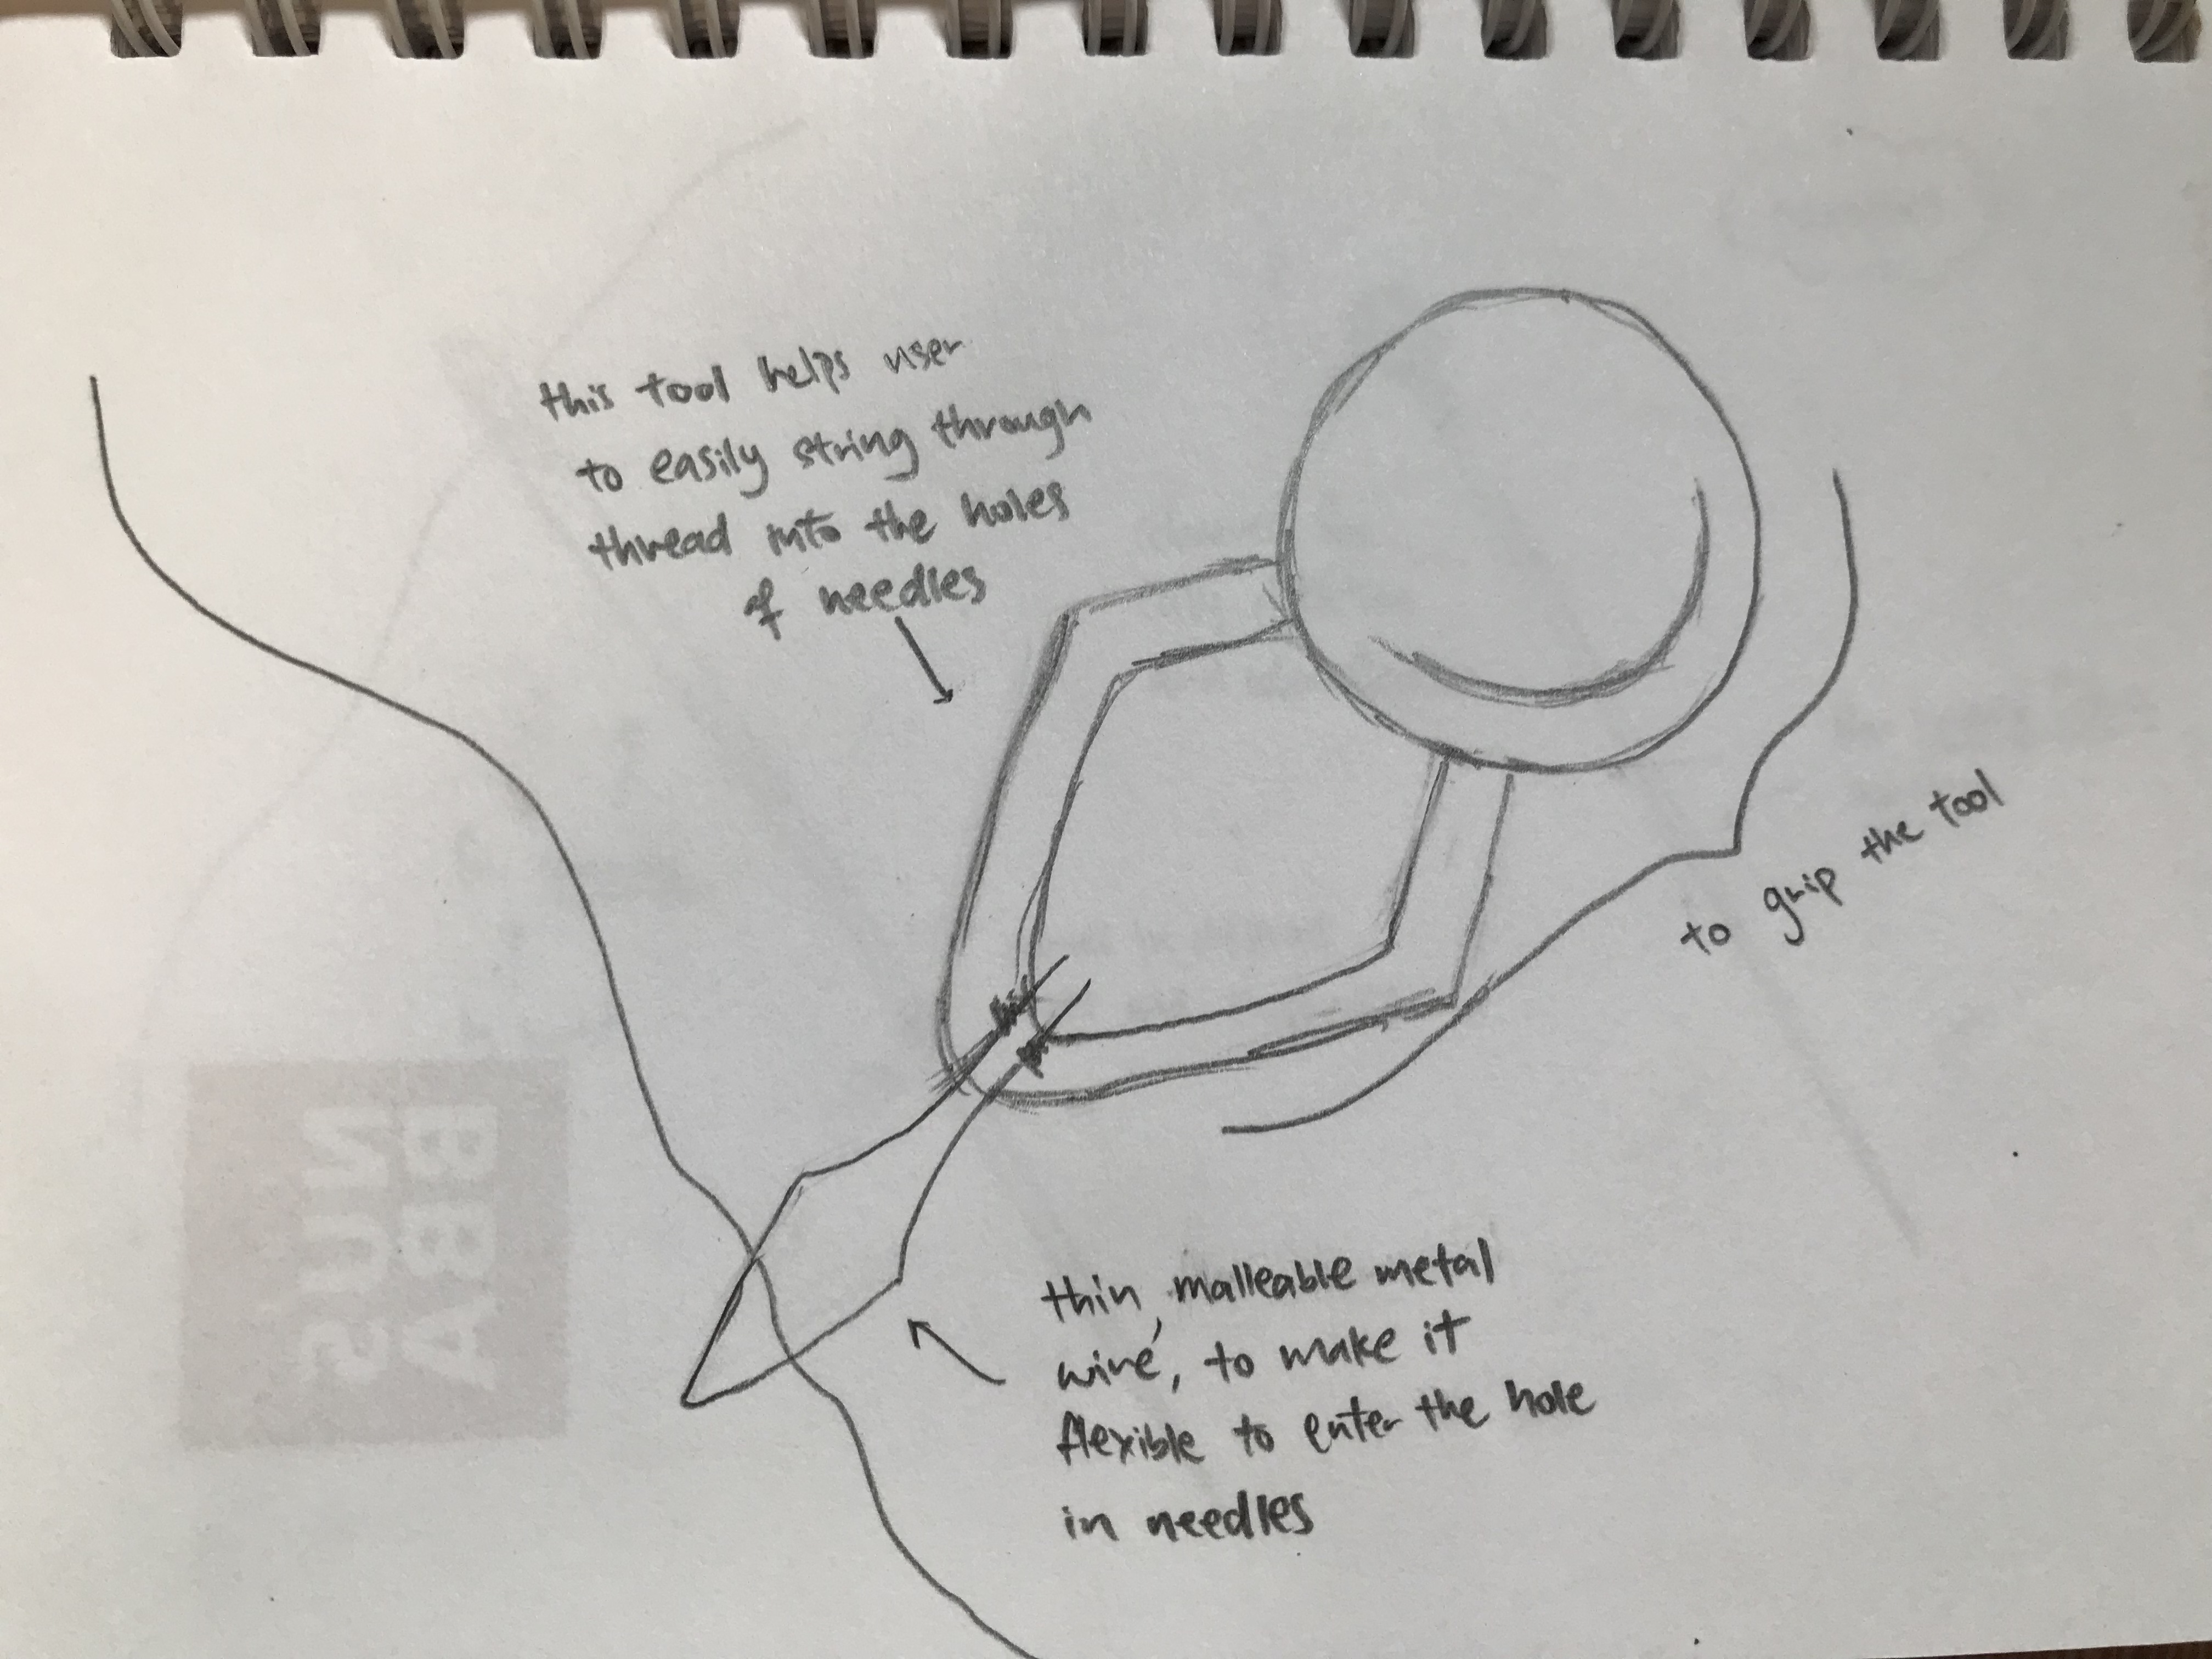
The tools incorporated included: a pin cushion, drawing chalk, scissors, a retractable straight ruler, a measuring tape, and a needle threading tool.
Initially, I thought that maybe it could work. After I created the model of the device, I realised that it was just a creative concept, but not functional. I put on the glove and tried to use them as if I were a seamstress, and thought that they were impractical, and would not work well when put into use.
This assignment made me realise how important making models and prototypes were. It is not enough to think of an idea, but building the actual idea will help you see if the idea is actually functional.
A better device would actually be a vest that gives them organization and easy access to their many tools! Sometimes thinking of a fancy idea may not be the best thing, but just a simple object that assists them in their daily activities is the sufficient enough.