Share your world – Chia Li Hui

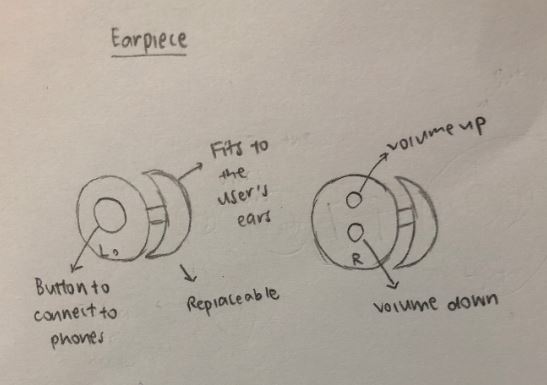
In this world, everyone wears a wireless earpiece and listens to the same music. Music becomes a drug of choice and no one will be walking anywhere without the earpiece. The music depends on what is played in the location, e.g. in coffee shops or in the library (silent disco concept). As long as there is music playing in the location, the earpiece will be connected automatically and will play them.

It functions similarly to a solar panel (but instead of sun, it will work when there is the presence of music). People can choose to disconnect from the location’s music and engage in a conversation with another party by connecting to a virtual chat room. Parties can hear one another through the earpiece. When TVs or radios are detected, users can also choose to connect to them. It can also store music in this earpiece.

Whenever someone loses or damages their earpiece, he or she can easily collect another one in any nearby train stations for free.

  •    Addresses accessibility and the reliance on this earpiece in this world.
  •    Addresses social class issues → Something that everyone has, regardless of social class

Summary of the functions:

  •       Plays any music that is playing at the location
  •       Will function whenever any music is detected
  •       Disconnect to background music
  •       Connect to a virtual chat room to engage in a conversation (face to face)
  •       If it detects any TVs or radios, users can choose to connect to them
  •       Store music
  •       Sets music of the location
  •       Do not need to charge (like solar panel)

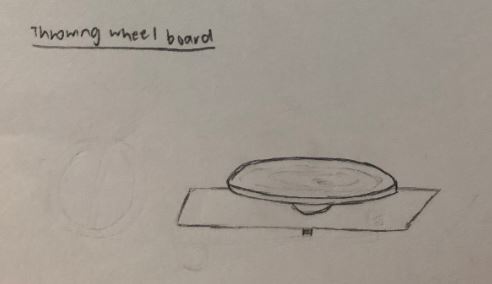
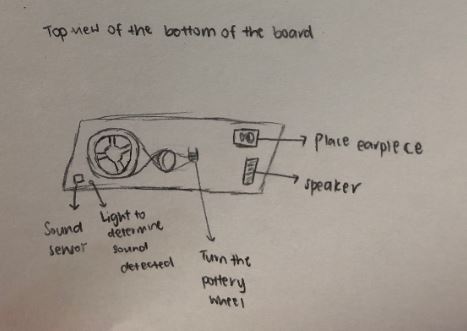
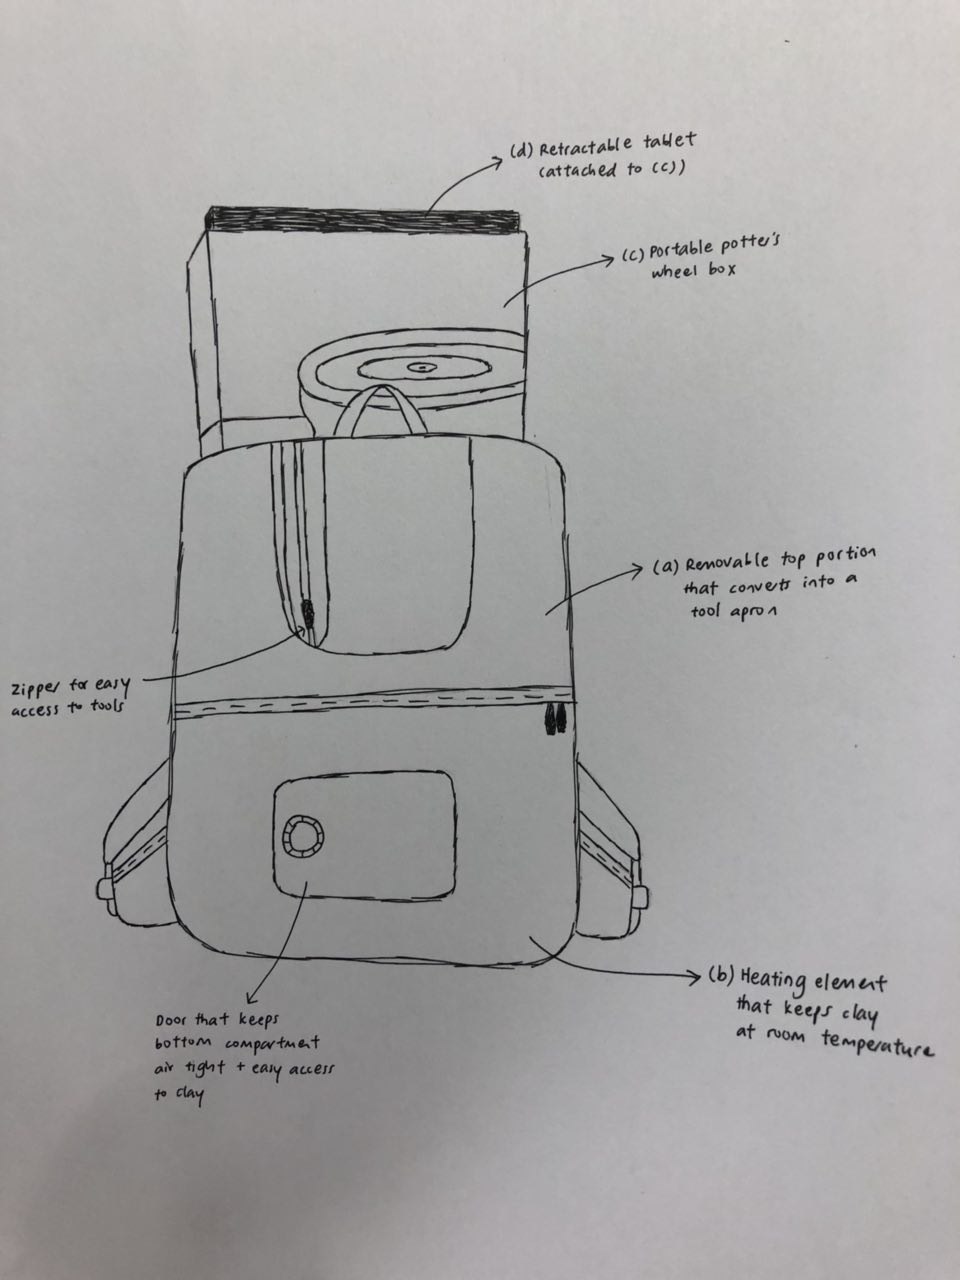
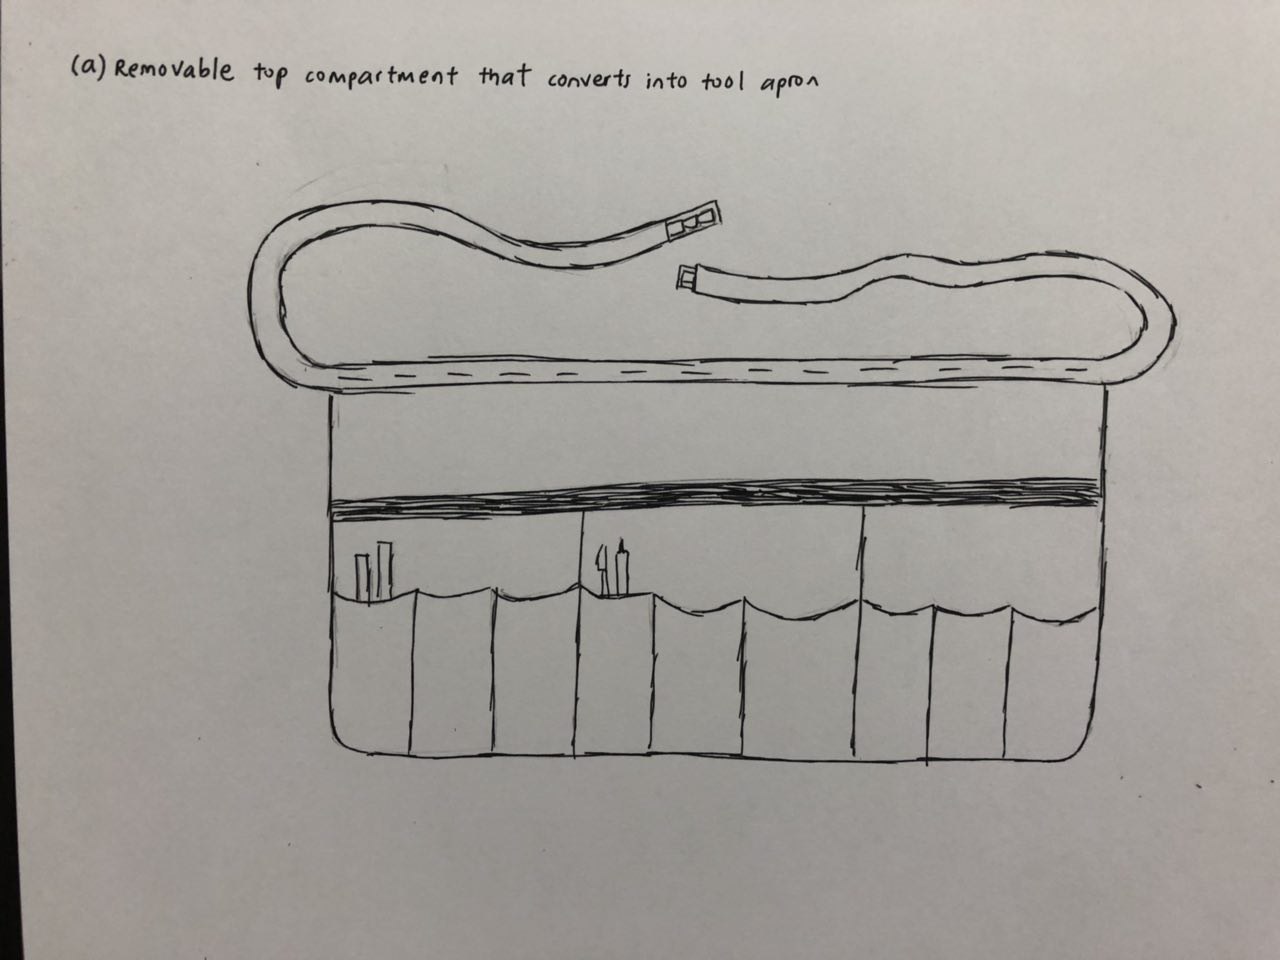
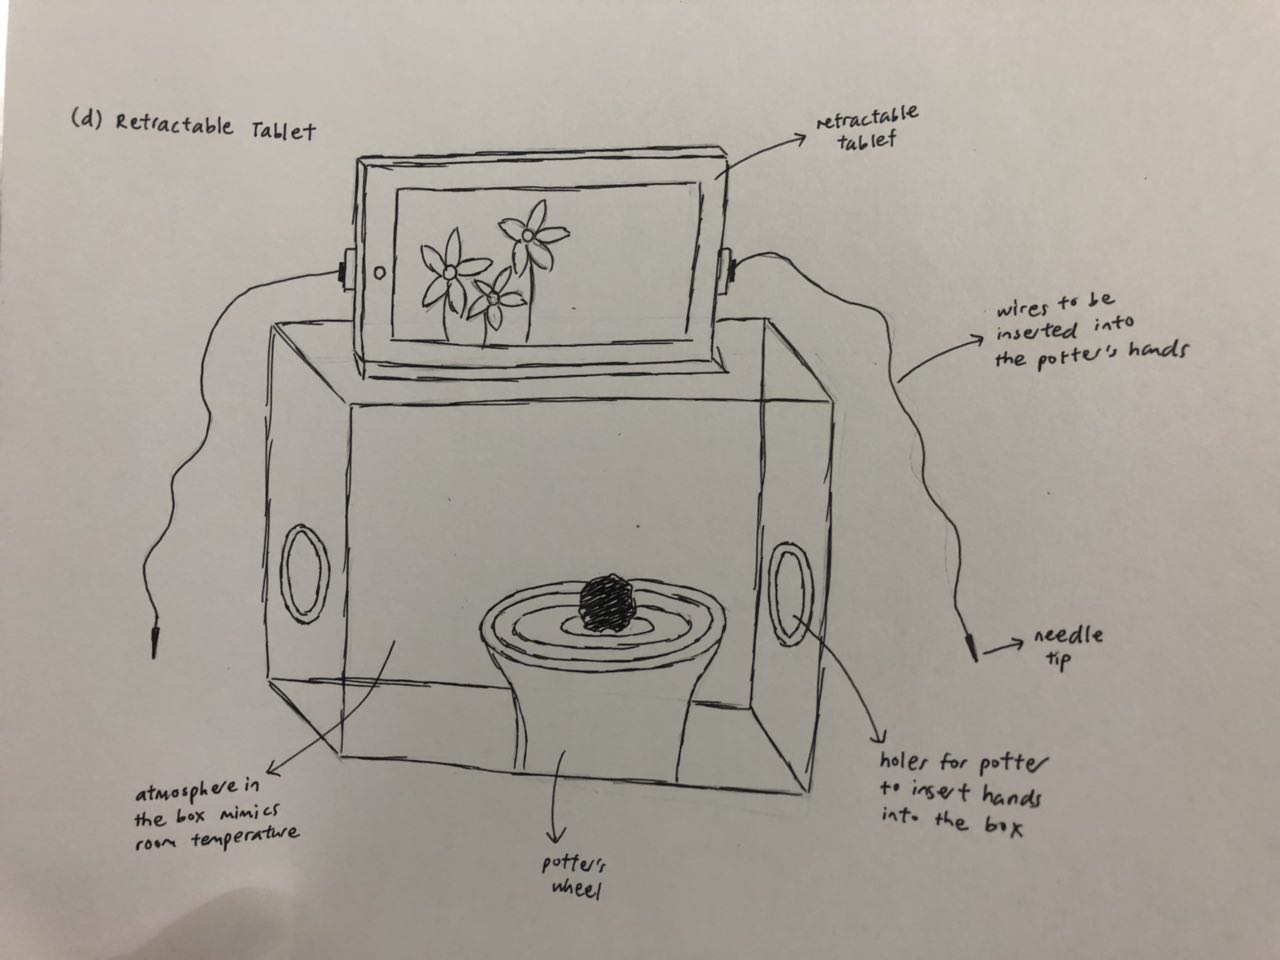
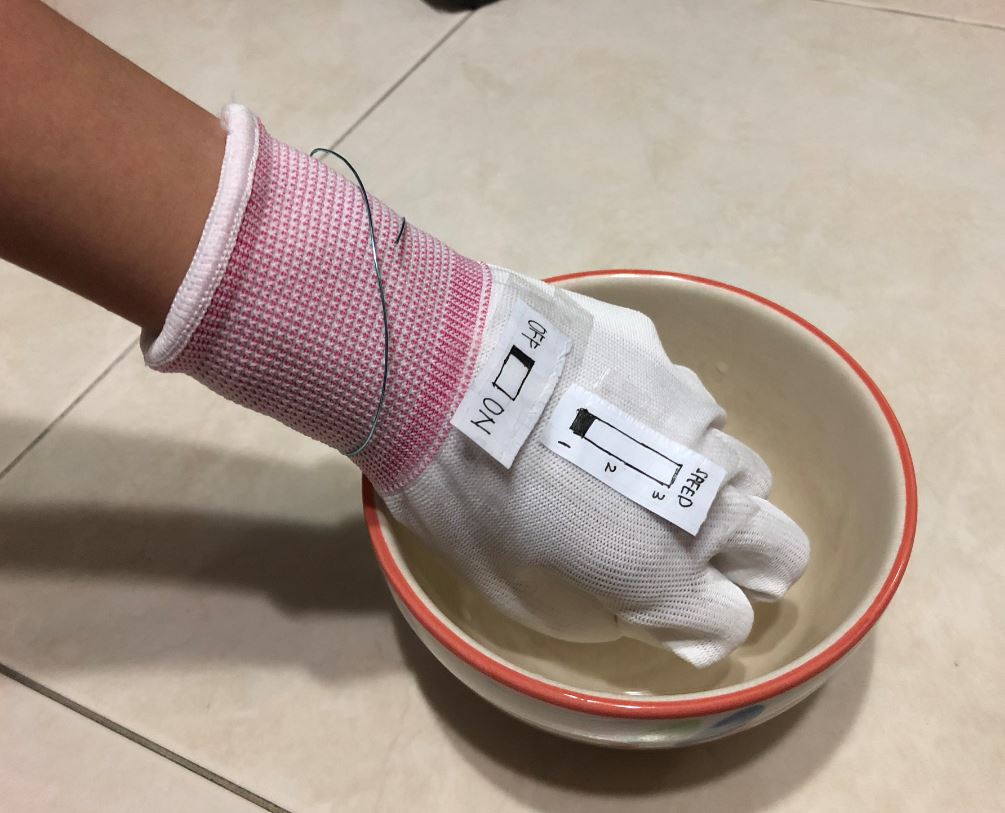
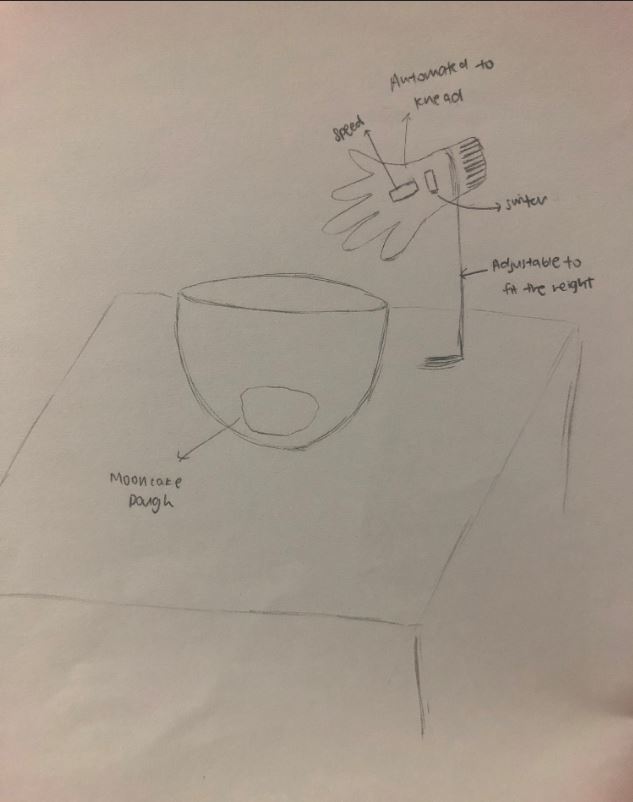
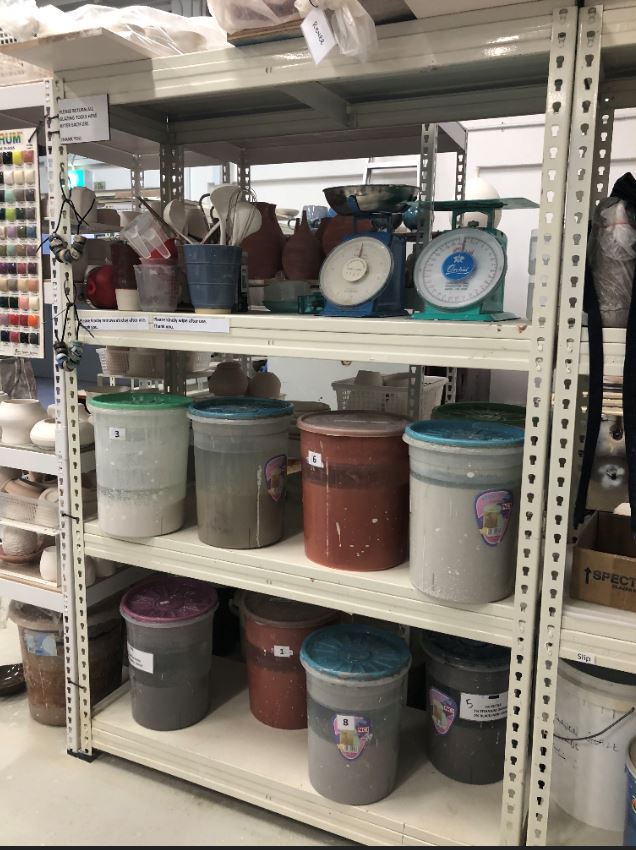
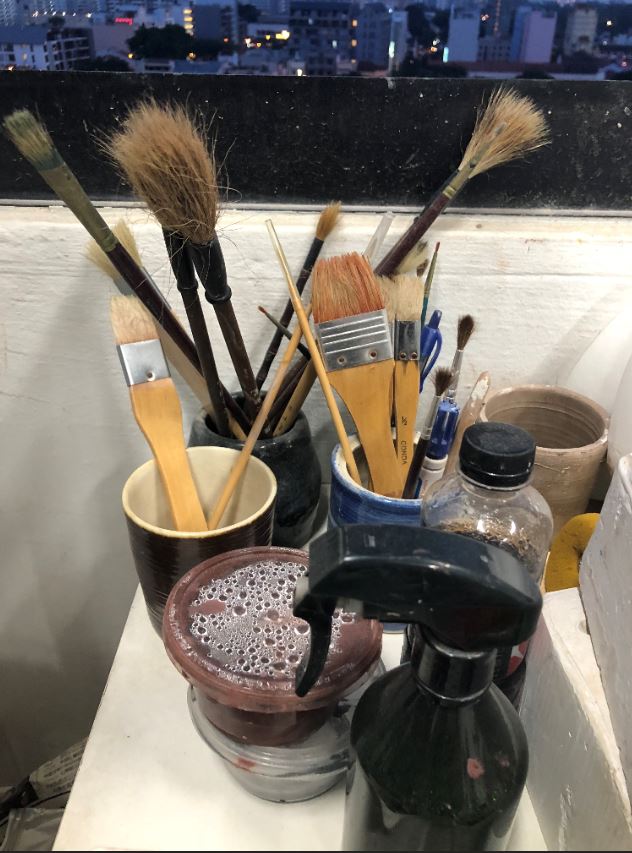
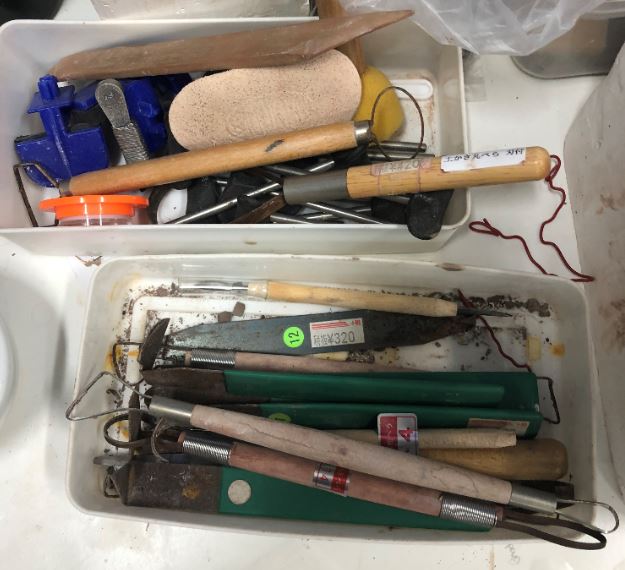
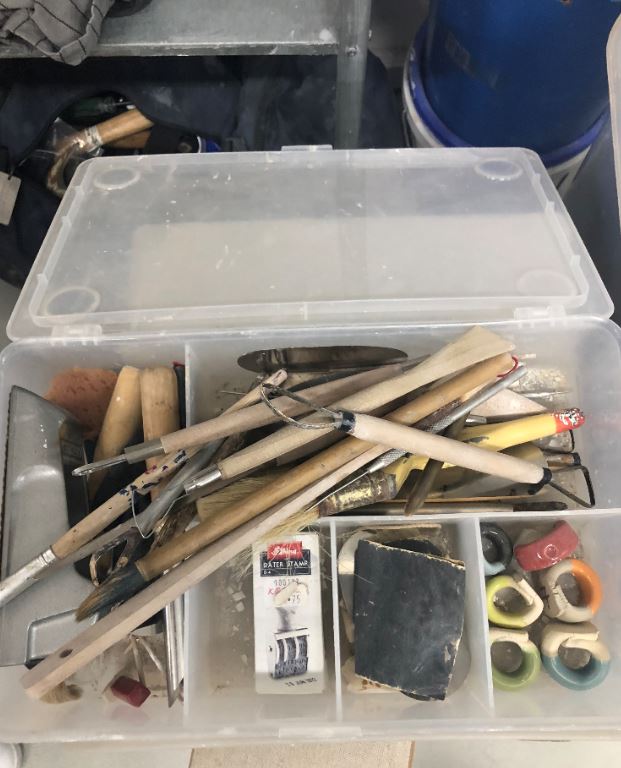
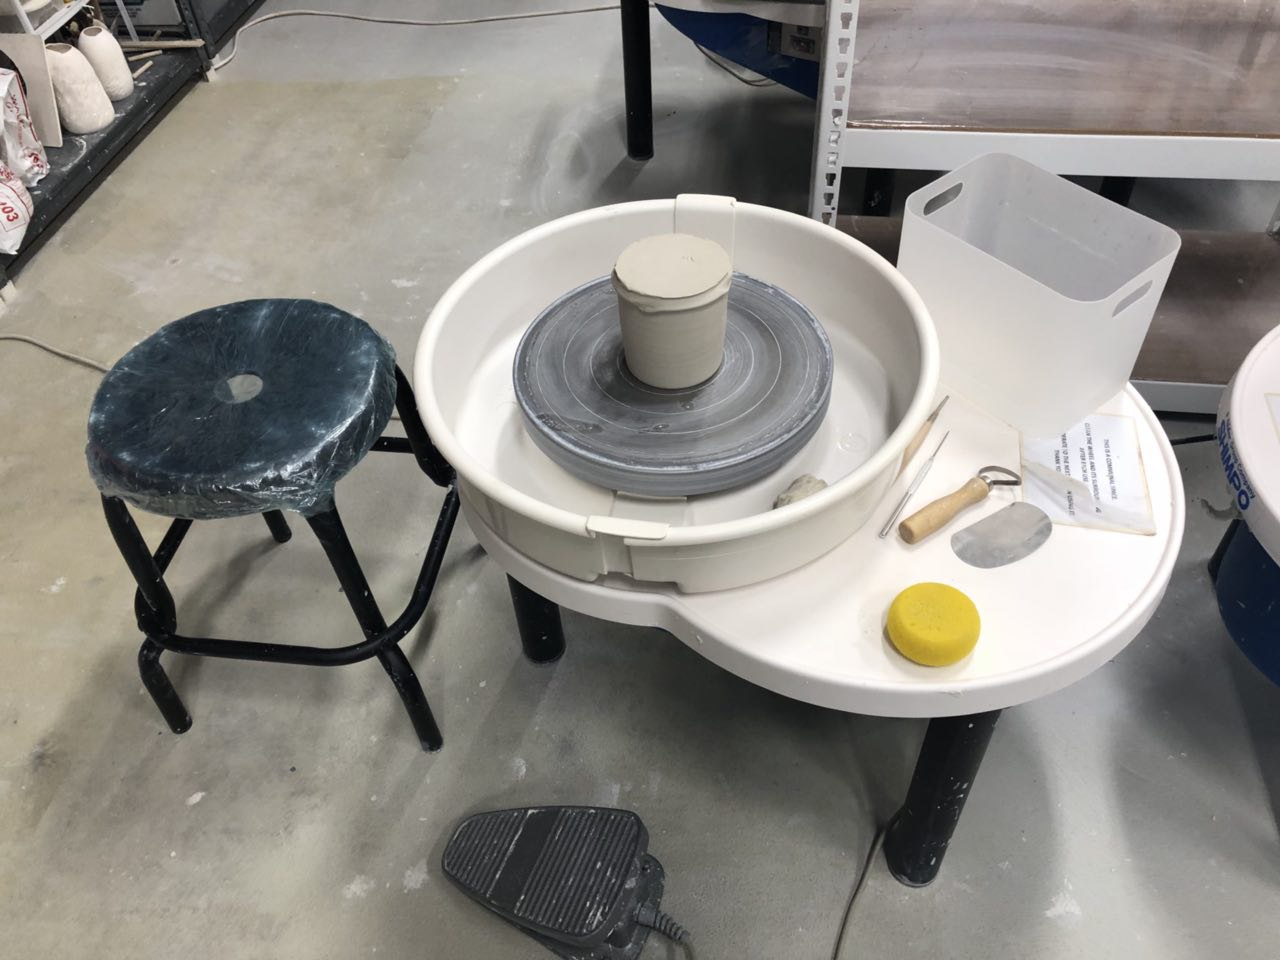
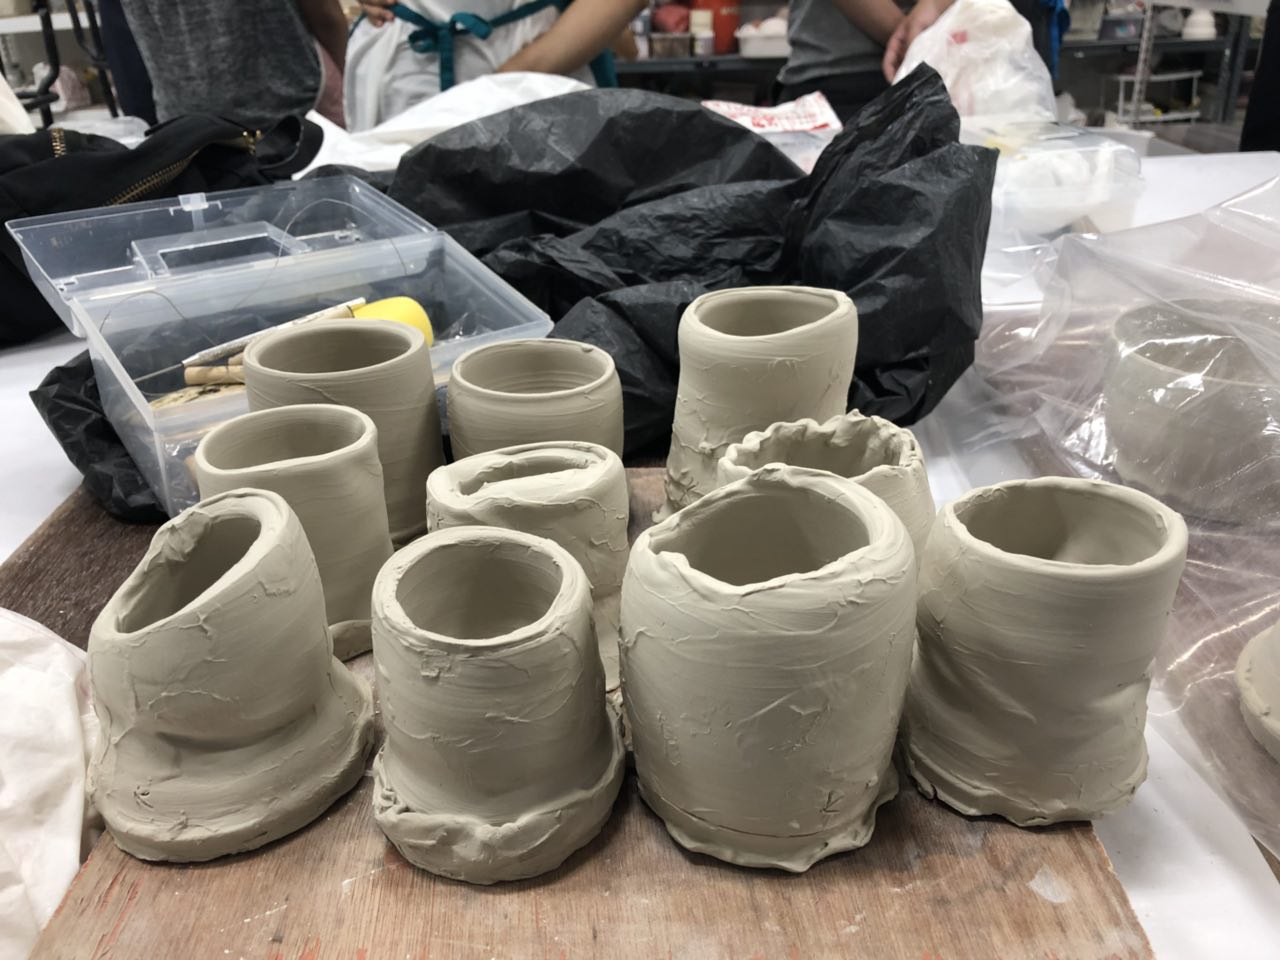
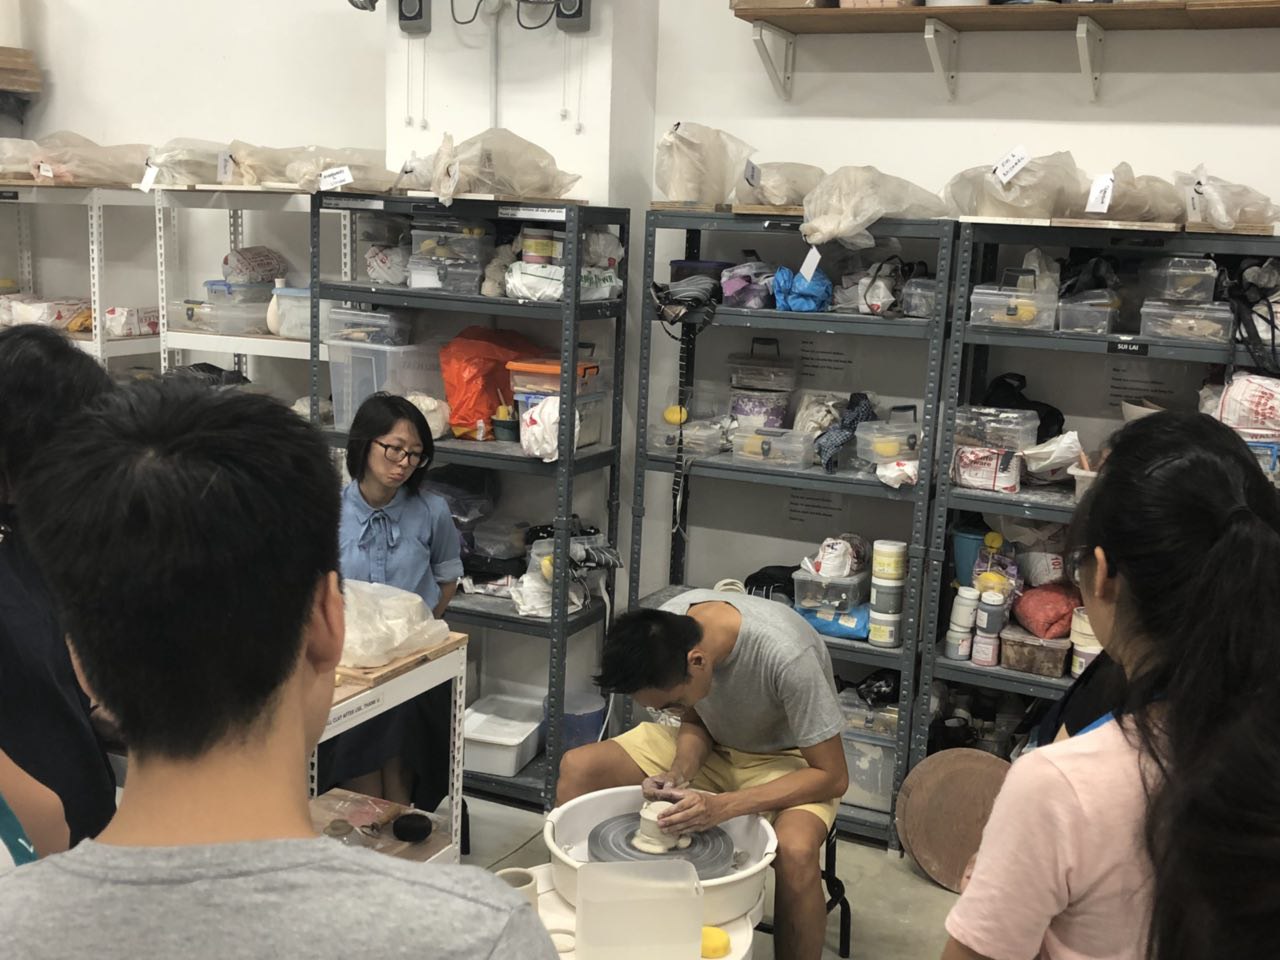
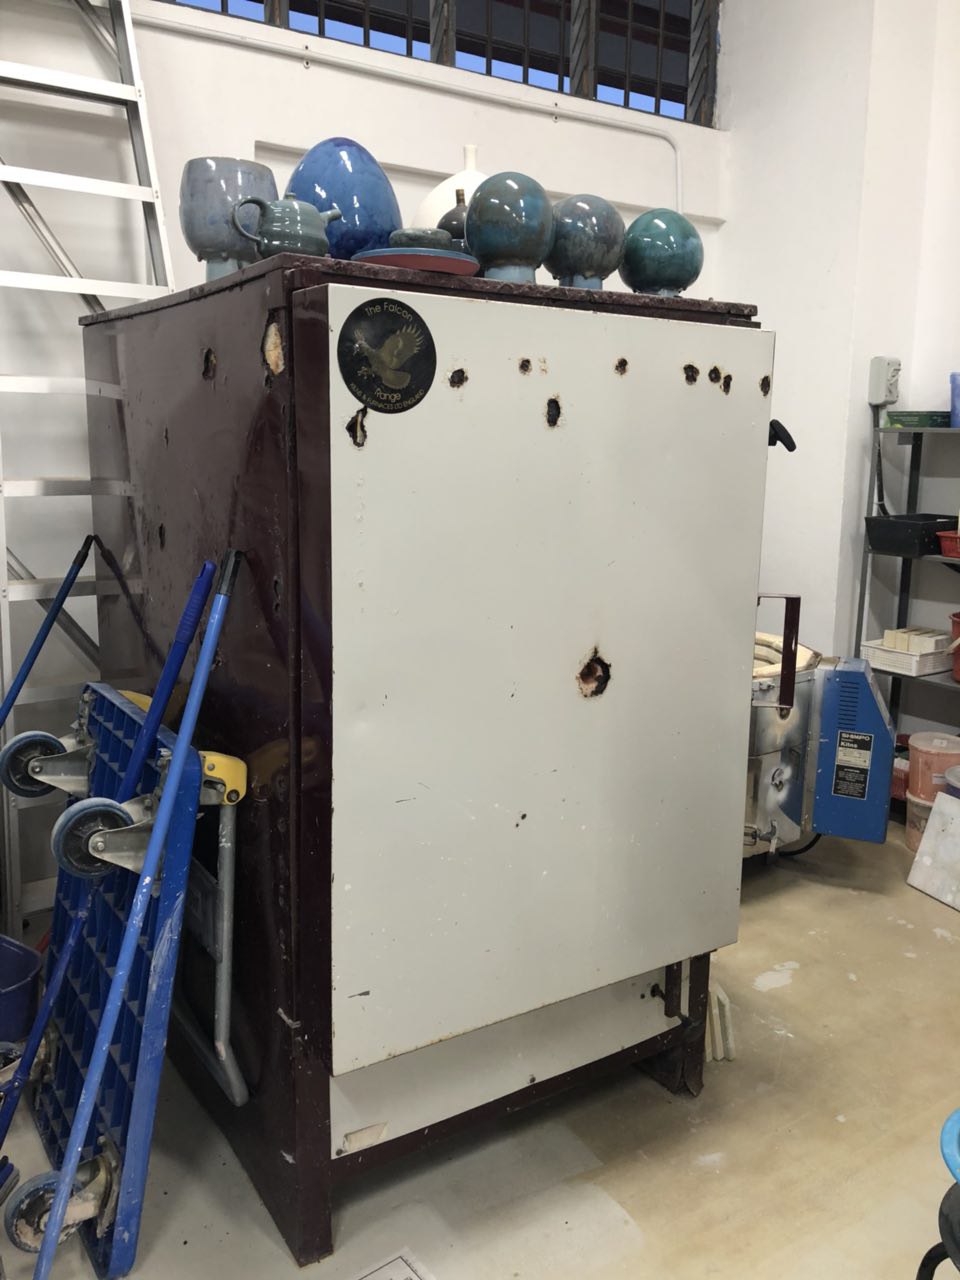
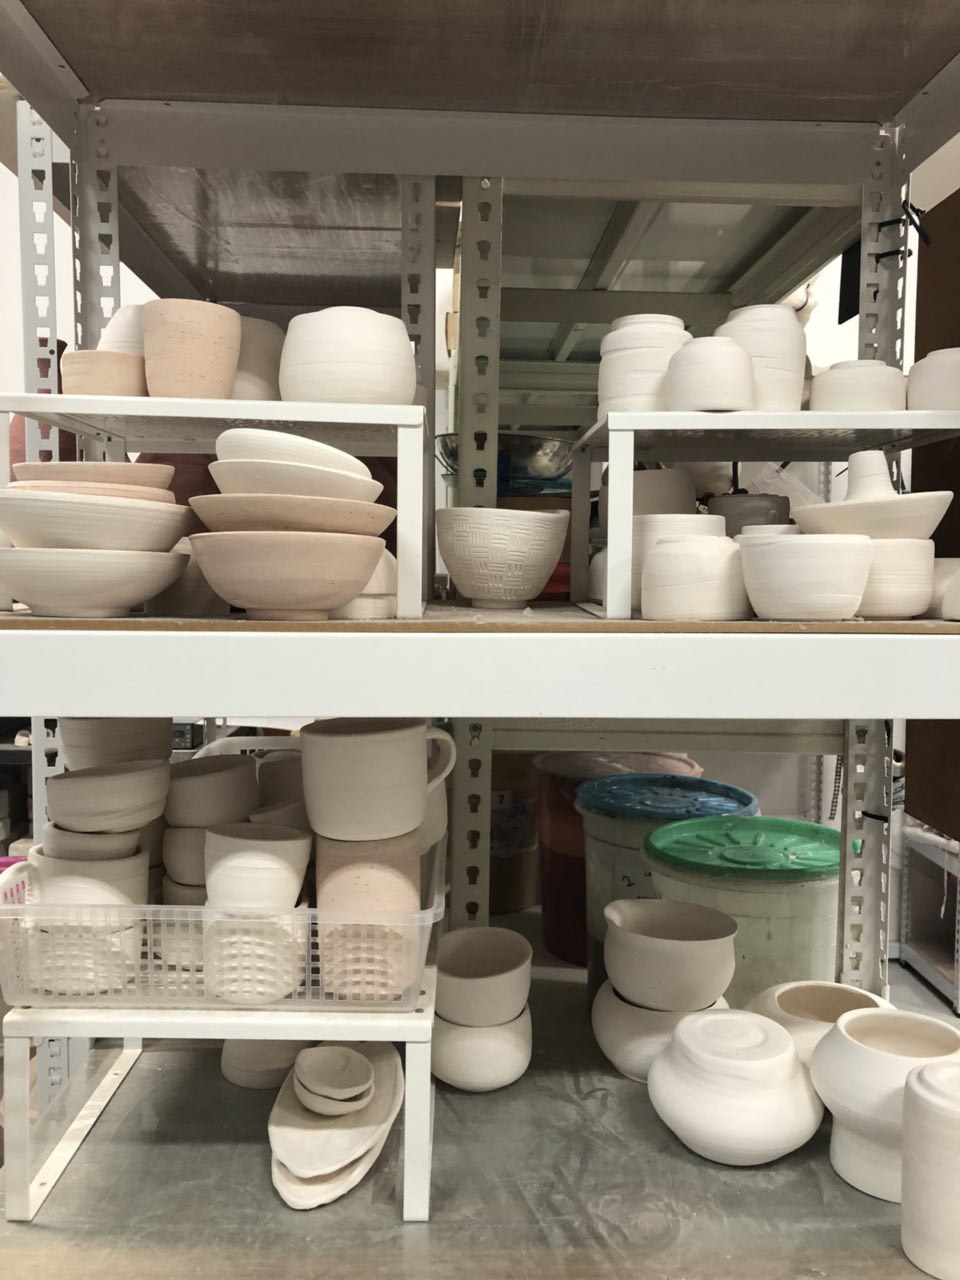
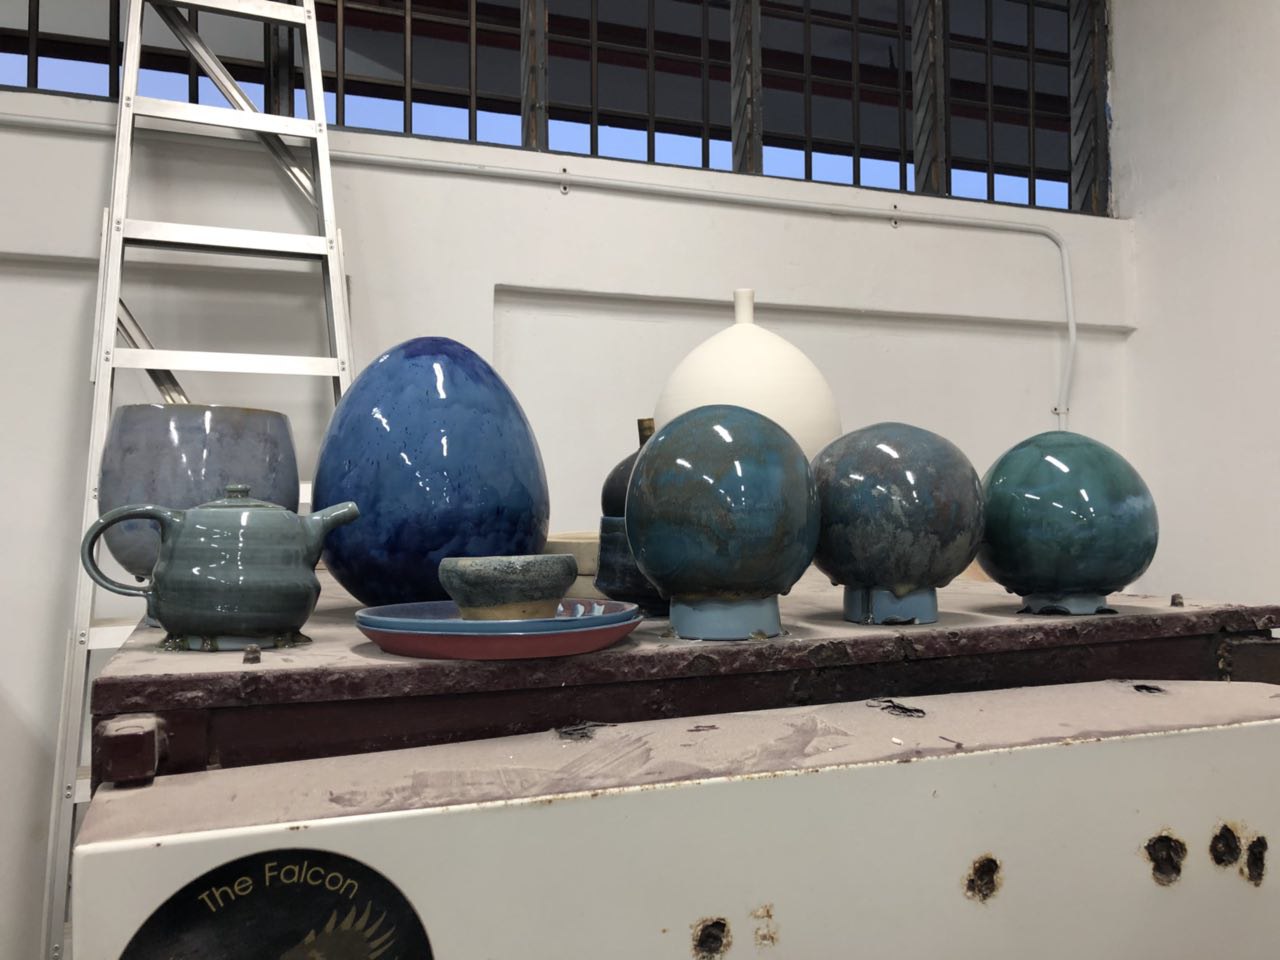
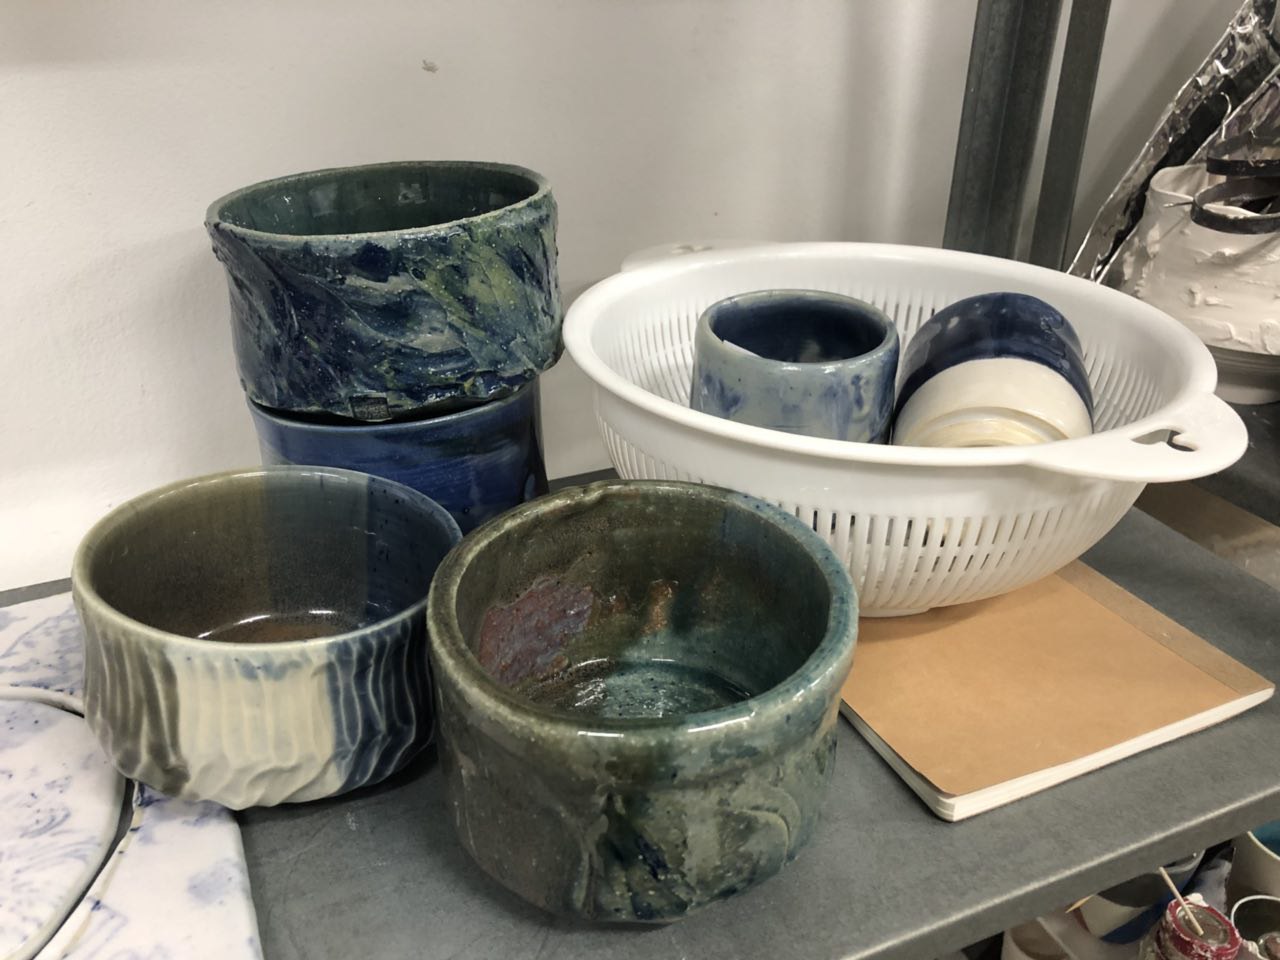
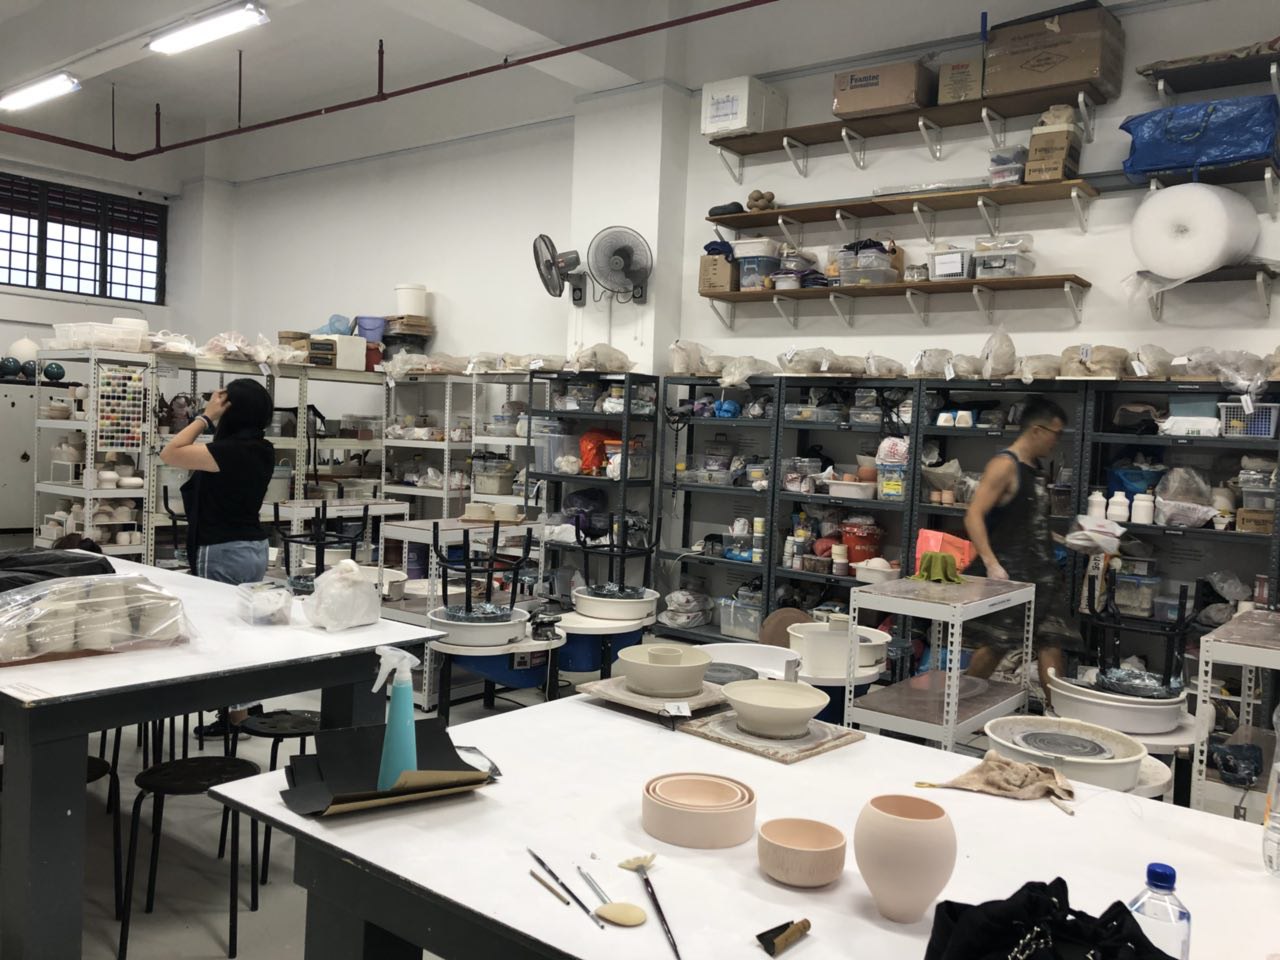
The story will focus on a male who is passionate about pottery and would like to perform street pottery to promote this underrated art. He uses a pottery wheel that works functions based on the music playing at the location. Whenever he reaches a location where there is no background music played, he will plug in his earpiece to the pottery wheel and sets the music of the location. This way, people who walk pass will be able to hear the tune he is creating his pottery to. As music consist of different tempos, there will be a stand to help control the stability of his hands which will help him to draw and carve the pottery in straight lines.
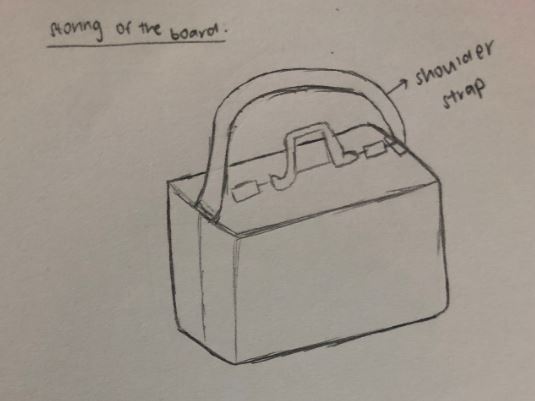
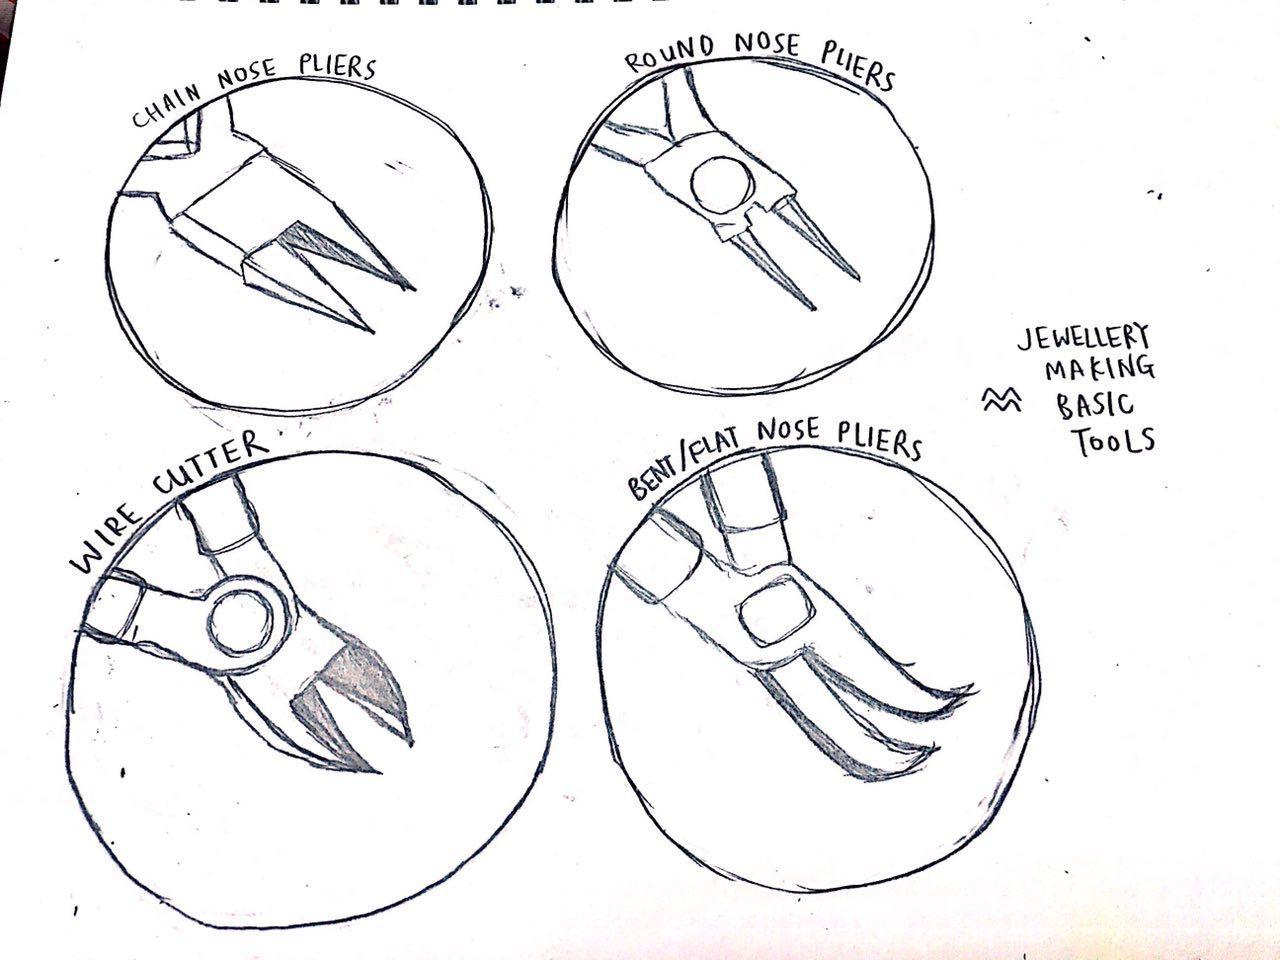
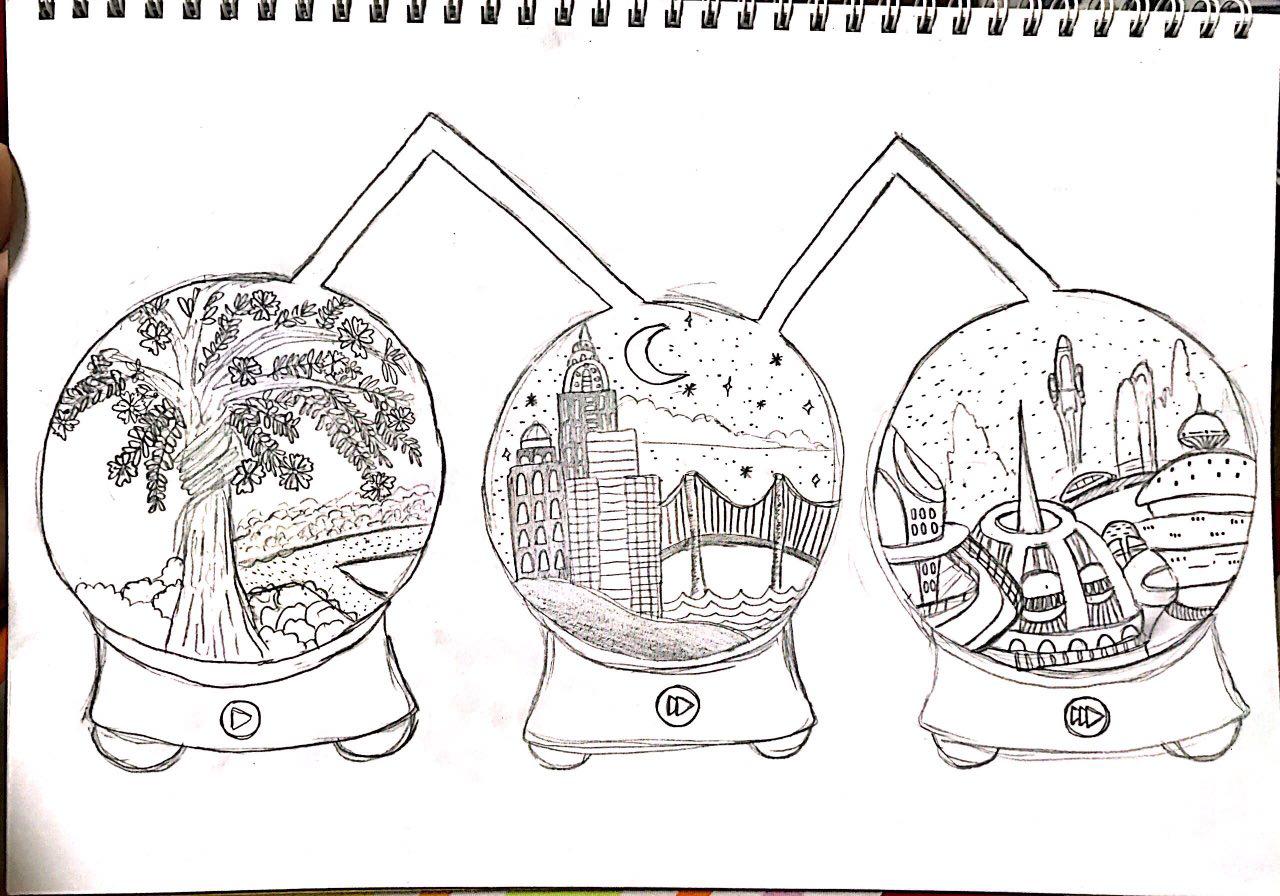
Sketch:

Share Your World – Brenda Tan

Practice 
Ceramic Art

Microfiction Story
In the year 2500, global warming is now almost fully eradicated. In order to stop the accumulation of heat, governments worked together to eliminate not just carbon dioxide emissions, but all greenhouse gases, such as methane and nitrous oxide. Deforestation and other harmful land uses that affect the Earth’s energy balance have been successfully reversed. As a result of this, the Earth is experiencing drastic climate change and now has an average temperature of -18°C. The weather in countries all around the world is now colder and drier than ever. Flowers are at the brink of extinction, and the Earth no longer looks as vibrant as compared to decades ago.

Our protagonist, Eleanor, has always been very passionate about ceramic art and she is now one of the very few ceramic artists left. Her family used to own a ceramic art cafe where people can either attend ceramic art workshops or just enjoy the ceramic art gallery while sipping their coffees. However, as the climate on Earth started experiencing drastic changes, the clay that they used could no longer withstand the low temperatures and started to harden very quickly during the throwing process. The chemical reactions between the mineral contents in the clay bodies during the throwing process is not controllable by the human hand. Thus, Eleanor’s family cafe was forced to shut down.

Eleanor’s biggest dream is to bring ceramic art back to life and she is unwilling to send it down the lane of banality. Therefore, she has been on a journey to educate others about ceramic art with her trusty one-of-a-kind convertible ceramic on-the-go backpack.

New technology
Eleanor’s convertible backpack includes the following functions: 

  1. Removable top compartment that converts into a ceramic art apron that holds all the tools she need
  2. Heating element at the bottom that keeps the clay at optimal room temperature
  3. Portable potter’s wheel box attached to the top of the backpack with atmosphere that mimics room temperature to facilitate the throwing process. Attached to the top of this box is a:
  4. Retractable tablet that stores all the photos of the past that inspired her ideation process: the tablet can be connected to the potter’s hands through his veins, which enables the potter to shape or design the clay based on the photo selected through electronic signals that are sent to the bloodstream

Sketches

Front view of backpack 
Close-up of removable apron
Close-up of portable potter’s wheel and retractable tablet 

Cultural Probe: Design and Findings – Chia Li Hui

Design probe (concept):

In the first documentation, I approached a practitioner that was making homemade snow skin mooncakes. To facilitate the kneading process, I came out with the design below. It is actually an automated heat-resistant machine hand that is used to mix the food colouring with the dough. This will avoid the dough to become sticky due to the heat transfer from your bare hands. Also, there is a switch that allows you to set the machine hand into automatic mode and the glove will knead the dough on its own. You can also control the speed of the kneading. Lastly, the height of the stand is adjustable. This will allow the glove to be set at a height that the practitioner is comfortable with. The whole purpose of this glove is to reduce the work of kneading and to refrain the dough from becoming too soft and sticky.

Instructions:

  1. Based on what you see, determine how it can help in your mooncake making process.

First person:

First thoughts:

  • Automated hand-shaped kneading tool
  • Adjustable height
  • Different levels of kneading speed
  • Heat resistant to prevent dough from becoming too sticky

Pros:

  • Reduce the amount of work needed to knead the dough
  • As many newbies face the problem of the dough becoming too sticky due to body heat, the heat resistant tool helps them a lot

Cons:

  • May not be able to get the preferred dough consistency as compared to kneading with real hands
  • Don’t think that it is possible to wash it since it is an electronic appliance -> Hygiene issues

Questions:

  • Will be battery operated or does it require the appliance to be plugged into a power socket? Personally, I think battery operated would be better as the cables that connect to the power socket may get tangled up with the tool.

Second Person:

First thoughts:

  • Is a glove that requires users to put their hands inside
  • The glove can help control the temperature when kneading

Pros:

  • It helps the user a lot as there is no need for him/her to use his/her muscles when kneading the dough

Cons:

  • Usually when you touch the dough, you should know when it is ready. However, this is automated, so you will not be able to feel the dough. Therefore, you do not know when will the dough be ready.

Suggestions:

  • The automated hand should be bigger so that it can knead even faster.

Third Person (Original Practitioner):

First thoughts:

  • At first glance, she does not know how to use it in her practice.
  • User fiddled with it for a while before asking what the purpose of it is.

Pros:

  • If it works well as what it assumes to be, it will save a lot of time and energy in the preparation process.

Cons:

  • Kneading is not just one fixed motion; The dough may not mix well if it is automated.
  • The machine can’t tell you whether it is sticky enough or not, it still requires manual work in testing it.

Questions:

  • Is there other way to set more motions? Kneading also includes squeezing and massaging the dough, is there a way to set the automated hand to do them as well?
  • Do you pre-set the time for the automated hand to work? Is there like a timer?

Cultural Probe: Design and Findings – Brenda Tan

For this assignment, I wanted to design a convenient and portable tool for pre-school teachers to store their teaching materials. Thus, I used a toolbox my cultural probe kit as it can also double as a toolbox for them to use and carry around in between lessons. The subsequent segments of this post will explain the contents of the cultural probe, tasks for the teachers, as well as my findings and personal evaluation. 

Top view of cultural probe kit 

Contents 

I used a transparent toolbox to hold the contents of the kit so that the teachers can easily locate the materials they need during lessons. Also, during my trip to the pre-school centre previously, I learnt that the teachers used baskets to store their writing materials. It was quite inconvenient for them as there were no handles for them to grip on to when they carried it around. Thus, I decided to use a toolbox with a handle for my cultural probe. My cultural probe kit includes the following items: 

Fig 1: Contents of cultural probe kit (with labels)

Unfortunately, I could not include any cameras or electronic devices in the kit because I was told that the use of electronic devices is strictly prohibited in classrooms because electronic devices can distract the children and divert their attention away from the lesson.  

Explanation of contents and tasks 

My cultural probe kit included an instruction manual as follows:

Cover page
Page 1: Introduction

Instructions

Page 2: Brief instructions 

Page 2 of the instruction manual includes some brief instructions that they should follow:

1. They should use the toolbox for one full day at the pre-school and use it to store their teaching materials.
2. Prompts them to refer to pages 3 and 4 for more instructions on the tasks they need to complete.
3. They can drop me a text message or call should they have any questions. 

Task 1

Page 3: Instructions for task 1

The teachers will find the instructions for task 1 on page 3 of the instruction manual. On the left, there is a box indicating the materials they need from the kit to complete the task. For task 1, the teachers are required to record the following in the (1) diary using the (7) pens and highlighters provided after every lesson (refer to fig 1): 

1. Describe your new experience with the toolbox. 
2. Pen down and pros and cons of the toolbox, if any.
3. Pen down your thoughts and emotions during the lesson.
4. Include the date and lesson at the top of each journal entry. 

Rationale for task 1: To understand their day-to-day schedules better, and how the toolbox improved/ hindered their teaching experience. 

Task 2

Page 4: Instructions for task 2

The teachers will then find the instructions for task 2 on page 4 of the instruction manual. There is a box indicating the materials they need from the kit to complete the task. For task 2, the teachers are required to complete the following at the end of the day:

1. Rate your day out of 5 with the (5) colourful star-shaped stickers provided. Paste the stickers on the (3) post-its provided. 
2. Explain briefly on the same (3) post-it why you rated your day as such.
3. Stick the (3) post-it on the back of the diary entries for that day.

Rationale for task 1: To understand their day-to-day experiences better, and the difficulties they face at school, so that I can improve on the tool design.

Practitioner’s experience with the cultural probe  

I only managed to get one teacher to use my probe for two full days. However, also managed to let two other teachers mingle with the cultural probe kit for a few minutes and collated their comments afterwards. Below are my findings. 

Diary entry 1
Diary entry 2

Although the instructions stated that the teacher had to write diary entries after every lesson, she could not do so due to time constraint. She explained that she needed to bring the children from one classroom to another in between lessons, and she only had time to write the diary entries during the children’s nap time from 2:00pm-3:00pm.  

Post-it with ratings

As for the post-its, the teacher forgot to do it on the first day. Therefore, there was only one post-it, which was done on the second day. 

Findings

Below are the overall pros and cons of the toolbox that I collated based on the findings from the participant as well as the two other teachers:

The teachers are listed down some suggestions for improvements as follows:

1. Can consider adding a longer strap to the toolbox so that the teacher can carry it around instead of holding the handle. 
2. Can divide the toolbox into different sections i.e. top and bottom tiers so that the things will be more organised.
3. The toolbox’s buckle can be more secure.
4. Can perhaps use a translucent toolbox instead of a fully transparent one so that it will be less distracting for the children.

Personal evaluation

  • I should have paid more attention to the teacher’s busy schedules while designing their probes. For example, one diary entry per day would have been more ideal given their erratic schedules. 
  • Initially, I wanted to use a toolbox with dividers i.e. top and bottom tiers. However, I could not find a toolbox with that design and thus settled with one without dividers, and it turned out to be a big problem pointed out by the teachers as well. 
  • This cultural probe really allowed me to understand the day-to-day experiences of the teachers, and their responses gave me great insights on how I can improve on the tool as well.  

Explore Practitioners 3: Ceramics – Clare Chang

Ceramics and pottery have been around since the Neolithic period. Moving into the 21st century, it has definitely evolved into a much more refined form of art. The techniques, process and tools alike have also evolved to become more sophisticated. Additionally, the uses of ceramics/pottery pieces have also progressed from solely practical uses to artisan pieces.

Process Documentation

The practitioner I followed was giving a lesson that involves making wheel thrown ceramics. 

Steps:

  1. Wheelthrowing – this first step is using clay to create the shape that is desired.
  2. Trimming is the second stage that Alvin (the practitioner) went in depth into explaining. This process is to transform the piece into different shapes and sizes and can also alter the texture. 
  3. When the trimming is complete, the third step would be allowing the piece to dry before it goes forbisque firing. Letting it set would allow the moisture in the clay to evaporate. At this stage, it would be bone dry.
  4. The next step would be bisque firing. Here, the clay piece is put into the the film and the clay is dehydrated to prepare it for glazing.
  5. Glazing (to add colour/texture to the piece)
  6. Following this, it goes into the kiln again for a second fire before completion. 
trimming

Tools Used

At Alvin’s workshop, he went into detail on step 2 which is trimming and here are the tools that are used at this step.

  1. Ribbon Trimming tools
  2. Hook Trimming tools
  3. Scraper 

Worksite Documentation 

A ceramic artists’ workplace is definitely not portable. This is due to the high amount of heavy equipment that is used such as the pottery wheel and also the kiln. Additionally, to carry smaller yet bulky items like the glazes would be a hassle. The worksite also houses a large number of artwork both finished, in process and also the actual clay itself. The worksite also requires a water outlet and many power sockets to power the kiln and potter’s wheel. 

Pain Points

At the worksite, there were other ceramic practitioners. They said that the difficulties of practicing ceramics in Singapore is that it is not a super affordable or accessible practice. Also, the transition from a newbie to a master takes many years and also a lot of patience. 
In the technical aspect, creating “successful” clay works also involves plenty of trial and error – what you expect may not always be what you get. For example, in the process of throwing, you may end up with another shape that you have not anticipated. Or when you glaze, the colour and texture might be different after coming out from the kiln. 
Also, precision and steady hands are needed while doing refinement works like trimming. This is difficult and only comes with hours of practice.

Explore Practitioners 2: Jeweller/Beading – Clare Chang

The practice of jewellery is one that involves an artisan that uses a variety of materials to create wearable pieces such as bracelets, earrings, rings, and necklace. However, they might also expand this practice to creating jewellery pieces for bag adornment (like key chains). Jewellers are also skilled craftsmen in repairing and appraising jewellery pieces. 

Process Documentation

For a jeweller, the process of creation starts from ideation. This means that the jeweller has a to brainstorm after drawing inspiration from his/her environment. The jeweller I observed mentions that she feels that in her day-to-day life, she is able to draw inspiration. Such as from the weather, like rain drops or the shapes of clouds. In the following stage, is idea finalisation and then the technical work comes in. 
Steps:

  1. Preparing the materials needed by gathering the related materials (the gem stones, wires etc.) 
  2. Experimentation stage/Assembly: this is where the skeleton of the piece comes together
  3. Modification and refinement: this is where the piece of jewellery is almost in its final stage. The jeweller makes the choice of editing her initial design and testing it physically since it is now in full scale and completely tangible  
  4. Final Touches and Polishing: as the jewellery piece is finished, the jeweller is now ready to end all wires and buff the piece with a polishing cloth to ensure that the piece is free from any unwanted working materials. 

Tools Used

The main family of tools that a jeweller utilises are:

  1. Wires (of different thickness, materials and colours) 
  2. Beads/Gems 
  3. An assortment of cutters (Pictured Below) 

Worksite Documentation 

A jewellers worksite as I observed, is also portable. However, the main important thing that has to be available is.a sturdy, stable working surface.  The jeweller usually keeps all her items in a large tool box that she individually packages her different stones/beads. She uses a premade and store-bought tool box to segregate her items such as wires from ring moulds to beads and also keeps the cutting tools together. 

Pain Points

When asked, the jeweller mentioned that this is a craft that is honed over time. There are many minute details that someone first starting out would find tedious and difficult to pick up, let alone master. These are things like the technical skills to being an ideation to life. Wiring is something that is not easy to the beginner. 


Also, the jeweller mentioned that with age, beading or jewellery work could becomes more difficult. She compared it to the practice of sewing, where having to thread the wire through a small opening in beads might become tough for older people who have shakier hands and declining eyesights.

Explore Practitioners 3: Ceramics Clay (Firing) – Chia Li Hui

As I went to a pottery workshop for my second practitioners, I decided to look for ceramics clay workshop next. Although most people find that they are the same thing, there is actually a slight difference between them. Ceramics are not only made up of clay, it also includes other materials like glazes. On the other hand, pottery is solely made up of clay. For this documentation, I will focus on the firing process; The aim is to heat the ceramic clay to the optimal level of melting.

Process Documentation

Steps:

  1. Throwing the ceramic clay
  2. Trimming it into your desired shape
  3. Apply wax at foot ring of the clay.
  4. Bisque Firing – To convert the greenware into glasslike. As greenware is fragile, it is important to deal with it carefully when loading it into the pottery kiln. From there, increase the temperature slowly as if it is heated too quickly, it may cause the clay to burst.
  5. When the clay reaches approximately 499°C, the clay is completely dehydrated – the pot is now a ceramic material. However, continue firing until it reaches 944°C, the ceramic will become less fragile and will be prepared to accept the application of glazes.
  6. Turn off the pottery kiln and wait for the ceramic to cool before removing it.
  7. Apply a layer of glaze using the paint brushes to the cooled ceramics and leave it to dry.
  8. Load into the pottery kiln for the second round of heating: glaze firing.
  9. Slowly heat the pottery kiln to the proper temperature to bring the clay and glazes to maturity and then slowly cool it again. Same as step 5, wait till the ceramic is cooled before removing it.
  10. The ceramic should be rock-hard and water-resistant now.

Tools used

  1. Wooden Carving tool
  2. Pottery Kiln
  3. Glaze Buckets
  4. Paint Brushes
  5. Sponge
  6. Wax

Thoughts

I find the worksite really big and spacious which is easy for us to move around. After attending this workshop, I realised ceramics clay art is something that needs lots of practice and consist of many different skills. I really respect ceramics clay artist as it takes a lot of patience to even get a hang of the different skills. I was really glad to be able to attend this workshop as I find that this workshop is an eye-opener for me and at the same time, participate slightly in the process.

Explore Practitioners 3: Ceramic Pottery – Brenda Tan

This afternoon, I participated in a ceramic pottery class. In particular, today’s class taught us how to trim a pot. Before the class started, I had the wonderful opportunity to sit down for a short interview with the practitioner, Alvin, who gave me a crash course in ceramic pottery making. 

Practice Documentation and Tools Used 

Step 1: Preparing and centering the clay, and creating the shape you want 

Tools used:
– Clay
– Potter’s wheel

First, the practitioner has to prepare some clay and place it on the wheel to start moulding it into the shape that he wants. This process is also known as throwing, which refers the entire activity of shaping the clay on the potter’s wheel. 

Vessel-shaped clay on the potter’s wheel

Step 2: Raising the walls

Next, the practitioner needs to pull the clay apart to create a dome and start raising the walls of the dome. Once it’s done, set the clay aside for it to dry a little. The clay shouldn’t look perfect, in fact, it should look very uneven. The clay should look something like this:

Step 3: Trimming 

Tools used:
– Loop, wire and ribbon tools 

Practitioner’s toolbox containing loop,
wire and ribbon tools 

The third step is trimming the clay to even it out. Once the clay is almost dry, place it back onto the wheel. Use three small wedges of softer clay to hold it in place. Get the trimming tools and gently shave away layers of clay until the shape is perfect. Once the top is done, place it upside down and do the same until the bottom has a nice, even foot to stand on.

Alvin teaching the students how to trim

Step 4: Firing

Tools used:
– Kiln 

Kiln used for firing

When the clay is completely dry, it will be placed in a special oven called a kiln, which bakes the clay at very high temperatures. After the clay is baked, it will turn from grey to a slightly peachy colour as shown here: 

Step 5: Glazing 

Tools used:
– Paint brushes
– Glaze 
– Measuring cups and mixing tools 

Different coloured glazes to choose from 
Measuring cups and mixing tools

After the clay is fired, colour can be added to it using glaze, which is a special mineral-based paint that turns into a smooth, glossy surface for the final product. 

Glazed clay

Step 6: Second round of firing 

After the glaze has dried, the clay needs to be fired again in the kiln to make the colours hard and glossy. Here are some final products made by the practitioner and other students: 

Worksite Documentation

The worksite was generally messy and cluttered, but the shelves which stored the clay, tools and unfinished products were quite neatly organised. Each practitioner also had their own toolbox which contained pottery tools such as trimming tools, paint brushes and sand paper. 

Photograph of worksite

Pain Points

Since I only had the chance to try out trimming, I could only document my experience for that portion of ceramic pottery making. In my opinion, trimming is one of the most challenging steps because it requires a lot of focus and hand stability. If you are not careful, you may cut off an uneven portion and you will be left with a slanted piece of work. Also, if your hand loses control after a while, you may drop the trimming tool in the potter’s wheel. In summary, trimming requires a lot of patience and determination. 

Practice Storyworld – Clare Chang

Genre:

Dystopian/Sci-Fi/Thriller

Story:

In a utilitarian world in the Year 2374, this philosophy has been advocated for years on end. In this dystopian reality, criminal punishment is dealt with in a different way. 

Instead of sentencing these criminals to life in prison, death sentence or even in inhumane penitentiaries, they are placed in a whole different ecosystem. Since technology would be incredibly advanced, criminals are rehabilitated here to before coming back to society as functioning members.

This device is inspired by snow globes. With technology, these people are shrunk and placed within each snow globe. Each contains an entirely different ecological community from the next. 

The first – represented by floral and fauna is to bring inmates back to basics and to live primitively. This is where they are re-learn basic human interactions and fundamentals such as caring for the environment, and to deeply connect with nature. This is the first stage as they are extracted from the unavoidable fast paced world of technology and innovations. Here, there are no other man-made and technological distractions. 

Once they have completed all the requirements in the first globe, they are transported to the second globe – where basic technology, more modernised sights and surroundings are introduced. At the same time, everything that they experience while in these environments are closely monitored by a group of authorities that act as their carers. 

Finally, once they have adapted to life in the second globe and have picked up more advanced socialising and living habits, they would be transported to the third. This third globe represents what I see the future world to be. The third and final globe is a microcosm of the reality in Year 2374. Inmates here would adapt and learn to be fully functional, contributing and respectful citizens before they can be released from this 3 snow globe system.

The City of Mizu

Important Technology

  1. Shrink Machine Technology
  2. Advanced Ecological Technology 
  3. Advanced Monitoring Devices 

Method

Visualised and narrated through a short film/video

Exploring Practitioners 1: DJs – Clare Chang

DJ-ing is a practice that has grew in recent years alongside the advancement of technology. I love how music connects people through our auditory while the whole process of DJ-ing extends to our visual and even somatosensation (from the vibration of beats etc). Therefore, my first practitioner of choice is a DJ. I reached out to an acquaintance who is a self-taught DJ. 

Process Documentation

For a DJ, a majority of prep work is done before performing live. This involves creating a playlist that is carefully curated according to the upcoming event and also to showcase teh DJ’s personal style. To put simply, the DJ has to take into consideration the BPM (beats per minute) of every song. From there, they adjust and sequence songs accordingly. As the DJ suggested, transitioning from one song to another smoothly, is quintessential. This can only be done with a prior knowledge of the beats of the song and if they do not match, then it has to be adjusted with the many tools and functions of a DJ set. 

Steps:

  1. Preps through background work of set/playlist
  2. Uploads playlist into a third party application on their laptop – a Record Box software 
  3. Set up the tracks and plug into an audio system
  4. Live manipulation (with different effects) begins! 
Record Box Software

Tools Used

The main tools that a DJ utilises are:

  1. CDJ with vinyls 
  2. DJ Mixer 
  3. Headphones 
  4. Laptop
  5. Audio Cables and Speakers
  6. Microphone (optional) 
  7. Table (to place entire turntable setup on) 
Overview of Whole Setup
Table, Cables, Audio Speakers, Plugs, Microphone 
Electronic Vinyl
DJ Mixer (controls effects/volume etc)

Worksite Documentation 

A DJ’s worksite as I observed, is portable. However, the main important thing that has to be present are electric sockets/plugs.  The DJ set (namely the CDJ and mixer) can be folded and portable as a luggage. This aids in the mobility of equipment and the protection of  these highly expensive tools (one entire set could cost around $10,000!). 

Pain Points

As explained by the DJ, the practice is one that has an extremely steep learning curve. The mastery of using the equipment and ease of it only comes with practice and experience. Also, we went through some of the rookie mistakes that are commonly made when one starts out:

  • Not mixing properly (meaning that it is off beat or off BPM)
  • Failure to sync BPMs during transition from one song to the next 
    • Can be rectified through use of the vinyl (if error is not drastic)
  • Forgetting to shut audio going out to the house while prepping for the next song (meaning, the sound from the headphones intended only for the DJ is played to everyone else)
  • Usage of wrong part of the song to transit
Live Demo 🙂