Documentation for Prototypes vs Models – Clare Chang

Prototype Creation Process Creative Practice 

Pottery/Ceramics

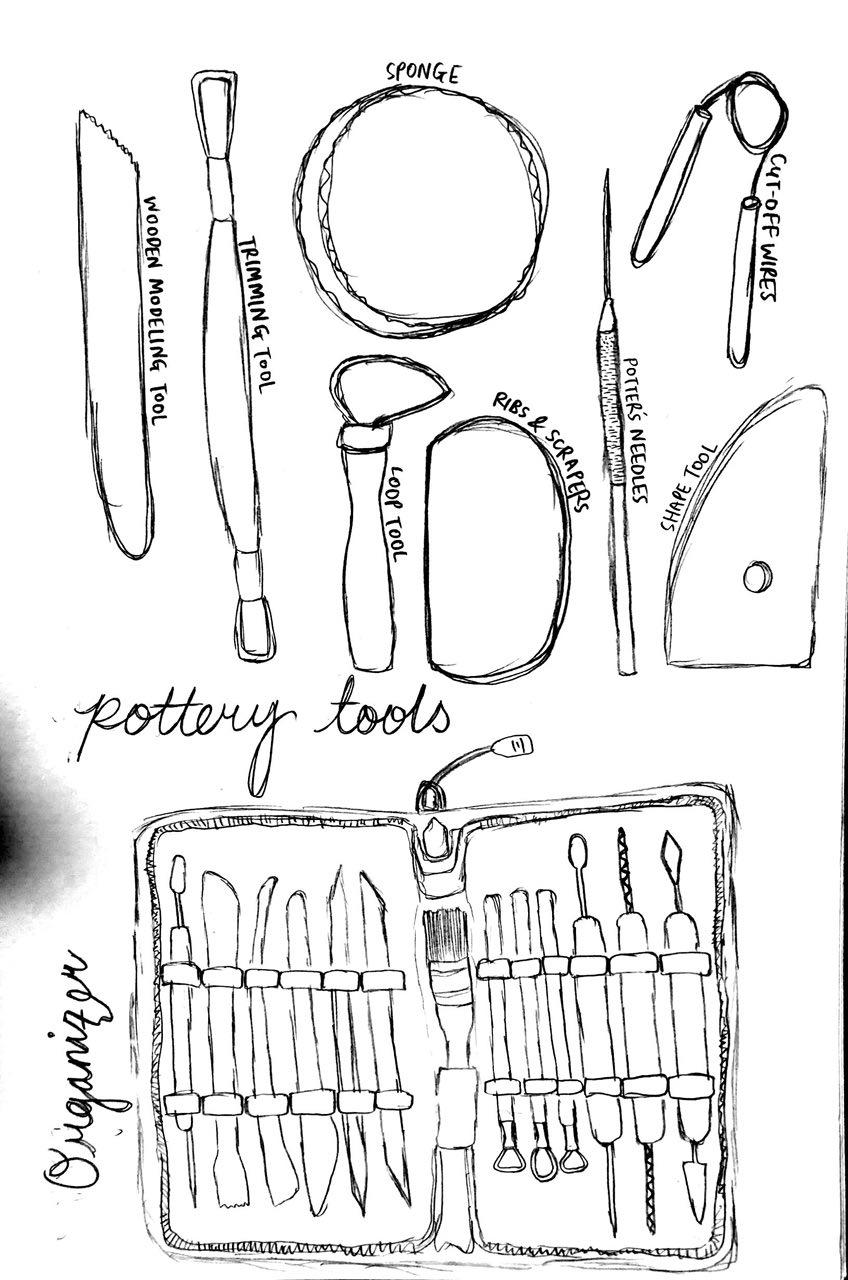
Tools Used

  1. Wooden Modelling Tool
  2. Trimming Tool
  3. Loop Tool
  4. Sponge 
  5. Ribs and Scrapers
  6. Potter’s Needles 
  7. Shape Tool
  8. Cut-Off Wires 
  9. An organiser

Ideation for Prototype 

The idea for this prototype derived from the potter’s difficulty in using an organiser to store their tools and also use during their practice. This is because the organiser would get dirtied easily with bits of clay. Additionally, there is also a hassle in pulling out the tools when all of them are jumbled up in a pile on the work table. Therefore, for this prototype, it aims to help ease these two difficulties.
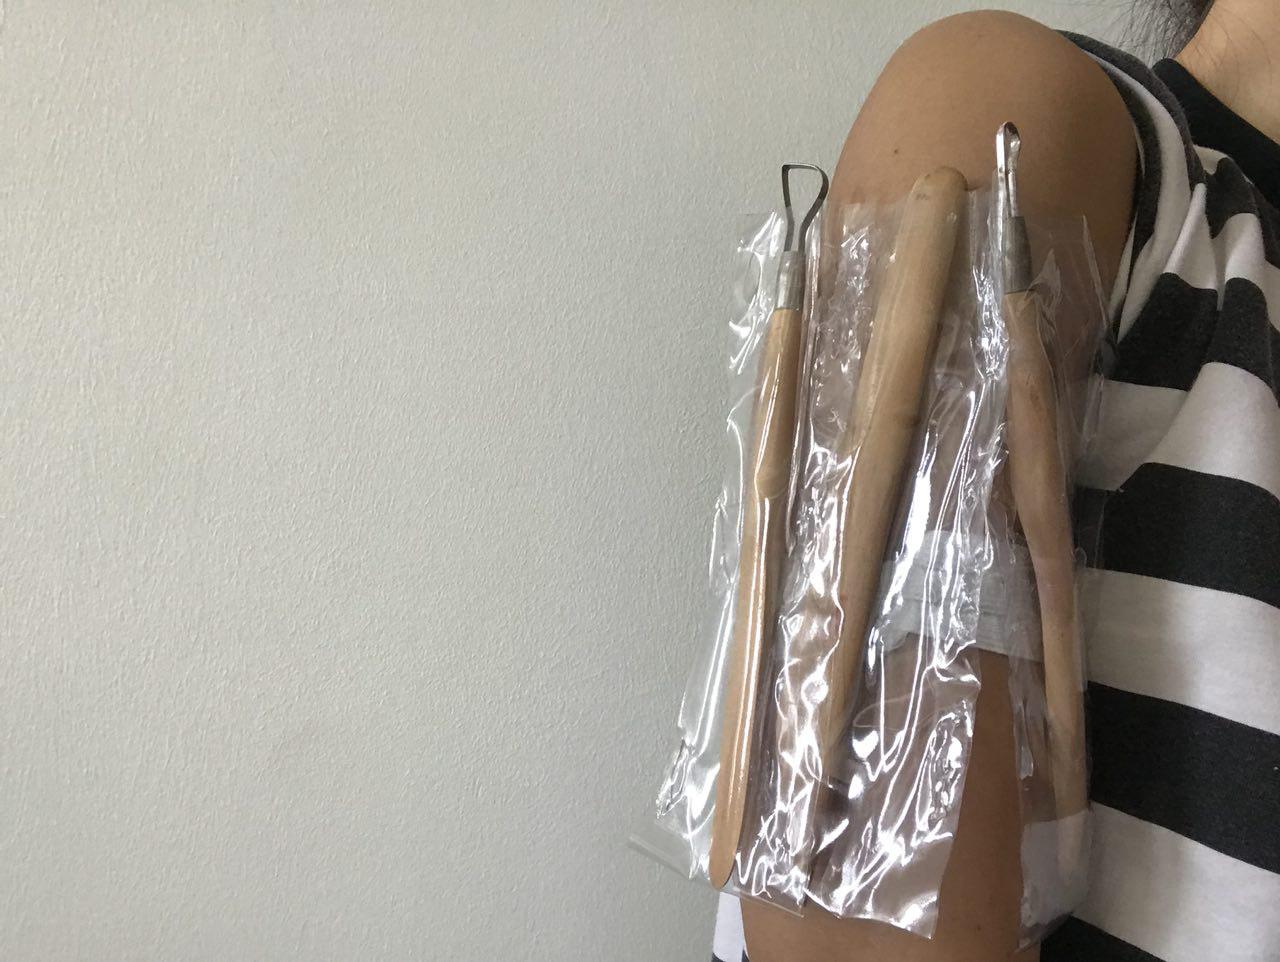
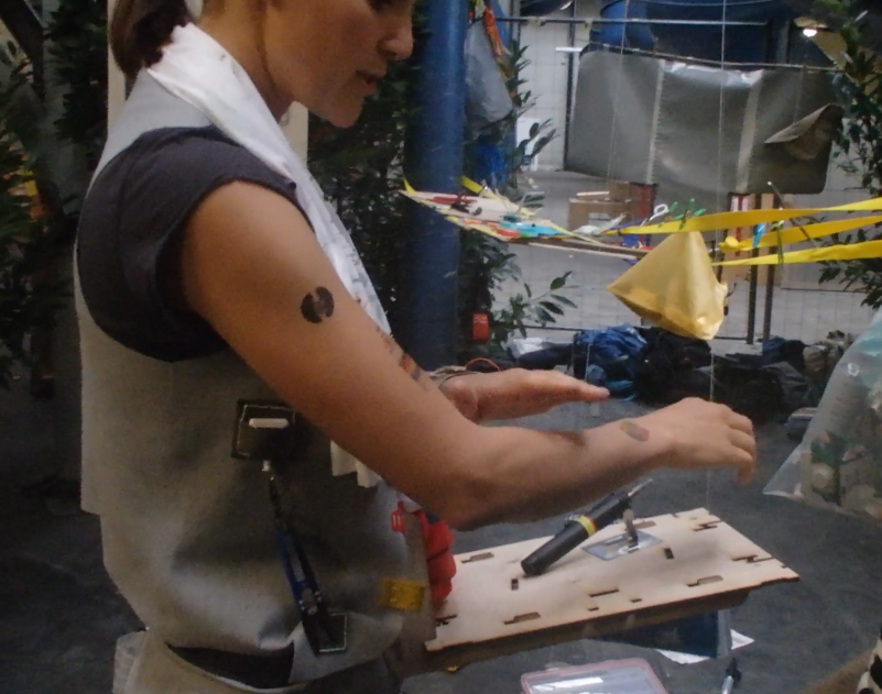
Firstly, the arm band that I sewed together is using an elastic strap, this is to ensure that people of different arm sizes will be able to use it with less discomfort. The placement of having it on the upper arm instead of other places such as the lower arm, leg, or even waist is because the upper arm is the least obstructive area. The lower arm would get in the way of the potter’s work, the waist would also be an obstruction and safety hazard if the potter decides to sit or bend down. Lastly, the leg would be the furthest and most inconvenient for the potter to access.
Also, the prototype is also created with water resistant pockets that are not sewn shut at the end so the potter is able to easily wash the tools and let the water drain out. For this first prototype, there are only 3 tools available. In future iterations, I hope to redesign this to be able to fit more.

Prototype 
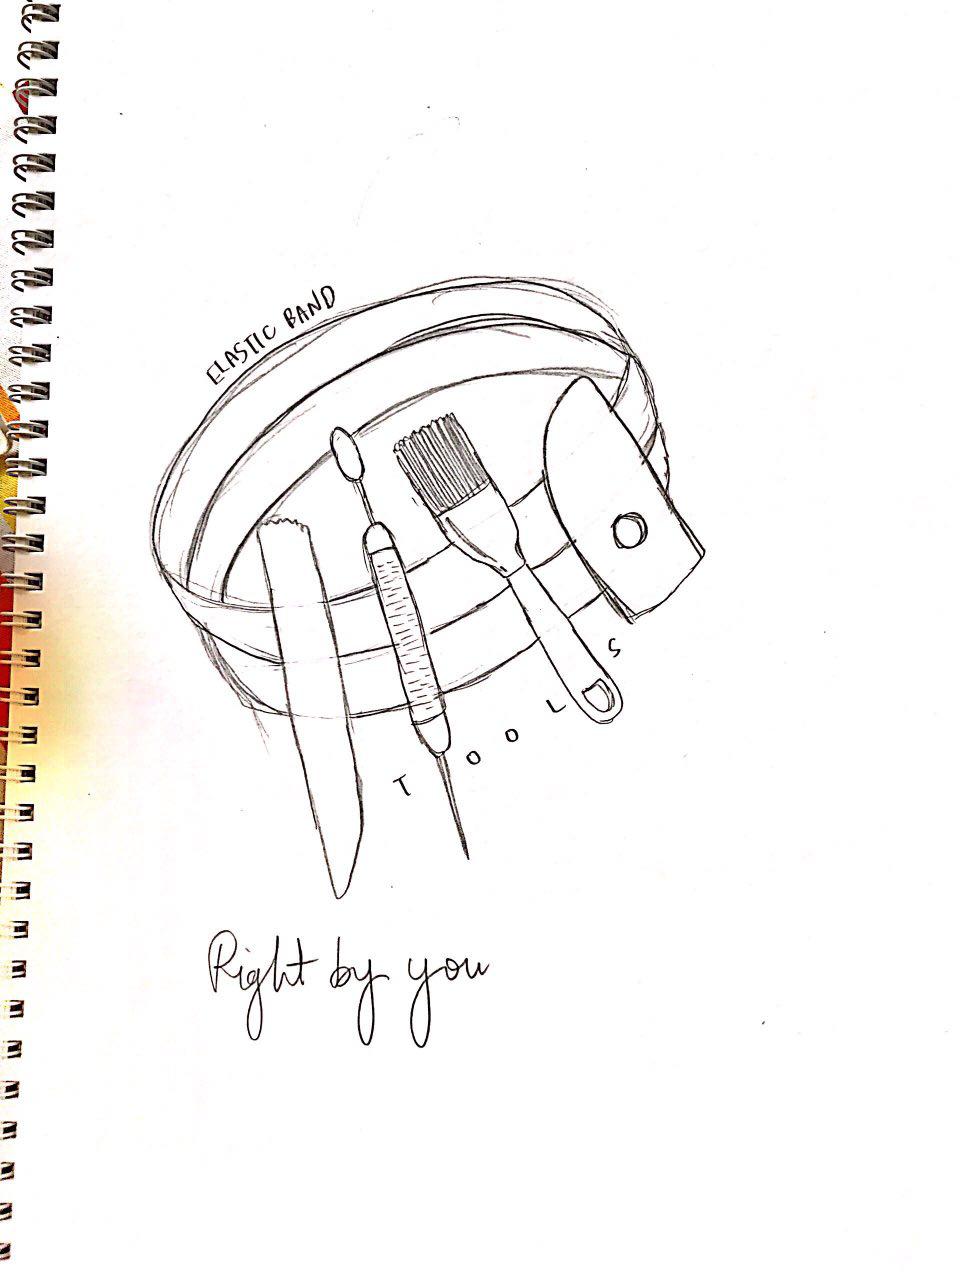
Prototype Design Idea
Prototype Creation

Model Creation Process

Creative Practice 

For the model, I challenged myself with another creative practice which was Yoga. This was a challenge because yoga is a practice that requires a lot less tools. 

Tools Used

  1. Yoga Mat
  2. Yoga Blocks

These are the two basic tools used during a yoga practice.
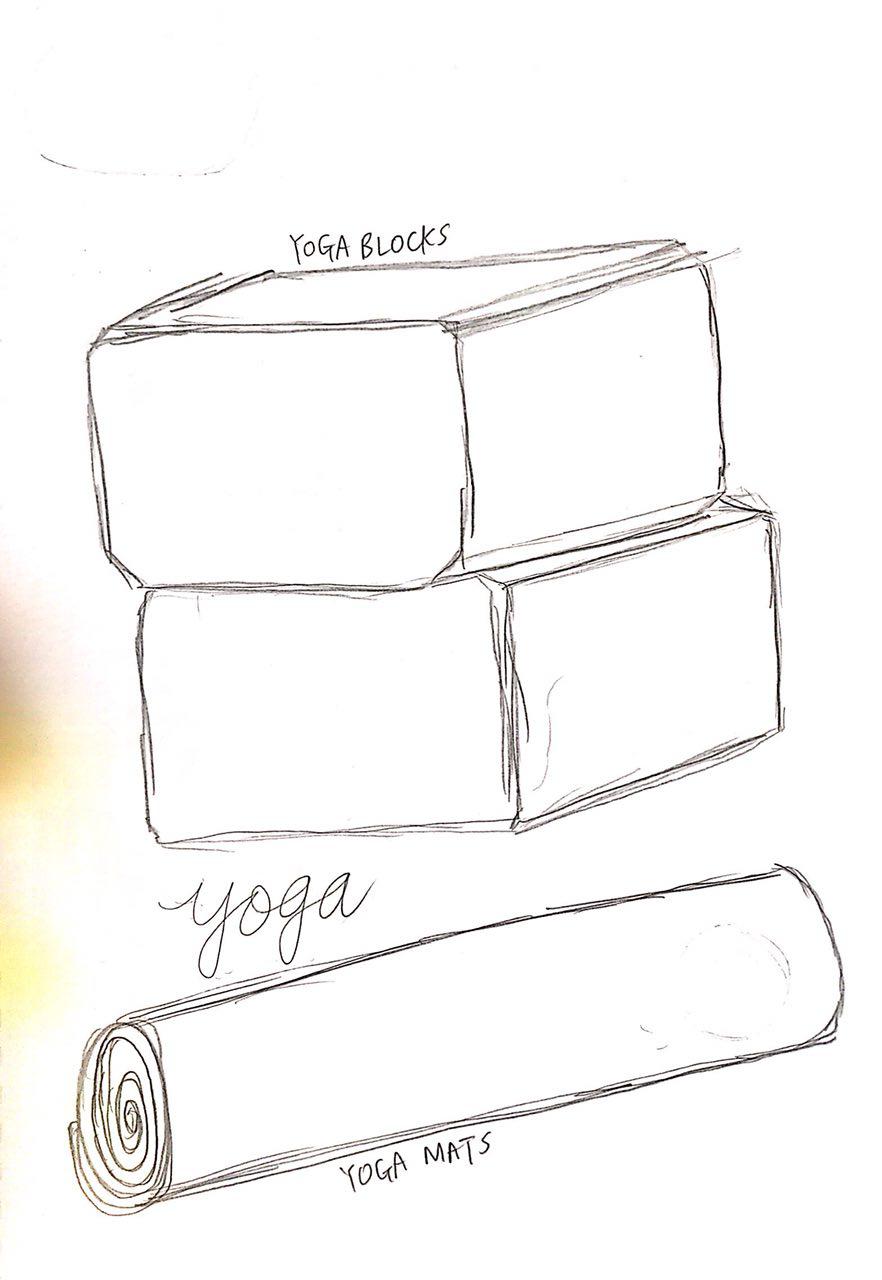
Ideation for Model

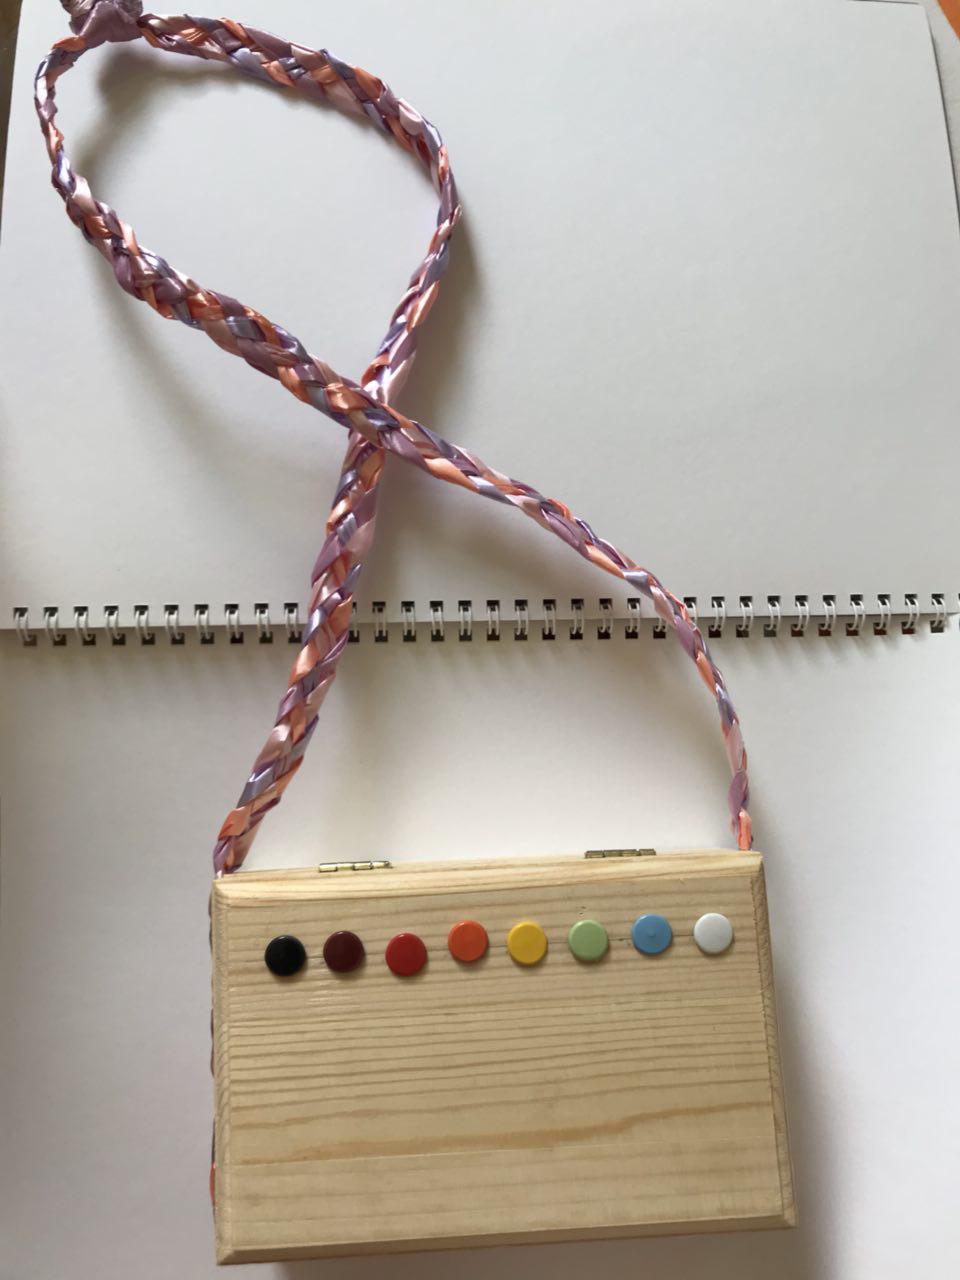
My inspiration, and uses of the model grew throughout the creative process. The starting point was to be able to make the yoga mat and yoga blocks into a miniature size so I did not have to carry them around. It then evolved into creating a Handy Imagine box which would be your one stop box that you could carry around with you that provided you with everything you need. 
The strap of the box would be slinked on your shoulder and this contact with the users’ body would send signals of what the body desires (e.g. food) or what the user needs at the point in time. The box would then create a miniature version of what it predicts the user wants and alerts him/her. The user would see the item in the box, and if it is what he/she wants, then they would press one of the coloured buttons on the cover (each representing a different item category). Upon pressing, the user would then open the box, where the item would become full size and fully usable.

Model
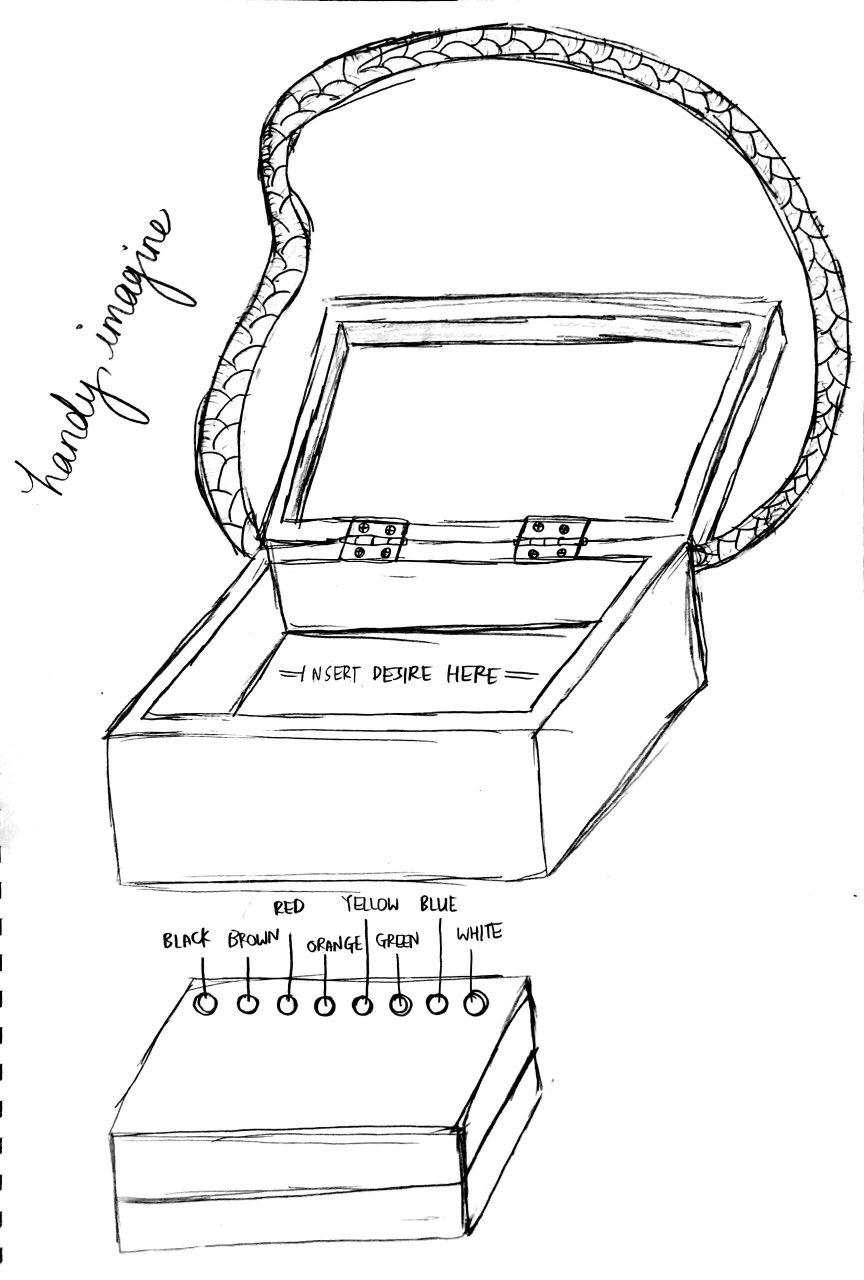
Model Design Idea
Overview of Model
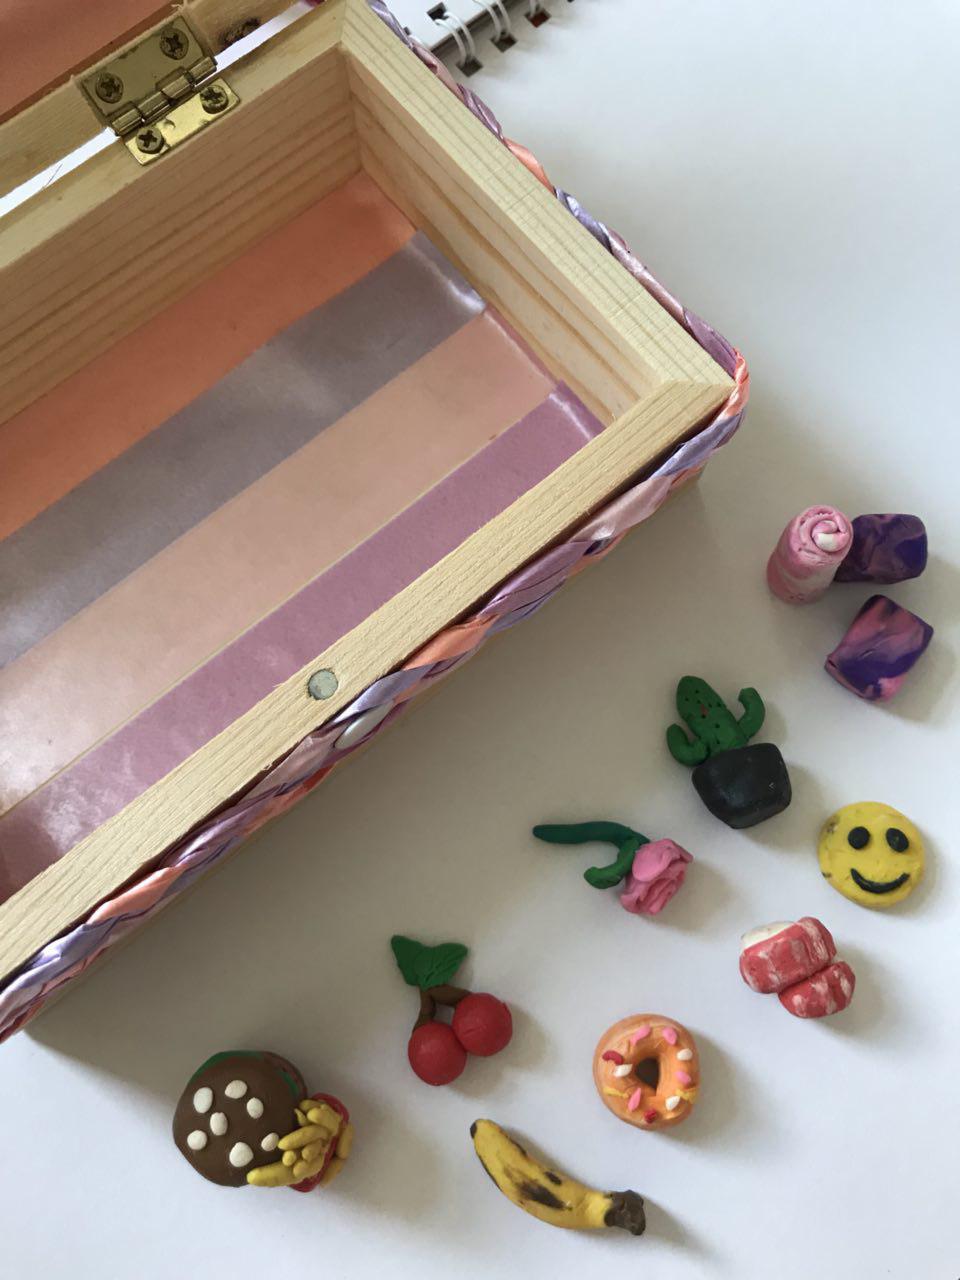
Inside of Handy Imagine and items made from mouldable clay

Explore Practitioners 2: Preschool Teacher – Brenda Tan

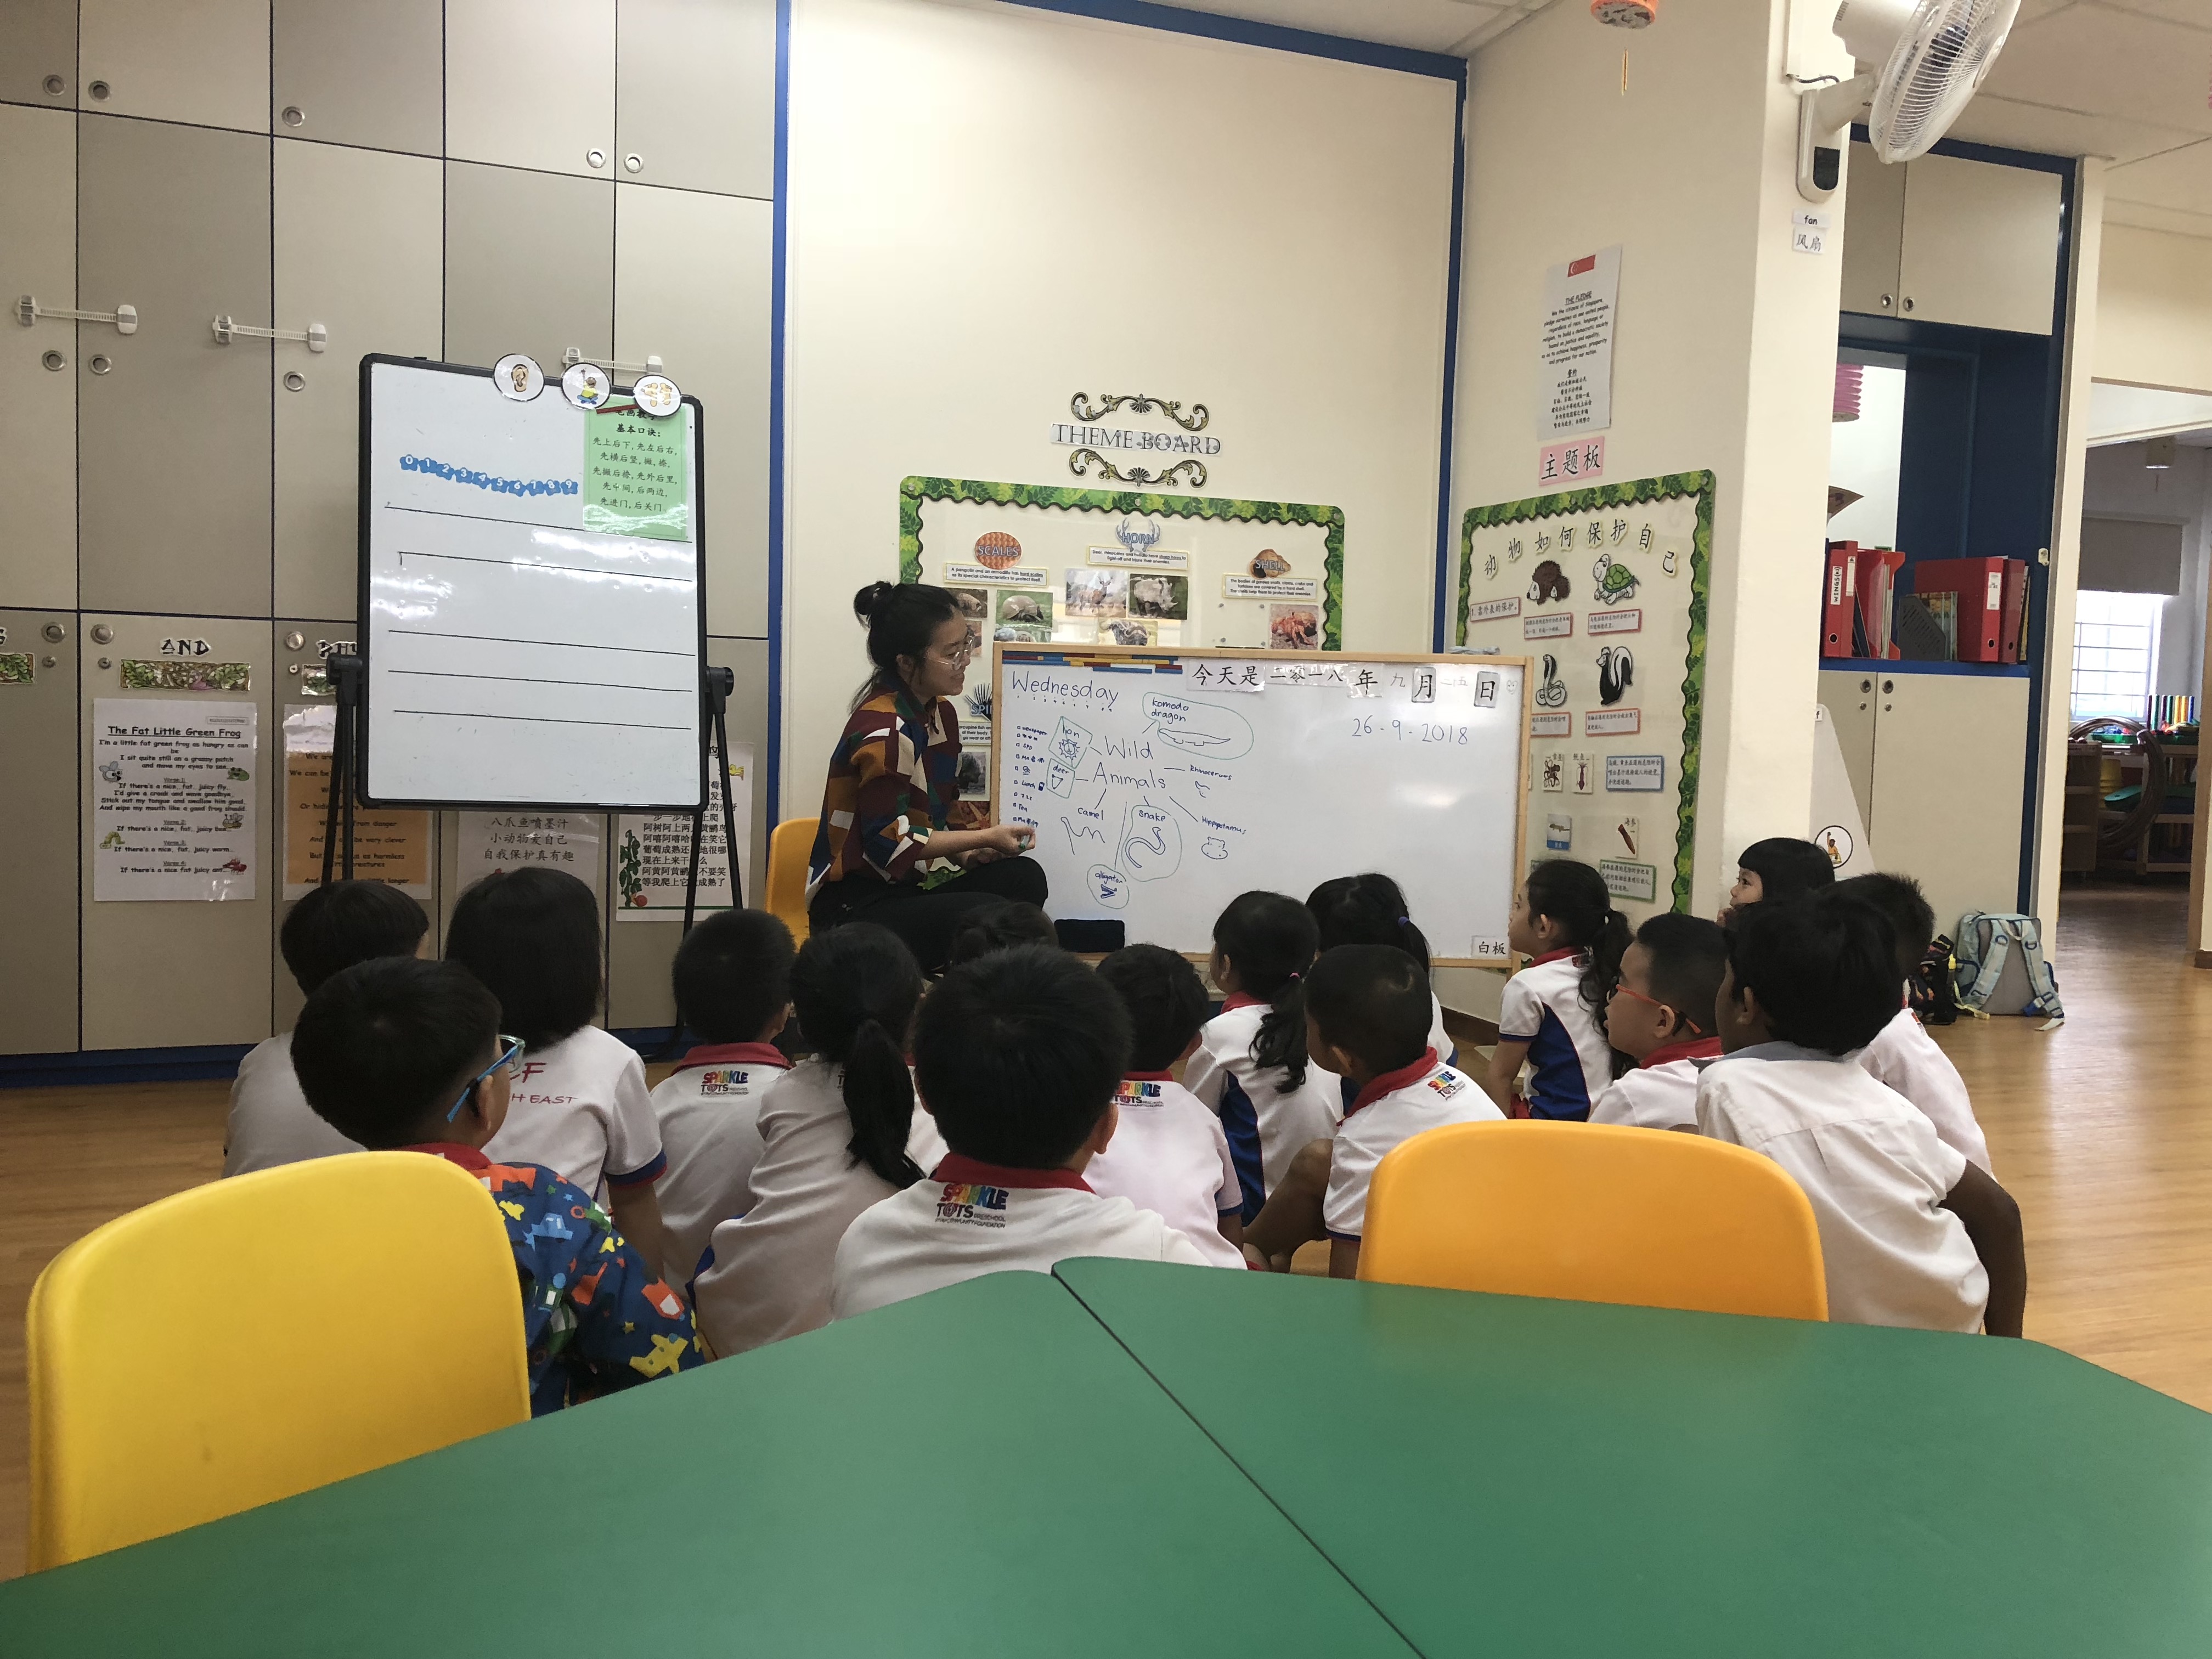
I have always thought that being an early childhood educator is the most rewarding and heartwarming job because you get to see young kids grow and achieve their little milestones. This morning, I sat in for an English class at a neighbourhood preschool center as I wanted to gain more insights on what it’s really like to be a preschool teacher.

*Note: I didn’t get to take a lot of photos of videos without an official permit.

K2 Classroom

Practice Documentation

There is no fixed process or steps when it comes to teaching a group of 6-year-olds. While the teachers have a lesson plan that they have to follow everyday, they usually have to be on the ball and ready to respond to the unpredictable needs of the kids. During the English lesson, the kids became a bit rowdy and they started to ask a lot of questions at the same time. Since the teachers need to face similar situations like this everyday, they need to be able to multi-task and learn to give her attention to more than 15 children at once.

Tools Used

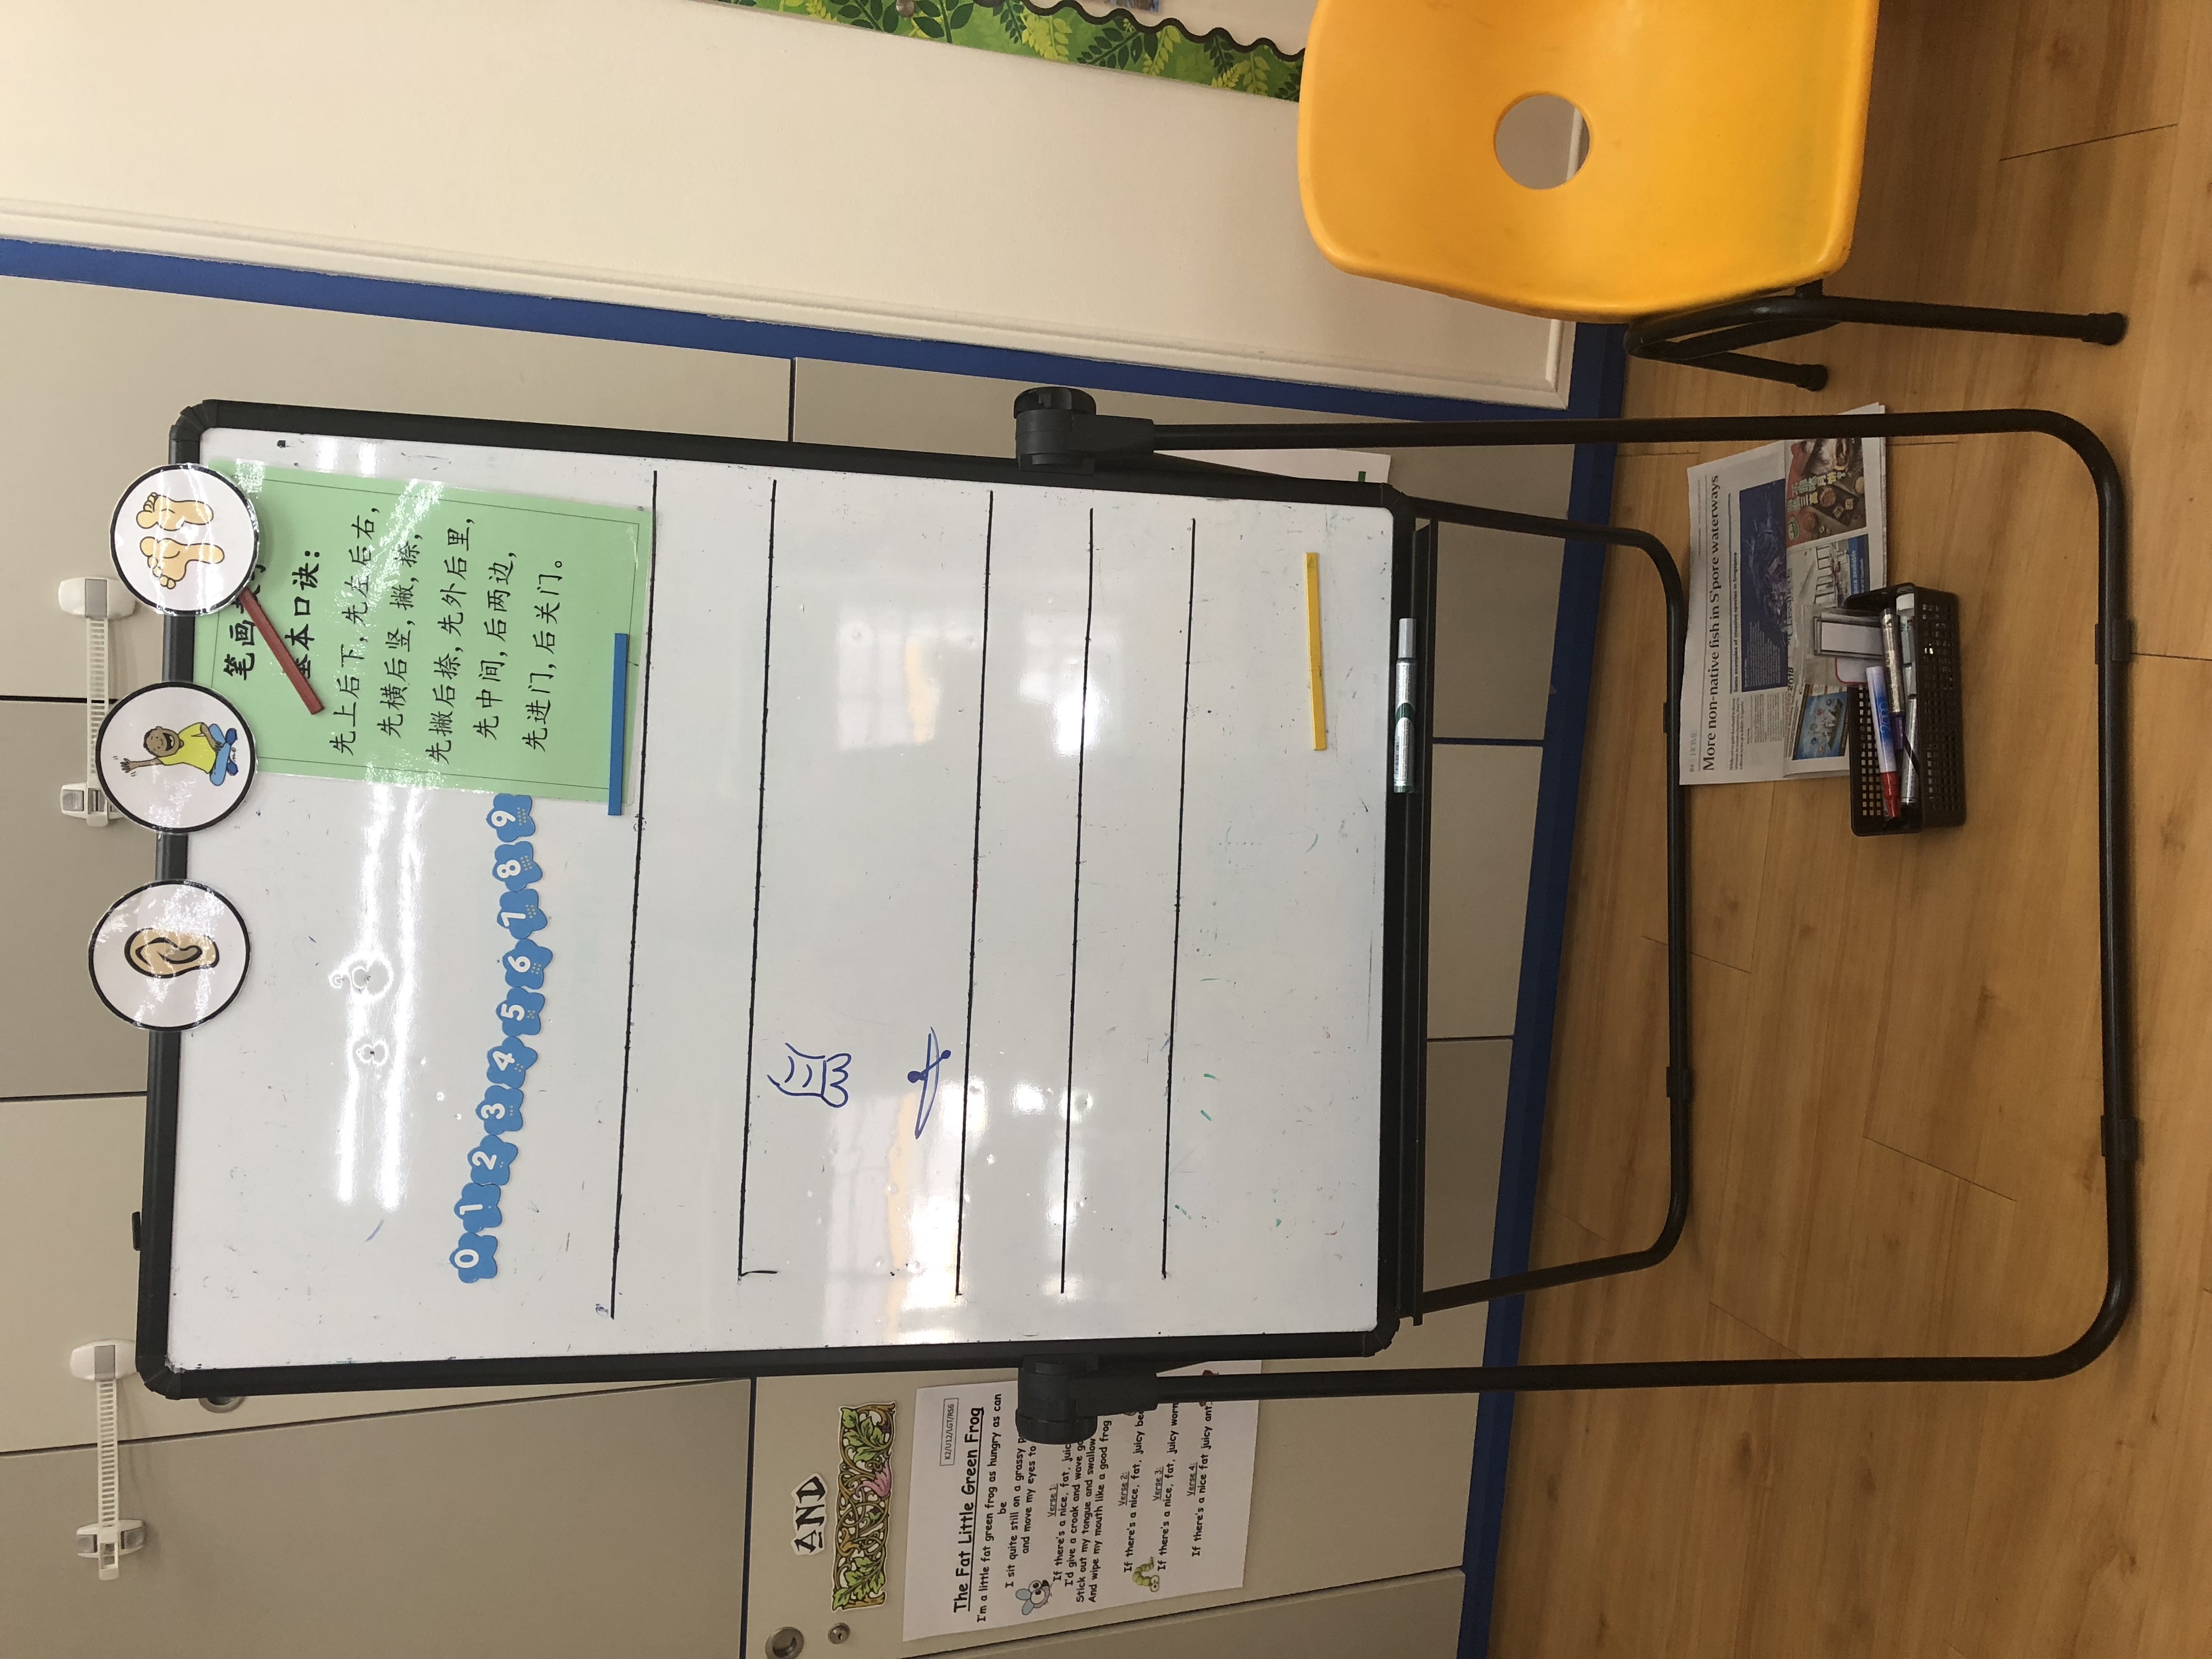
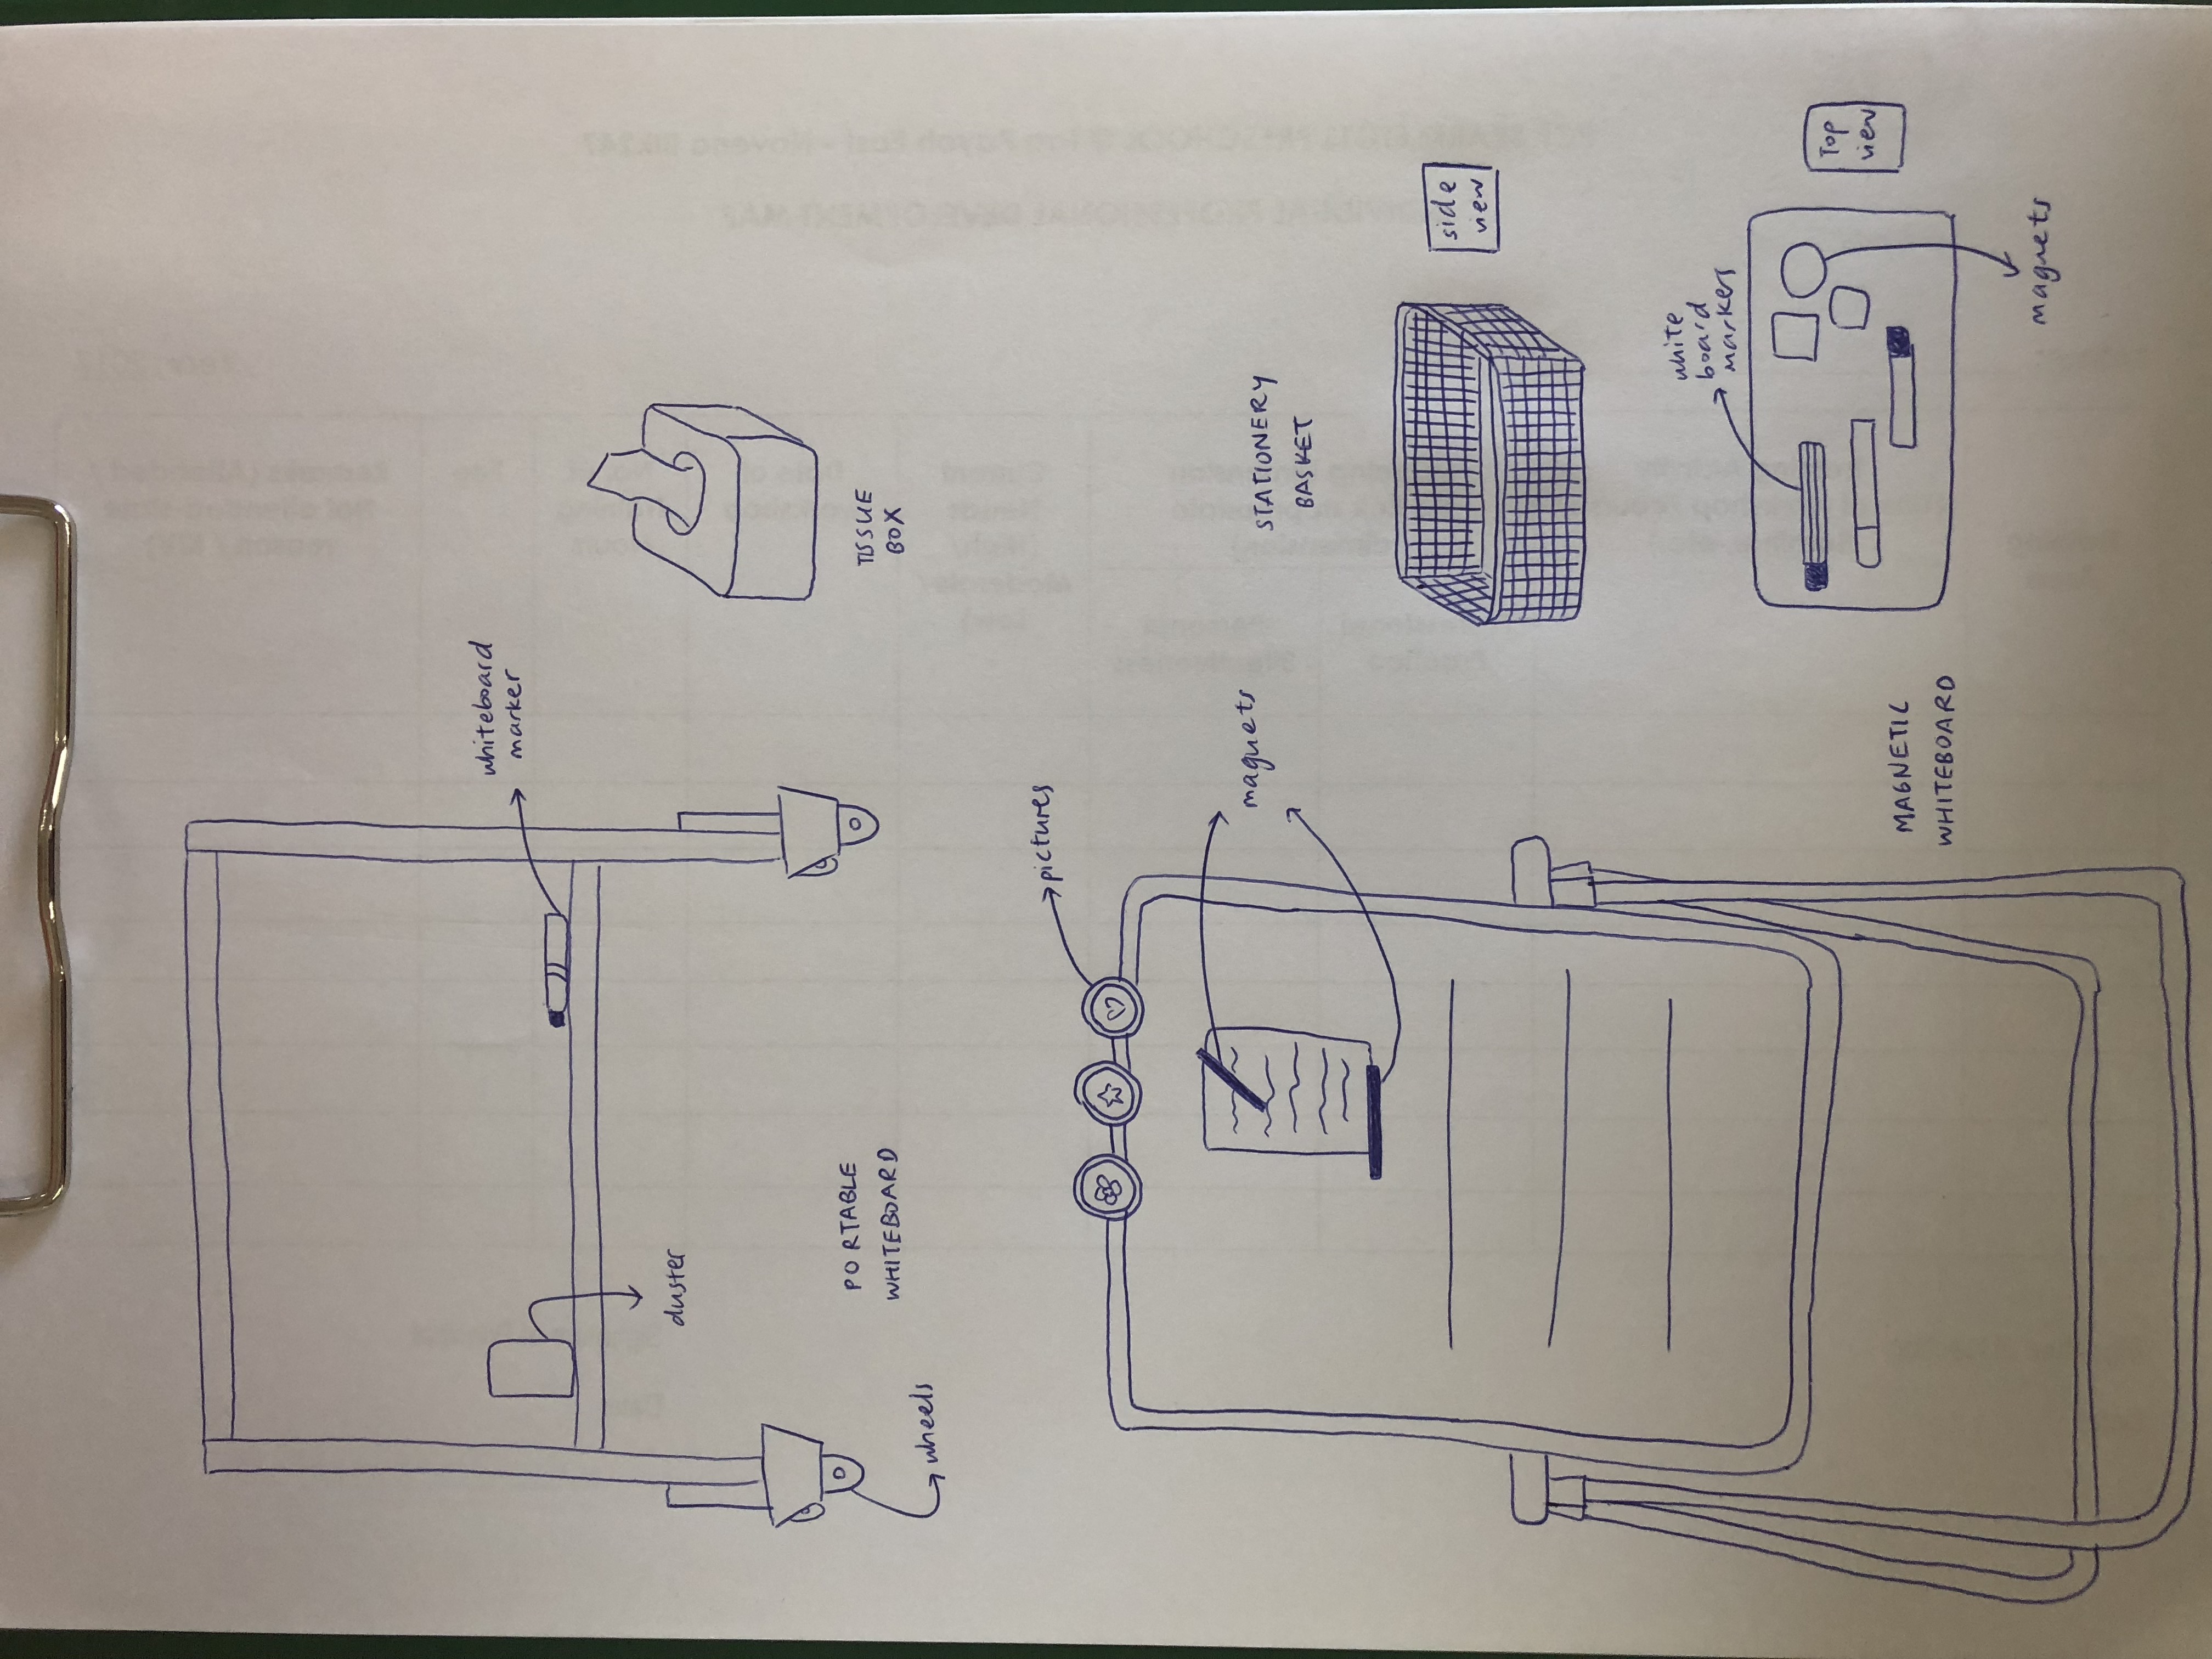
  • Portable whiteboard
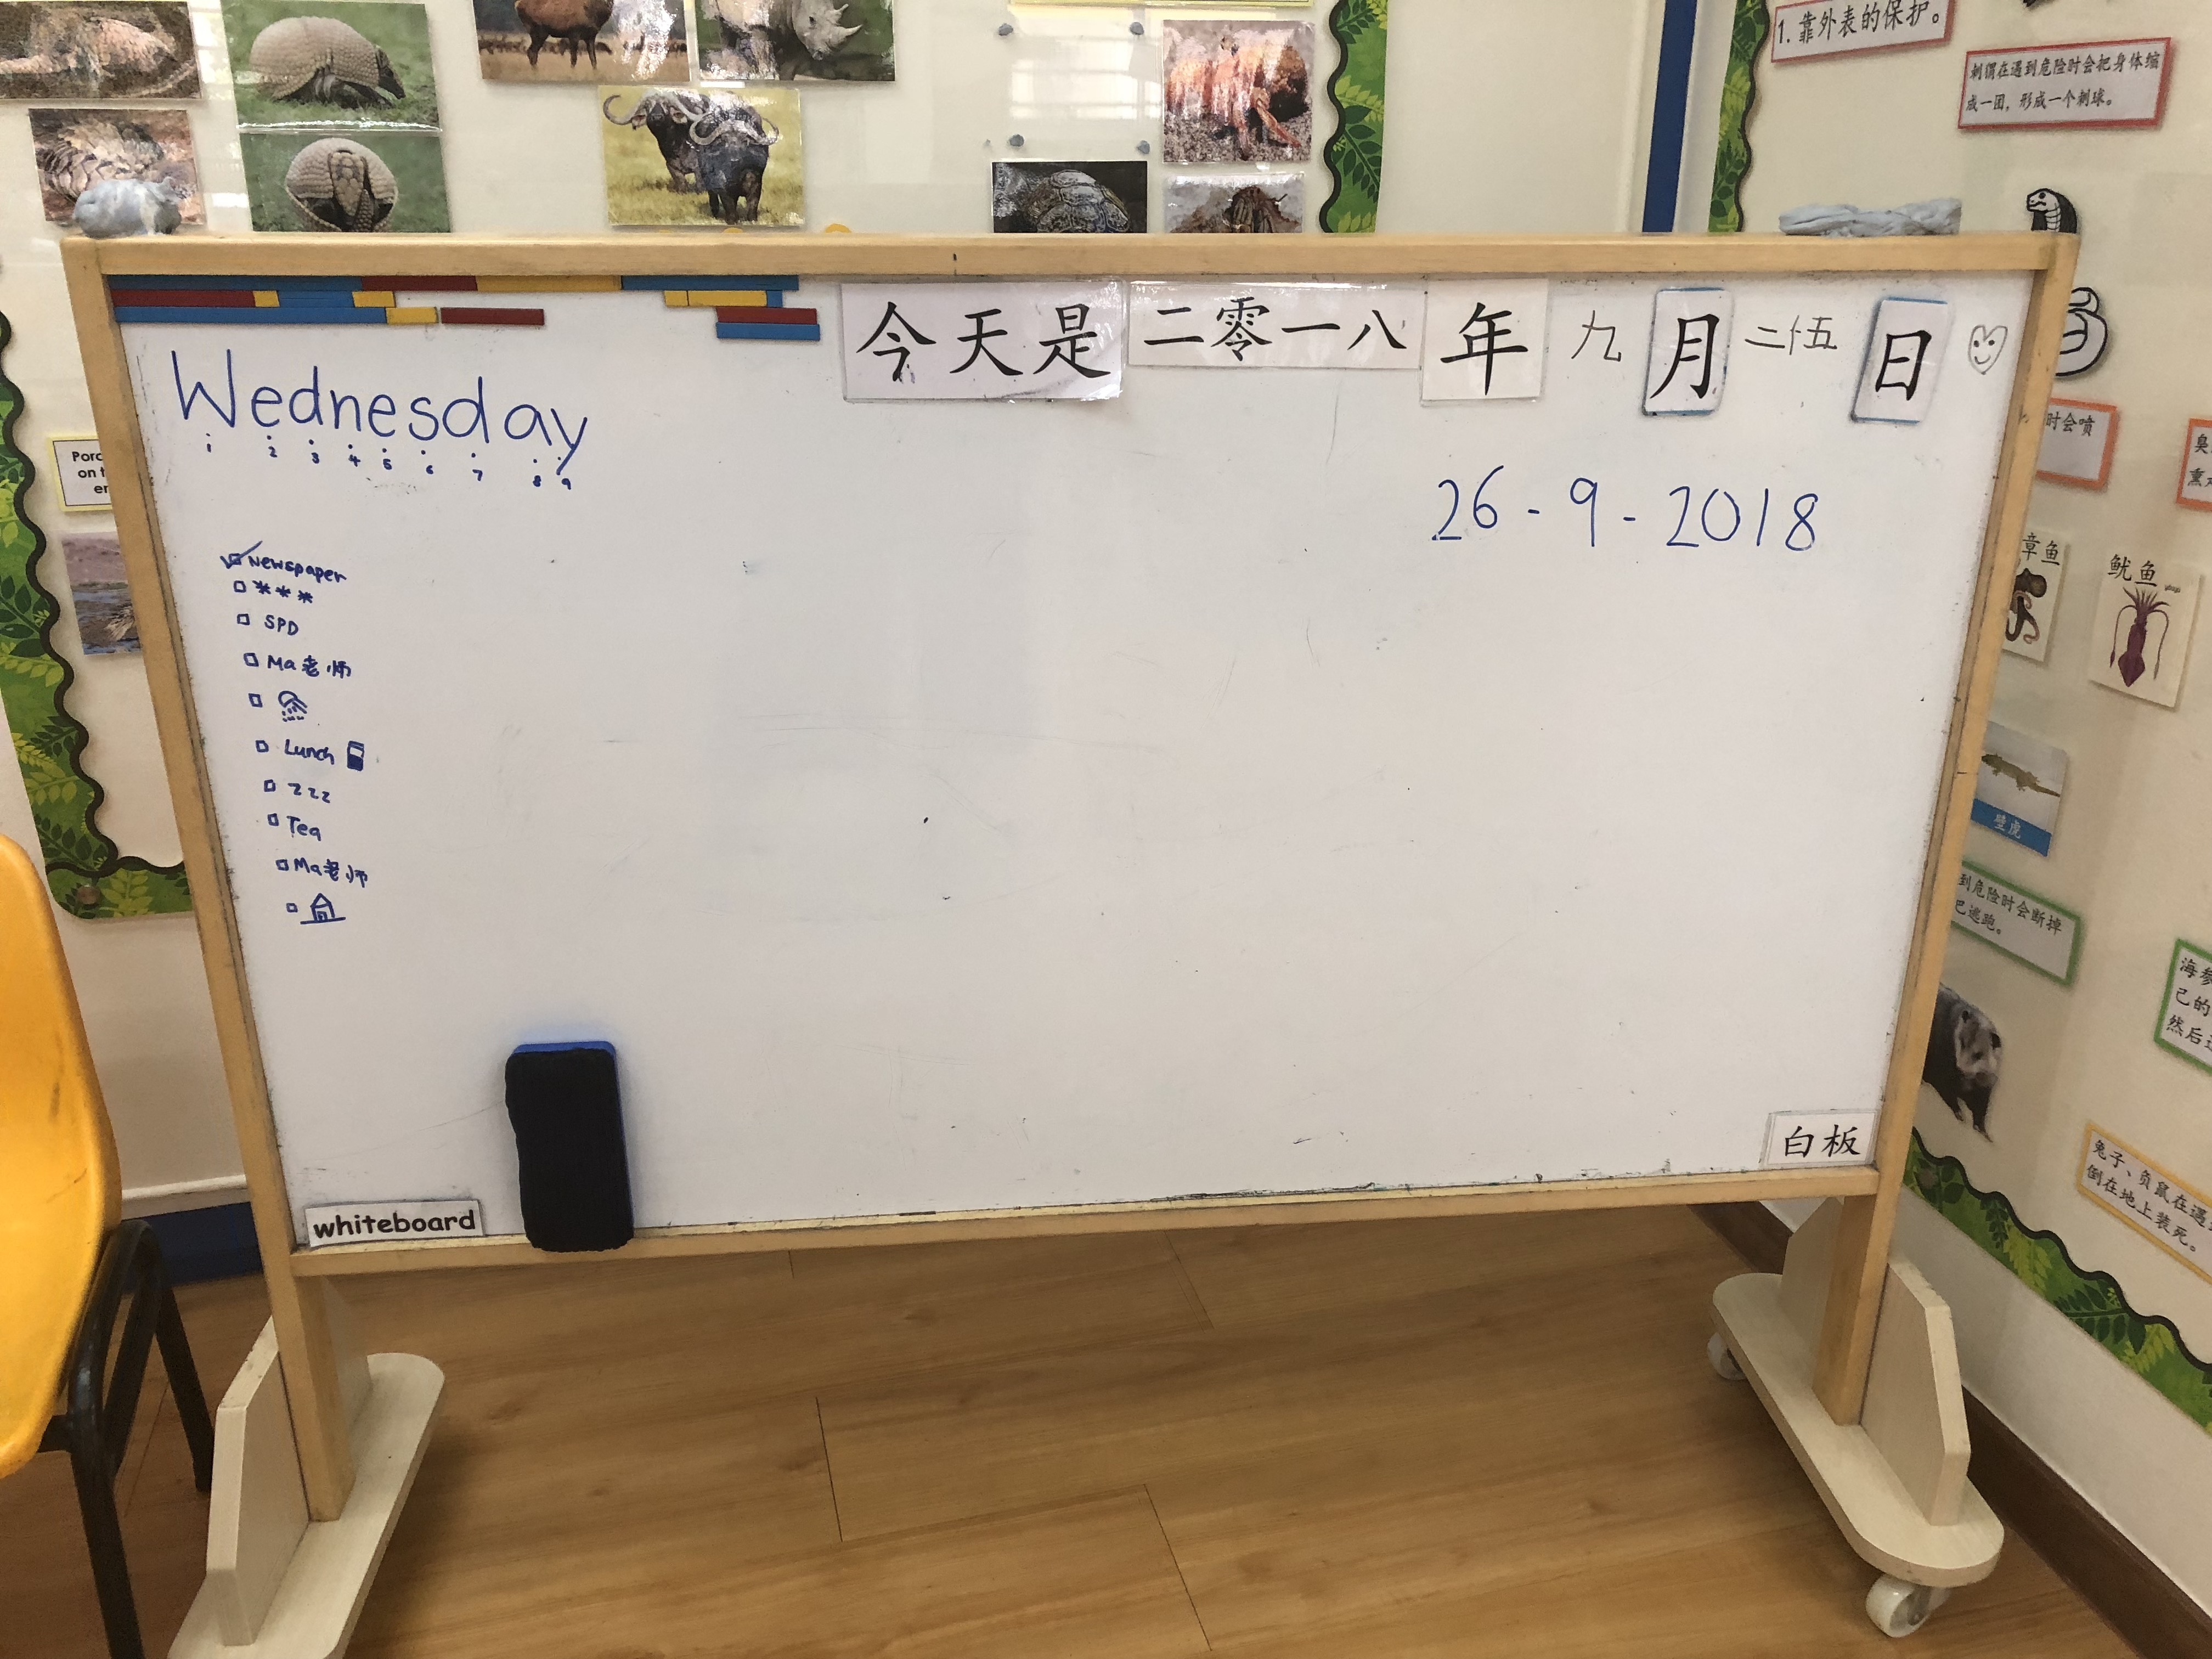
  • Magnetic whiteboard – for writing or attaching pictures/ news articles to facilitate the lesson
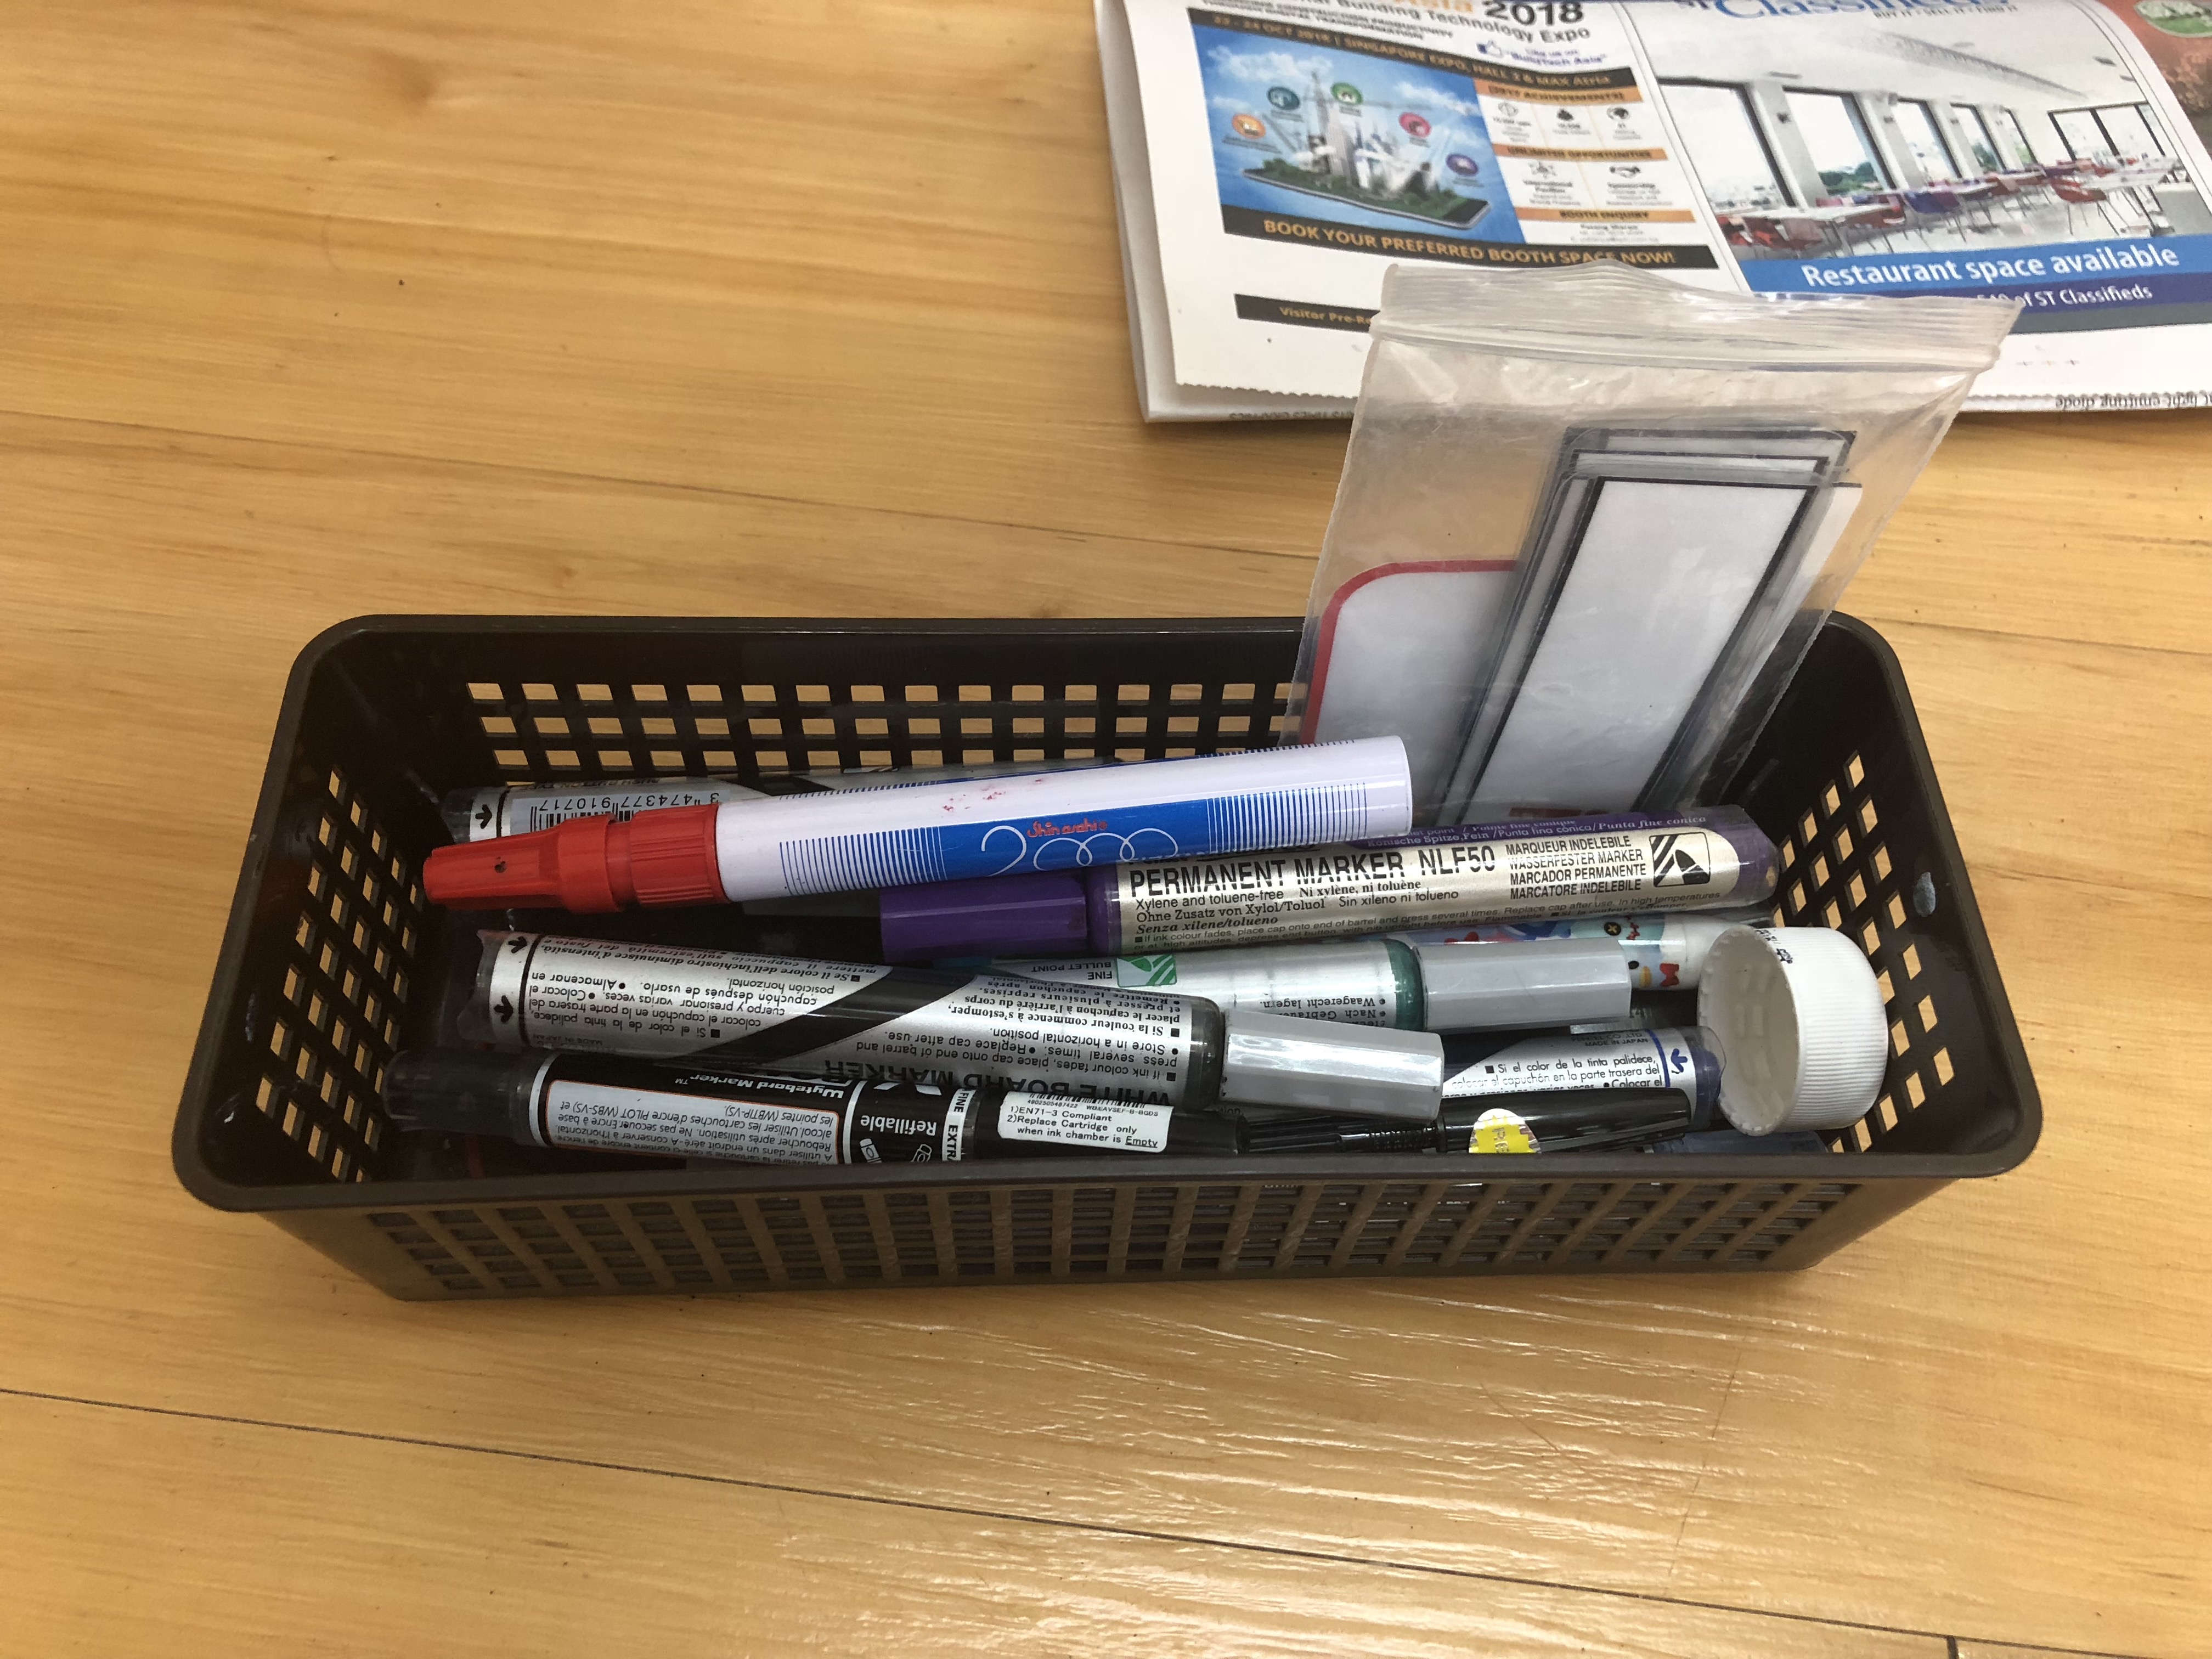
  • Stationery basket – contains whiteboard markers of different colours and magnets
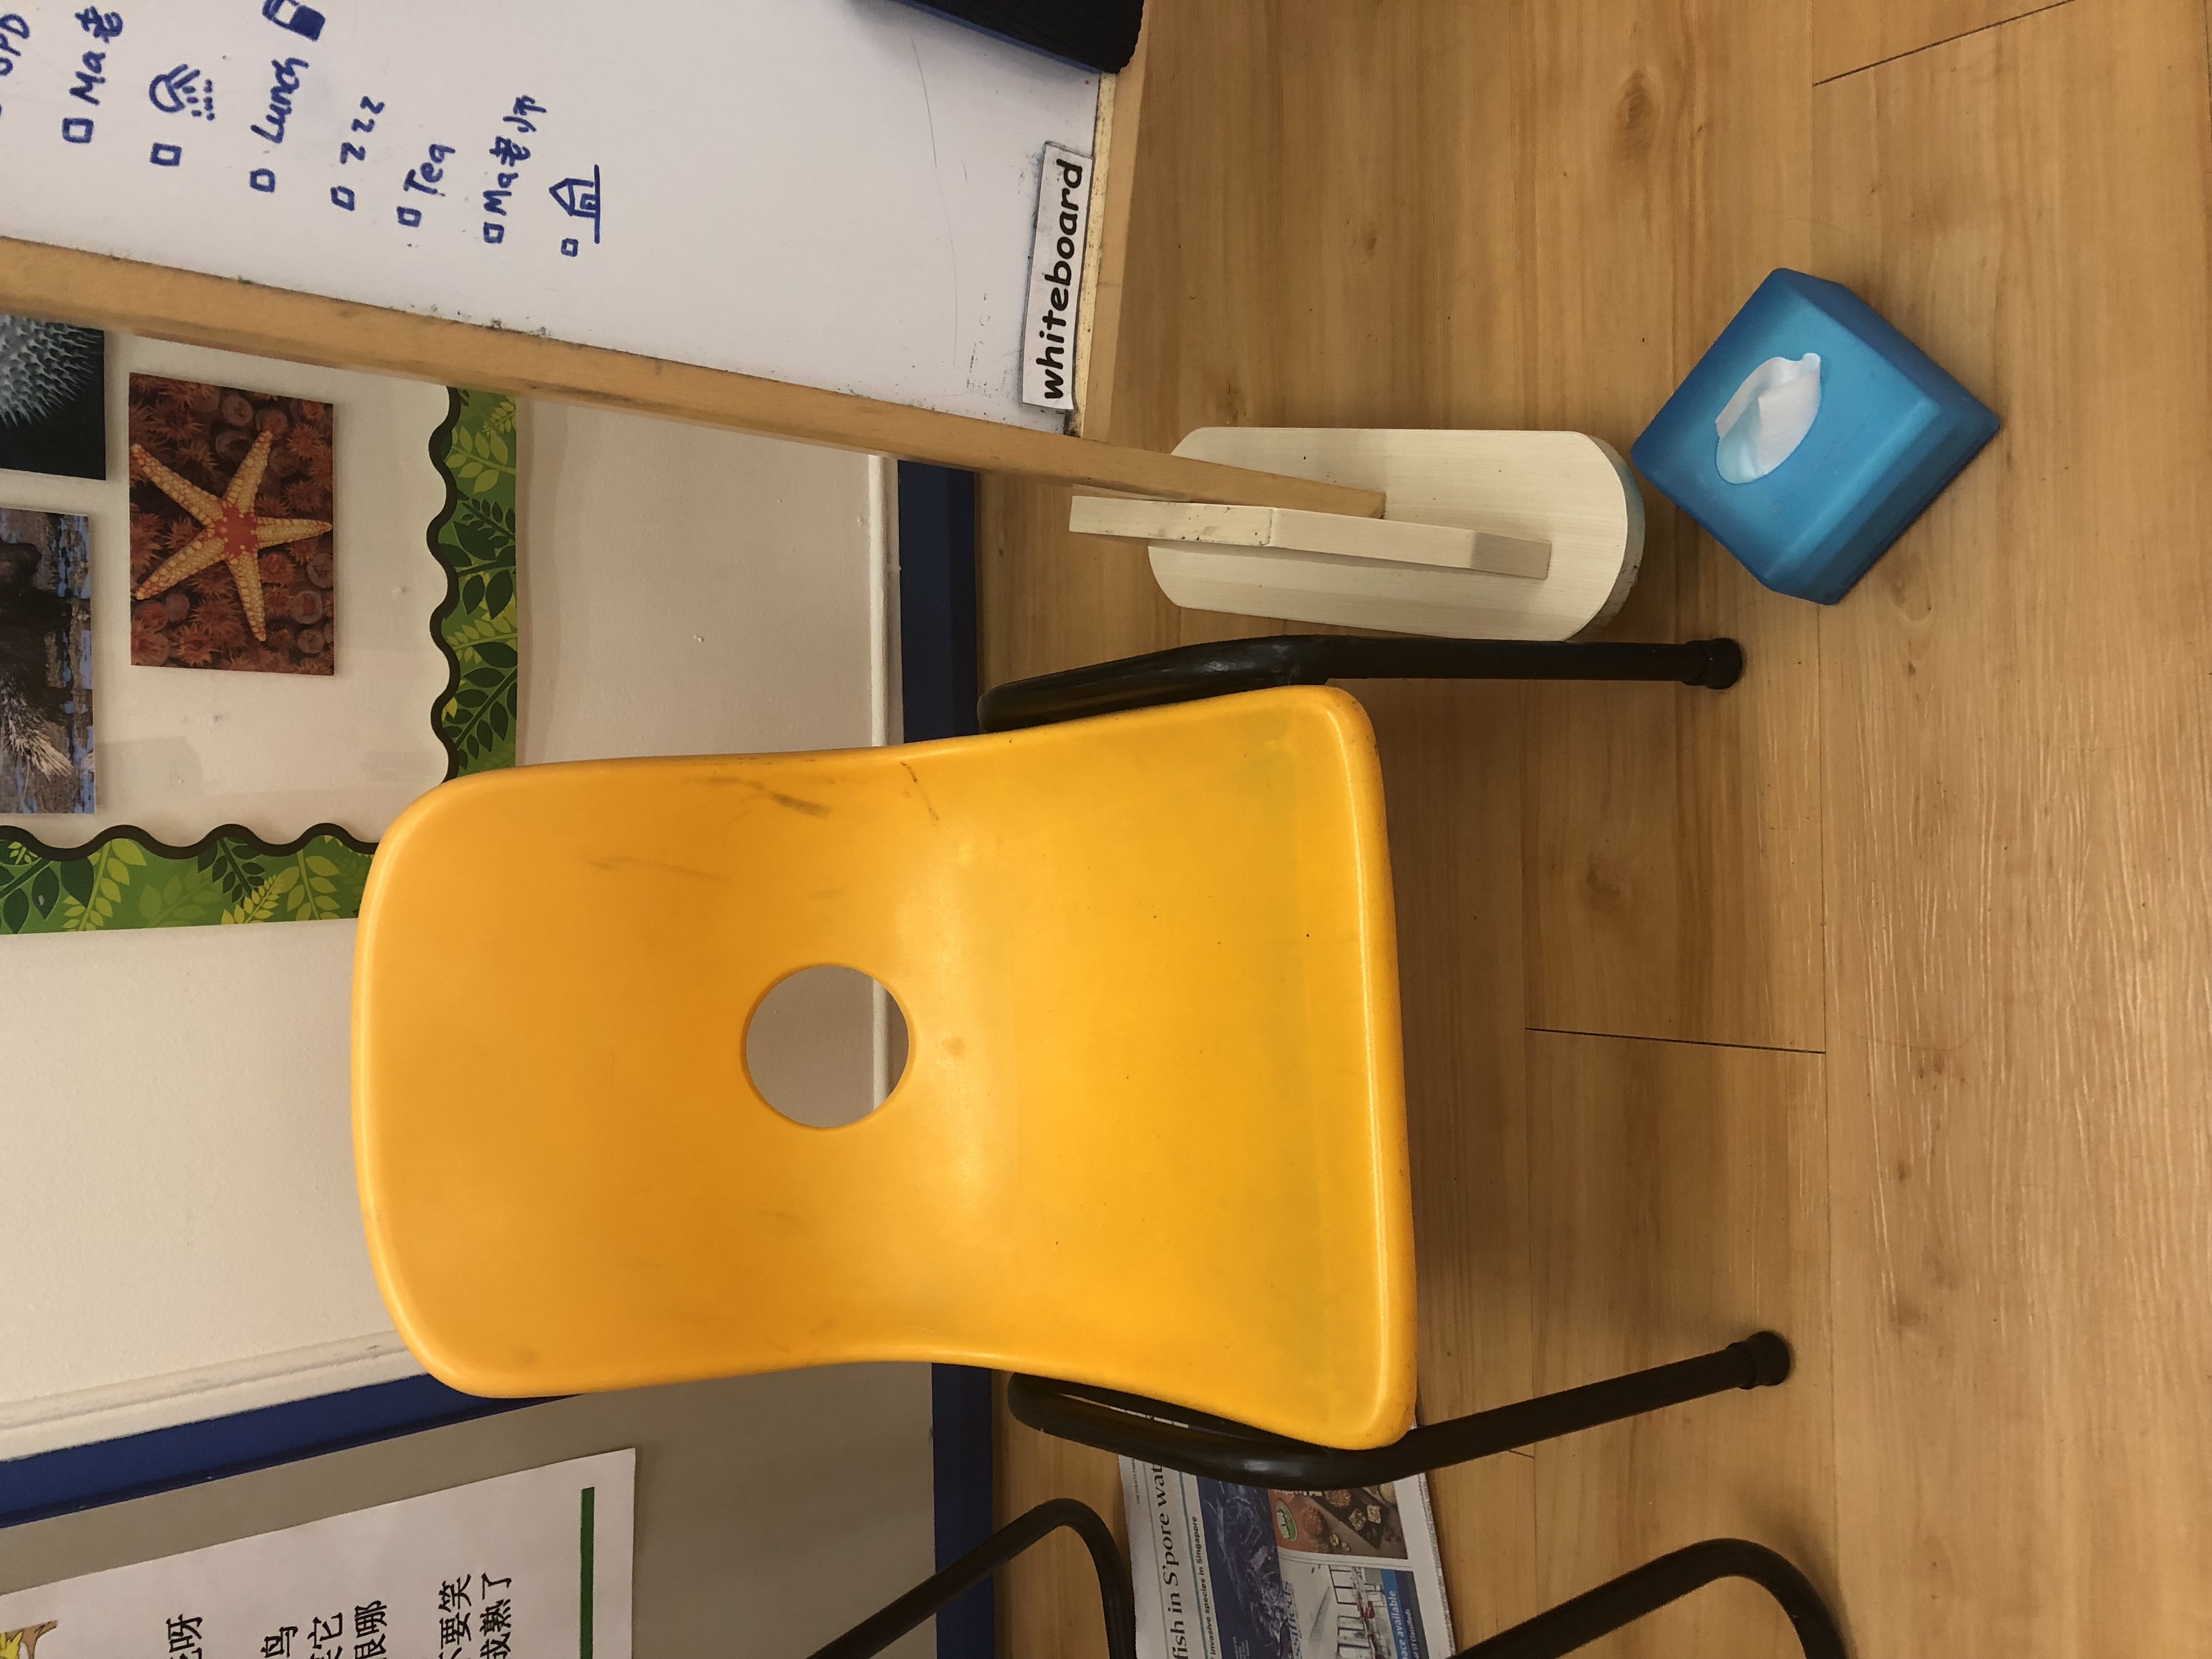
  • Chair 
  • Tissue box – to clean up after the children

Evaluation of tools used
In my opinion, the stationery basket is a little inconvenient because it has no handles for the teacher to grab on to. In addition, the basket has no lid, thus increasing the risk of all the stationery falling out of the basket if the teacher does not hold it properly. Furthermore, although other tools like whiteboard markers, duster and tissue box are placed near to the teacher, she still has to look around for them whenever she needs them, while paying attention to the kids at the same time.

Portable whiteboard
Magnetic whiteboard
Stationery basket
Chair and tissue box
Sketches of tools used

Worksite Documentation

The classroom is generally organised as everything is packed neatly in the shelves. The kids’ bags and water bottles are also placed nicely in the cubby holes provided. However, since everything is placed in different shelves, whenever the teacher needs something other than the tools stated above, she would need to walk to the shelves to take it.

Personal Insights

Apart from sitting in for the class, I was also given the wonderful opportunity to conduct a short lesson. Since I’m not a professionally-trained preschool teacher, I could only conduct a drawing lesson. Also, since I was not familiar with where everything was kept, I had to ask the teachers and this made the process slightly more time consuming.

In my opinion, since the kids can be rather unpredictable, it is better for the teachers to have a portable toolbox, or a wearable kit, with all the tools that they need. This way, the teachers can spend less time searching for the things they need and they can pay more attention to the kids around them.

Explore Practitioners 2: Pottery (Cups) – Chia Li Hui

Pottery is one of my many interests that I have always wanted to learn but have no time to do it. As I wish to create my own plates and cups in the future, I decided to choose my second creative practice to be pottery. As my cousin opens pottery workshop for children, I decided to approach him to learn the basic skills of pottery.

Process Documentation

Steps:

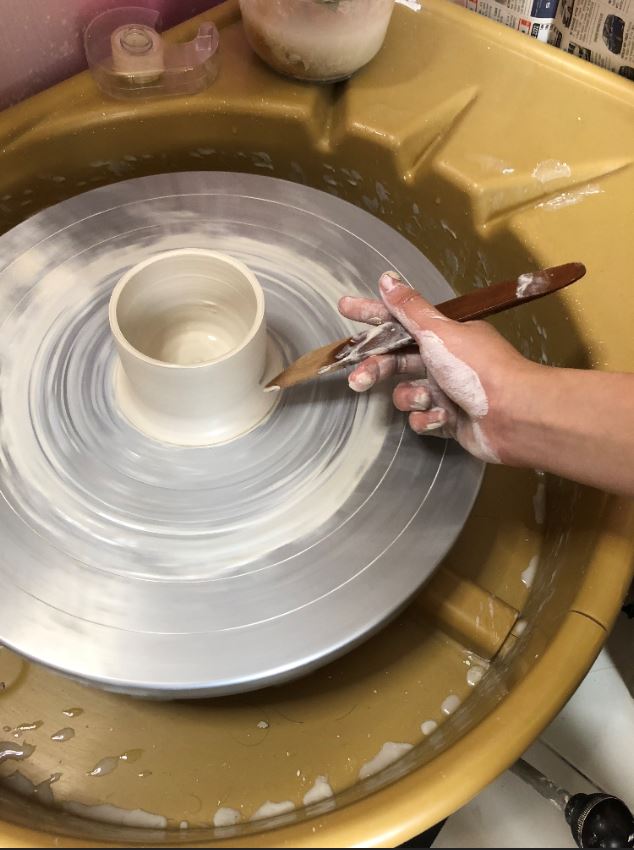
  1. Take a fair amount of clay and put some water on it.
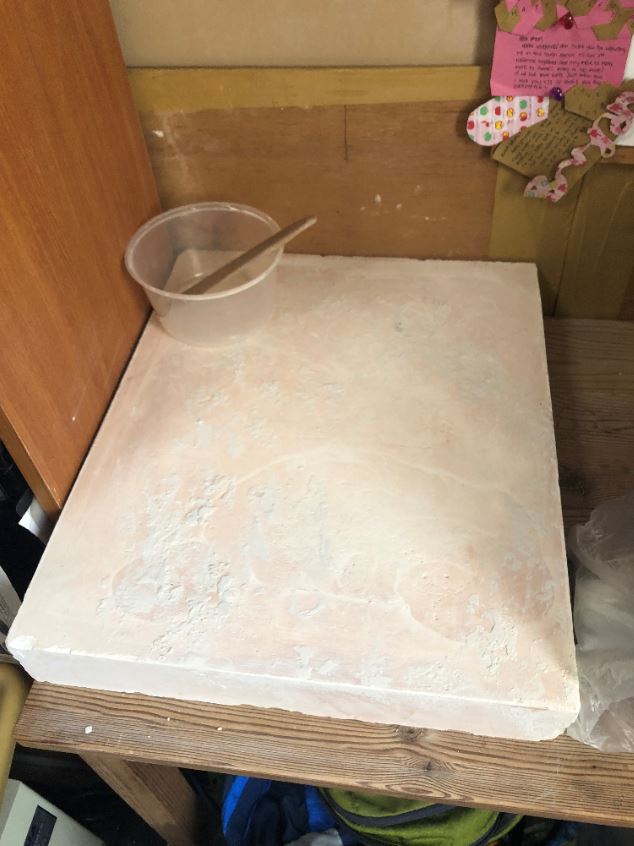
  2. Make sure that the clay is not too watery. If it is, leave it to dry on Plaster of Paris. The clay should be partially sticky and not too hard.
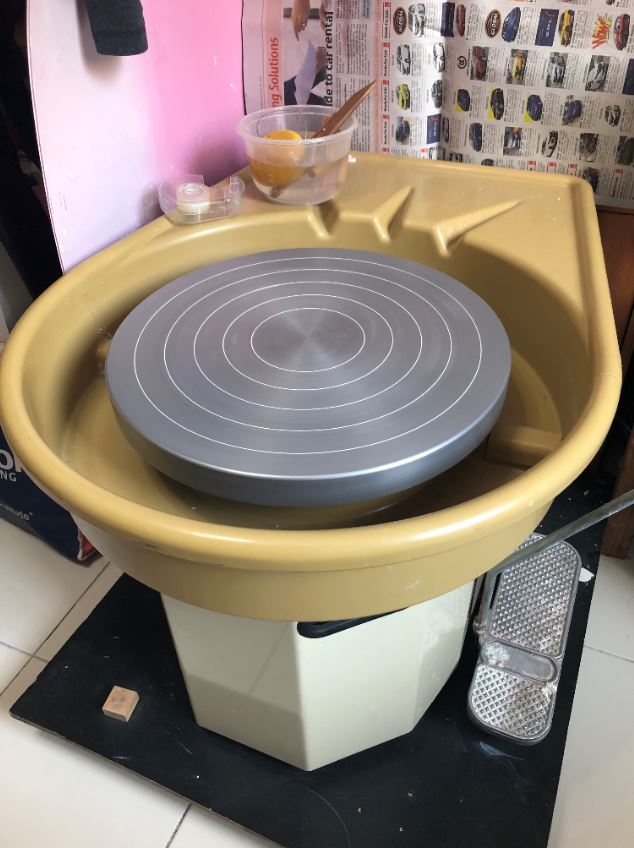
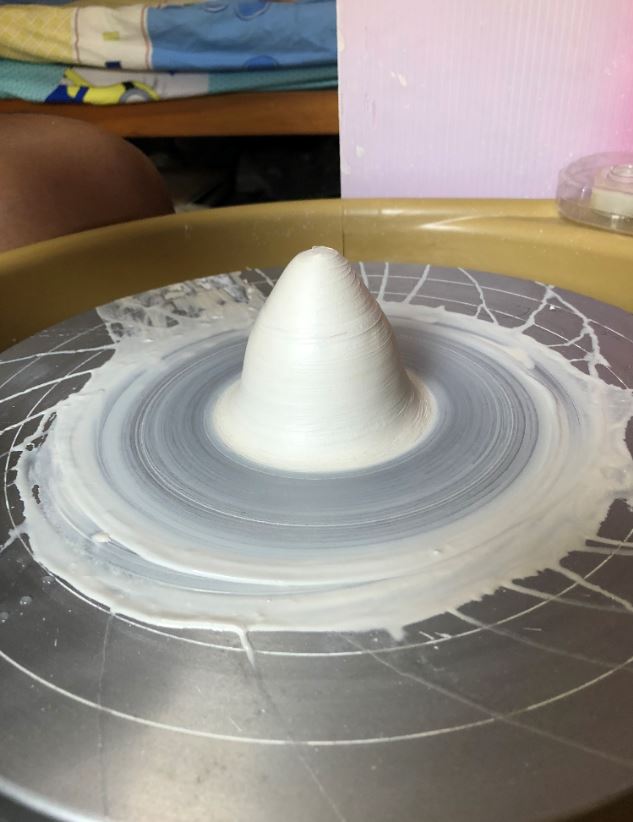
  3. Put it on the middle of the pottery wheel and set the pottery wheel to be turning at a pace you are comfortable with.
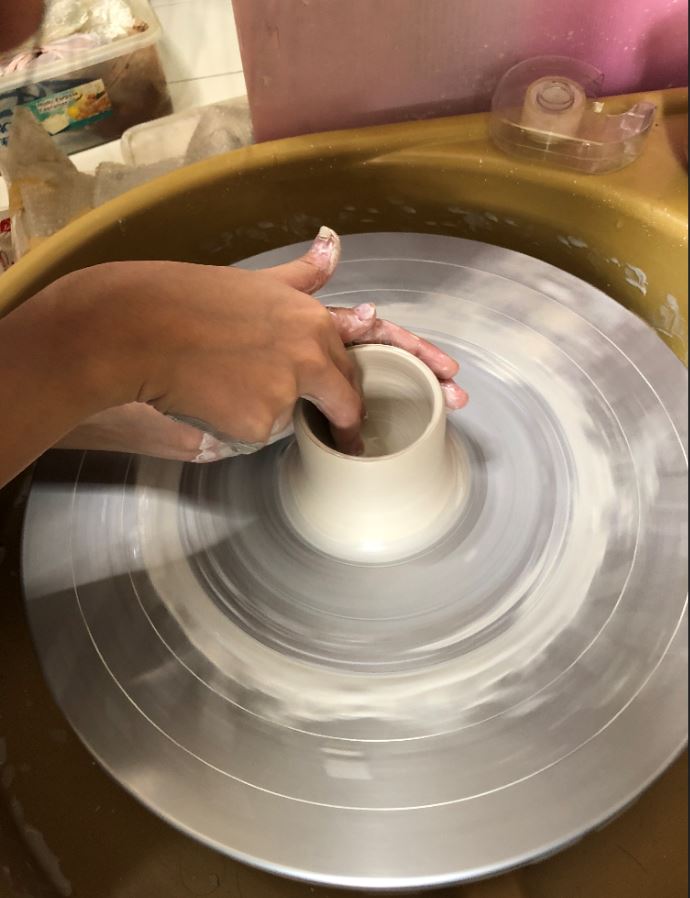
  4. Shape the clay into a cone-shape and use your thumb to push the middle of the cone down to create the opening for the cup.
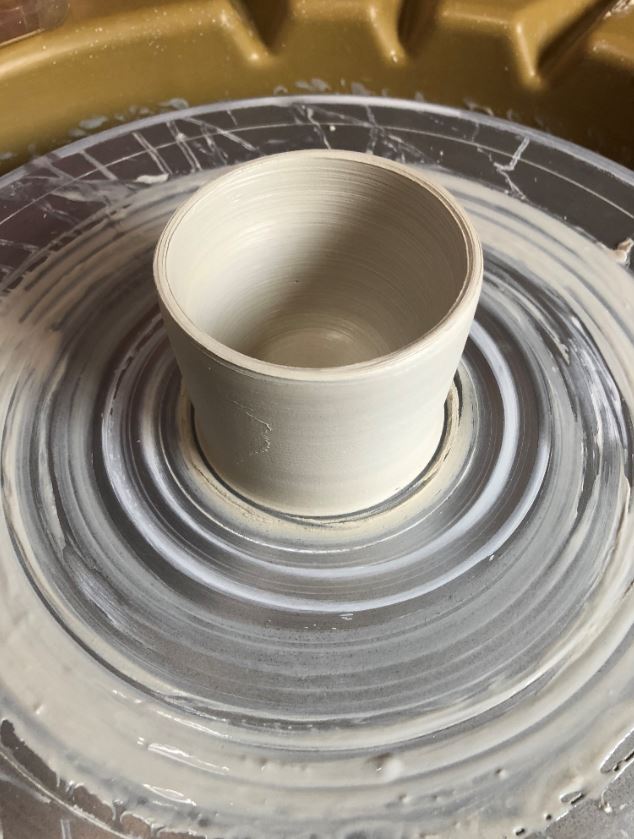
  5. Move on to shape the body of the cup.
  6. Use the wooden carving tool to shape the bottom of the cup.
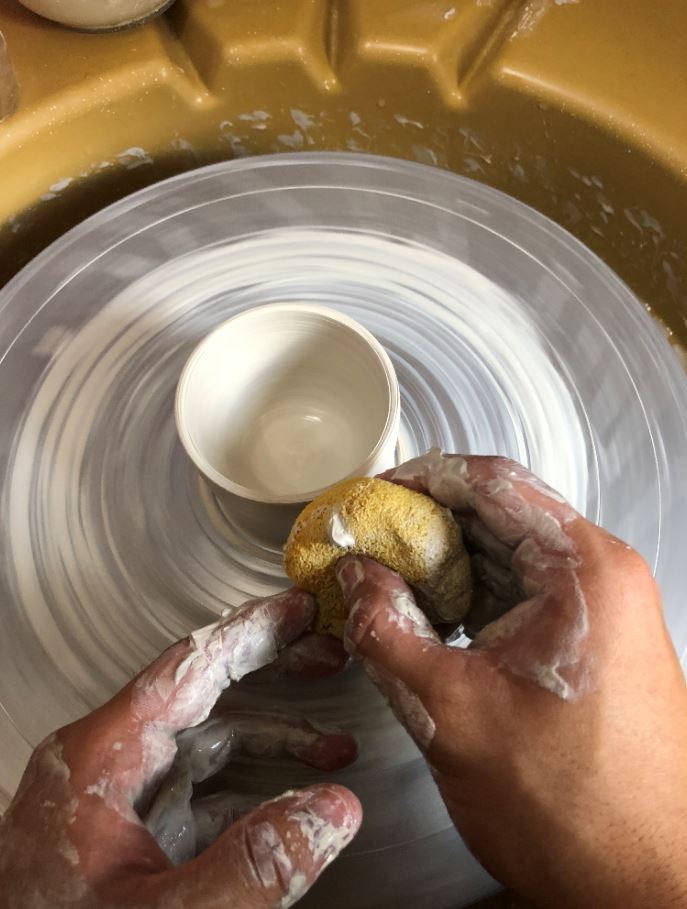
  7. Use the sponge to remove air bubbles in the clay and the tip of the cup so that there will be consistency.
  8. Use hairdryer to dry the clay.
  9. Use the wire clay cutting tool to remove the cup from the pottery wheel.

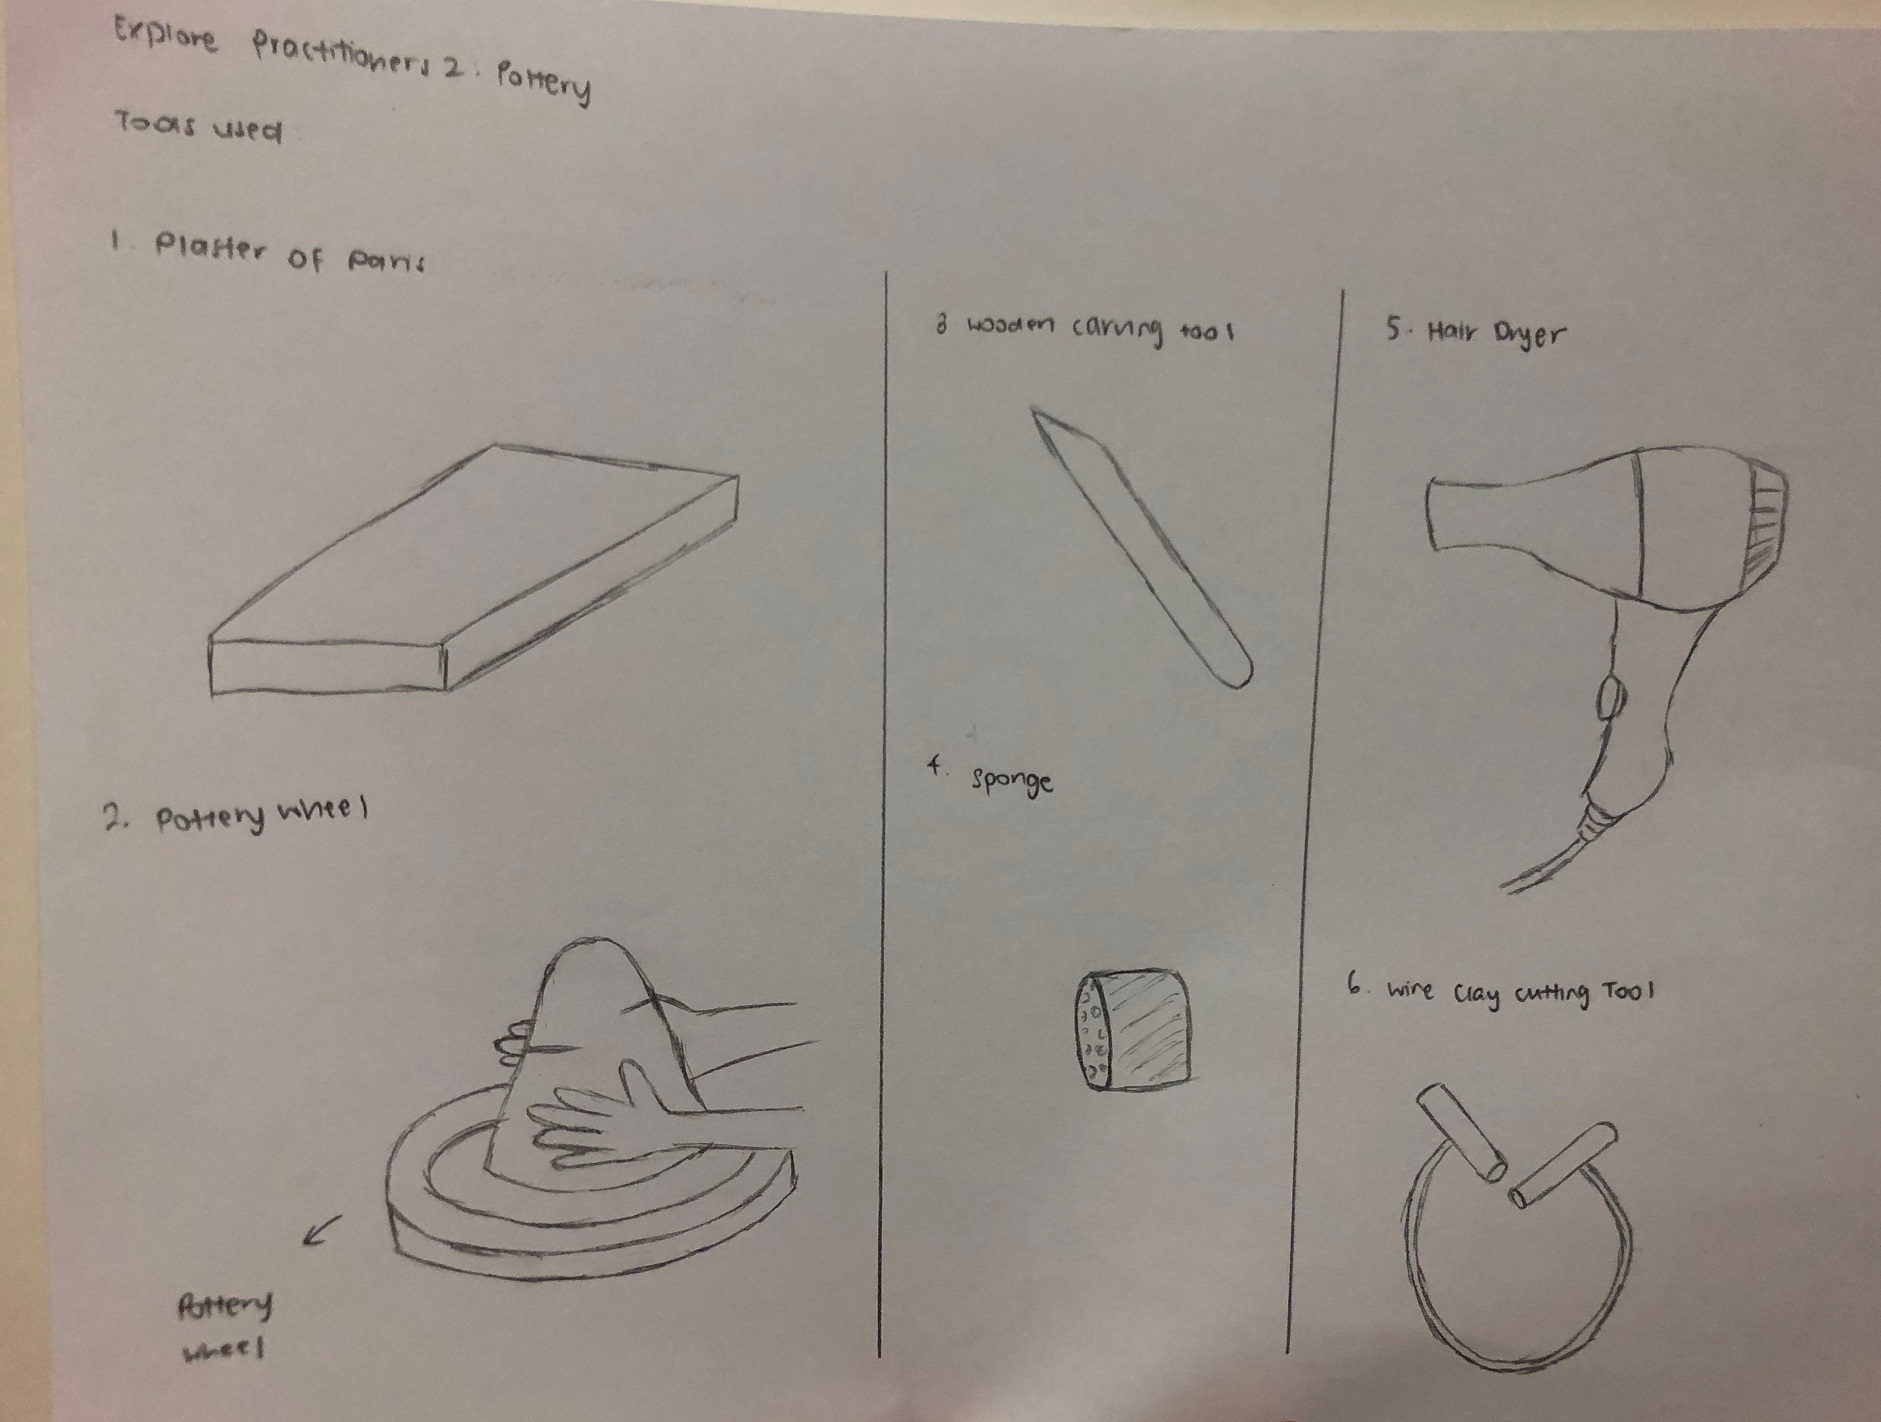
Tools used

  1. Plaster of Paris (Calcium Sulphate Monohydrate)
  2. Pottery wheel
  3. Wooden Carving tool
  4. Sponge
  5. Hairdryer
  6. Wire Clay Cutting Tool

Worksite Documentation

My cousin conducts the workshops in his house. Although I find that the worksite is a little cramped, there was still enough space to learn. As his stuffs were surrounding the pottery wheel, I had to be extremely careful so that I would not dirty his stuffs while learning.

Pain points

As it was my first time trying out, I find it hard to gauge how much clay to use and how to determine whether the clay was ready to put on the pottery wheel. It is also important to have firm hands so that the sides of the cup were even. In addition, the cleaning up was quite tedious as for an amateur, the clay will splatter outside of the pottery wheel. However, despite all these difficulties, I still enjoy the process of learning pottery!

Explore Practitioners 1: Mooncake Making – Chia Li Hui

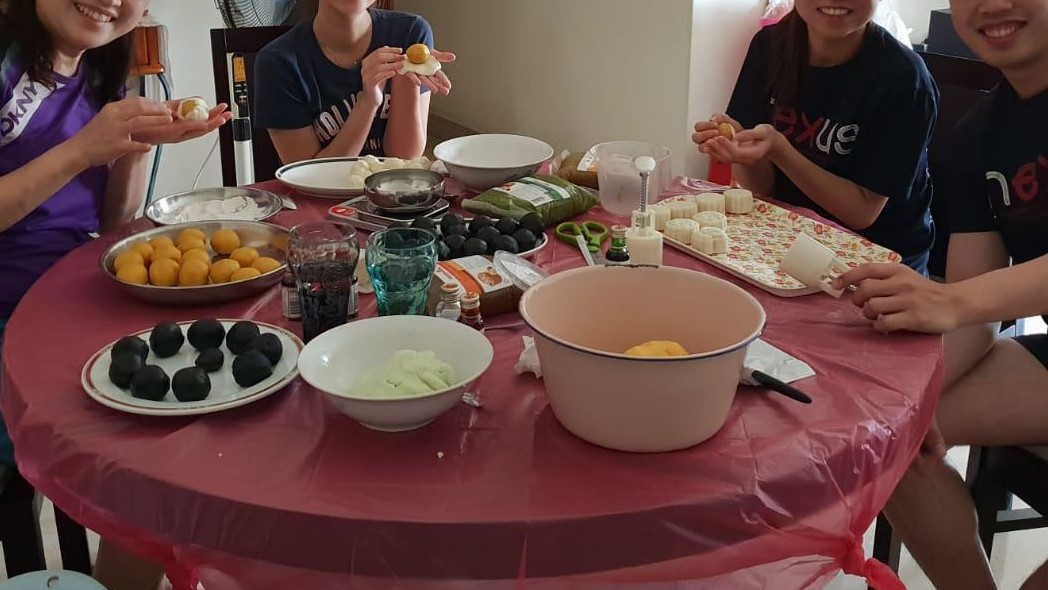
As mid-autumn festival is around the corner, I have decided to learn how to make handmade snow skin mooncakes to give out to my family and friends. Therefore, I chose to approach my friend who sells snow skin mooncakes.

Process Documentation

Making handmade snow skin mooncakes may seem easy but it is a very tedious process. It takes up one whole day to create just a few pieces!

Steps:

  1. Mix the flour with water and butter. Knead until the dough is form.
  2. Add food flavouring and colouring to the dough. Knead the dough until the colour is evenly spread out.
  3. Scoop about 20g of dough and roll it into a ball.
  4. Leave the dough one side and scoop about 40g of paste. Roll the paste into a ball.
  5. Flatten the dough balls using a wooden rolling pin.
  6. Wrap each flatten dough around each paste ball.
  7. Dust some premix flour around the wrapped ball to prevent it from sticking to the mooncake mould.
  8. Put the wrapped ball into the mooncake mould to create your final mooncake!
  9. Refrigerate the mooncake.

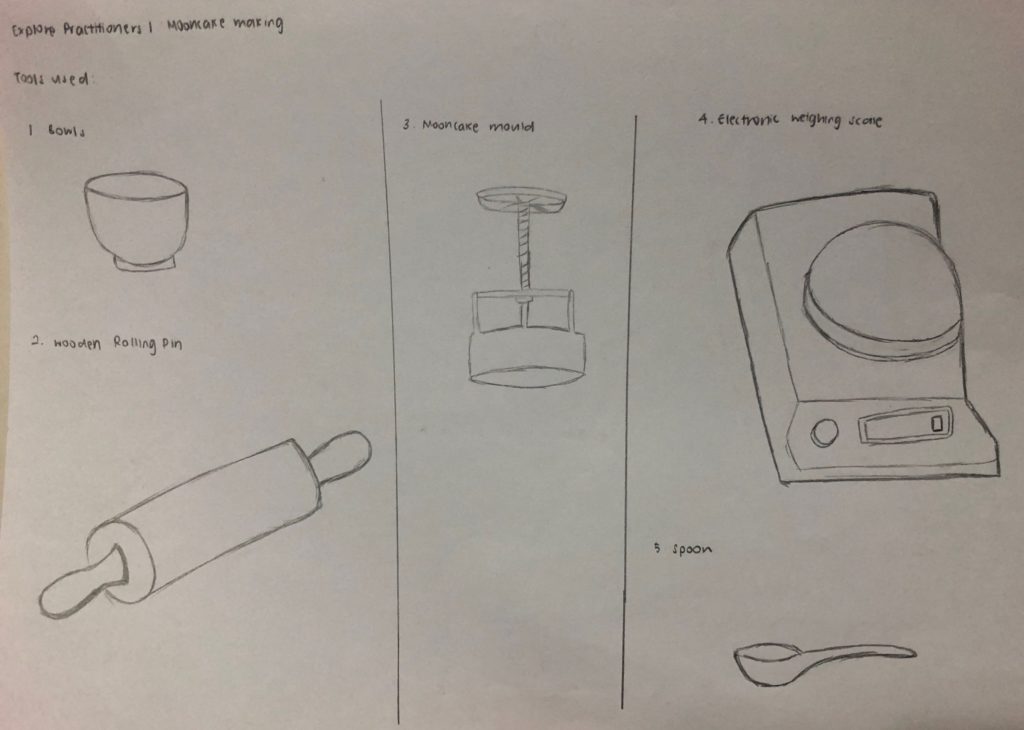
Tools used

  1. Bowls
  2. Wooden rolling pin
  3. Mooncake mould
  4. Electronic weighing scale
  5. Spoon

Worksite Documentation

As I made the snow skin mooncakes at my friend’s house, it is very convenient to get extra bowls. Additionally, it was easy to clean up and we prepared a plastic cover on the table so even with all the flour, we did not make a big mess. As there were several types of paste and dough, we are also required to wash our hands every single time we change a paste or dough. Hence, it was very convenient for us to wash our hands as the workspace was just beside the kitchen. Therefore, I find that I was at a very comfortable state to learn this new skill.

Pain points

Kneading of the dough takes the most effort. It takes skill to knead it properly and we are not supposed to knead the dough for too long as it would become too soft. When it becomes too soft, it would be hard to flatten it and wrap it around the paste balls. At the same time, the colours may not be spread evenly if the dough was not kneaded properly as well. From this, I learnt that making handmade snow skin mooncakes are not as easy as I thought it will be. It is a very tiring process and it takes up a lot of time to produce a small amount.

Explore Practitioners 1: Traditional Hawker – Brenda Tan

I have always been very supportive of Singapore’s hawker culture as I always visit hawker centers when I am craving some comfort food or a taste of nostalgia. Hence, for my first practitioner, I decided to approach a family friend who owns a coffeeshop, to teach me how to make one of my favourite dishes – lor mee, which literally translates to “braised noodles”.

Process Documentation 

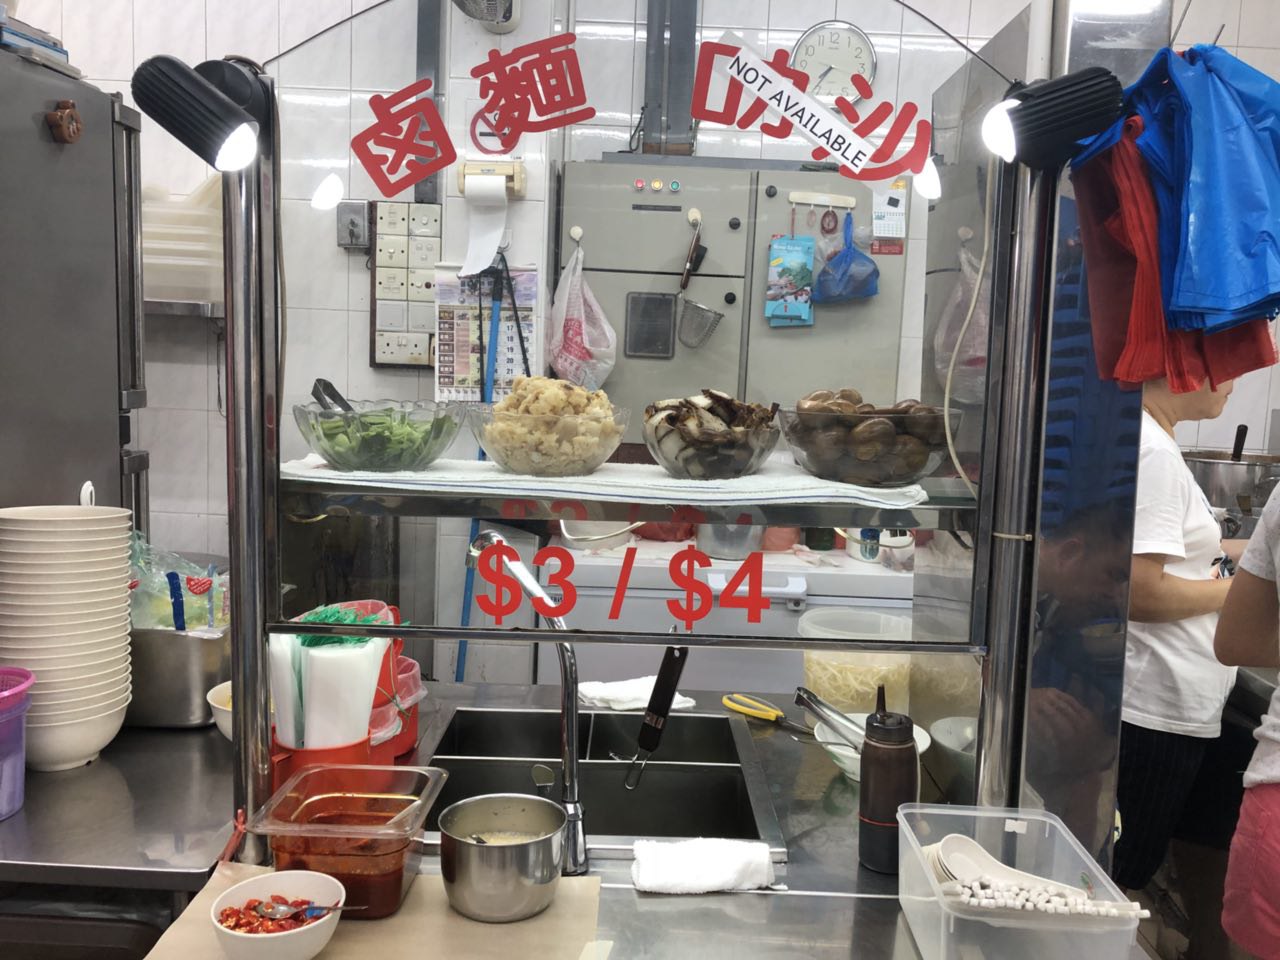
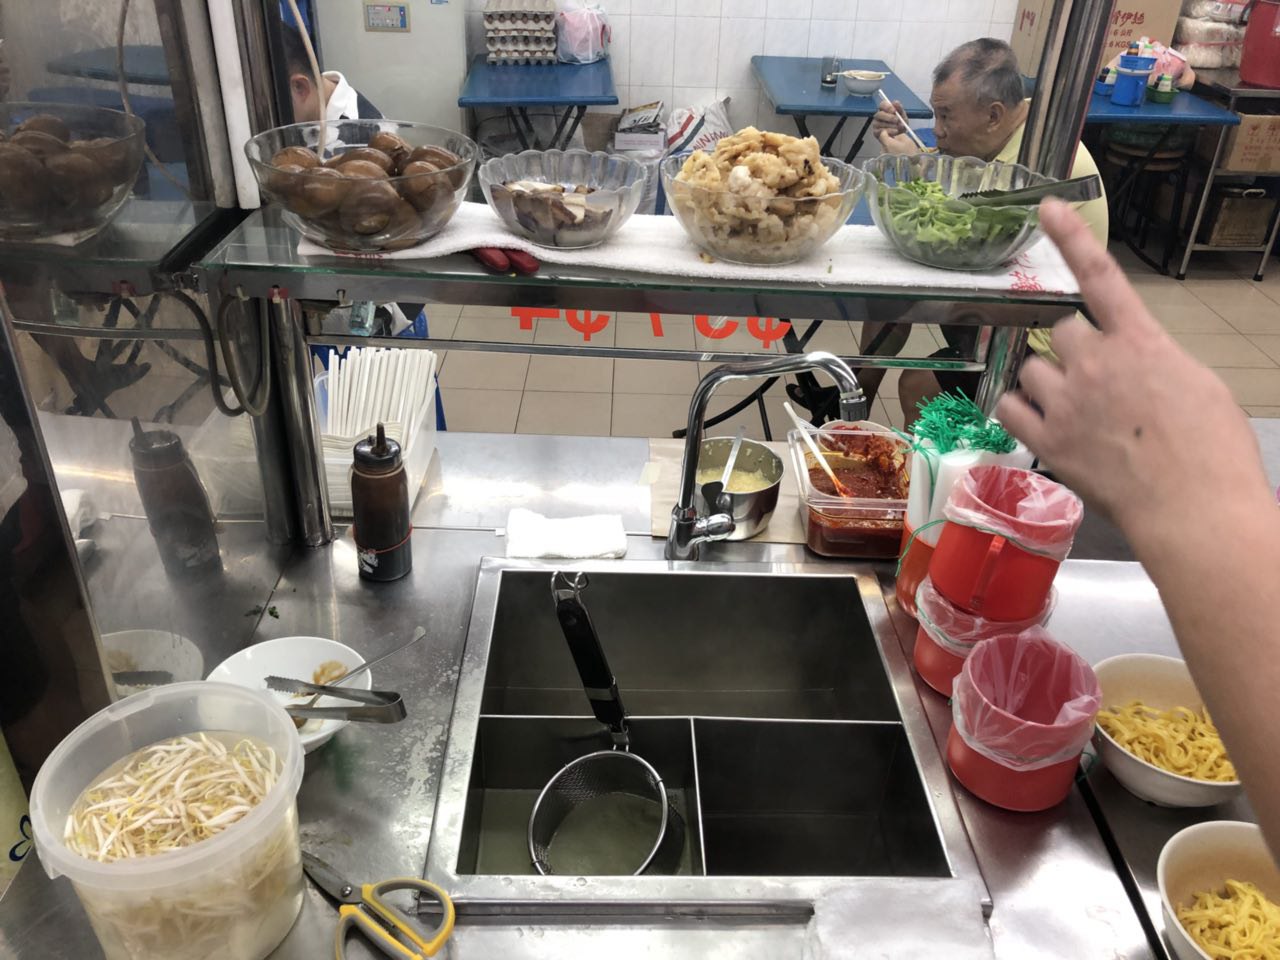
Usually, the chef wakes up at 1am to prepare the gravy beforehand! After the gravy is done, she will move on to prepare the toppings for the noodles. Below is a short video of how a typical bowl of lor mee is prepared and served to customers. 

Preparing a bowl of lor mee involves a systematic and arduous process. Here are the steps according to the video above:

  1. Firstly, the amount of noodles and beansprouts are estimated by hand and placed into a noodle strainer, before being blanched in piping hot water.
  2. After the noodles are cooked, 1 1/2 ladles worth of thick, sticky gravy is poured on top of the noodles, just enough to cover the noodles.
  3. Next, toppings such as braised egg, fried fish, braised pork and parsley are added to the bowl. 
  4. Last but not least, condiments like black vinegar, chilli paste and minced garlic are added before serving the bowl of noodles to the customer. 

Tools used

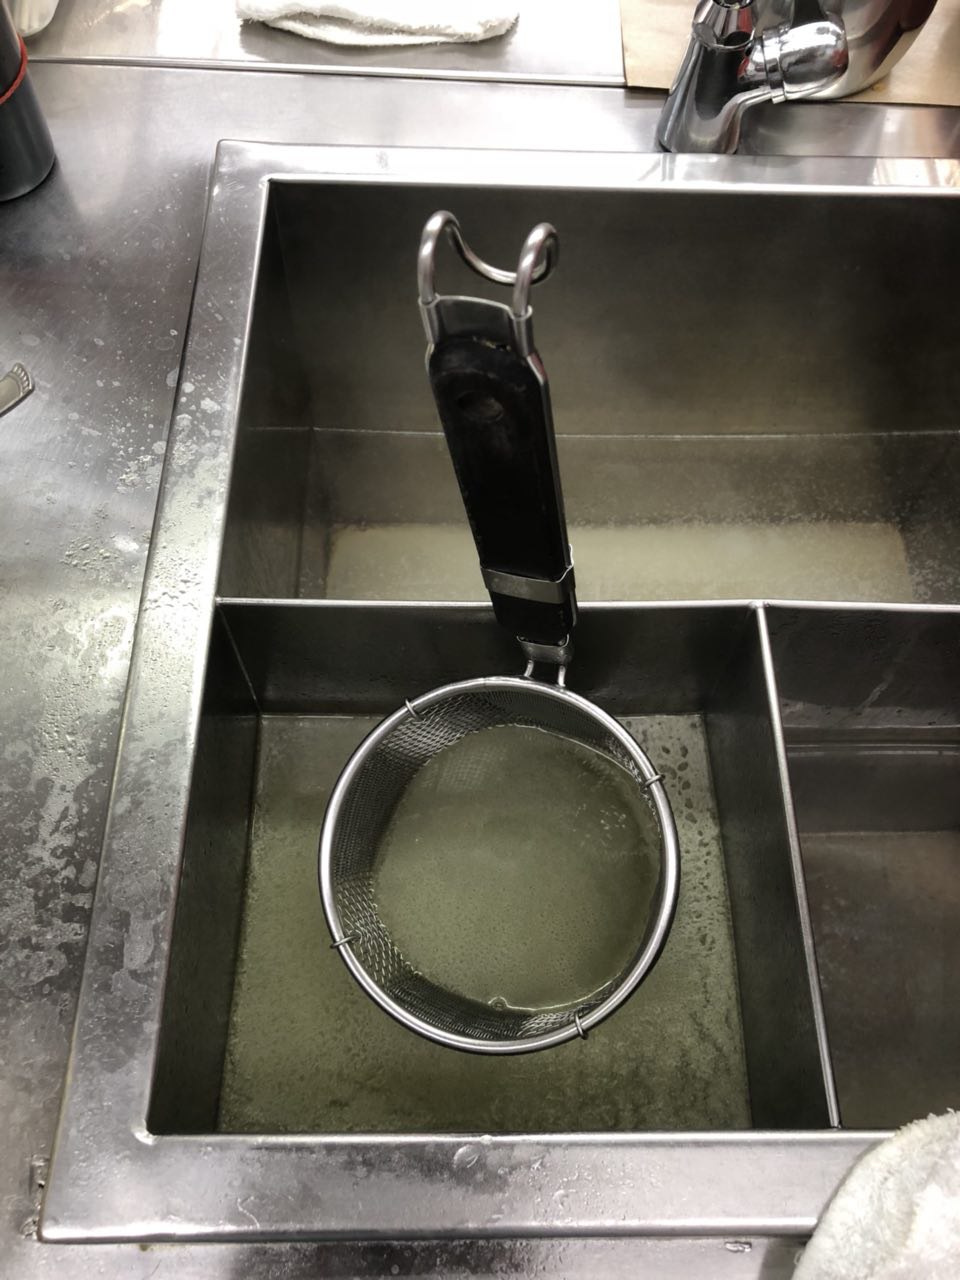
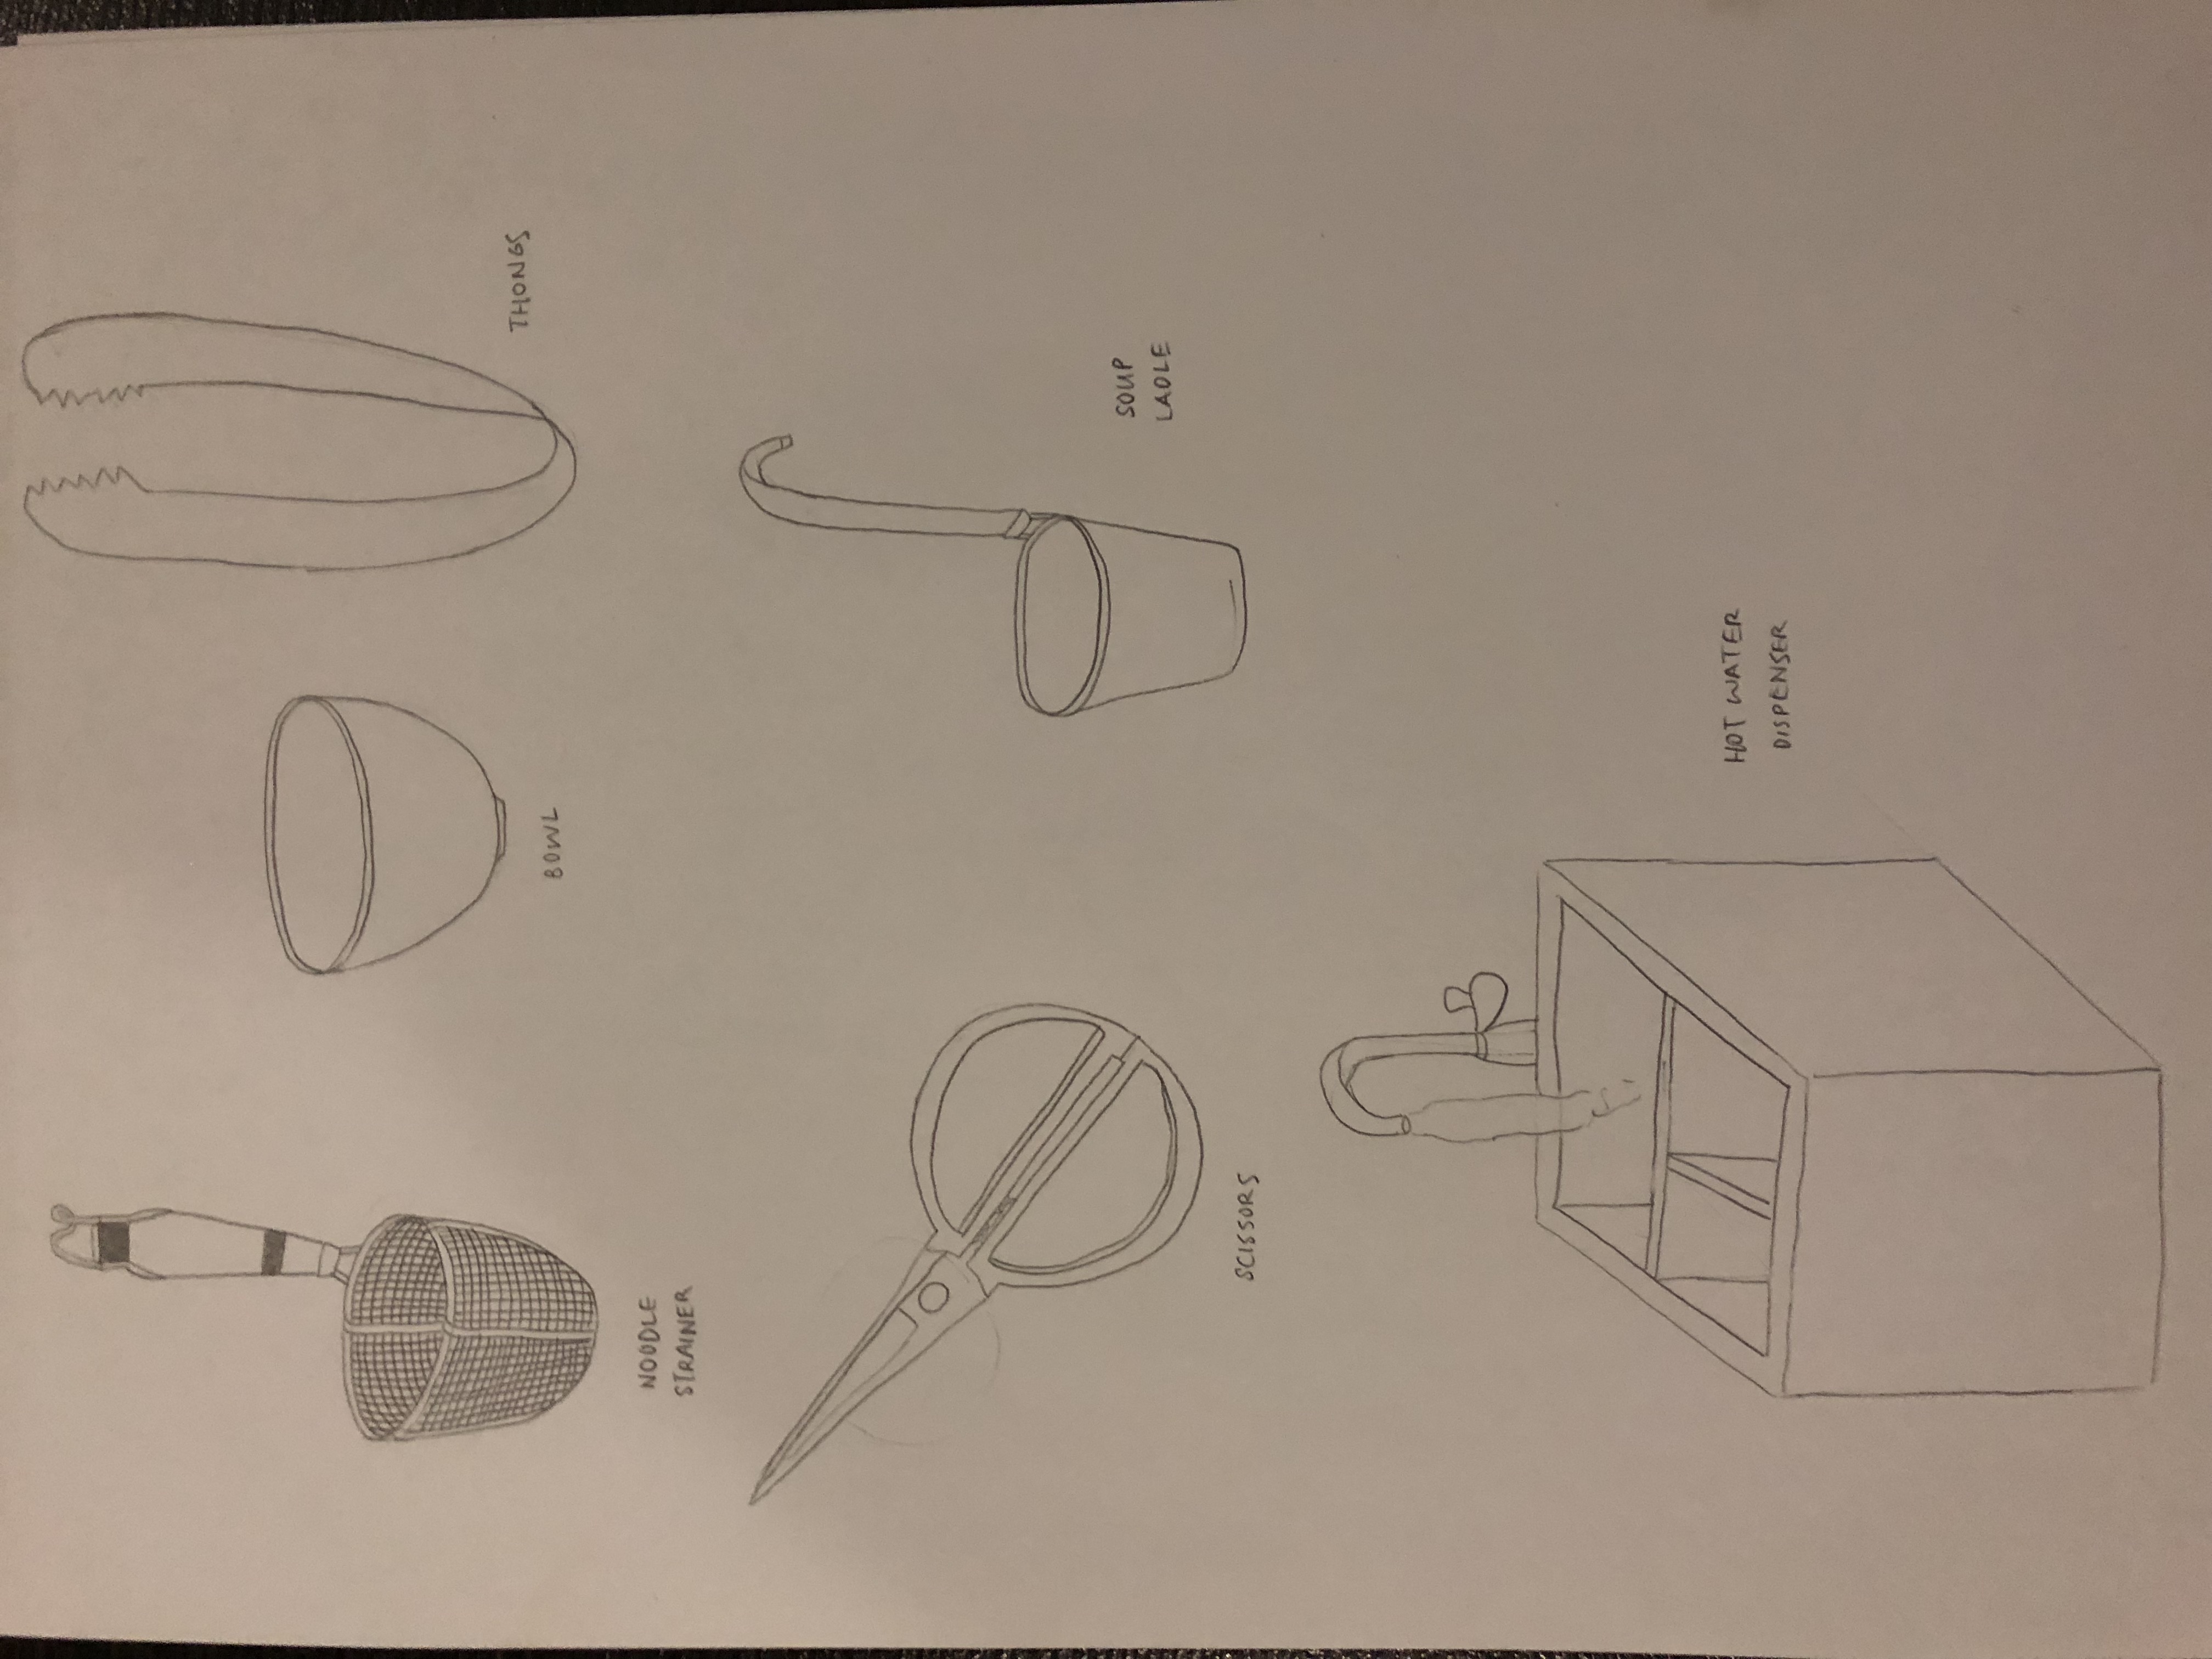
  • Stainless steel noodle strainer
  • Thongs
  • Ladle 
  • Bowl
  • Scissors 
  • Hot water dispenser 
Thongs used
Noodle strainer used
Sketches of tools used

Worksite Documentation 

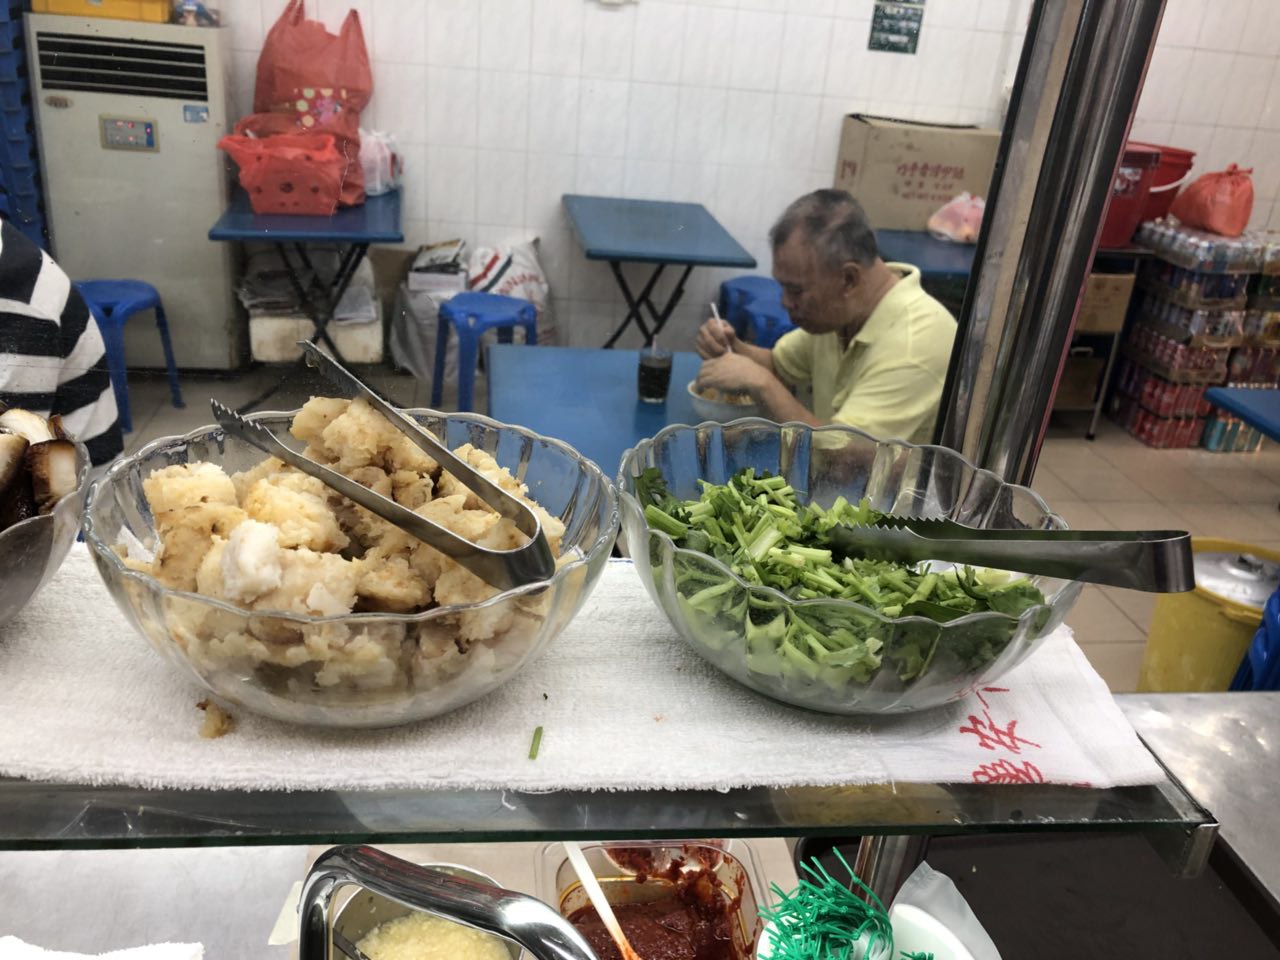
The worksite is a small and humble space, and it also very clean and organised. Below are a few photos I took of the worksite. 

Personal Insights 

After attempting to prepare a bowl of lor mee by myself, I took down some notes regarding my experience. 
The most challenging part would be straining the water out of the noodles, because I need to leave the right amount of water in the noodles, and if there is too much water retained in the noodles, it will become too soggy. In my opinion, it takes a lot of time and experience for one to master this step. On the other hand, I learnt that preparing a humble bowl of noodles is actually a very laborious and meticulous process, and almost no machines or pre-made food are used. Everything from the braised egg to the braised pork are made with love by the chef and kitchen staff.

Practice Storyworld – Brenda Tan

1. Storyworld

Character Descriptions:
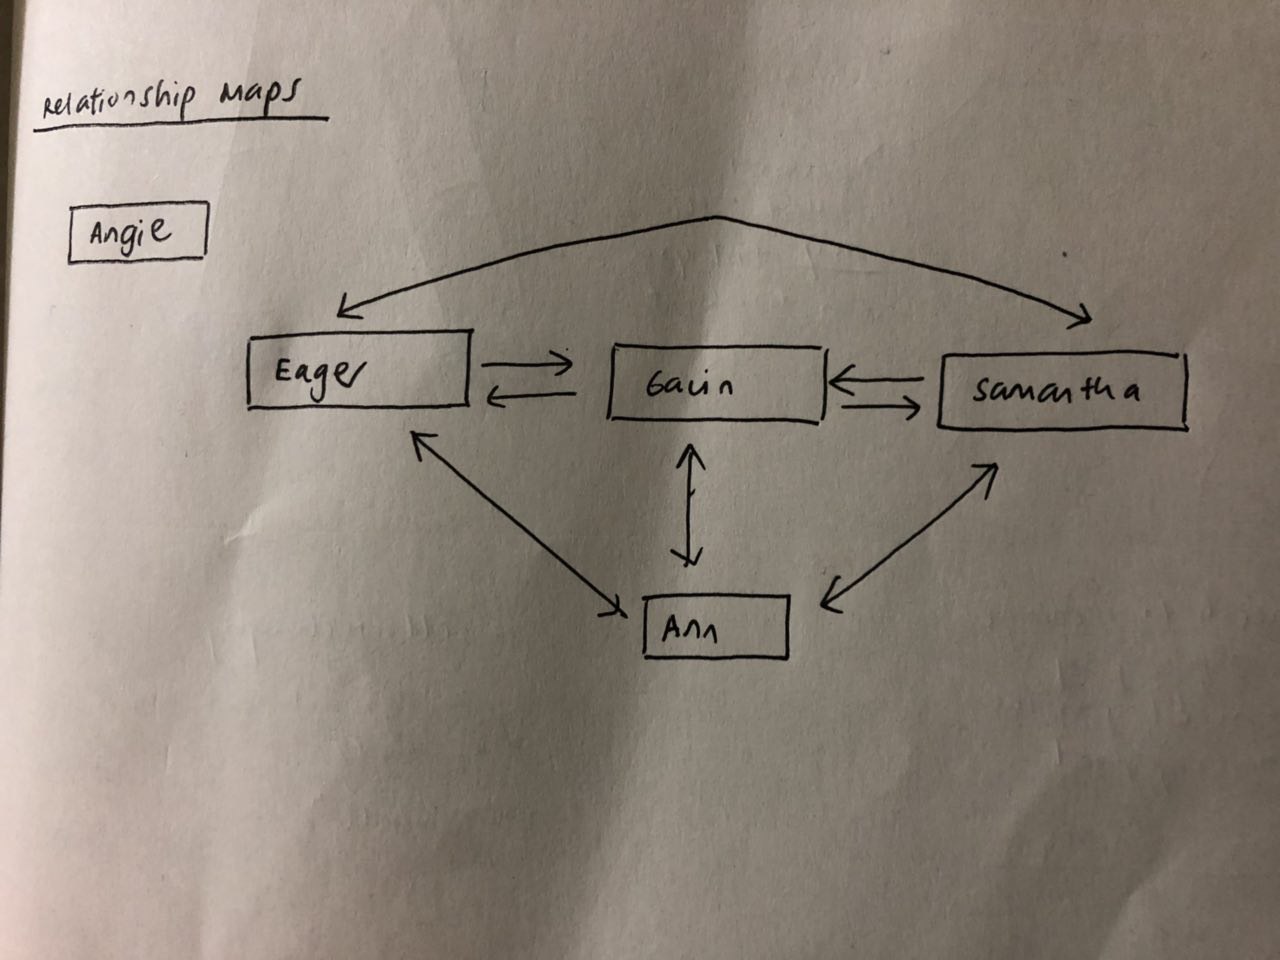
– Angie: old family robot that was beginning to malfunction 
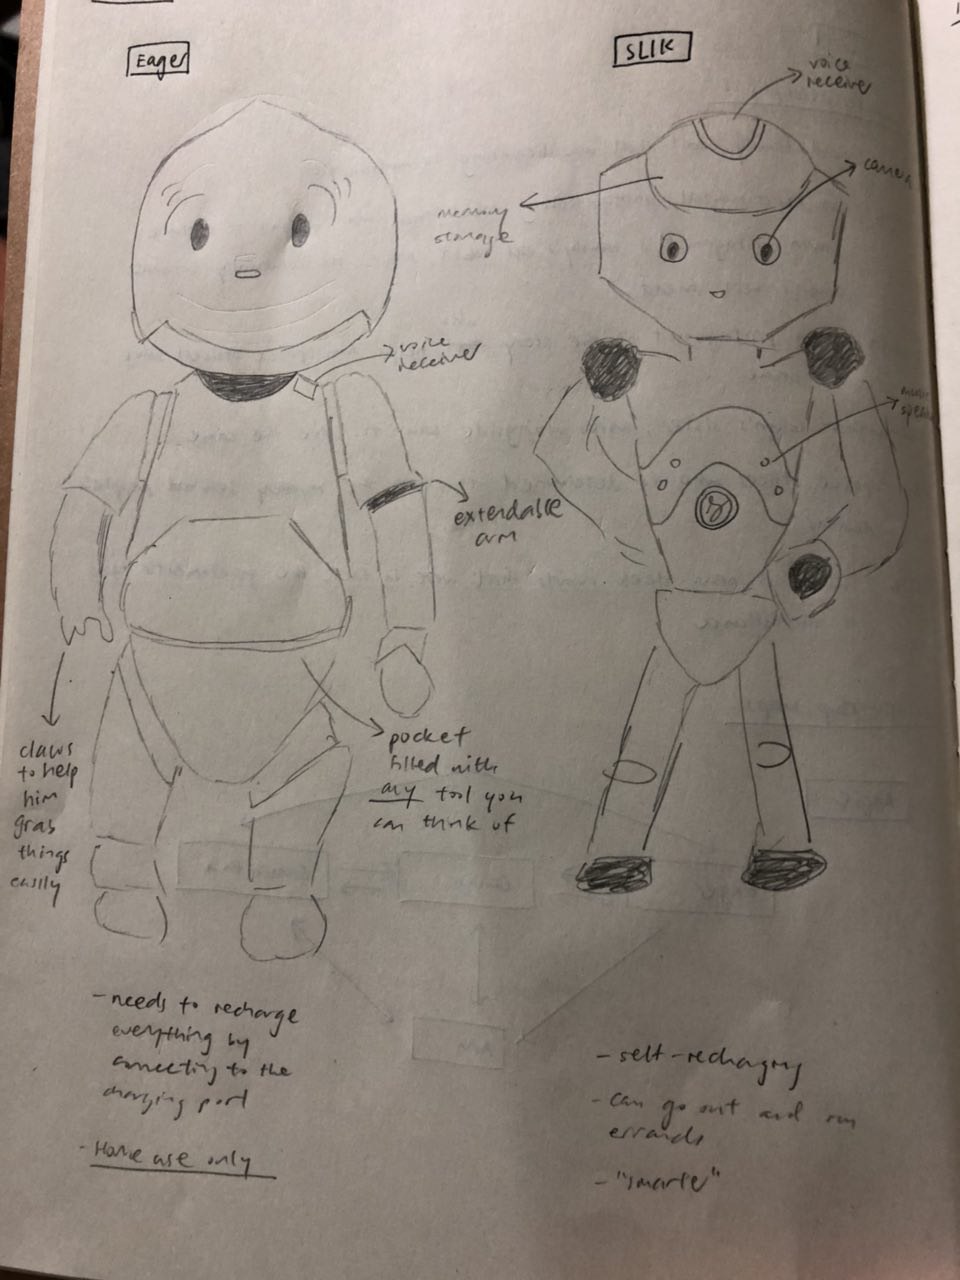
– Eager: an experimental, goofy-looking robot that was bought to replace Gavin’s old family robot, Angie. He eventually becomes Gavin’s best friend 
– Gavin: main protagonist of the story; helps Ann to uncover the truth behind the mysterious deaths 
– Samantha: Gavin’s sister; works alongside Gavin and Ann to solve the crime
– Ann: police officer who was put in charge of the recent series of mysterious deaths 
– SLIK Robots: batch of newer, sleek robots that were rolled out to replace the old batch of family robots. 

Relationship Maps:

Important Technology:
– AI system that runs the smart robots
– Advanced sensory and biometric technologies
– Surveillance cameras that were installed inside the SLIK robots 

Antecedent Technology:

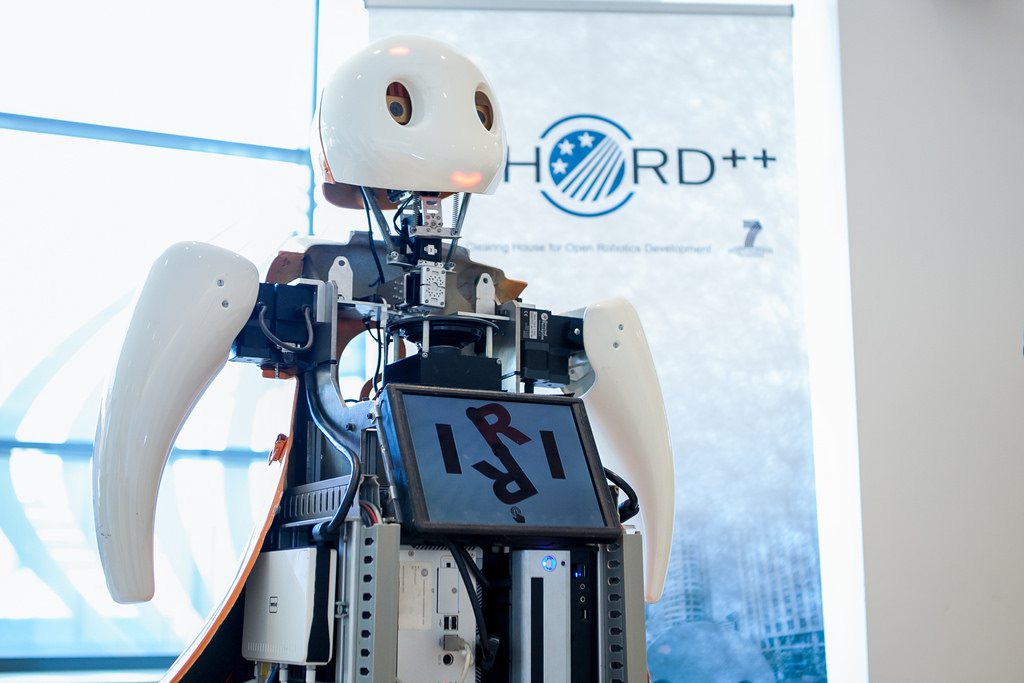
Smart robots designed to serve families already exist in today’s world, ranging from the Aeolus Robot which is able to move household objects and adapt to changing environments, to Ubtech Robotics’ Walker, which offers a complete “home butler” service. However, these robots can only provide assistance to humans at home.

Equipped with an advanced GPS system and recognition function, the SLIK robots in this storyworld are able to run errands for their owners outside of the house. With highly advanced sensory and biometric technologies, it can also recognise and differentiate between an unlimited number of people, places and items. 

Image source: https://www.flickr.com/photos/cor-photos/34571264585
Sketches of Eager (experimental robot) and SLIK robots (more advanced robots)

2. Genre
Sci-Fi/ Thriller 

3. Story 

In the late 22nd century, rising sea levels and natural disasters from global warming have wiped out many coastal cities and the world’s population was tremendously reduced. Due to a severe lack of manpower, robots were created to serve families and take over jobs. In Washington, a new batch of robots called SLIK was rolled out to replace the old batch. 

One day, Gavin’s family robot, Angie, starts malfunctioning. Since Gavin’s family is unable to afford a SLIK robot, they decided to get one of the cheaper, experimental robots  – Eager. Eager and Gavin quickly became best friends. 

Weeks later, Eager and Gavin were watching the news together – there was a series of mysterious deaths in the state. People who opposed the governments started dying mysteriously without any signs of struggle, and the SLIK robots that belonged to the victims were destroyed as well. 

Suddenly, Eager started glitching and a vision of his past reappeared, showing the employees from SLIK installing mysterious-looking devices into the SLIK robots. Gavin, Samantha and Ann worked together to uncover the truth behind these mysterious deaths and found out that those mysterious-looking devices were in fact surveillance cameras planted by the government in the SLIK robots, for purposes of “national security”. The government, which only wanted only their supporters to survive, installed the robots with a unique voice recognition function that will alert the government whenever the robots’ owners mention keywords like “hate the government”.  Since the government had full control over the SLIK robots, they were able to make the robots self-destruct, while standing beside their owners, killing them as a result. In the end, Ann, Samantha, Gavin and Eager found the main control station that controlled all the robots in the state, and managed to turn off all the robots in the country, including Eager. 

Documentation for Prototypes vs Models – Brenda Tan

Creative practice
Digital Painting

Tools used
1. Wacom Bamboo Pen Tablet
2. Stylus pen
3. Computer
4. USB cable (to connect the tablet to the computer)

Problems faced by the practitioner 
1. Inconvenience: The tablet needs to be connected to a computer for it to work. Since the computer and tablet can be quite bulky and heavy,  the practitioner can only do digital painting at home and not anywhere outside.
2. Stylus pen may get lost: Since the pen is quite small and there is no cord connecting it to the tablet, the practitioner may sometimes lose it if she’s not careful enough.

Sketches of tools used (Tablet and pen)
Sketches of tools used (Computer and USB cable)

Idea 1
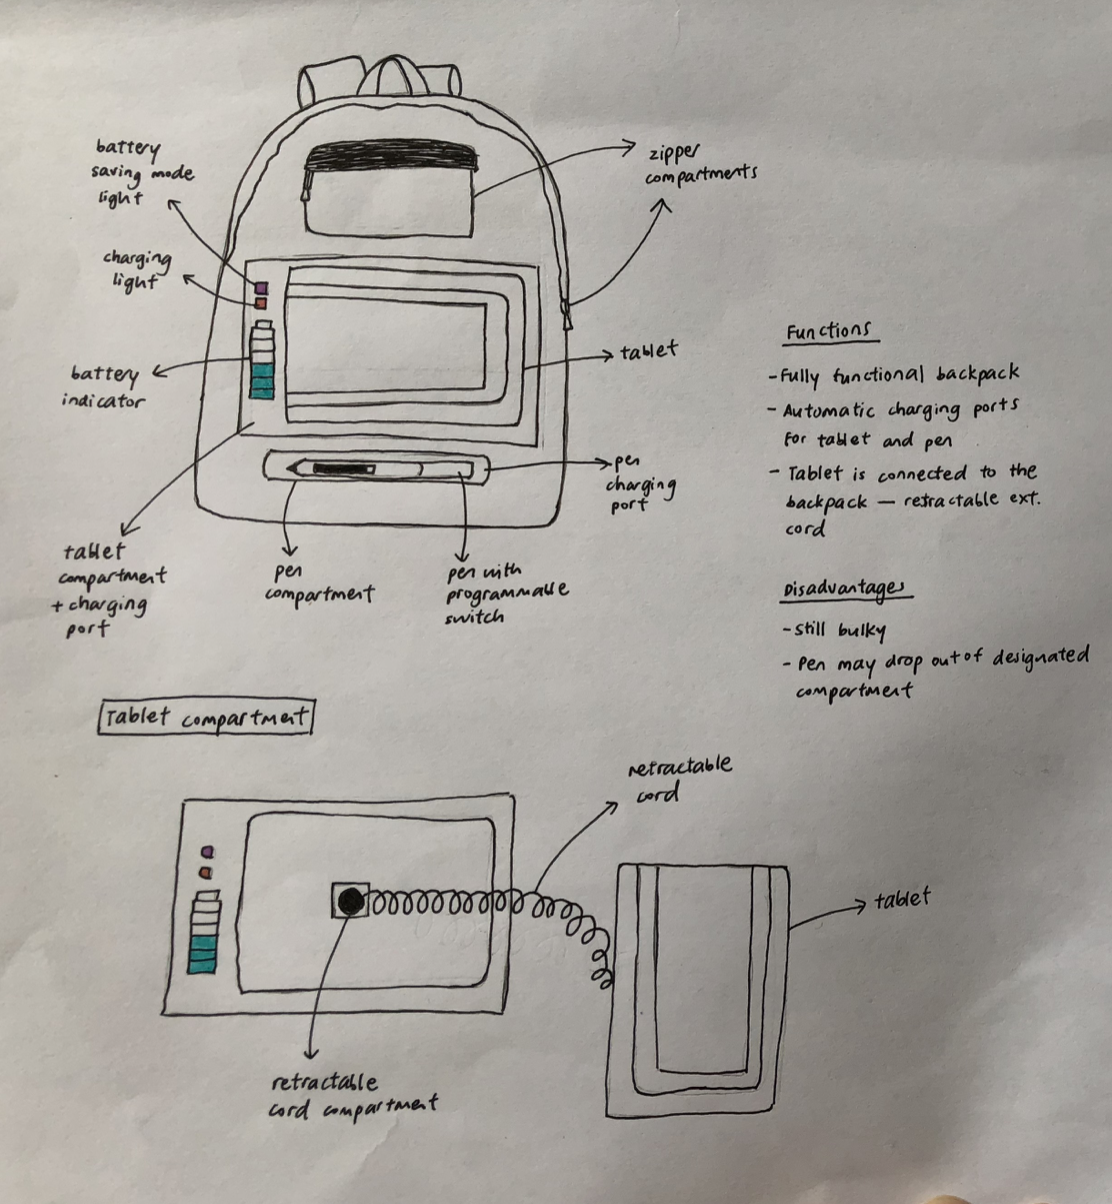
Backpack Pen Tablet 


My first idea is to embed automatic charging ports for both the tablet and pen into a fully functional backpack, and this aims to combat the problem of inconvenience. The tablet is connected to the backpack with a retractable extension cord and the user can simply place it back into the charging port once the battery indicator states that its battery is running low. 

Although the user can now bring the tablet out on the go, this idea still has a few problems. Firstly, this backpack is still rather bulky. Also, the tablet screen may be scratched when it touches rough surfaces. The pen may also drop out of its designated compartment if it is not securely fastened. 

Idea 2 (with model)
Wearable Convertible Pen Bracelet 

For my second idea, I aim to combat the problem of losing the stylus pen by creating a convertible pen bracelet that the user can wear on the go. The stylus pen can be transformed into a high quality bracelet, couple with a magnetic tip to facilitate the transformation process. 

My model (shown below), made out of beads, elastic string and black tape, shows the pen bracelet at its second stage.

Model of Idea 2

Idea 3 (with prototype)
Wearable Bluetooth Pen 

Prototype of Idea 3

Last but not least, I created a wearable bluetooth pen with an in-built illustrator software that allows the user to engage in digital painting on the go, as long as there is a flat surface that the user can work with. Each finger represents a different illustrator tool (e.g. the index finger represents the pen tool) and the in-built sensor on each ring senses the user’s finger movements and converts them into the specific tools. The bluetooth function also allows the user to save his or her artworks and sync them to the computer app afterwards. Since the bluetooth pen is battery operated, there will also be a charging case to recharge the device. 

However, this idea has its disadvantages as well. Firstly, the user might forget the tools represented by each finger. Also, the usage of fingers might not be precise enough to draw fine lines. Lastly, this device only works on flat surfaces. 

Documentation for Prototypes vs Models – Chia Li Hui

Creative Practice
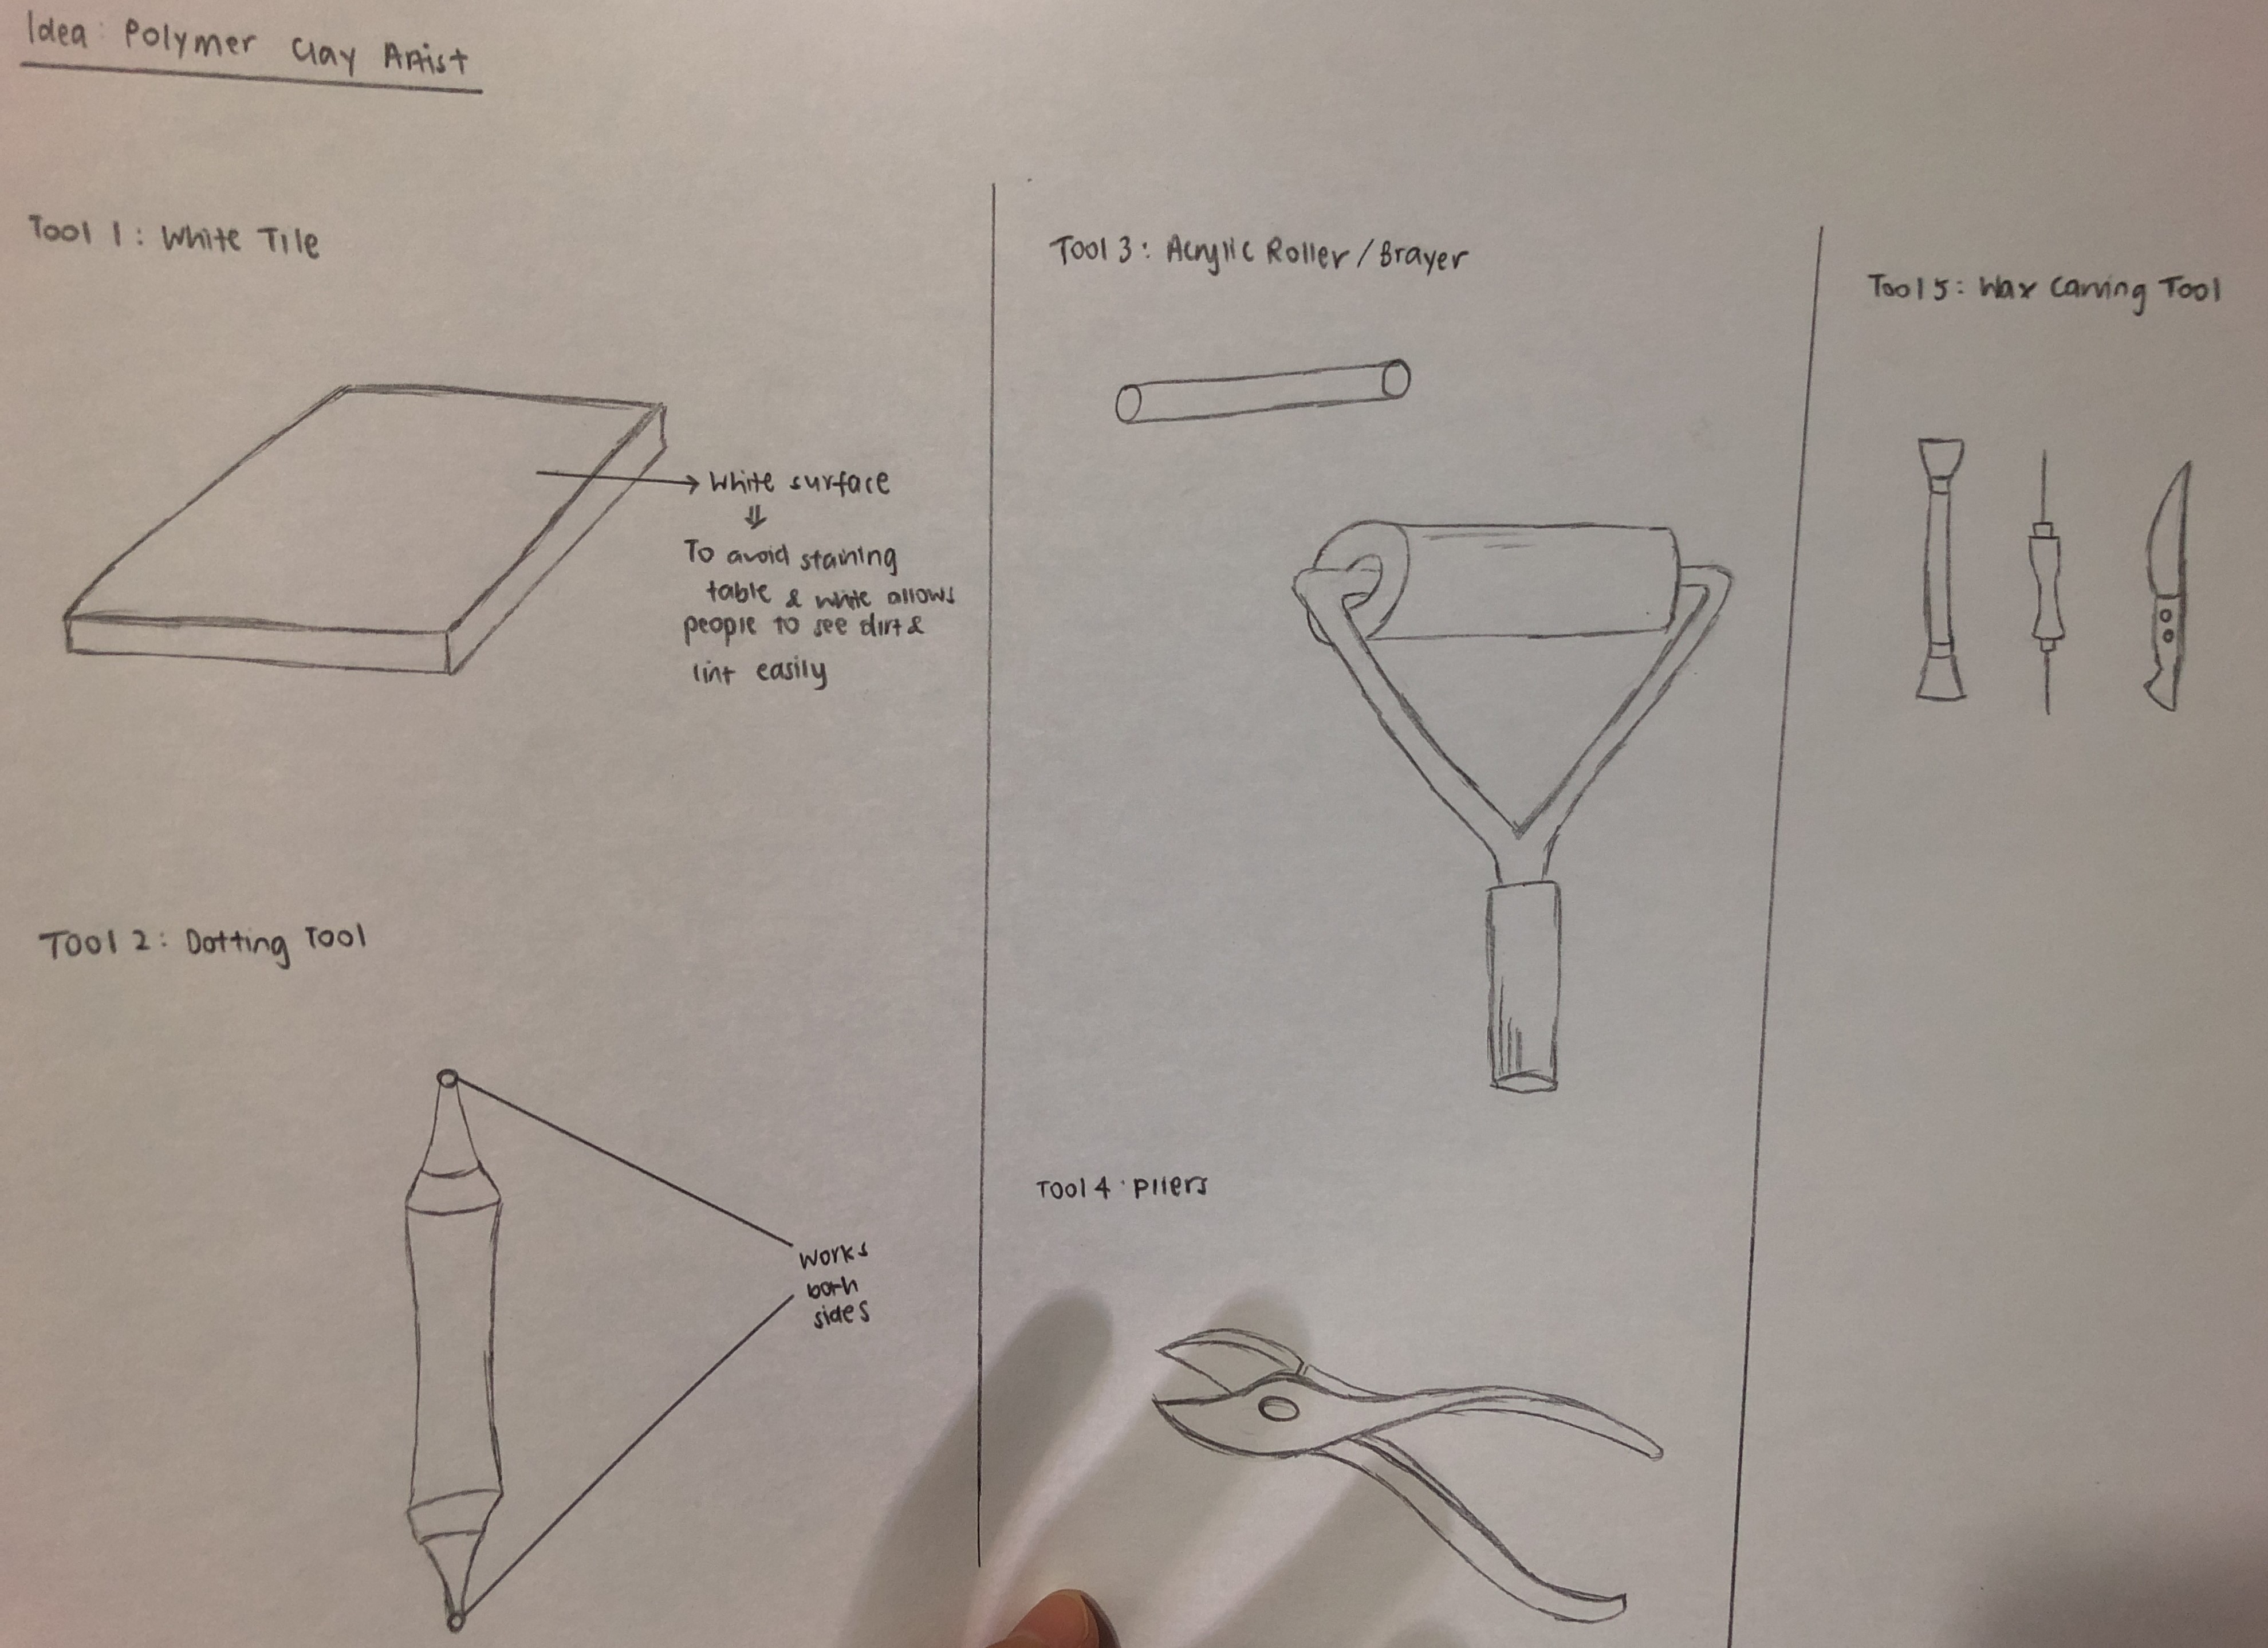
Polymer Clay 

Tools used
1. White Tile (To avoid staining the table and white allows people to see dirt and lint easily)
2. Dotting Tool
3. Acrylic Roller/Brayer
4. Wire Cutter
5. Wax Carving Tool

Sketches of 5 tools used

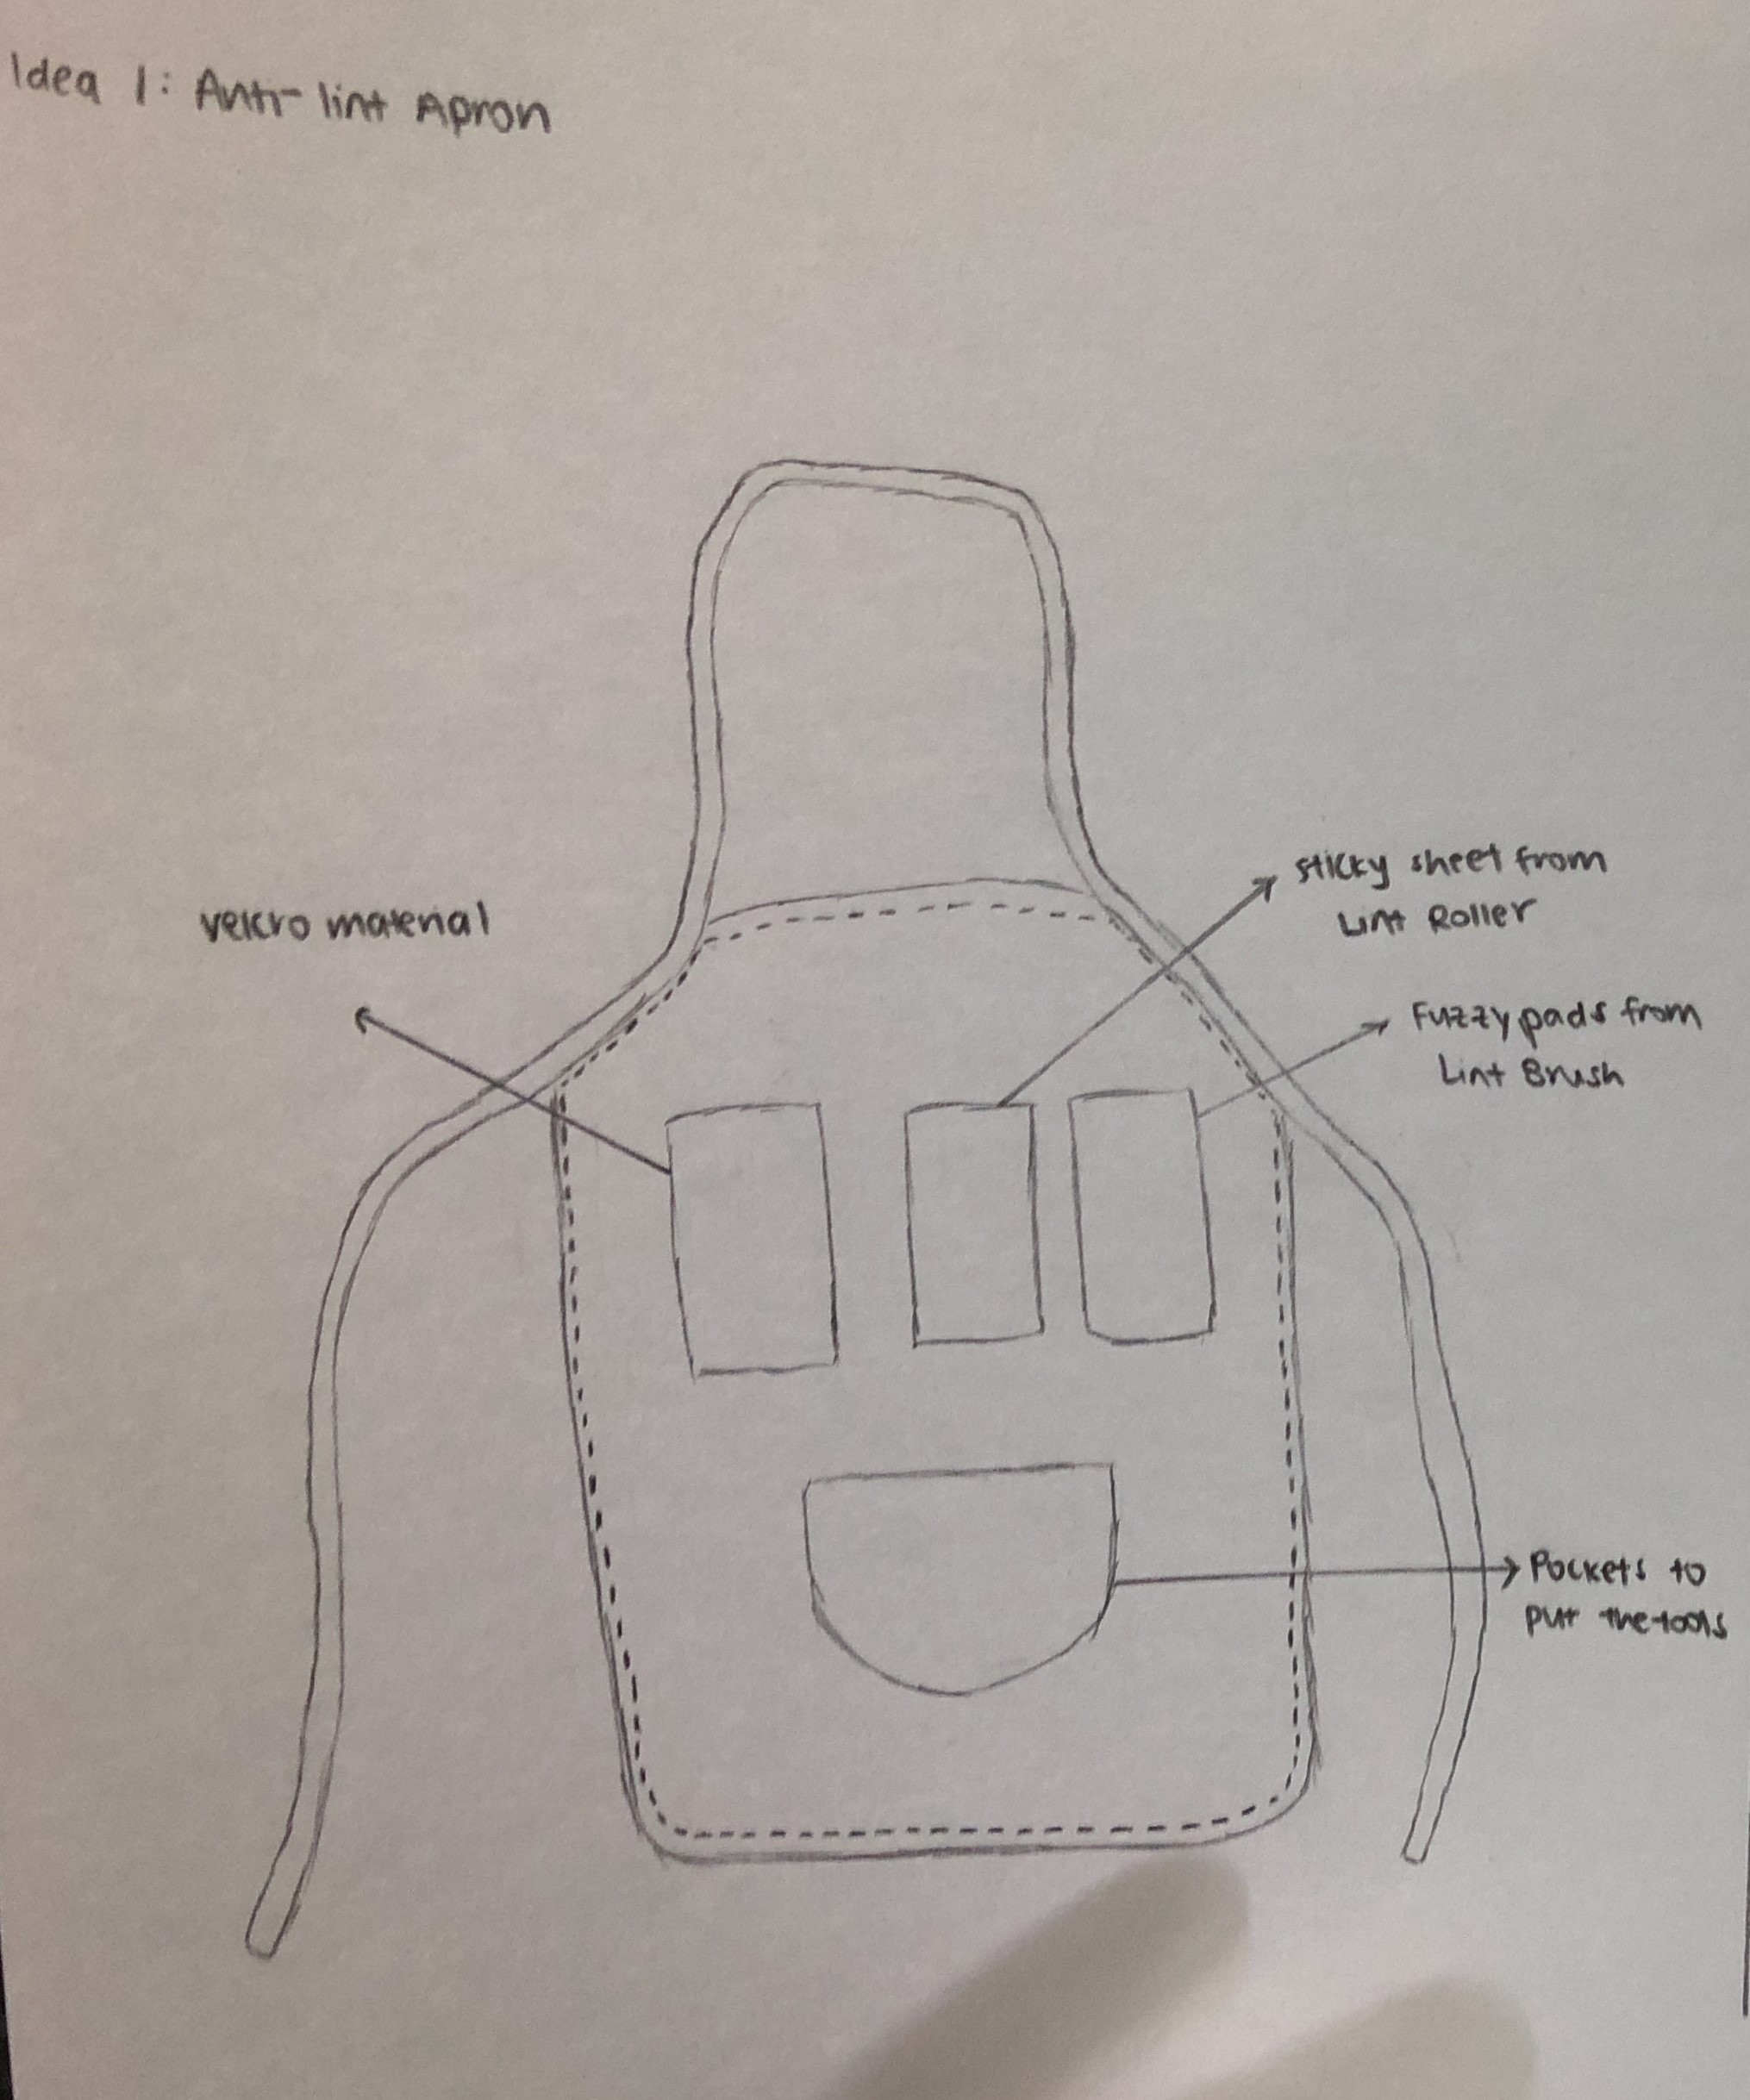
Idea 1: Anti-lint Apron

Anti-Lint Apron

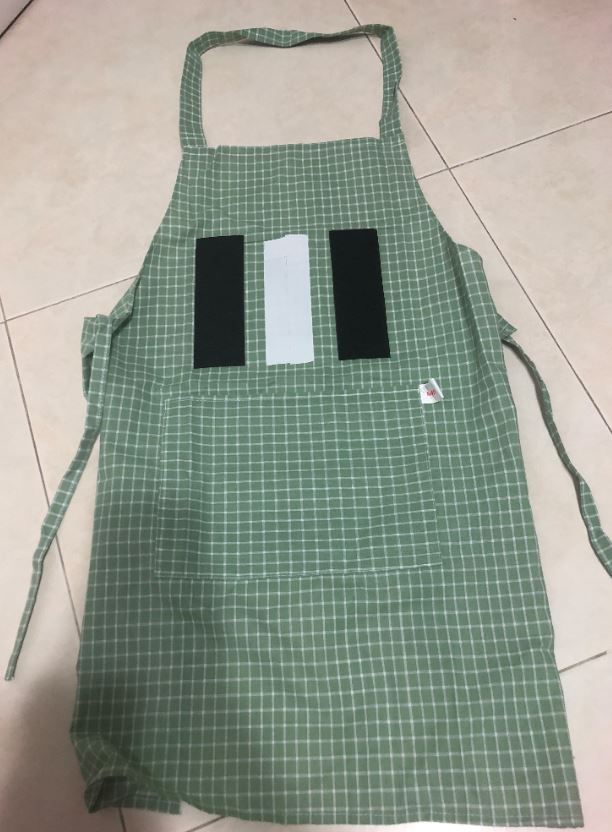
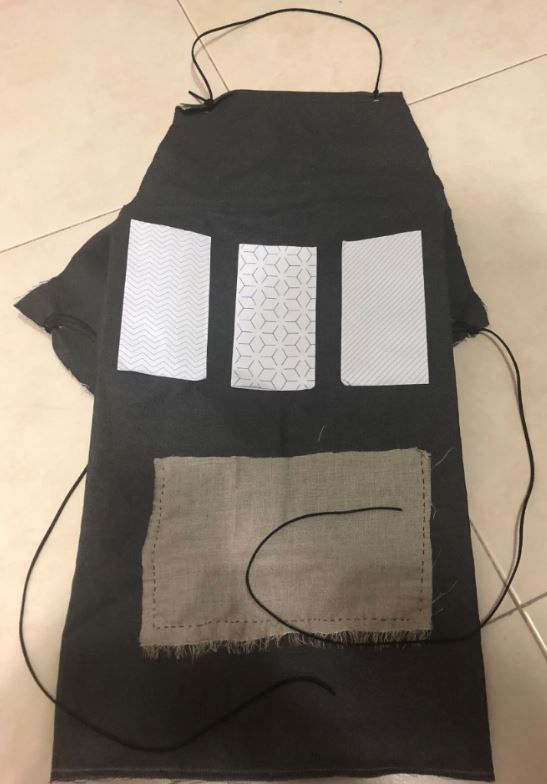
The idea is to allow the artist to remove fabric lints easily while making polymer clay. This is to avoid having lints trap in the clay. The velcro, sticky sheet from lint roller and fuzzy pads are all tools used to remove the lints. There is also a pocket for the artist to put other tools that he or she wishes to use.

Apron Prototype
Apron Model (Strings are adjustable according to the artists’ preference and height)

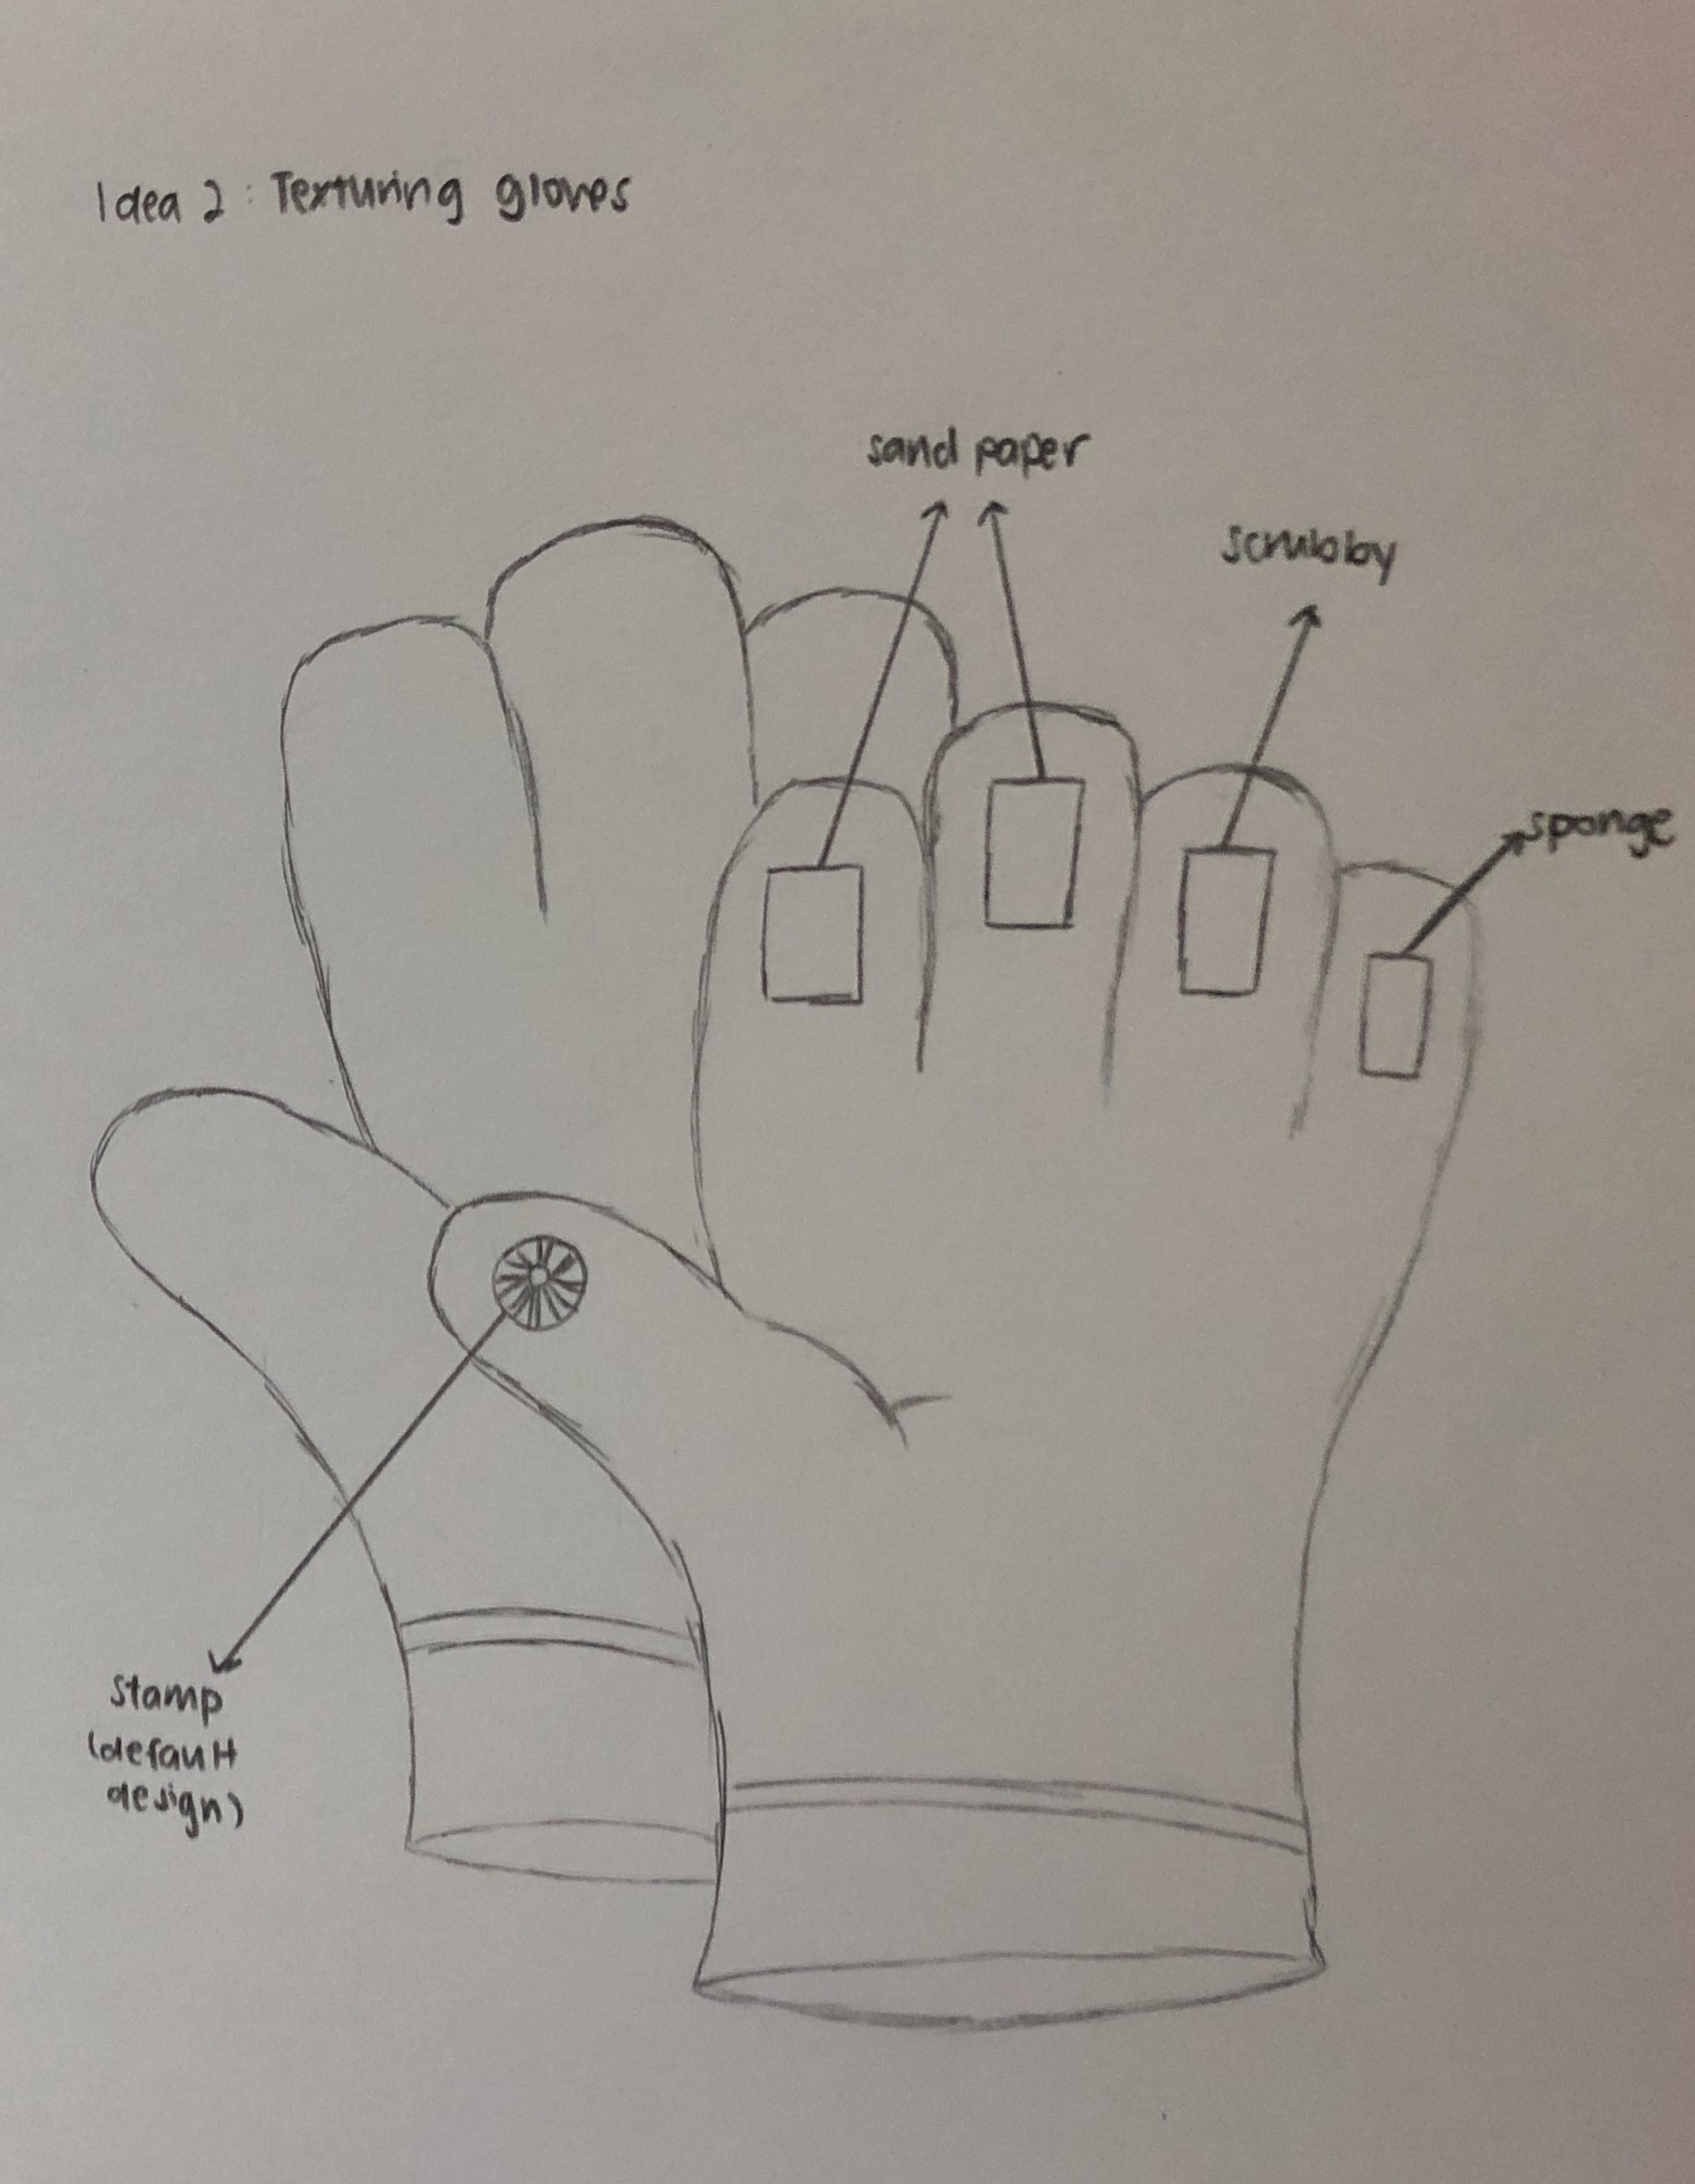
Idea 2 (absurd): Texturing Gloves

Sketch of Texturing Gloves

Idea is to aid the artist in texturing the clay.

Texturing Gloves

Wearable Research – Clare Chang

Catch

Practice it Works In

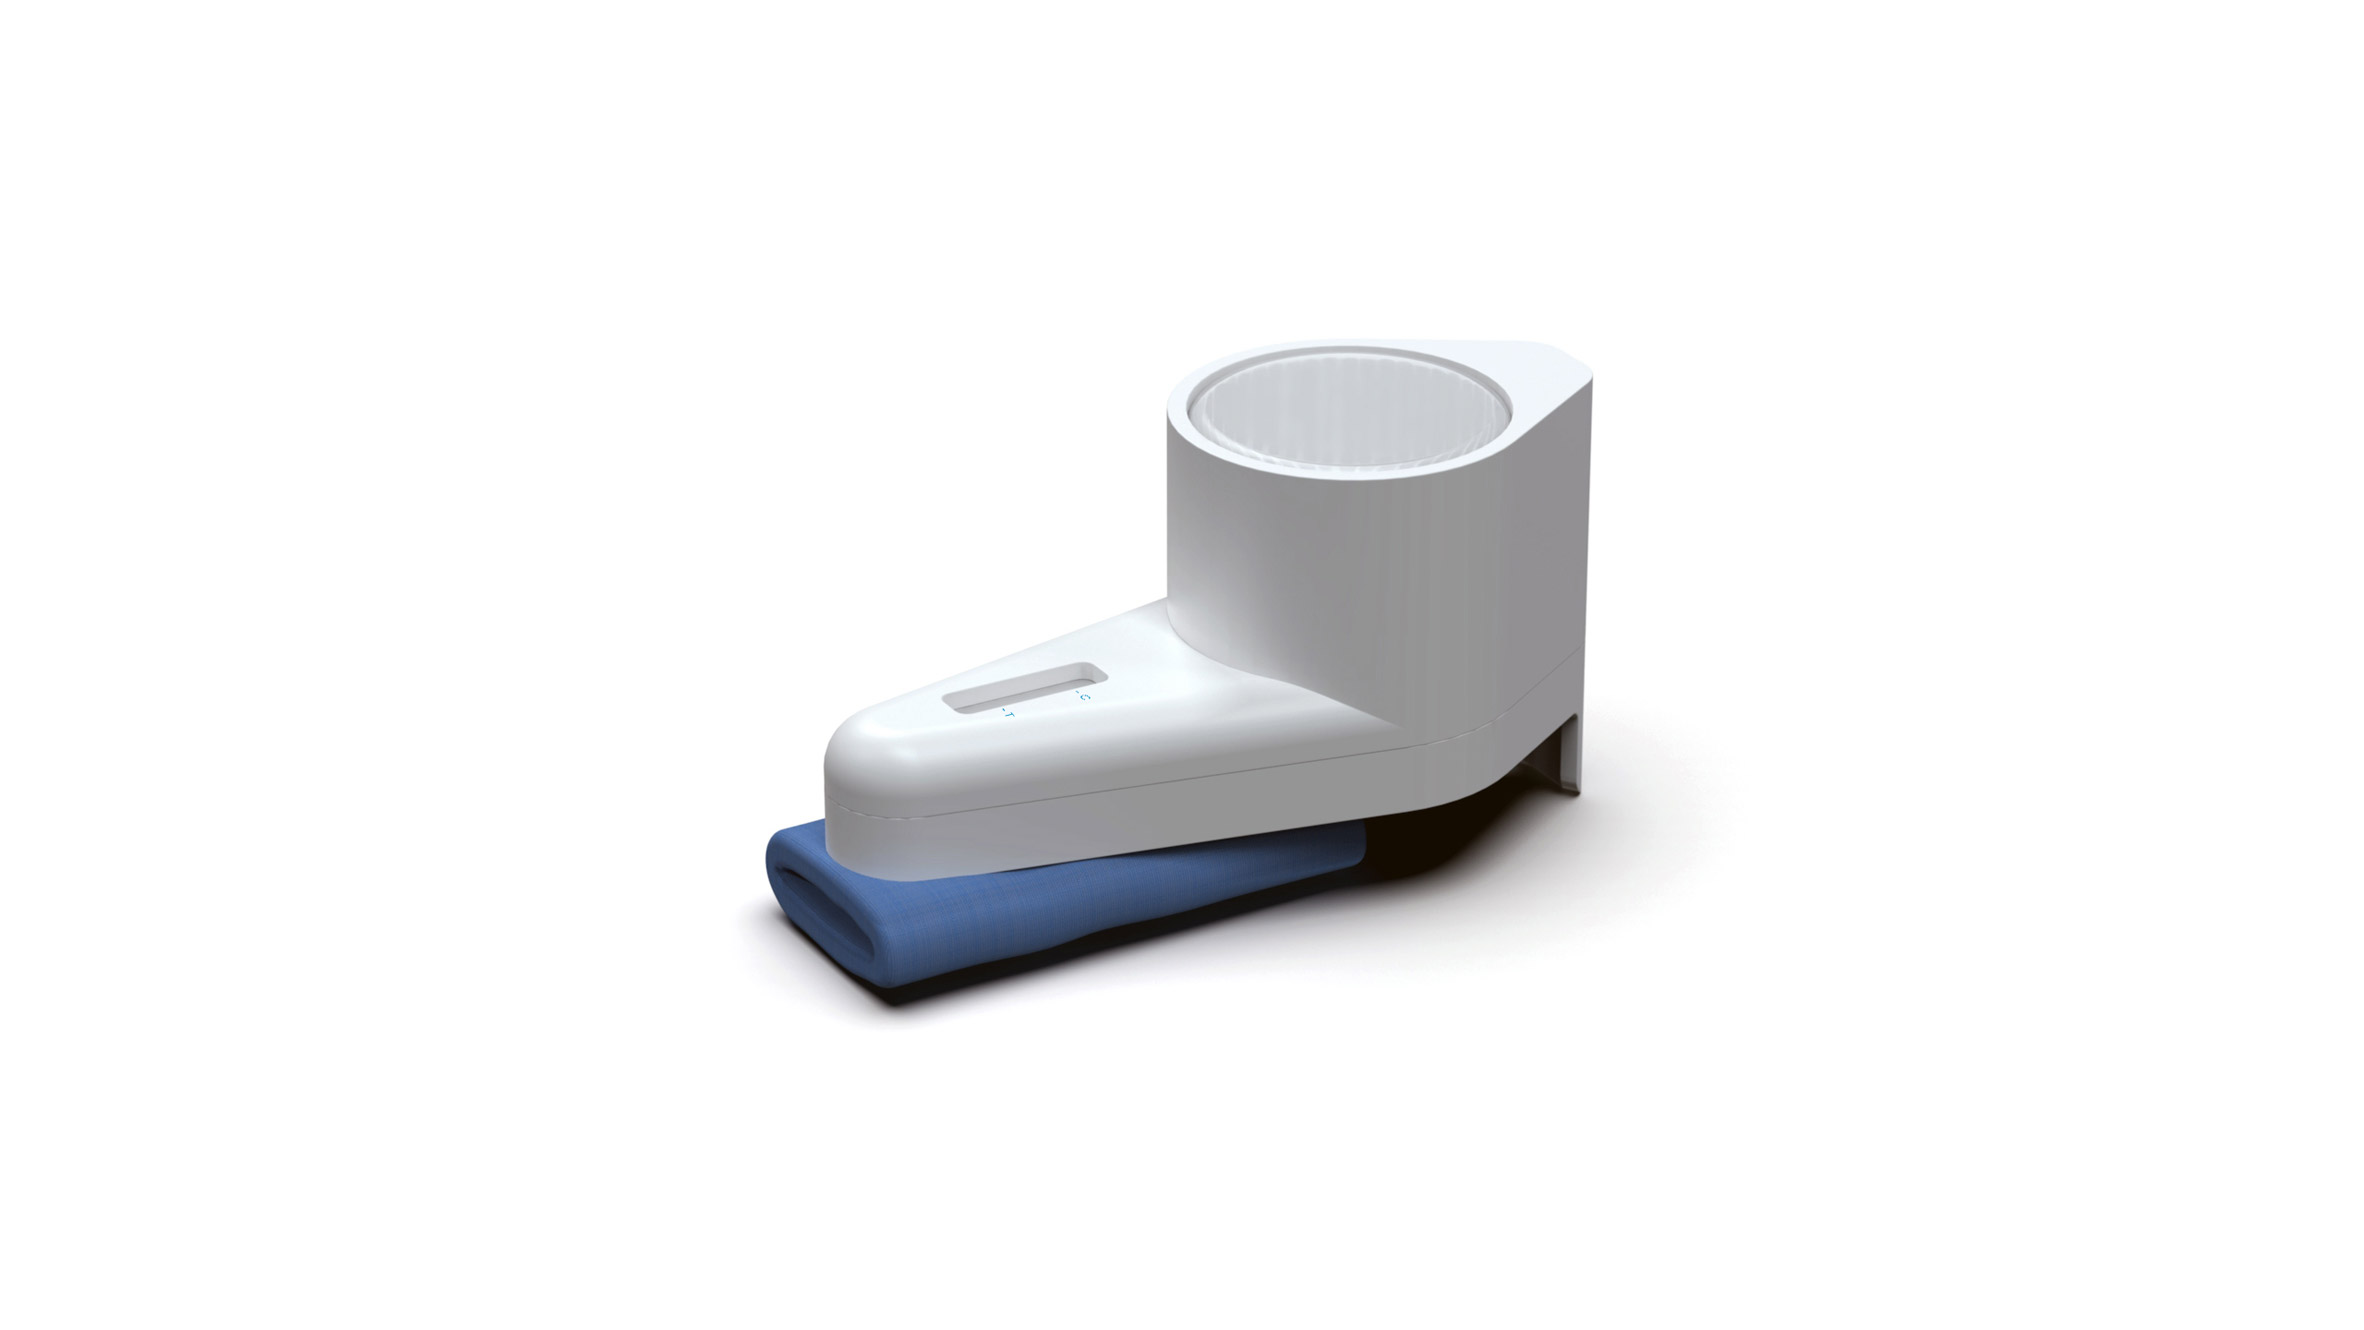
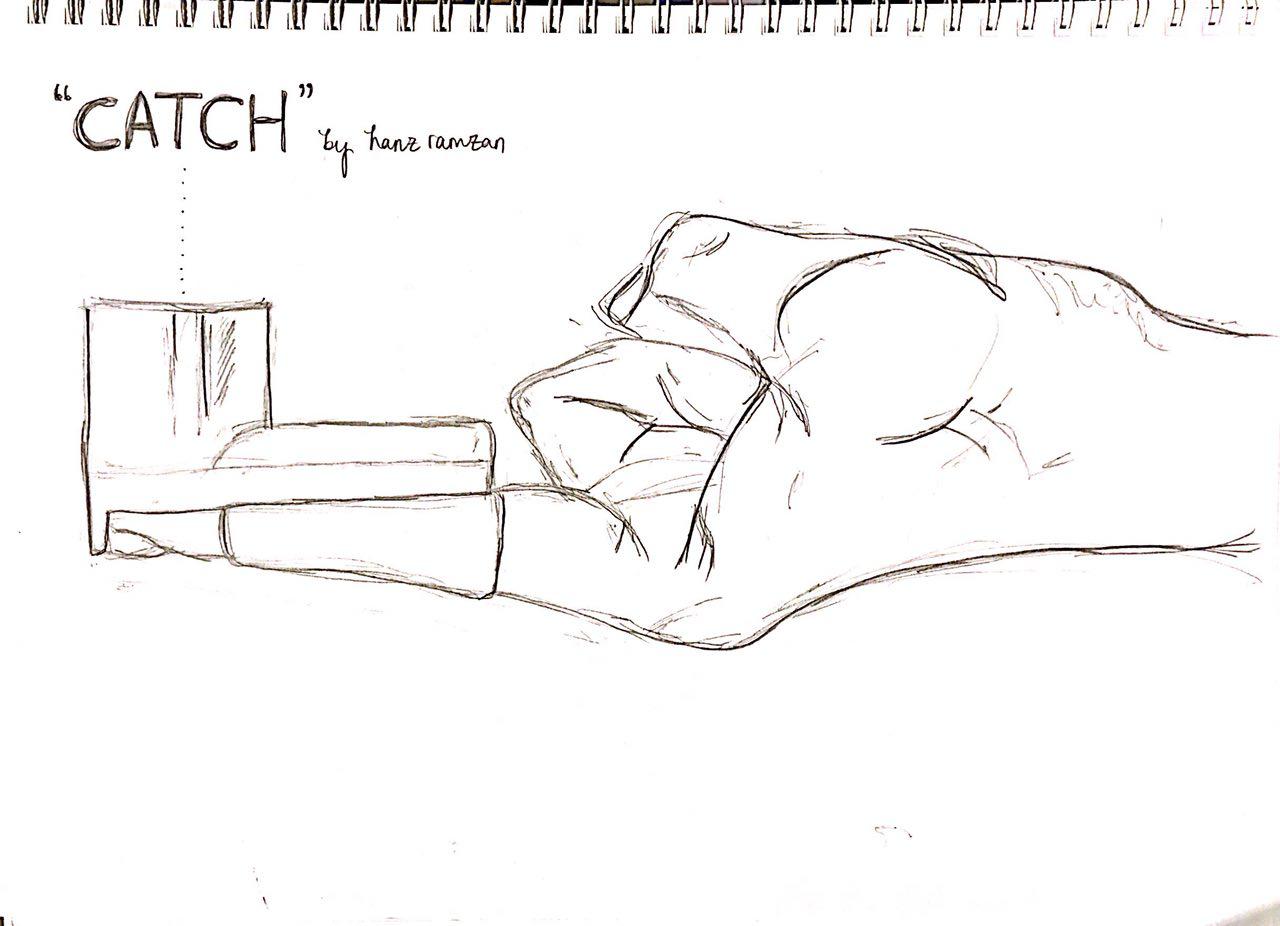
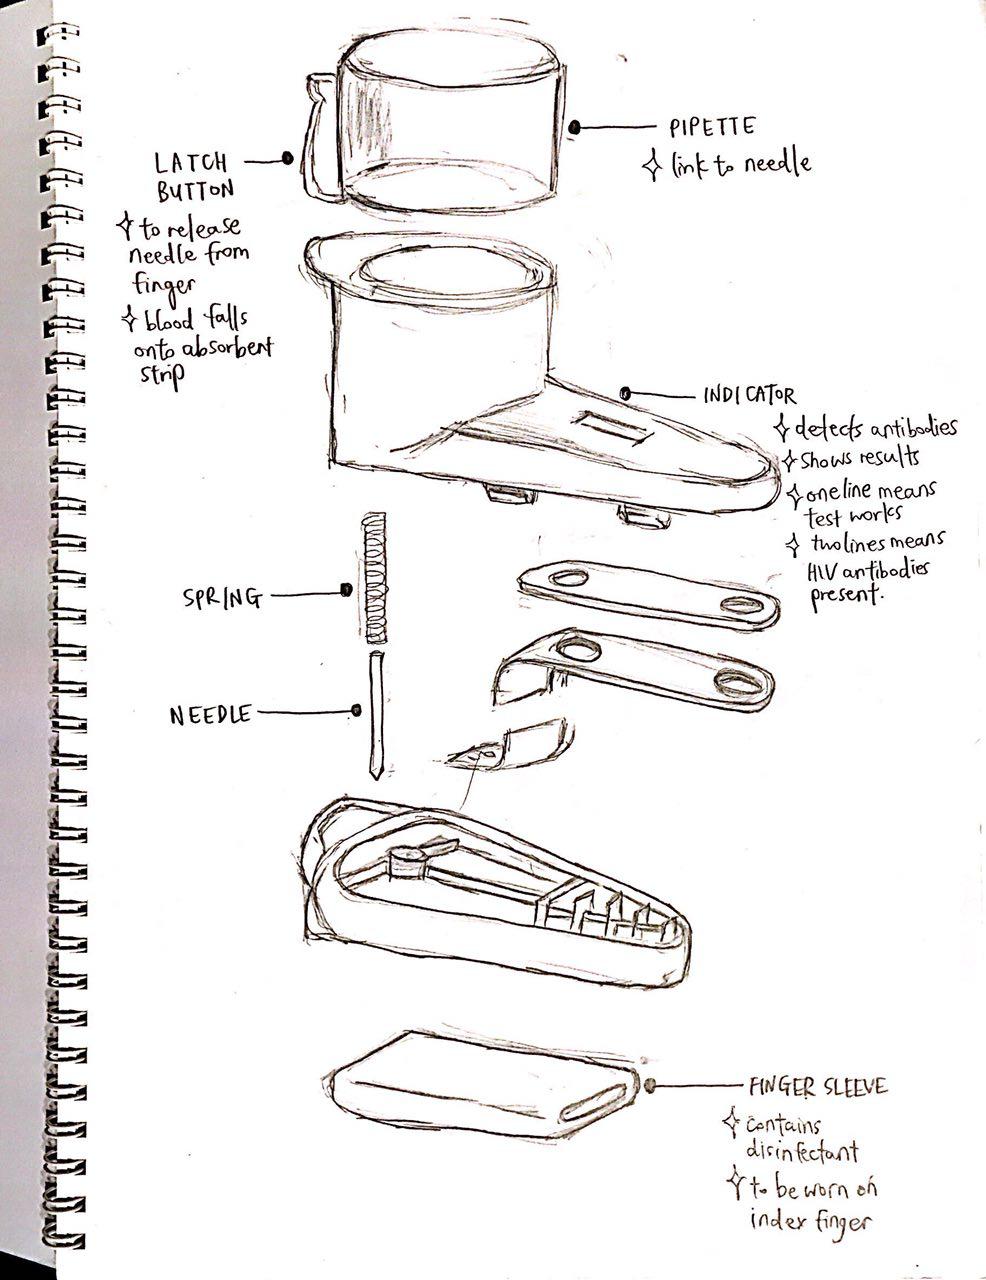
Catch is designed by a British product designer Hans Ramzan. It is a pocket-sized device that allows for people to test for HIV from home. Therefore, it is branched out from the practice of medicine and healthcare. 

Its Specific Use

This mechanism was invented because people sometimes do not notice the signs of HIV and hence transition into AIDS, which is the final stage. This is designed for people from developing countries, to solve the problem of people there also not being able to afford and access healthcare aid. This device is specifically designed to extract blood and check if HIV is present. It is done in a few simple steps:
  1. User inserts finger into sleeve 
  2. Pipette on the top (which is linked to the needle) is pushed down
  3. Needle enters the finger, and when pipette is released, blood is extracted and sucked into the device
  4. Press the latch button at the side of device and needle is removed and blood flows onto absorbent strip
  5. The indicator shows results – one line means test works, two lines means HIV antibodies are present 

Mobility

This device is extremely lightweight and portable, being slightly smaller than the length of an index finger. This is also attributed to the material it is made of. Catch is made from a composite of recycled polythylene terephthalate (PET) water bottles and regular PET.

Utility VS Fashionability

Ramzan has kept the design of Catch extremely simplistic. Instead of undergoing a more rigorous procedure of doing a blood test and waiting hours or even days to obtain result, Catch produces results almost immediately. This is also useful because it saves on manpower for this healthcare service. It is also profitable since it is made from recycled material (with an estimated production cost of ~SGD7). The visual design in also appealing because of the sleekness and minimalistic details.

Fishing Vest

Practice It Works In

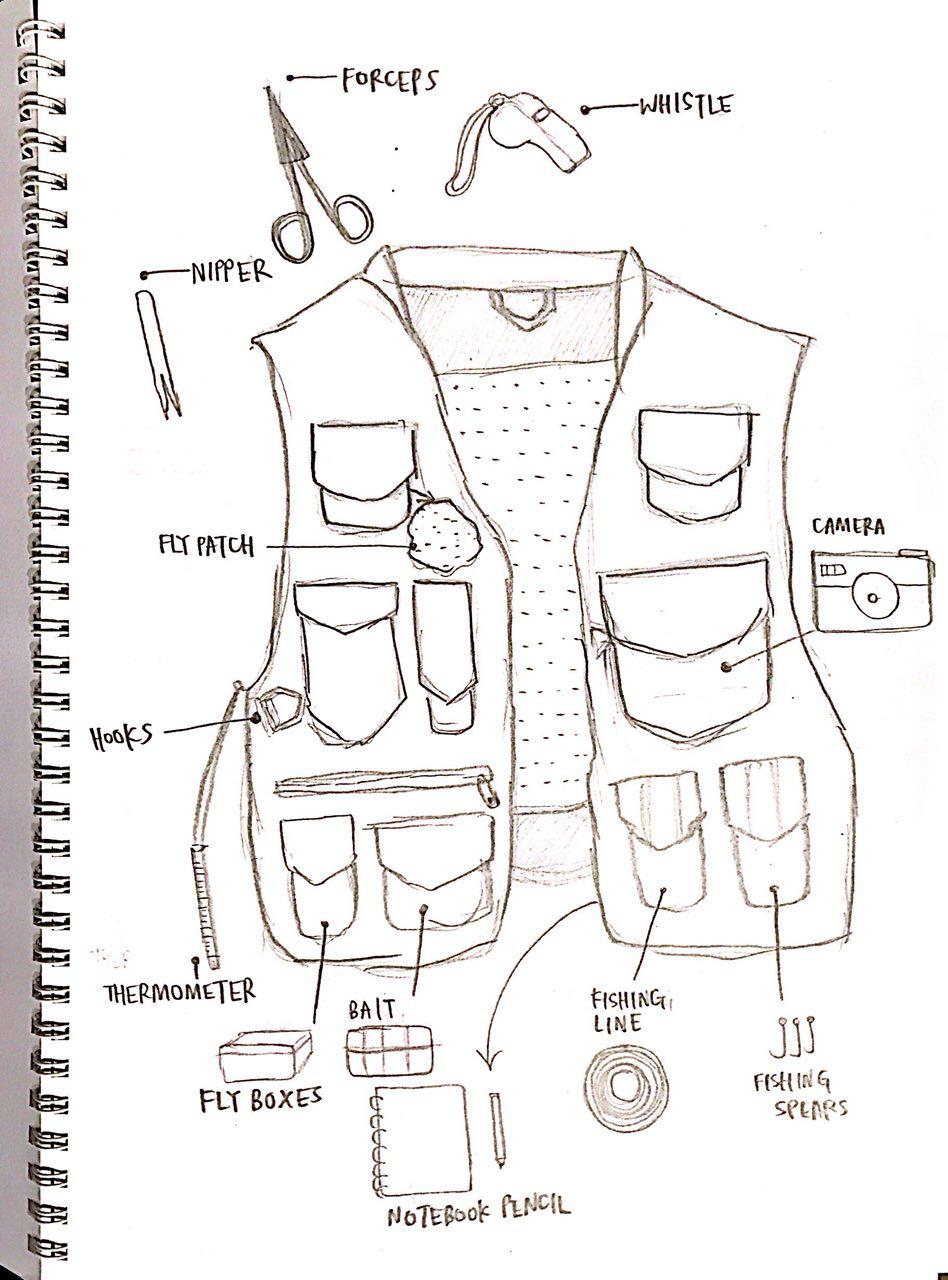
The fishing vest is made for those who participate in the sport – both recreational and competitive. It is to keep all the tools organised and close to the users’ reach.

Its Specific Use

The vest is designed with multiple compartments in order for the user to store different items separately. The compartments are also made of different sizes and also with different closures (either zip, button, or zippers). It is meant to keep the fisherman’s tools neat and dry, especially since there are various small items that could be easily misplaced. The vest is also double-sided meaning that storage compartments are not only on the outside but also on the inside, maximising the amount of space.

Mobility

The fishing vest does not restrict the movement of the fisherman since it sits only on the body’s torso, allowing for a free range of movement of the arms and legs.

Utility VS Fashionability 

Overall, the fishing vest is very practical and acting as a mobile storage space. It is also useful because it acts as an indirect fishing tool checklist for the user when one of the compartments are empty. As for fashionability, it is definitely not suited for everyday wear since it may not be that lightweight and also the conglomerate of items in a single vest may look bulky and unflattering.

Wearable Research – Li Hui

AlterEgo Headset

Practice:

This headset can be used by anyone who wishes to control their devices and ask queries without speaking.

Specific Use:

The device helps to transcribe words that wearers verbalise internally without saying them out loud, using electrodes attached to the skin. When someone say something inside their head, the electrodes will make contact with the skin and the device will pick up subtle neuromuscular signals. These signals will be matched to particular words and they will then be sent into a computer. The computer can also respond through the device using a bone conduction speaker which only allows the wearer to hear it.

Mobility:

The device is worn around the jaw and chin, clipped over the top of the ear to hold it in place.

Utility vs Fashionability:

The best thing about this device is that it does not cause much disruption to the wearer’s daily life. For instance, when one wants to look up something while having a conversation with someone else, the person will be able to search for it without shifting his or her attention from the environment or conversation.

The disadvantage of this device is that users would have to wear a device strapped to their face which may not look that appealing.

Zwim

Practice:

The Zwim Goggles is used by swimmers who wishes to track their real-time data while exercising.

Specific Use:

Although there are several technologies to track your fitness data but it works differently for swimming. Watches interfere with the flow of the workout as swimmers are required to check their data in the middle of the workout. Therefore, Zwim comes with an optical heart-rate sensor that will be placed on our temple, firmly attached by the strap. Zwim also has a motion sensor that determines every turn made after completing each lap. It helps to keep track of lap time, lap count, elapsed time, the user’s heart rate and the calories burned. It also integrates a near-eye full-colour display which shows key real-time statistics.

Mobility:

This device is very convenient as it works exactly like a normal goggle, protecting your eyes from the chlorine water and at the same time, showing the users’ key real-time statistics.

Utility vs Fashionability:

Zwim allows users to customise their screen display by selecting the data they want to see.

It is considered fashionable as it looks like a normal goggle and it does not cause any disruption during the workout.